DCI Edge SERIES 4 Installation Instructions Manual
Center island cabinet
Hide thumbs
Also See for SERIES 4:
- Instructions for use manual (23 pages) ,
- Installation instructions manual (14 pages) ,
- Installation instructions manual (11 pages)
Advertisement
Quick Links
Advertisement

Subscribe to Our Youtube Channel
Related Manuals for DCI Edge SERIES 4


Summary of Contents for DCI Edge SERIES 4
- Page 1 SERIES 4 & SERIES 5 CENTER ISLAND CABINET Installation Instructions...
-
Page 2: Overview
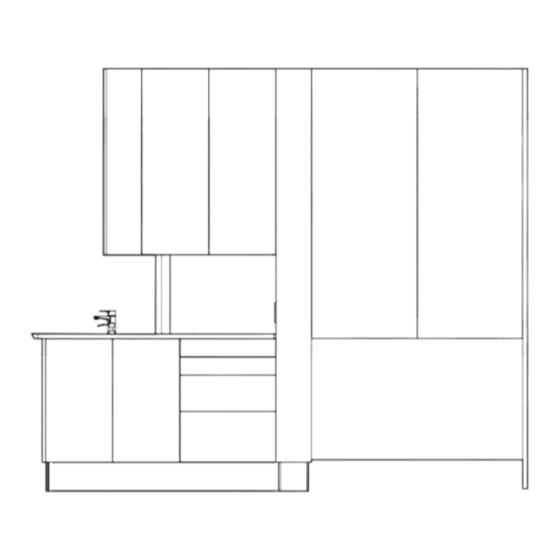
SERIES 4 & SERIES 5 CENTER ISLAND CABINET Installation Instructions OVERVIEW OPTIONAL X-RAY / STORAGE MODULE OPTIONAL CABINET MOUNT LIGHT GFCI ELECTRICAL DUPLEX OUTLETS (2) (Series 5 only) GLOVE DISPENSER/ CUP AND TOWEL DISPENSER BACKSPLASH (varies by model) SOLID SURFACE... -
Page 3: Table Of Contents
SERIES 4 & SERIES 5 CENTER ISLAND CABINET Installation Instructions INTRODUCTION BEFORE YOU BEGIN TABLE OF CONTENTS Overview Study the overview and dimensional specifications. Make sure the planned location will have the necessary space available for installation, including room for all of the operatory equipment. -
Page 4: Dimensional Specifications
SERIES 4 & SERIES 5 CENTER ISLAND CABINET Installation Instructions DIMENSIONAL SPECIFICATIONS - SERIES 5 TOP VIEW FRONT VIEW SIDE VIEW... -
Page 5: Site Preparation
SERIES 4 & SERIES 5 CENTER ISLAND CABINET Installation Instructions SITE PREPARATION FIRST STEPS Lay the installation template over plumbing stub-ups and check the position in the operatory. Install air and water shut-off valves (not supplied). Install 4 x 4 electrical connection box (not supplied). -
Page 6: Installation
SERIES 4 & SERIES 5 CENTER ISLAND CABINET Installation Instructions INSTALLATION PREPARATION Rear Storage Module Sink Module WARNING: Always lift cabinets by the bottom edge, being careful to lift with your legs and not your back. Do not lift from the underside of the counter. - Page 7 SERIES 4 & SERIES 5 CENTER ISLAND CABINET Installation Instructions INSTALLATION POSITION MODULES Locate the Support Column in alignment with the position for the 1/2” anchor bolts in the floor template. Push the Sink Module against the support column and in the correct position over the stub-ups.
- Page 8 SERIES 4 & SERIES 5 CENTER ISLAND CABINET Installation Instructions INSTALLATION SECURE TO THE FLOOR Wood Floor: Secure the Support Column to the floor using two 1/2” x 3-1/2” lag bolts, washers, and lock washers. WARNING: This cabinet must be bolted Concrete Floor: Secure the Support Column to the to the floor as directed in this section.
- Page 9 SERIES 4 & SERIES 5 CENTER ISLAND CABINET Installation Instructions INSTALLATION ADD UPPER FRONT STORAGE Install the center divider panel using two 2-1/8” High/Low screws. Install the metal backsplash behind the sink using two1/4-20 x 2 3/8” bolts. Install screws from below the counter without tightening.
-
Page 10: Door And Drawer Alignment
SERIES 4 & SERIES 5 CENTER ISLAND CABINET Installation Instructions DOOR AND DRAWER ALIGNMENT ALIGN DRAWERS Align drawer faces and seams by adjusting the drawer face attachment. ALIGN DOORS Align door faces and seams by adjusting the hinges. Align door faces and seams by adjusting the hinges. -
Page 11: Electrical Outlets
SERIES 4 & SERIES 5 CENTER ISLAND CABINET Installation Instructions ELECTRICAL OUTLETS DIAGRAM BLACK WIRE - CONNECT TO NEGATIVE CONTACTS GREEN WIRE - CONNECT TO MAINS GROUND WHITE WIRE - CONNECT TO POSITIVE CONTACTS GROUNDING INSTRUCTIONS This product must be connected to a grounded metal, permanent wiring system, or an equipment-grounding conductor must be run with the circuit conductors and connected to the equipment-grounding terminal or lead on the product. - Page 12 DCI International, LLC 305 N. Springbrook Road Newberg, OR 97132, USA PN 67019, Rev. A, 2018-09-14...
Need help?
Do you have a question about the SERIES 4 and is the answer not in the manual?
Questions and answers