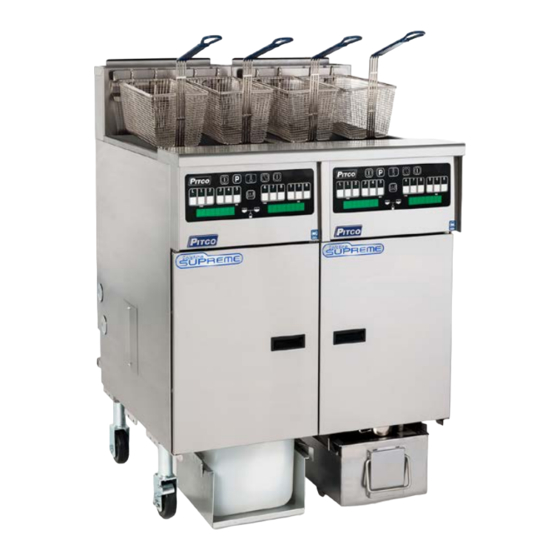
Page 1
Please complete this information and retain this manual for the life of the equipment: Model #: ___________________________ Serial #: ___________________________ Date Purchased: ____________________ Installation & Operation Manual REDUCED OIL VOLUME FRYING SYSTEM Covering Models SSHLV14, SSHLV184 SERIES L20-407 rev. 5 (06/19)
Page 2
Authorized Service and Parts (ASAP) companies, this service technician for proper performance and operation on a warranty will be void. In addition, Pitco and its affiliates will not yearly basis. be liable for any claims, damages or expenses incurred by the...
INSTALLATION & OPERATIONAL SSHLV SERIES MANUAL THEORY OF OPERATION ..........................5 INSTALLATION ............................... 6 2.1. CHECKING AND UNPACKING YOUR NEW APPLIANCE ................6 2.2. INSTALLATION CLEARANCES ......................... 6 2.3. LEVELING THE FRYER – LEGS/CASTERS ....................7 2.4. GAS CONNECTION ..........................8 2.5.
Page 4
INSTALLATION & OPERATIONAL SSHLV SERIES MANUAL 9.2. WEEKLY PREVENTATIVE MAINTENANCE .................... 24 9.3. MONTHLY PREVENTATIVE MAINTENANCE ..................24 9.3.1. BOIL OUT PROCEDURE ........................24 9.3.2. TEMPERATURE CHECK ........................25 9.4. ANNUAL/PERIODIC PREVENTATIVE MAINTENANCE AND INSPECTION ..........26 9.4.1. Safety Evaluation ..........................26 9.4.2.
INSTALLATION & OPERATIONAL SSHLV SERIES MANUAL 1. THEORY OF OPERATION The Pitco Reduced Oil Volume fryer works very similarly to the standard Pitco SG/SSH fryer. The Reduced Oil Volume Fryer has a reduced cold zone to significantly reduce oil usage and extend oil life. This smaller zone may require more frequent filtering depending on the product being fried.
CHECKING AND UNPACKING YOUR NEW APPLIANCE Your new Pitco appliance has been carefully packed into one crate. Every effort has been made to ensure that it is delivered to you in perfect condition. Pitco does not assume responsibility for damage or loss incurred in transit.
INSTALLATION & OPERATIONAL SSHLV SERIES MANUAL 2.3. LEVELING THE FRYER – LEGS/CASTERS CAUTION To prevent equipment damage and/or personal injury, do not tilt the appliance onto any two of its casters or legs, or pull the appliance by the splash back. WARNING This appliance must be installed with the legs or casters provided by the manufacturer.
INSTALLATION & OPERATIONAL SSHLV SERIES MANUAL WARNING NEVER supply the appliance with a gas other than the one that is indicated on the data plate. Using the incorrect gas type will cause improper operation and could result in serious injury or death. If you need to convert the appliance to another type of fuel, contact the dealer you purchased it from.
INSTALLATION & OPERATIONAL SSHLV MANUAL 2.8. ELECTRICAL CONNECTIONS It is advised that this power supply be plugged into a wall receptacle that is controlled by the ventilation control. This will prevent the appliance from being operated without the ventilator on. If your appliance requires an electrical connection, the power requirements are listed below.
INSTALLATION & OPERATIONAL SSHLV SERIES MANUAL WARNING Ensure that your ventilation system does not cause a down draft at the appliance’s flue opening. A down draft will not allow the appliance to exhaust properly and will cause overheating, which may cause permanent damage. Damage caused by down drafts will not be covered by the warranty.
INSTALLATION & OPERATIONAL SSHLV MANUAL 2.11. INITIAL ADJUSTMENTS After your appliance has been properly installed as described in the installation section of this manual, it will need to be adjusted to ensure that it will perform as designed. A qualified person must perform these adjustments.
INSTALLATION & OPERATIONAL SSHLV SERIES MANUAL WARNING Do not store flammable materials in or near this appliance. Do not spray aerosols in the vicinity of this appliance while it is in operation. Contact a qualified service person or the factory, using the information on the back of this manual, if the appliance produces unusual odor, yellow tipping flames or is not performing as per the original installation.
INSTALLATION & OPERATIONAL SSHLV MANUAL 5. Turn off ALL appliances, shut the main gas valve to your Pitco appliance and remove the pressure gauge. Apply pipe joint compound to the manifold pressure tap plug and reinstall it. 6. Check for leaks at the pressure tap fitting.
INSTALLATION & OPERATIONAL SSHLV SERIES MANUAL 3. OPERATION An operator’s manual for your appliance’s specific control type should be included with this manual. Refer to that manual prior to operating this appliance. WARNING Before operating the fryer, check that tipping restraints or other features to prevent tipping are installed and mechanically sound.
INSTALLATION & OPERATIONAL SSHLV MANUAL 3.2. Basic operational Features 1. Basket Hanger - Holds fry baskets while draining or between loads. Lifts off for easy cleaning. 2. Fry pot oil top off supply jug- Supplied by others, provides on board storage for fresh cooking oil. 3.
INSTALLATION & OPERATIONAL SSHLV SERIES MANUAL 3.3. FILLING THE FRY POT Only use shortening that is liquid at room temperature in this appliance. CAUTION This appliance is NOT designed for cooking with water. Cook with oil or shortening only. WARNING This appliance is not designed for use with solid shortening.
INSTALLATION & OPERATIONAL SSHLV MANUAL 4. APPLIANCE START UP If the appliance is plugged in and has power the display will show . Refer to the following procedure to start the appliance prior to operation. 1. On manual (non-Auto Filter) models verify that the drain valve is closed by ensuring that the blue drain handle is pushed all the way in.
Manual top offs are not permitted while there is an active cook in process. AUTOMATIC OIL TOP OFF SYSTEM (OPTION) Pitco offers the “Automatic Oil Level Control” option (Auto-Top Off) to maintain the optimal oil level in your Pitco fryer. This optional system minimizes the need for the operator’s attention during busy cooking hours.
INSTALLATION & OPERATIONAL SSHLV MANUAL QUICK STRAIN FILTERING When the controller indicates the need to perform a “Quick Filtering” as soon as business levels permit. For more thorough filtering/cleaning operations refer to the Preventative maintenance section of this document or the separate controller manual that was provided with your appliance. 7.1.
INSTALLATION & OPERATIONAL SSHLV SERIES MANUAL 8. APPLIANCE SHUTDOWN There are two shutdown modes of appliance operation: STANDBY and COMPLETE. The standby mode removes the ability of the appliances main burners to operate. Complete shutdown turns off the gas supply to the appliance. A STANDBY shutdown can be used during slow business periods. ALWAYS perform a COMPLETE shut down when the appliance will not be in use and unsupervised for an extended period of time.
INSTALLATION & OPERATIONAL SSHLV MANUAL 3. Press the #1 key. The control will display 4. Press the #6 key (YES). The drain valve will open and the oil will drain from the tank into the filter pan and the control will display 5.
INSTALLATION & OPERATIONAL SSHLV SERIES MANUAL 9.1.3. APPLIANCE INSPECTION Check that the high temperature limit and temperature probe are in the correct position and secured in place. (Refer to illustration on page 11 of this manual). Check that wires and cords are not frayed or loose in and out of the cabinet. ...
INSTALLATION & OPERATIONAL SSHLV MANUAL 9.2. WEEKLY PREVENTATIVE MAINTENANCE Performing the preventative maintenance steps above on a daily basis will keep your equipment clean and safe. On a weekly basis these additional steps should be performed. Wear personal protective gear when performing preventative maintenance! 1.
INSTALLATION & OPERATIONAL SSHLV SERIES MANUAL 11. Scrub the inside of the tank using a cleaning brush safe for hot water. Care must be taken to remove all the foreign material on the tank, heating tubes, sidewalls and other components in the tank.
This section should ONLY be performed by a qualified service technician as part of a regular kitchen maintenance program. This inspection should take place a minimum of once a year by an Authorized Service Technician recommended by Pitco. It may be necessary perform this inspection more than once a year.
INSTALLATION & OPERATIONAL SSHLV SERIES MANUAL 9.4.5. GAS COMBUSTION SYSTEM Check for gas leaks. Check and clean vent tube on gas valve pressure regulator. Check burners, clean debris and grease from pilot and pilot orifice tips. Check self cleaning burner system (if equipped) that it activates when the appliance is turned on and NOT during normal cooking &...
If there is no obstruction and the drain valve still will not close there may be a hardware malfunction. Call Pitco Technical Support at the number provided in this manual. Otherwise, to exit the Fryer Control Menu, press the ON/OFF key or the Filter key 3.
INSTALLATION & OPERATIONAL SSHLV MANUAL 10.4. SELF CLEANING BURNER SYSTEM If your appliance is equipped with the self cleaning burner system, the appliance should behave as outlined in the table below. A cleaning cycle will execute every time the appliance is turned “ON” from an “OFF”...
INSTALLATION & OPERATIONAL SSHLV MANUAL 10.6. TROUBLESHOOTING CHARTS 10.6.1. Fryer Troubleshooting Chart Problem Possible Causes Corrective Actions No power to appliance. Check main building power supply. Circuit Breaker/GFI tripped. Reset circuit breaker/GFI. Power Cord loose or not Connect power cord. Verify that power cord is Computer Controller connected.
INSTALLATION & OPERATIONAL SSHLV MANUAL 10.6.3. COMPUTER CONTROLLER DISPLAYS Below is a list of common computer controller displays and guidance. For additional computer controller displays and information concerning them, refer to the controller manual that was shipped with your appliance. Display Problem Action...
Page 32
Pitco Frialator Authorized Service and Parts (603) 225-6684 World Wide representative (ASAP) covering your area, or Website Address: www.pitco.com contact Pitco at the numbers listed to the left. MAILING ADDRESS – P.O. BOX 501, CONCORD, NH 03302-0501 L20-407 rev. 5 (06/19)