Winterhalter UC Series Operating Instructions Manual
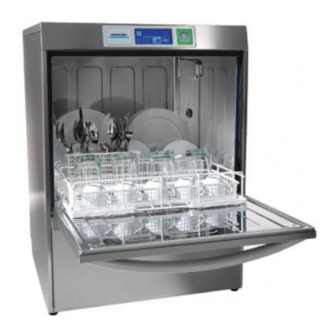
Undercounter warewasher
Hide thumbs
Also See for UC Series:
- Operating instructions manual (49 pages) ,
- Manual (21 pages) ,
- Short operating instructions (2 pages)
Table of Contents
Advertisement
Quick Links
Advertisement
Table of Contents

Subscribe to Our Youtube Channel
Related Manuals for Winterhalter UC Series


Summary of Contents for Winterhalter UC Series
- Page 1 Undercounter warewasher UC Series Operating instructions...
-
Page 3: Table Of Contents
About this manual Operating instructions for Winterhalter UC Series undercounter warewashers (translation of the original German operating instructions) Contents 9.2 Switching on the machine ----------------------- 26 About this manual -------------------------------- 2 9.3 Washing --------------------------------------------- 27 Intended use --------------------------------------- 2 9.4 Switching the machine off ----------------------- 28 2.1 Improper use ---------------------------------------- 2... -
Page 4: About This Manual
Do not carry out a wash without a wash rack. Do not make any changes, additions or modifications to the device without the approval of the manufacturer. Winterhalter Gastronom GmbH assumes no liability for any damage caused by improper use of the warewasher. -
Page 5: Safety Notes
If the mains cable of this machine is damaged, it must be replaced by Winterhalter or its Customer Service or another qualified person in order to prevent hazards. The mains... -
Page 6: Before Working With The Machine
Have the machine connected according to local standards and the regulations of the authorised techni- cians (water, waste water, electrical system). After connecting the water and the power properly, contact the relevant Winterhalter engineer or your dealer for the commissioning of the machine and for providing training in its operation. Have yourself and your operating personnel trained in the operation of the machine. -
Page 7: Options
Machine description 5.3 Options Energy Machine with a heat exchanger Requirement: Connect the machine to the cold water. UC-S Excellence-i(Plus), UC-M Excellence-i(Plus) Machine with an integrated reverse osmosis module Requirement: Connect the machine to the cold water. Cool Machine with cold water rinsing, can be switched to hot water rinsing. Requirement: Connect the machine to the cold water. -
Page 8: General Operation
General operation General operation 6.1 Display Operating the display is similar to operating the display of a smartphone. The display responds to light touches. Therefore, only operate the display with your fingers; do not use any sharp objects. INFO The display and start button can also be operated with wet hands or rubber gloves. Item Description Standard washing programmes... - Page 9 General operation 6.3.1 Main level The main level appears automatically with image B when the machine is ready for operation. Image Functions Switching off ( 9 .4) Self-cleaning programme ( 1 1.1) Tank water exchange programme ( 9 .3.7) ...
- Page 10 General operation 6.3.2 Dishwashing staff menu level Image Functions Accesstothechef’sPINmenu( Errors Priming Videos Addresses Pay PER WASH menu (optional) You can find more information on www.pay-per-wash.com. Errors Current Current errors History Rectified errors Tap the fault message. A detailed fault message appears.
- Page 11 General operation Priming Dosing devices must be primed if air has entered the dosing hose. This occurs when the storage tank is not refilled in time or the containers are not replaced in time. Rinse aid dosing device Detergent dosing device ...
- Page 12 General operation Addresses Supplier for rinse aid, detergent, etc. Service technician Release code (only for service technician)
-
Page 13: Washing Programmes
General operation 6.4 Washing programmes Programme 2 is pre-selected (blue frame) as soon the machine is ready. The following programmes are available, irrespective of the degree of soiling: Programme 1 Programme 2 Programme 3 Soiling Light Normal Severe The authorised service technician can adjust programmes to your dishes (temperature, rinsing pressure, dosing and programme length). -
Page 14: Chef's Pin Menu
Chef’s PIN menu Chef’s PIN menu INFO If you switch to the PIN menu, the machine switches off. After leaving the PIN menu, the machine must be switched back on. Accessing the PIN menu INFO If you have entered your PIN incorrectly three times, the input is locked for 10 minutes. Menus ... -
Page 15: Hygiene Logbook
Chef’s PIN menu 7.1 Hygiene logbook Machine events are in the hygiene logbook. Calling up the menu 7.2 Operating data Calling up the menu INFO Water consumptions are reference values and are not based on precise measurements. 7.3 Water hardness INFO Only for machines with an integral water softener. -
Page 16: Dosing
7.4.2 Chemicals database When using Winterhalter rinse aid and detergent, the containers incorporate the information for a detergent group (e.g. DT05) or rinse aid group (e.g. RA01). This information is used as an aid for dosing. However, we recommend that the dosing setting be set precisely by an authorised service technician. - Page 17 Chef’s PIN menu Setting the water hardness Tap field (3). Select the hardness range. INFO Calculate and set water hardness in °dH. Set“0-3°dH”formachineswithabuilt-in water softener. Calculation table °dH °e °TH mmol/l German hardness 1°dH= 1.253 1.78 0.179 English hardness 1°e= 0.798 1.0 1.43...
-
Page 18: Timer
Chef’s PIN menu 7.5 Timer The timer can programme the machine to switch on or off automatically at a specific time. IMPORTANT At the time of automatic start-up the following requirements must be met: The door is closed. The on-site mains disconnector is switched on. -
Page 19: Pictograms
Chef’s PIN menu Programming a non-recurring date Item Description Sliding switch Date and time for automatic start-up Date and time for automatic switch-off Tap field (2 or 3). Set the desired time and date. Save. Pushtheslidingswitch(1)to‘I’. Automatic switch-off sequence Machine is emp- tied and switched... -
Page 20: Descaling
For descaling, you need an acid-based descaler suitable for commercial warewashers. We recommend the Winterhalter Descaler A 70 LS. When handling chemicals, observe the safety notes and the dosage recommendations on the packaging. -
Page 21: Brightness
Chef’s PIN menu 7.8 Brightness The brightness can be adjusted to match the screen display to the lighting conditions in your kitchen. Calling up the menu 7.9 Sounds Turn the sounds on or off. Calling up the menu Item Description Turn all sounds on or off Turn individual sounds on or off... -
Page 22: Date / Time
Chef’s PIN menu 7.10 Date / time Enter the current date and the current time. Calling up the menu INFO Time must be changed for the summer/ winter time changeover. 7.11 Language Set the language in which to display texts on the screen. Calling up the menu 7.12 Units Here you can change the temperature display unit. -
Page 23: Connected Wash
Chef’s PIN menu 7.13 CONNECTED WASH Calling up the menu Activating CONNECTED WASH Configuring LAN or WLAN Registering machine (pairing) Requirements: You have registered on the www.connected-wash.biz/start website. You have added your machine to your user account and received a PIN. ... -
Page 24: Water Back-Flow Counter
Chef’s PIN menu 7.14 Water back-flow counter The water back-flow counter needs to be reset if, on machines with partial or full demineralisation cartridge, the accompanying symbol appears on the display. Calling up the menu Item Description Set the total capacity Reset the water back-flow counter Partial demineralisation cartridge ... -
Page 25: Rinse Aid And Detergent
To attain good wash results, assign the required work to an authorised service technician. If this is not done, the Winterhalter Gastronom GmbH warranty and product liability will be void. If the chemical product is dosed from external containers, rinse the dosing hoses and the dosing device us- ing water. -
Page 26: Rinse Aid
Rinse aid and detergent 8.2 Rinse aid Rinse aid is necessary to ensure that water on the items being washed drains off after washing as a thin film. This ensures that the wash items dry quickly. Rinse aid is automatically dispensed using a dosing device. 8.3 Detergent ... - Page 27 Rinse aid and detergent Variant A: External containers and suction tubes Do not place the suction tube for the rinse aid in the container with detergent or vice versa. Only use the suction tube with sufficiently stable containers. Narrow and tall containers can tip if you pull on the suction tube.
-
Page 28: Priming The Dosing Devices
Operation 8.4 Priming the dosing devices Dosing devices must be primed when air has entered the dosing hose. This occurs when the storage tank is not refilled in time or the containers are not replaced in time. Rinse aid dosing device Detergent dosing device ... -
Page 29: Washing
Operation 9.3 Washing Possible risk of scalding from hot wash water Keep children away from the warewasher. The interior holds wash water at a temperature of approx. 62 °C. Warning Do not open the door while the machine is washing. There is a risk of the hot wash water ... -
Page 30: Switching The Machine Off
Operation 9.3.5 Changing the washing programme Programme 2 is already pre-selected when the machine is ready. Select a different washing programme by tapping the button. The button has a blue border. 9.3.6 Terminating the washing programme Press the start button or . 9.3.7 Changing the tank water If the tank water is very dirty and the end wash result is suffering, the tank water can be replaced. -
Page 31: Integral Water Softener (Optional)
Integral water softener (optional) 10 Integral water softener (optional) By softening the mains water, limescale build-up in the machine and on the dishes can be avoided. For the water softener to work correctly, the salt container must be filled with regeneration salt. 10.1 Display of lack of salt A pictogram on the display shows when the salt container is empty and needs to be refilled. -
Page 32: Servicing And Maintenance
Servicing and maintenance 11 Servicing and maintenance Do not spray the machine and the surrounding area (panels, base) using a water hose, steam jet or high-pressure cleaner. Ensure when cleaning the floor that the base of the machine is not flooded, to prevent the Warning uncontrolled inflow of water. -
Page 33: Cleaning The Interior
Servicing and maintenance 11.2 Cleaning the interior Ensure that there are no rusty foreign objects in the interior of the machine which could cause even the "stainless steel rust-free" material to start to rust. Rust particles can come from non- rust-free wash items, from cleaning aids, damaged wire racks or from water pipes that are not Caution protected against rust. -
Page 34: Error Pictograms
Error pictograms 12 Error pictograms Errors are displayed as pictograms. If many errors occur, washing will still be possible but the end wash re- sult will be impaired. Please therefore rectify any error as soon as possible. If you are unable to rectify the error yourself: ... -
Page 35: Poor Wash Result
Error pictograms If a serious error is present, washing is no longer possible and a red bar appears at the top of the display: Accessing the error code °C °C 12.1 Poor wash result Possible cause Remedy Set the dosing amount as per the manufac- ... -
Page 36: Maintenance By The Customer Service Department
Taking the machine out of operation for long periods of disuse 12.2 Maintenance by the customer service department We recommend that you have an authorised service technician carry out maintenance of the machine at least once a year so that vulnerable parts subject to ageing and wear can be checked and replaced accord- ingly. -
Page 37: Installing The Machine
Installing the machine 15 Installing the machine The installation site must be frost-resistant to prevent the water supply systems from freezing. Install the machine horizontally using a spirit level. Adjust the base unevenness using the height-adjustable machine feet. 16 Connecting the machine The machine and any other relevant additional devices must be connected in adherence to local standards and regulations by an electrical company authorised by the relevant electricity... -
Page 38: Installation Diagram
Connecting the machine 16.3 Installation diagram IMPORTANT 400* 400* Provide the connections next to the machine on 300* 300* the left or the right. 200* 200* Define the precise dimensions taking the local 100* 100* circumstances into account. Network socket RJ45 (if the machine is to be networked) Electrical connection Waste water connection... -
Page 39: Connecting The Supply Hose
Connecting the machine 16.5 Connecting the supply hose Do not shorten or damage the hose. Old existing hoses may not be re-used. Do not bend the hose when laying it. Caution The supply hose and dirt trap are located in the machine. INFO The dirt trap prevents particles from the water supply line from entering the machine, thus prevent- ing extraneous rust on the dishes and in the machine. -
Page 40: Electrical Connection
Connecting the machine 16.7 Electrical connection Danger of death: live components! The machine and the relevant additional devices must be connected by an electrical compa- ny authorised by the relevant electricity supplier as per the locally applicable standards and Danger regulations. - Page 41 Connecting the machine Connecting the mains cable Requirements for the mains cable: Cable of type H07 RN-F or equivalent Cross-section and number of wires appropriate for voltage, fusing and total connected load Example Follow the connection diagram. The connection diagram is attached to the rear of the partition wall for the electrical installation compartment.
-
Page 42: External Dosing Devices
External dosing devices 17 External dosing devices Instead of the integral dosing device, external dosing devices can also be used. 17.1 Terminals Danger of death: live components! Have the dosing devices installed and commissioned by an authorised service technician. Danger Item Description Entries for hoses and cables... -
Page 43: Electrical Connection
External dosing devices 17.2 Electrical connection When connecting an external dosing device to the control board, there must be no short circuit. The control board can be destroyed by a short circuit. Connect external dosing devices only with their own fuse protection. Caution IMPORTANT Maximum current drain at the transfer strip: 0.5 A. -
Page 44: Programming The Transfer Strip
Calling up the menu Configuration options Terminal Settings Application While machine fills For dosing devices not from Winterhalter Parallel to the solenoid valve For hose pumps with fixed output (e. g. ESP 166, DETERGENT Time-controlled ESP 166C, SP 166Z) Impulse-controlled... -
Page 45: Examples
External dosing devices 17.4 Examples Connecting an external detergent dosing device Hose pump with time-delay relay and fixed output Connectto“WASH”terminal. Set time-delay relay on the dosing device. Hose pump with adjustable output Connectto“DETERGENT”terminal. Programming the transfer strip ( 1 7.3): Parallel to the solenoid valve ... -
Page 46: Technical Data
Technical data 18 Technical data General Operating conditions Voltage Operating temperature 0 - 40 °C see rating plate Total connected load Relative air humidity < 95% Inlet water temperature Storage temperature > -25 °C 1 6.4 Minimum flow pressure Max. -
Page 47: Ec Declaration Of Conformity
EC Declaration of Conformity 21 EC Declaration of Conformity... - Page 48 Winterhalter Gastronom GmbH Winterhalter Gastronom GmbH Gewerbliche Spülsysteme Commercial Dishwashing Systems Winterhalterstraße 2–12 Winterhalterstrasse 2–12 88074 Meckenbeuren 88074 Meckenbeuren Deutschland Germany Telefon +49 (0) 75 42/4 02-0 Telephone +49 (0) 75 42/4 02-0 www.winterhalter.de www.winterhalter.com info@winterhalter.de info@winterhalter.com...
Need help?
Do you have a question about the UC Series and is the answer not in the manual?
Questions and answers