
Related Manuals for True TI1000


Summary of Contents for True TI1000
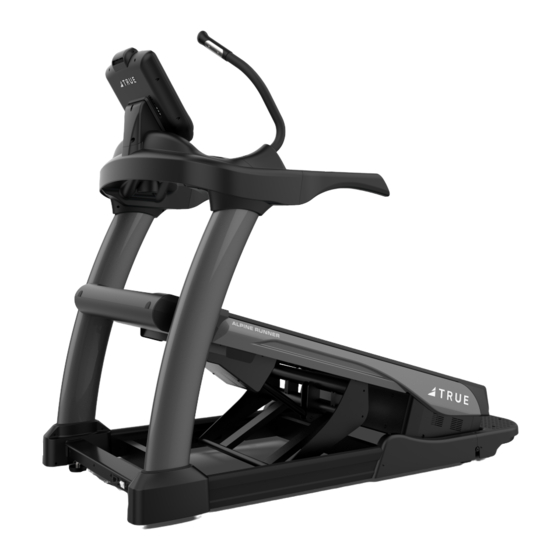
- Page 1 * Assembly Guide & Warranty Card Included ALPINE RUNNER OWNER’S MANUAL Model# TI1000 Revision 091418...
- Page 2 ALPINE RUNNER OWNERS MANUAL IMPORTANT: All products shown are prototype. Actual product delivered may vary. Product specifications, features & software are subject to change without notice. For the most up-to-date owner’s manual please visit www.truefitness.com. For documents in additional languages please visit www.truefitness.com/resources/document-library/ IMPORTANTE: Todos los productos mostrados son prototipos.
- Page 3 The proud manufacturing tradition of quality and the culture of innovation at TRUE have given rise to a full line of extraordinary cardio and strength equipment. As a result, people all over the world are benefiting from the TRUE experience.
-
Page 4: Table Of Contents
ALPINE RUNNER OWNERS MANUAL TABLE OF CONTENTS: Chapter 1: Safety Instructions Safety Instructions ..................................5 Space Requirements ................................8 Grounding Instructions .................................9 Power Requirements ................................10 Warning Decals..................................11 Compliances ..................................11 Chapter 2: Assembly Instructions Pre Assembly Checklist ...............................13 Assembly Steps ..................................14 Chapter 3: Product Overview Product Overview ................................27 Chapter 4: Care &... -
Page 5: Chapter 1: Safety Instructions
45, smokes, has high cholesterol, is obese or has not exercised regularly in the past year. Additionally, TRUE recommends consulting a fitness professional on the correct use of this product. - Page 6 To disconnect, turn power OFF at the ON/OFF switch if applicable, then remove plug from electrical outlet. • Never operate a TRUE product if it has a damaged power cord or electrical plug, or if it has been dropped, damaged, or even partially immersed in water. Contact TRUE Customer Service for a replacement.
- Page 7 Never insert objects into any openings in this product. If an object should drop inside, turn off the power, unplug the power cord from the outlet and carefully retrieve it. If the item cannot be reached, contact TRUE Customer Service.
-
Page 8: Space Requirements
SPACE REQUIREMENTS: TRUE’S recommendation is to leave a minimum of 20” (0.5 m) on each side of the equipment and a 79” (2 m) safety zone at the rear of the equipment. Note that the maximum lateral running surface is 22” as shown below. (See Fig. 1) Truefitness.com / 800.426.6570 / 636.272.7100... -
Page 9: Grounding Instructions
CHAPTER 1: SAFETY INSTRUCTIONS GROUNDING INSTRUCTIONS: This product must be grounded, if it should malfunction or breakdown, grounding provides a path of least resistance for electric current to reduce the risk of electric shock. This product is equipped with a cord having an equipment-grounding conductor and a grounding plug. -
Page 10: Power Requirements
CHAPTER 1: SAFETY INSTRUCTIONS Truefitness.com / 800.426.6570 / 636.272.7100 10 of 50... -
Page 11: Warning Decals
WARNING DECALS: WARNING: Replace warning labels that may be worn, damaged, or missing. To replace any worn or missing decals contact TRUE FITNESS by visiting www.truefitness.com or contact customer service at 800-883-8783. COMPLIANCES: This equipment complies with all applicable codes and regulations. For a complete list of compliances, please visit www.truefitness.com. - Page 12 Important Electrical Requirements – 120V: Your TRUE equipment requires a dedicated 120 volt, alternating current (AC), 20 amp grounded outlet circuit. This means nothing else can be plugged into the same circuit. Most power circuits are rated for this 120V AC 20 amp requirement, but you must ensure the equipment does not share the circuit with anything else.
-
Page 13: Pre Assembly Checklist
CHAPTER 2: ASSEMBLY GUIDE PRE-ASSEMBLY CHECKLIST: ITEM DESCRIPTION ITEM DESCRIPTION Console Mast Right Pedestal Base Cover Rear Console Cover Right Heart Rate Handlebar Left Handlebar Base Cover Left Heart Rate Handlebar Right Handlebar Base Cover Lower Console Rack Cover Left Outer Console Rack Cover Console Rack Right Outer Console Rack Cover Base Unit... -
Page 14: Assembly Steps
CHAPTER 2: ASSEMBLY GUIDE ASSEMBLY STEPS: Step 1 Pedestal Wire Connections: a) Connect the network & coaxial wires coming from the bottom of the left pedestal to the corresponding cables coming from the base of the machine. b) Connect the data & power cables coming from the bottom of the right pedestal to the corresponding cables coming from the base of the machine... - Page 15 CHAPTER 2: ASSEMBLY GUIDE ASSEMBLY STEPS: Step 3 Console Rack & Secure Pedestals: a) Install Console Rack onto Pedestal Uprights by resting Console Rack tubing on top of pedestal tubing cradles. Do not pinch cabling! b) Install, but do not tighten, eight bolts and 8 external tooth washers through pedestal tubing cradle and into Console Rack.
- Page 16 CHAPTER 2: ASSEMBLY GUIDE ASSEMBLY STEPS: Step 5 Secure Handlebar Base Covers: a) Slide a Handlebar Base Cover down into positon. b) Secure the base covers with one screw each and attach the screw cover. *Screw covers are marked “L” & “R” c) Slide each rubber gasket down and press firmly into the Handlebar Base Covers.
- Page 17 CHAPTER 2: ASSEMBLY GUIDE ASSEMBLY STEPS: Step 7 Console Mast: a) Insert the Console Mast into the Console Rack and secure it with 4 screws and 4 spring washers, but do not tighten the screws completely until they have all been installed. Hardware Required: 4 M8 Lock Washers 4 5/16”-24 UNF x 16mm Bolts...
- Page 18 CHAPTER 2: ASSEMBLY GUIDE ASSEMBLY STEPS: Step 9 Lower Console Rack Cover: a) Install the lower console rack cover using 13 screws, but do not tighten completely until all screws are installed. Hardware Required: 13 M4xP0.7x12mm Screws Step 10 Outer Console Rack Covers: a) Attach the Outer Console Rack Covers using four screws for each cover.
- Page 19 CHAPTER 2: ASSEMBLY GUIDE ASSEMBLY STEPS: Step 11 Console Assembly: Place the two bottom console mounting screws inside the bottom keyholes on the console mast assembly. Partially thread the two top console mounting screws into the console. Fully tighten all four console mounting screws.
- Page 20 CHAPTER 2: ASSEMBLY GUIDE ASSEMBLY STEPS: Step 13A Safety Key: a) Locate the Safety Stop already attached to the console rack. b) Attach Safety Key Clip to anchor plate located on Console Rack (when not working out). c) Attach clip to clothing at the beginning of any workout.
- Page 21 CHAPTER 2: ASSEMBLY GUIDE ASSEMBLY STEPS: Step 13B Safety Key (E-Stop) Usage: Safety Key (E-Stop) Disengaged: Shown to the left is the disengaged position of the safety key (e-stop). When the equipment is in use or the user is standing on the belt not in use, the safety key clip must be attached to the user’s clothing.
- Page 22 CHAPTER 2: ASSEMBLY GUIDE ASSEMBLY STEPS: Step 14 Remove Middle Frame Cover: a) Determine if the unit is being installed on a 110 volt line or a 220 volt line. b) For 110V units, skip to Step 19. For 220V units, proceed with Step 15.
- Page 23 CHAPTER 2: ASSEMBLY GUIDE ASSEMBLY STEPS: Step 16 Reinstall Middle Frame Cover: a) Re-install the Middle Frame Cover to the front of the unit using 4 screws. Hardware Required: Screws from Step 15 Step 17 Connect Power: a) Remove M5 x 10mm bolt from the power inlet plate on the machine.
- Page 24 CHAPTER 2: ASSEMBLY GUIDE ASSEMBLY STEPS: Step 18 Pedestal Base Covers: a) Install each Pedestal Base Cover using five screws as shown. b) Slide the black pedestal cover rings down and press firmly into the Pedestal Base Covers. Hardware Required: 8 M4xP0.7x12mm Screws 2 M5xP0.8x10 Screws Step 19 Final Connections:...
- Page 25 CHAPTER 2: ASSEMBLY GUIDE OPTIONAL REAR STEP: Step 1 Remove Stock Transport Wheel Covers: a) Remove 3 screws from each transport wheel cover as shown. b) Set the screws aside for use in step 4. Step 2 Remove Step Plastic: a) Remove the plastic cover from the step frame by removing the six screws as shown.
- Page 26 CHAPTER 2: ASSEMBLY GUIDE OPTIONAL REAR STEP: Step 3 Attach Step Frame to Unit: a) Attach the step frame to the unit using four bolts and two nuts. Hardware Required: Included in Step Kit. Step 4 Reinstall Step Plastic: a) Reinstall the step plastic using the screws from steps 1 and 2 as shown.
-
Page 27: Product Overview
CHAPTER 3: PRODUCT OVERVIEW TREADMILL OVERVIEW: Contact Heart Rate Pads Quick Access Keys Safety (E-Stop) Key Console Assembly Belt Adjustment Belt Bolts Straddle Covers On/Off Switch, Leveling Feet Circuit Breaker, and Power Cord Truefitness.com / 800.426.6570 / 636.272.7100 27 of 50... - Page 28 CHAPTER 3: PRODUCT OVERVIEW TREADMILL OVERVIEW: Console Assembly: The console allows the user to set up a workout program and control the Alpine Runner during a workout (For console overview and operation instructions refer to chapter 4). Quick Access Keys: Allows the user to quickly start, stop and wake the Alpine Runner or make fast, convenient adjustments to the incline level or speed of the Alpine Runner.
-
Page 29: Chapter 4: Care & Maintenance Care & Maintenance
CAUTION: Do not use any acidic cleaners. Doing so will weaken the paint or powder coatings and may void the TRUE Fitness Warranty. Never pour water or spray liquids on any part of the treadmill. Allow the treadmill to dry completely before using. -
Page 30: Running Belt Alignment
The belt should be centered on the running deck. If the belt drifts off center, you must make adjustments. Important: Failure to align the belt may cause the belt to tear or fray, which may not be covered under the TRUE Fitness Warranty. To stop the running belt, press the STOP key. Turn the treadmill off. -
Page 31: Tensioning The Running Belt
Allen wrenches have been removed from the adjustment bolts in the front belt cover before further use. BELT LUBRICATION: For commercial use over 20 hours per week, TRUE recommends lubricating every three months. • Locate the belt adjustment bolts in the front belt cover •... -
Page 32: Leveling The Equipment
OTHER SCHEDULED PREVENTIVE MAINTENANCE: TRUE recommends that quarterly scheduled maintenance be performed by a qualified service technician. Please contact your dealer or visit www.truefitness.com to contact a local TRUE authorized service technician. Scheduled Preventive Maintenance: •... -
Page 33: Chapter 5: Customer Service Contacting Service
HOURS OF OPERATION: 8:30 A.M. - 5:00 P.M. CST E-MAIL: service@truefitness.com CONTACTING SALES: Interested in TRUE Products? Please contact us with any sales or product inquires so that we may direct you to the appropriate sales representative to answer your questions. TRUE FITNESS HOME OFFICE 865 HOFF ROAD ST. -
Page 34: Reporting Freight Or Parts Damage
Please make sure the photos include the damaged product as well as the damaged box the product arrived in. Contact the TRUE Fitness customer support team by calling 800.883.8783 or sales support team by calling 800.426.6570 Monday-Friday during normal business hours. -
Page 35: Chapter 6: Additional Information
This troubleshooting guide is intended to assist in diagnostics only and is not all inclusive. Technical specifications, error codes and programming are subject to change without notice. TRUE accepts no liability for any damage or loss suffered by persons whom rely wholly or in part on any description or statement contained within this manual. Please visit www.TRUEfitness.com to obtain the most recent version of all manuals and contact the TRUE Service Department at 800-... - Page 36 Fault CN00: Corrupted Re-install software/ Console configuration - fails integrity Firmware and Console Configuration firmware check software versions are Contact dealer or TRUE not compatible service Power cycle Console Configure Incorrectly Re-configure console Fault CN01: Internal Re-install software/ Math error - software...
- Page 37 CHAPTER 6: ADDITIONAL INFORMATION Membrane key is Fault CN03: Membrane Key stuck Console Contact dealer or TRUE service Stuck Key down/closed damaged Power cycle Brainboard fails Loose Cable Fault CN04: to receive timely Check cable connections Lower Board communication Comm Fault...
- Page 38 CHAPTER 6: ADDITIONAL INFORMATION High Belt Deck Friction Lubricate treadbelt High Belt Tension Contact dealer or TRUE service Fault SP01: Tread motor rpm is Check drive belt and walking belt Belt Under Speed Low Line Voltage below target rpm tension...
- Page 39 Incline disabled. Incline Run incline calibration range - may indicate Incline Max/Min that it is disconnected. Incline Potentiometer Contact dealer or TRUE service value out of range Fault A101: Power cycle AC MCB 2.5 VDC Ref Status Motor Control Board...
- Page 40 CHAPTER 6: ADDITIONAL INFORMATION Dirty or misaligned Contact dealer or TRUE service speed sensor Illegal Speed Fault A111: Motor Lubricate treadbelt AC MCB High Belt Deck Friction Controller Fault Command Contact dealer or TRUE service Low Line Voltage Check AC line voltage...
- Page 41 Check cable connections Fault A121: Motor Phase A High AC MCB Drive Motor Controller Fault Gate Driver Fault Contact dealer or TRUE service Loose Cable Connection Check cable connections Fault A122: Motor Phase B High AC MCB Drive Motor Controller Fault...
- Page 42 Run incline calibration Smart Fault SC02: Incline Stall Incline Stall Incline Potentiometer value Card out of range Contact dealer or TRUE service Acme Nut Jammed Motor Bearings Power cycle Console displays Fault Check cable connections Calibration not saved. Incline disabled.
-
Page 43: Exploded Diagram
CHAPTER 6: ADDITIONAL INFORMATION EXPLODED DIAGRAMS: Pedestal & Console Rack: Truefitness.com / 800.426.6570 / 636.272.7100 43 of 50... - Page 44 CHAPTER 6: ADDITIONAL INFORMATION EXPLODED DIAGRAMS: Motor Pan: Truefitness.com / 800.426.6570 / 636.272.7100 44 of 50...
- Page 45 CHAPTER 6: ADDITIONAL INFORMATION EXPLODED DIAGRAMS: Running Surface: Truefitness.com / 800.426.6570 / 636.272.7100 45 of 50...
- Page 46 CHAPTER 6: ADDITIONAL INFORMATION EXPLODED DIAGRAMS: Base Frame: Truefitness.com / 800.426.6570 / 636.272.7100 46 of 50...
- Page 47 CHAPTER 6: ADDITIONAL INFORMATION EXPLODED DIAGRAMS: Incline System: Truefitness.com / 800.426.6570 / 636.272.7100 47 of 50...
-
Page 48: Chapter 7: Warranty Information
COMMERCIAL LIMITED WARRANTY TI1000 ALPINE RUNNER Save Time and Register Online! Activate Multiple Warranties at truefitness.com All TRUE® Fitness products are distributed by TRUE and are touchscreens and Escalate consoles are warranted for warranted to the original registered product purchaser and the defects in material and workmanship for three years with three parts of the TRUE product (the “Product”) listed below, under... -
Page 49: Warranty Registration
OR LIMITATION OF INCIDENTAL OR CONSEQUENTIAL attached form is filled in, signed by the original purchaser and mailed to TRUE within 30 days of purchaser’s receipt of this DAMAGES, SO THE ABOVE LIMITATION OR EXCLUSION MAY Product. The serial number must be intact on the Product for NOT APPLY TO YOU. - Page 50 If you prefer to mail your warranty card, have the owner of the product complete the information below and return it to TRUE Fitness within 30 days from the date of equipment installation.
Need help?
Do you have a question about the TI1000 and is the answer not in the manual?
Questions and answers