True CS800 Assembly Instructions Manual
Hide thumbs
Also See for CS800:
- Owner's manual (34 pages) ,
- Troubleshooting manual (24 pages) ,
- Owner's manual (31 pages)
Advertisement
Quick Links
Assembly Instructions
15 INCH LCD with TOUCHSCREEN
DISPLAY ASSEMBLY INSTRUCTIONS
Display Assembly Instructions cover the
three TRUE Fitness series of products below.
Treadmills Page 1
Bikes and Ellipticals: Page 6
Changing units between English & Metric: Page 10
TV Tuner Programming: Page 11
NTSC / ATSC Tuner Version
Advertisement

Related Manuals for True CS800


Summary of Contents for True CS800
- Page 1 Assembly Instructions 15 INCH LCD with TOUCHSCREEN DISPLAY ASSEMBLY INSTRUCTIONS Display Assembly Instructions cover the three TRUE Fitness series of products below. Treadmills Page 1 Bikes and Ellipticals: Page 6 Changing units between English & Metric: Page 10 TV Tuner Programming: Page 11...
- Page 2 Cables will be labeled near their connector with identifying names such as those listed below in BOLD TEXT and in the instructions below. Should you need technical assistance in assembly of your TRUE Fitness product, you can contact TRUE Fitness Technical Support at 1-800-883-8783...
- Page 3 Assembly Instructions TREADMILLS NOTE: Treadmill Wiring Schematic is available on page 5. 1. Using 8 inch Wire Ties (d), install Auxiliary Power Supply per Treadmill Frame Assembly Instructions shipped with treadmill. NOTE: 220V treadmills come equipped with the Auxiliary Power Supply already installed. 2.
- Page 4 Cable– red and black wire - CABLE (DC Fan Power from Display) STANDARD on CS500, CS550, CS800 models Not available on LC1100 model NOTE: 2-pin connector is polarized. Insert properly. 5. After cable connections are made, gently recess all excess cabling back into Console Rack neck (where cabling exits).
- Page 5 Assembly Instructions DISPLAY CONNECTION DIAGRAM - TREADMILL 8 COAX (NOT REQUIRED FOR PS850 MODEL. PS850 TOUCH SCREEN DOES NOT HAVE TV TUNER OPTION) 6 GND 7 AUXPS 9 FAN STANDARD ON CS MODELS N/A ON LC1100 1 CNTRL 4 SAFE 5 KEYS 3 RIGHT 2 LEFT...
- Page 6 Assembly Instructions WIRING SCHEMATIC – TREADMILL MODELS: CS500, CS550, CS800, ES900...
- Page 7 Assembly Instructions WIRING SCHEMATIC – TREADMILL MODELS: PS850, LC900, LC1100...
- Page 8 Assembly Instructions BIKES and ELLIPTICALS 15 INCH LCD with TOUCHSCREEN DISPLAY HARDWARE KIT ITEM DESCRIPTION WHERE USED 15 inch LCD Display Treadmill Display Screw M5 w/ lock washer Display Attachment Auxiliary Power Supply In Frame for Display Power 8 inch Wire Ties Secure Power Supply 4 inch Wire Ties Cable Management...
- Page 9 (DC Fan Power from Display) STANDARD on CS800 Upright and Recumbent Bikes and CS800 Ellipticals. N/A on LC models. NOTE: 2-pin connector is polarized. Insert properly. 4. Place Display onto Console Rack neck mounting flange so that flange sits in display recess.
- Page 10 Note: iPod ® Cable is not removable from Display Front. Any attempt to remove cord could damage cord or display front lower panel. _____________________________________________________________________________________________________________ Ground Screw Locations for Bikes CS800 Upright & Recumbent, LC900 Upright Bike LC900 Recumbent Bike Secure 4 GND here Secure 4 GND here...
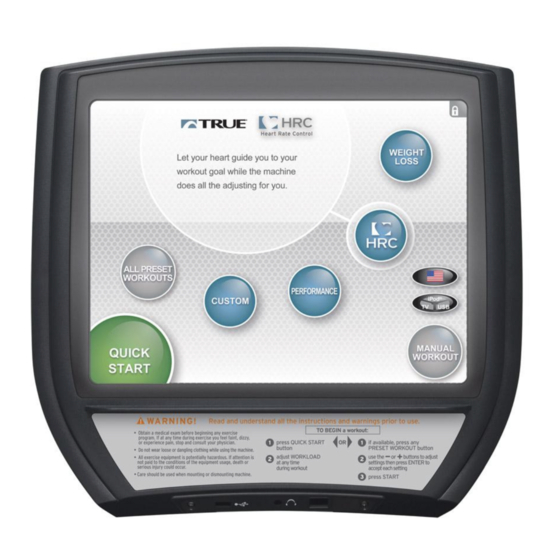
- Page 11 Assembly Instructions DISPLAY CONNECTION DIAGRAM – BIKE and ELLIPTICAL 4 GND 6 COAX 5 AUXPS 7 FAN (OPTIONAL) 1 CNTRL - BIKE 1 CNTRL 3 RIGHT 2 LEFT - ELLIPTICAL BIKE and ELLIPTICAL OPERATION 1. Read and understand all instructions and warnings prior to use. 2.
- Page 12 This example will be used for the remainder of instructions. 7. You will see two arrows and a SAVE key appear. See image below on right. 8. Press the up or down arrow to change “CS800” to “CS800X”. NOTE: The “X” designates a metric units configured model.
- Page 13 Assembly Instructions TV TUNER PROGRAMMING Analog (NTSC) and Digital (ATSC) Tuner (Not applicable for Model PS850 Touchscreen without TV Tuner) INITIAL STEPS 1. If you have not already reviewed and completed the necessary requirements for: a) Treadmill Operation on Page 4 or b) Bike and Elliptical Operation on Page 9 please complete these steps at this time if you have not already.
- Page 14 Assembly Instructions 9. The UTILITIES screen will appear as shown. Press the TV TUNER SETUP key on the UTILITIES screen. 10. TV TUNER SETUP screen will appear as below. 11. Determine if the video signal source is Analog or Digital and if it is supplied by Cable or Antenna. Once you have determined this then select the appropriate section below.
- Page 15 Assembly Instructions c) For Digital TV (ATSC) by Air (antenna is source) programming: i) TV Mode = DTV Air ii) TV Type = ATSC d) For Digital TV (ATSC) by Cable (cable is source) programming: i) TV Mode = DTV Cable ii) TV Type = QAM STD (most common setting) NOTE: Depending on your cable provider the QAM STD setting may result in zero...
- Page 16 Assembly Instructions Closed Captioning Setup- Digital Tuner 18. Once the scan procedure has been completed press the CONTROL MENU key. CONTROL MENU Key 19. Press the MENU key that is inside the Digital TV Only box. Menu Key 20. Press the Right navigation key until the CAPTION tab is highlighted Right Navigation 21.Press the OK key that is inside the Digital TV Only box.
- Page 17 24. Press the RETURN key RETURN NOTE: CC only works in the muted state; if the power cycled the equipment wakes in an unmuted state. truefitness.com / 800-426-6570 / 1-636-272-7100 2010 TRUE FITNESS TECHNOLOGY, INC. 061311 Specifications subject to change...
Need help?
Do you have a question about the CS800 and is the answer not in the manual?
Questions and answers