Moneris iWL220 Reference Manual
Hide thumbs
Also See for iWL220:
- Operating manual (245 pages) ,
- Reference manual (59 pages) ,
- Manual (27 pages)
Table of Contents
Advertisement
Quick Links
Advertisement
Table of Contents
Troubleshooting

Related Manuals for Moneris iWL220


Summary of Contents for Moneris iWL220
- Page 1 Moneris® iWL220 Reference Guide 05/18...
- Page 2 Need help? Web: moneris.com/support-iWL220 Toll-free: 1-866-319-7450 Record your Moneris merchant ID here: ____________________________________...
-
Page 3: Table Of Contents
Enabling the admin password for manual entry protection ................21 Enabling loyalty and gift cards ..........................22 Enabling tip entry (gift cards) ............................22 Using Your Terminal ....................23 Moneris iWL220 ............................24 Terminal keys and hardware ..........................25 Wireless communication and the base ...................... 26 Important screen icons .............................26 The iWL220 base ..............................26... - Page 4 Pre-Auth receipt ................................47 Original receipt ................................47 Partial Approval receipt ..............................48 Reports ..............................49 Masking on reports ............................49 Reprint merchant receipt [66] ..........................49 Clerk subtotals report [82] ..........................49 Current batch totals report [99] ........................50 Moneris® iWL220 Reference Guide...
- Page 5 Admin functions ............................52 Logon [02] .................................52 Logoff [03] ................................52 Re-initialization [01] ............................52 End-of-day process ........................... 53 Merchant close ..............................53 System close ..............................54 Troubleshooting ............................55 Error messages ..............................55 Equipment issues ..............................59 Merchant support ....................... 61 Moneris® iWL220 Reference Guide...
- Page 6 This page left blank intentionally. Moneris® iWL220 Reference Guide...
-
Page 7: Setting Up Your Terminal
Setting up Your Terminal Setting up your terminal In this section, we go over everything you need to know to set up your Moneris iWL220. You can also view our setup videos online at moneris.com/support-iWL220. Moneris® iWL220 Reference Guide... -
Page 8: Before You Get Started
2. Review the Installation Checklist: Moneris Wireless Communication Base (available at moneris.com/installation. 3. If your terminal will communicate with the Moneris host over high-speed Ethernet, review the Moneris IP Readiness Checklist (available at moneris.com/checklist) to ensure that your Ethernet service is ready to support your terminal. - Page 9 Merchant Close (you are responsible for closing your batch at the end of each day). Optional features e.g. gift cards, loyalty cards, Ernex Terminal ID (found in your Moneris Gift & Loyalty ...
-
Page 10: Hardware Setup
Plug the other end of the Ethernet cable into the router/switch/hub/internal wiring — whatever is applicable to the high-speed Internet service at your location. (If necessary, refer to the Moneris IP Readiness Checklist available at moneris.com/checklist.) Recommendation: Set up dial backup as well (follow the... - Page 11 IMPORTANT: You must use the exact power adaptor and cables provided by Moneris to work with the Moneris iWL220 terminal. Failure to do so may affect the operability of, or cause damage to, the equipment.
- Page 12 Remove the protective film (if applicable) a. If your iWL220 terminal has a protective film covering the display screen, peel the film off. Hint: Peel from the top right to the bottom left corner. b. Go to step 5 “Install the paper roll” below.
- Page 13 100%. When this happens, the icon will display fully solid as shown in the image on the right. (The Battery Charging icon may continue to flash regardless of the charge level of the battery.) Proceed to Registering the terminal to a base on page 12. Moneris® iWL220 Reference Guide...
-
Page 14: Registering The Terminal To A Base
You may register your new terminal to the communications base that was packaged with it, or you may register the terminal to a different iWL220 base if that base is already functioning as a communications base. 1. Note the following before proceeding: Do not register the terminal to more than one base at a time. -
Page 15: Establishing A Connection To The Base
9. Confirm that your terminal screen appears as shown here: Wireless Signal (signal strength indicator) icon Base ID (for example, 12345678) Ethernet indicator (Eth) appears only if the terminal is connected to a functioning Ethernet network. 10. Proceed to Communications setup on page 14. Moneris® iWL220 Reference Guide... -
Page 16: Communications Setup
Communications setup Your terminal must be configured to communicate with the Moneris host. 1. Do one of the following based on your requirements: If you are using dynamic IP as default, proceed to Using dynamic IP below. If you are using static IP as default, proceed to Using static IP below. - Page 17 If you are using dial backup and need to enter a prefix (e.g., 9) to connect to an outside line, go to Setting a dial prefix on page 16. If you are not using dial backup or you are but do not need to enter a prefix, go to Initialization and logon on page 19. Moneris® iWL220 Reference Guide...
-
Page 18: Using Dial
Using dial To set up dial as your default method of communicating with the Moneris host, follow these steps. key twice, key in 08 and, press the green 1. Press the Admin key. 2. Press the green key to select COMMS TYPE. -
Page 19: Communications Troubleshooting
Note: If you are attempting to register the terminal to a base that is already connected to more than one iWL220 terminal, ensure that the Base ID that you are using for the registration is the same ID that is displayed on the READY screen of the other terminal(s). - Page 20 4. If the terminal must use a prefix to dial out, ensure that the dial PREFIX parameter has been configured correctly. Refer to Setting a dial prefix on page 16. 5. Return to Initialization and logon on page 19. Moneris® iWL220 Reference Guide...
-
Page 21: Initialization And Logon
1 888 358 8602 00304 1 888 332 8433 4. Wait while the terminal communicates with the Moneris host. Over the next few moments, the screen will display SENDING, RECEIVING, and PROCESSING. • If SWIPE ADMIN CARD appears, swipe one of the white POS Admin cards (provided with your new terminal). -
Page 22: Additional Options
READY screen. Note: To change the default values for the tip and cash back options, or to enable enhanced tip prompting, refer to the iWL220 Short-Range Mobile Operating Manual in WebHelp format at moneris.com/support- iWL220. -
Page 23: Changing The Terminal Language
(shipped with your terminal) must be swiped any time card information is manually entered in order to continue the transaction. Moneris recommends that you change this parameter by setting up an admin password to be entered instead of swiping the POS Admin card. To change this parameter and set up an admin password, follow these steps. -
Page 24: Enabling Loyalty And Gift Cards
7. The READY screen appears. 8. Your terminal is ready to process loyalty card and gift card transactions. For instructions on performing: gift card transactions, refer to the Moneris iWL220 Gift Card Program Reference Guide. loyalty card transactions, refer to the Moneris iWL220 Loyalty Programs Reference Guide. -
Page 25: Using Your Terminal
Using Your Terminal Using your terminal In this section, we go over everything you need to know to use your Moneris iWL220, including how to perform transactions and end-of-day processes. Moneris® iWL220 Reference Guide... -
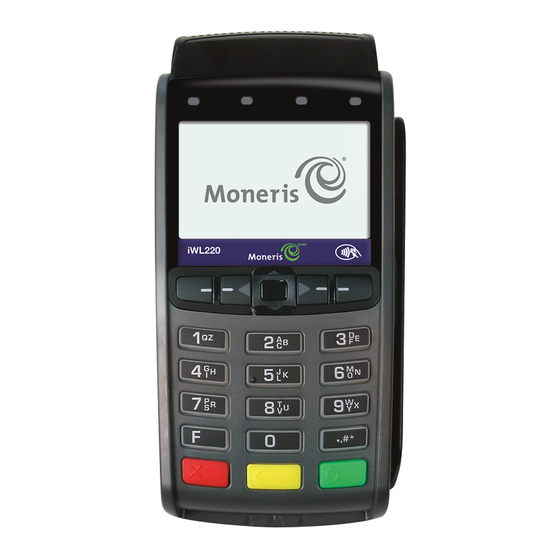
Page 26: Moneris Iwl220
When prompted, you (and sometimes your customer) will key in information on the terminal. If your customer is required to key in information, pass the handheld to the customer. When the customer has finished keying in the information, retrieve the terminal and complete the transaction. Moneris® iWL220 Reference Guide... -
Page 27: Terminal Keys And Hardware
To advance receipt paper, see label 6 above Keypad Magnetic stripe reader Chip reader Display screen/Contactless reader (internal) Note: If the terminal’s backlight dims (keys lose their bright glow), press any key. The keys function even if the backlight is dimmed. Moneris® iWL220 Reference Guide... -
Page 28: Wireless Communication And The Base
Wireless communication and the base The iWL220 terminal uses wireless communication to connect to the communications base to which it is registered. The terminal must be within the coverage area of the base to process transactions. Important screen icons Wireless signal status Terminal recognizes the wireless signal from the base and can process transactions. -
Page 29: Battery Use
25% charge or less: Printing slows. Empty battery: Terminal powers off. (Data are not lost.) icon] 1 Appears on READY screen (top left corner). 2 Appears (top right corner) on screens: MAIN MENU, REPORT FUNCS, ADMIN FUNCS, and CONFIG FUNCS. Moneris® iWL220 Reference Guide... -
Page 30: Stand-By Mode
Ensure that the terminal is not docked on a base. key twice. Key in 49, and press the green 1. From the READY screen, press the Admin key. When POWER OFF TERMINAL? appears, press the key (YES). Moneris® iWL220 Reference Guide... -
Page 31: Card Types
Card types The Moneris iWL220 supports the following card types and formats. These card types are not mutually exclusive. A single card can include a magnetic stripe, a chip, and contactless functionality. Magnetic stripe card A card with a magnetic stripe ... -
Page 32: Cardholder Verification
In most cases, this limit does not apply to: • Credit transactions where the card is swiped or inserted • Interac Debit transactions where the card is swiped or inserted These transactions require cardholder verification regardless of the transaction amount. Moneris® iWL220 Reference Guide... -
Page 33: Card Entry Options
The card must be within 0.5 in. (1.3 cm) of the screen, but it does not have to touch it. The card must be tapped or waved by itself (the customer cannot leave the card in their wallet and wave it in front of the screen). Moneris® iWL220 Reference Guide... -
Page 34: Contactless Transaction Limit (Ctl)
If SWIPE ADMIN CARD appears, swipe your POS Admin card on the terminal. If TAKE MANUAL IMPRINT OF CARD AND PRESS OK appears, take a manual imprint of the card, and press the green key. Moneris® iWL220 Reference Guide... -
Page 35: Transactions
2. Key in the Admin code, and press the green key. The transaction appears. To print a list of all Admin codes: 1. Press the Admin key until ENTER ADMIN CODE appears. 2. Key in 40, and press the green key. The list is printed. Moneris® iWL220 Reference Guide... -
Page 36: Purchase [100]
3. Follow the merchant prompts table on page 36. Note: When the final Purchase amount is known, you must perform an Advice for the final amount using the same card number (see Advice options starting on page 35). Moneris® iWL220 Reference Guide... -
Page 37: Cheque Authorization [105]
3. Scroll to the Pre-Auth that you want to complete or cancel (e.g., “PA1234 $#.##”), and press the green key. 4. Press the key (COMPL), and follow the merchant prompts table on page 38. Moneris® iWL220 Reference Guide... -
Page 38: Balance Inquiry [110]
Key in the last four digits of the card number, and press the green key. 4 DIGITS ENTER EXPIRY Key in the card’s expiry date (MMYY), and press the green key. DATE [MMYY] SWIPE ADMIN CARD Swipe your POS Admin card. Moneris® iWL220 Reference Guide... - Page 39 If cardholder would like to pay a balance due by credit or debit, press $00.00 key (CR/DB). CR/DB CASH If they would like to pay by cash, press the key (CASH). UPDATE POINTS Refer to the Moneris iWL220 Loyalty Programs Reference Guide. TO LOYALTY CARD? Moneris® iWL220 Reference Guide...
-
Page 40: Merchant Prompts: Cheque Authorizations
Key in the 6-digit portion of the RECEIPT NUMBER found on the Pre-Auth receipt (see Pre-Auth Receipt on page 47), and press the green NUMBER key. 1234567890123456 Press the green key to confirm the displayed card number. PRESS [OK] Moneris® iWL220 Reference Guide... - Page 41 To bypass this prompt, simply press the green key. ENTER ORIGINAL Key in the (IVR) Auth # written on your paper sales draft, and press the AUTHORIZATION # green key. ENTER CARD Key in the card number, and press the green key. NUMBER Moneris® iWL220 Reference Guide...
-
Page 42: Customer Prompts: On The Terminal
NOT FOUND Pre-Auths stored in the terminal's memory.) USE LOYALTY INFO Refer to the Moneris iWL220 Loyalty Programs Reference Guide. FROM PRE-AUTH? Customer prompts: On the terminal This table lists in order of appearance the prompts (and the actions to take for each) that your customer might see on the terminal during a transaction when tip entry is disabled. - Page 43 Note: The remaining balance is displayed during a Partial Approval PRESS OK transaction if the pre-paid card allows this. REMOVE CARD Removes their card from chip reader and returns the terminal to you (see APPROVED ######## prompt on page 37). Moneris® iWL220 Reference Guide...
-
Page 44: Prompts With Tip Entry
Take a manual imprint of the card, and press the green key. IMPRINT OF CARD AND PRESS OK RETURN TO CLERK Press the green key on the terminal to continue. APPROVED Press the green key, and process any receipt that prints (see page 46). ######## Moneris® iWL220 Reference Guide... -
Page 45: Customer Prompts On The Terminal: Purchase With Tip Entry Enabled
(CASH). UPDATE POINTS Refer to the Moneris iWL220 Loyalty Programs Reference Guide. TO LOYALTY CARD? Customer prompts on the terminal: Purchase with tip entry enabled This table lists in order of appearance the prompts (and the actions to take for each) that your customers might see on the terminal during a Purchase when tipping is enabled. - Page 46 For savings: Presses the key (SAVINGS). ENTER PIN & OK Keys in their Personal Identification Number and presses the green key. RETURN TO CLERK Returns the terminal to you (see RETURN TO CLERK prompt on page 42). Moneris® iWL220 Reference Guide...
- Page 47 Note: The remaining balance is displayed during a Partial Approval PRESS OK transaction if the pre-paid card allows this. REMOVE CARD Removes their card from chip reader and returns the terminal to you (see APPROVED ######## prompt on page 42 ). Moneris® iWL220 Reference Guide...
-
Page 48: Receipts
To reduce the risk of fraudulent card use, masking and truncation are applied to card numbers printed on receipts. Masking replaces a card’s numbers with asterisks (e.g., ************1234). Truncation prints only the last 4 digits of a card (e.g., 1234). The expiry date is not printed on any copy of any receipt. Moneris® iWL220 Reference Guide... -
Page 49: Contactless Transactions
Contactless transactions Receipts can be suppressed for tapped credit transactions that do not require cardholder verification. Refer to printer configuration in the Moneris iWL220 Operating Manual in WebHelp format located at moneris.com/support-iWL220. Receipts are always printed for Interac Flash transactions. -
Page 50: Partial Approval Receipt
Partial Approval receipt Moneris® iWL220 Reference Guide... -
Page 51: Reports
TO BE PROCESSED appears, key in the Group ID and press the green key, then select PROCESS LIST. For all clerks, press the key (MULTIPLE) then select ALL CLERKS. The report prints, and the READY screen appears. Moneris® iWL220 Reference Guide... -
Page 52: Current Batch Totals Report [99]
The report prints, and the READY screen appears. Merchant sub-totals report [95] Prints a list of transaction type totals by card type for the current batch from the Moneris host. Grand totals by transaction type are also included. key, select REPORTS, and select MERCH SUBTOTAL. -
Page 53: Balance Inquiry Report [94]
When END TIME appears, key in the end time (HHMM, 24-hour clock), and press the green key. If BATCH is selected, key in the batch number, and press the green key. The report prints, and the READY screen appears. Moneris® iWL220 Reference Guide... -
Page 54: Admin Functions
ADMIN, then select LOGOFF. The PLEASE LOGON prompt appears within 60 seconds. Re-initialization [01] Moneris Customer Care may ask you to re-initialize your terminal if changes have been made to it or your merchant account. key, select CONFIGURATION, then select INITIALIZATION. -
Page 55: End-Of-Day Process
Step 3: Confirmation Confirm that the totals on the Stored Transactions report (printed in step 1) match the totals on the Batch Totals report (printed in step 2). If they do not match, call Moneris Customer Care toll-free at 1-866-319-7450 the next business day for reconciliation assistance. -
Page 56: System Close
System close If your merchant account is set up for System Close settlement, Moneris automatically closes your batch for you at the end of each day. You must verify transaction totals on a daily basis. Here’s how: Step 1: Print a stored transactions report [60] See page 53. -
Page 57: Troubleshooting
If the error message reappears and is listed in the table below, follow the instructions in the table. If the problem is still not resolved, call Moneris Customer Care toll-free at 1-866-319-7450. Error messages... - Page 58 3. Before retrying a transaction, confirm that the signal strength indicator bars (at least 3 bars) appear on the READY screen. key to return to the READY screen. See TCP ETHERNET DOWN Press the green CONNECTION FAILED solution on page 17. PRESS OK Moneris® iWL220 Reference Guide...
- Page 59 The total value of Refunds performed today is greater than your daily EXCEEDED Refund Limit. Contact Moneris for a temporary increase in your daily Refund Limit. Please have the original Purchase receipt available for reference. REINITIALIZATION Re-Initialize the terminal. See page 52.
- Page 60 Simply leave it blank and press the green key to continue. TRANSACTION The terminal cannot find a matching transaction. This message appears for NOT FOUND three seconds then the terminal returns to the previous prompt. Moneris® iWL220 Reference Guide...
-
Page 61: Equipment Issues
Ethernet cable first before plugging in the FAILED power cable. 2. Confirm that the router and hub/switch (if any) are functioning (refer to the Moneris IP Readiness Checklist at moneris.com/checklist confirm that your firewall rules have been updated). 3. Confirm that the network is functioning. - Page 62 The paper well won't close. The printer paper roller may have popped out of place. Press gently but firmly on the loose end of the printer roller to pop it back into place. Then close the printer lid. Moneris® iWL220 Reference Guide...
-
Page 63: Merchant Support
Merchant support Merchant support At Moneris, help is always here for you 24/7. Moneris® iWL220 Reference Guide... - Page 64 Setup and Installation video download additional copies of this guide and other resources consult the Moneris iWL220 WebHelp for detailed information on all of the options available on your terminal and how to enable them Visit shop.moneris.com...
- Page 65 Solutions Corporation (“Moneris”). This manual is for informational purposes only. Neither Moneris nor any of its affiliates shall be liable for any direct, indirect, incidental, consequential or punitive damages arising out of use of any of the information contained in this manual. Neither Moneris or any of its affiliates nor any of our or their respective licensors, licensees, service providers or suppliers warrant or make any representation regarding the use or the results of the use of the information, content and materials contained in this manual in terms of their correctness, accuracy, reliability or otherwise.
Need help?
Do you have a question about the iWL220 and is the answer not in the manual?
Questions and answers