Table of Contents
Advertisement
Quick Links
Published 03/14 / Revised03/17
This Operator's Manual is an integral part of the safe operation of this machine and must
be maintained with the unit at all times. READ, UNDERSTAND, and FOLLOW the Safety
and Operation Instructions contained in this manual before operating the equipment. C01-
Cover
®
BUSH HOG
2501 Griffin Ave.
Selma, AL 36703
334-874-2700
www.bushhog.com
OPERATOR'S MANUAL
© 2014 Alamo Group Inc.
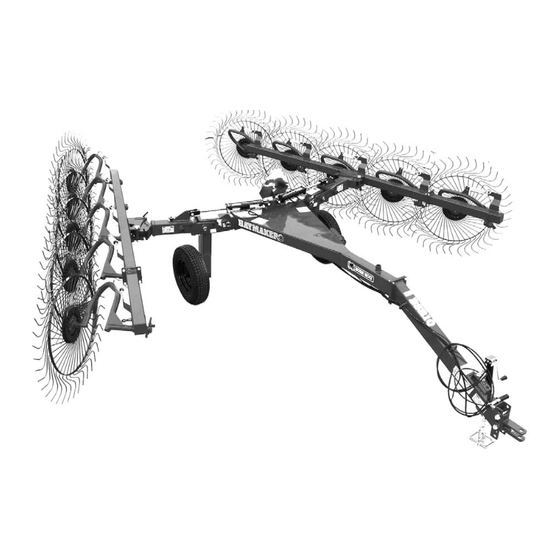
SUSPENSION RAKE
MODELS
BSR8 Hay Rake
BSR10 Hay Rake
BSR12 Hay Rake
Part No. 50074094
$0.00
Advertisement
Table of Contents

Related Manuals for Bush Hog BSR Series


Summary of Contents for Bush Hog BSR Series
- Page 1 This Operator's Manual is an integral part of the safe operation of this machine and must be maintained with the unit at all times. READ, UNDERSTAND, and FOLLOW the Safety and Operation Instructions contained in this manual before operating the equipment. C01- Cover ® BUSH HOG 2501 Griffin Ave. Selma, AL 36703 334-874-2700 www.bushhog.com $0.00...
- Page 2 BEFORE YOU START! Read the safety messages on the implement and shown in your manual. Observe the rules of safety and common sense! For future reference, record your Bush Hog product model number and serial number. Dealer Telephone Model Number...
-
Page 3: Table Of Contents
TABLE OF CONTENTS SAFETY SECTION ......................1-1 General Safety Instructions and Practices ......................1-2 Operator Safety Instructions and Practices ....................... 1-3 Equipment Operation Safety Instructions and Practices ..................1-5 Connection or Disconnecting Implement Safety Instructions and Practices ............1-7 Transporting Safety Instructions and Practices ....................1-8 Maintenance and Service Safety Instructions and Practices ................ - Page 4 PRE-OPERATION INSPECTION AND SERVICE ................... 4-10 Tractor Pre-Operation Inspection/Service ......................4-11 Checking Ballast, Wheel Spacing, and Tire Inflation ..................4-11 Rake Pre-Operation Inspection/Service ......................4-11 DRIVING THE TRACTOR AND IMPLEMENT ....................4-16 Starting the Tractor ............................4-17 Brake and Differential Lock Setting ........................4-17 Driving the Tractor and Rake ...........................
-
Page 5: Safety Section
SAFETY SECTION Safety Section 1-1... -
Page 6: General Safety Instructions And Practices
Safety Messages. Always use good common sense to avoid hazards. (SG-2) Si no lee ingles, pida ayuda a alguien que si lo lea para que le traduzca las medidas de seguridad. (SG-3) BSR Series Rakes 03/14 Safety Section 1-2 © 2014 Alamo Group Inc. -
Page 7: Operator Safety Instructions And Practices
(SG-I7) Always read carefully and comply fully with the manufacturer’s instructions when handling oil, solvents, cleansers, and any other chemical agent. (SG-22) BSR Series Rakes 03/14 Safety Section 1-3 © 2014 Alamo Group Inc. - Page 8 Stop raking if anyone comes within 25 feet of the Implement to prevent possible passerby injury or death from being struck from a thrown object, entanglement with the rakes, or run over. (SRK-01) BSR Series Rakes 03/14 Safety Section 1-4 © 2014 Alamo Group Inc.
-
Page 9: Equipment Operation Safety Instructions And Practices
Never dismount a Tractor that is moving or while the engine is running. Operate the Tractor controls from the tractor seat only. (SG-9) BSR Series Rakes 03/14 Safety Section 1-5 © 2014 Alamo Group Inc. - Page 10 PTO and the engine and remove the key. Wait until all rotating motion has stopped before dismounting. (SG-39) BSR Series Rakes 03/14 Safety Section 1-6 © 2014 Alamo Group Inc.
-
Page 11: Connection Or Disconnecting Implement Safety Instructions And Practices
On a fully-assembled unit, do not remove the Wing Retaining Strap until hoses are attached to the tractor and the Wing Cylinders are filled with oil. Lower the Wings slowly and carefully. Keep bystanders away during operations. (STI-05) BSR Series Rakes 03/14 Safety Section 1-7 © 2014 Alamo Group Inc. -
Page 12: Transporting Safety Instructions And Practices
Make certain that the “Slow Moving Vehicle” (SMV) sign is installed in such a way as to be clearly visible and legible. When transporting the Equipment use the Tractor flashing warning lights and follow all local traffic regulations. (SG-6) BSR Series Rakes 03/14 Safety Section 1-8 © 2014 Alamo Group Inc. - Page 13 Implement behind a truck or other type of vehicle. Never tow the Implement and another Implement connected in tandem. Never tow the Implement at speeds over 20 MPH. (STI-06) BSR Series Rakes 03/14 Safety Section 1-9 © 2014 Alamo Group Inc.
-
Page 14: Maintenance And Service Safety Instructions And Practices
Never work under the Implement, the framework, or any lifted component unless the Implement is securely supported or blocked up to prevent sudden or inadvertent falling which could cause serious injury or even death. (SG-14) BSR Series Rakes 03/14 Safety Section 1-10 © 2014 Alamo Group Inc. -
Page 15: Storage And Parking Safety Instructions And Practices
(if equipped) or block up securely to prevent falling and possible crushing injury and/or other injury from holding or lifting heavy components. Use the stand to stabilize the implement during storage. (S3PT-3) BSR Series Rakes 03/14 Safety Section 1-11 © 2014 Alamo Group Inc. -
Page 16: Parts Information
These parts are made and tested to Bush Hog specifications. Non-genuine "will fit" parts do not consistently meet these specifications. The use of “will fit” parts may reduce equipment performance, void warranties, and present a safety hazard. Use genuine Bush Hog parts for economy and safety. -
Page 17: Decal Location
SAFETY Decal Location NOTE: Bush Hog supplies safety decals on this product to promote safe operation. Damage to the decals may occur while in shipping, use, or reconditioning. Bush Hog cares about the safety of its customers, operators, and bystanders, and will replace the safety decals on this product in the field, free of charge (Some shipping and handling charges may apply). - Page 18 50073508 LOGO Haymaker Logo 50074260 LOGO BSR Series Logo 94359 REFLECT SMV Symbol 50035829 -------------- Canister, Parts Manual 50073511 IMPORTANT Transport Latch 50074094 -------------- Operator’s Manual (Inside Canister) BSR Series Rakes 03/14 Safety Section 1-14 © 2014 Alamo Group Inc.
-
Page 19: Decal Description
SAFETY Decal Description BSR Series Rakes 03/14 Safety Section 1-15 © 2014 Alamo Group Inc. - Page 20 SAFETY BSR Series Rakes 03/14 Safety Section 1-16 © 2014 Alamo Group Inc.
- Page 21 SAFETY BSR Series Rakes 03/14 Safety Section 1-17 © 2014 Alamo Group Inc.
-
Page 22: Federal Laws And Regulations
(Refer to U.S. Dept. of Labor, Employment Standard Administration, Wage & Home Division, Child Labor Bulletin #102.) BSR Series Rakes 03/14 Safety Section 1-18 © 2014 Alamo Group Inc. -
Page 23: Introduction Section
INTRODUCTION SECTION Introduction Section 2-1... - Page 24 OR SERIOUS INJURY. Indicates an imminently hazardous situation that, if not avoided, MAY result in MINOR INJURY. Identifies special instructions or procedures that, if not strictly observed, co BSR Series Rakes 03/14 Introduction Section 2-2 © 2014 Alamo Group Inc.
- Page 25 INTRODUCTION The Bush Hog Series BSR Rakes provide the best of both worlds; clean efficient raking and budget minded price. In maximum working widths of 19 ft. - BSR8, 20.7 ft. - BSR10, 24.2 ft. - BSR12 rakes make fast work of big jobs. With a reasonable amount of...
- Page 26 3. Record the Rake Model and Serial Numbers on the Warranty page at the front of the Operator’s Manual. Keep this as part of the permanent maintenance file for the implement. BSR Series Rakes 03/14 Introduction Section 2-4 © 2014 Alamo Group Inc.
- Page 27 2. If the unit has been subjected to misapplication, abuse, misuse, negligence, fire or other accident. 3. If parts not made or supplied by Bush Hog have been used in connection with the unit, if, in the sole judgment of Bush Hog such use affects its performance, stability or reliability.
-
Page 29: Assembly Section
ASSEMBLY SECTION Assembly Section 3-1... -
Page 30: General Instructions
Indicates an imminently hazardous situation that, if not avoided, MAY result in MONOR INJURY. Identifies special instructions or procedures that, if not strictly observed, could result in damage to, or destruction of the machine, attachments or the environment. BSR Series Rakes 03/14 Assembly Section 3-2 © 2014 Alamo Group Inc. -
Page 31: Dealer Set-Up Instructions
Asm-RK-0212. ENSURE ALL BYSTANDERS ARE CLEAR OF THE WINGS. Cycle the remote to lower one wing slowly to the ground. Repeat the same procedure to lower the other wing slowly to the ground. BSR Series Rakes 03/14 Assembly Section 3-3... -
Page 32: Attaching The Tongue
5/8” x 2” Capscrews and Locknuts provided in bolt bag. Attach the Tongue to the Tongue Extension using four 5/8” x 2” Capscrews and Locknuts provide in bolt bag. BSR Series Rakes 03/14 Assembly Section 3-4 © 2014 Alamo Group Inc. -
Page 33: Taillight Wiring Harness Connection
TAILLIGHT WIRING HARNESS CONNECTION The BSR Series Hay Rake is shipped from the factory with the Taillight assemblies and Enhance Box assembled to machine. It will be necessary to install the wiring harness to the rake after the Tongue has been properly attached to the rake. -
Page 34: Relocating The Wingframes On Bsr Models
6. Place Win Frame with mount back on Extension Arm. Place capscrew (D) through Mount (G) and Extension Arm and hexnut (B). Re-install Pin (C) and secure with spring pin (A). BSR Series Rakes 03/14 Assembly Section 3-6 © 2014 Alamo Group Inc. -
Page 35: Cylinder Lug Plate Extension & Wheel Arm Assembly
Pin and Lock Pin place in the transport position.NOTE: During this procedure the Hydraulic Lift Cylinders will be detached from the mount lug of the Mainframe and will provide no support to the Rake Wheel Pivot Arms. BSR Series Rakes 03/14 Assembly Section 3-7 © 2014 Alamo Group Inc. - Page 36 6. After aligning inner hole and outer holes re-install the two 1” x 6-1/2” bolts, four 1” flatwasher and two 1” locknuts through the mainframe and tighten. 7. Attach the Hydraulic Cylinder to the Cylinder Lug Extension. 8. Repeat steps 1-7 for R.H. side. BSR Series Rakes 03/14 Assembly Section 3-8 © 2014 Alamo Group Inc.
-
Page 37: Attaching The Wing Frame Extensions Bsr10 And Bsr12
ATTACHING THE WING FRAME EXTENSIONS BSR10 AND BSR12 For shipping purposes the Bush Hog BSR10 and BSR12 Models are shipped with the forward wing frame extensions unattached and will need to be installed. Refer to Attaching the Wing Frame Extension located on previous pages of this section. -
Page 38: Setting Up Rear Rake Arms For Use
Place the capscrew back through the hole and install the larger flatwasher to the opposite side. Place the smaller washer to the outside of the larger washer. Reinstall the hex nut and tighten. BSR Series Rakes 03/14 Assembly Section 3-10 © 2014 Alamo Group Inc. -
Page 39: Attaching The Rake Wheels
A. - If the last bend in the tines curve is in a clockwise direction, it is a Left Hand Rake Wheel. B. - If the last bend in the tines curve is in a Counter Clockwise direction, it is a Right Hand Rake Wheel. BSR Series Rakes 03/14 Assembly Section 3-11... -
Page 40: Installing Optional Kicker Wheel Kit
2. Install nylon bushings (A) in mounting bracket. Seat bushings with rubber mallet. 3. Install rake wheel arm (A) to mounting bracket. Fasten with 1-1/4” SAE flatwasher (B) and 3/8” x 1-1/2” spiral pin (C). BSR Series Rakes 03/14 Assembly Section 3-12 © 2014 Alamo Group Inc. - Page 41 (C). Fasten the rod end of the cylinder to the pin on the sliding support and place the 1” flatwasher (D) on pin. Place pin (E) through hole to secure. BSR Series Rakes 03/14 Assembly Section 3-13 © 2014 Alamo Group Inc.
-
Page 42: Connecting The Rake Arm To The Sliding Support
After the Kicker Wheel is assembled, move the SMV placard from the rear of the mainframe and relocate to the bracket attached to the slide tube of the kicker wheel. Asm-RK-0232 BSR Series Rakes 03/14 Assembly Section 3-14 © 2014 Alamo Group Inc. -
Page 43: Hydraulic Plumbing Installation For Kicker Wheel
It will raise when the wings are raised. To keep the kicker wheel in the raise position close the ball valve by rotating the lever counter-clockwise as viewed from above. BSR Series Rakes 03/14 Assembly Section 3-15 © 2014 Alamo Group Inc. -
Page 45: Operation Section
OPERATION SECTION Operation Section 4-1... - Page 46 Pictures contained in this section are intended to be used as a visual aid to assist in explaining the operation of a rake and are not necessarily of the BSR Series. Some pictures may show shields removed for purposes of clarity.
-
Page 47: Standard Equipment And Specifications
83” 83” 83” Weight 1950 lbs. 2100 lbs. 2450 lbs. Tires 205-75/15 205-75/15 205-75/15 Tractor Horse Power 30 HP 30HP 50 HP *Ratings based on actual field performance. BSR Series Rakes 03/14 Operation Section 4-3 © 2014 Alamo Group Inc. -
Page 48: Operator Requirements
Serious injury or death to the operator or others could result if the operator is under the influence of drugs or alcohol. (SG-27) BSR Series Rakes 03/14 Operation Section 4-4 © 2014 Alamo Group Inc. -
Page 49: Tractor Requirements
RHP8 and RHP10 rake requires a tractor with at least 30 HP, and the RHP12 rake requires a tractor with at least 50 HP. Operating these implements with a tractor that does not have adequate power may damage the tractor engine. BSR Series Rakes 03/14 Operation Section 4-5 © 2014 Alamo Group Inc. -
Page 50: Getting On And Off The Tractor
Use all handrails and steps for support and never rush or jump off the tractor. OPS-U- 0009 BSR Series Rakes 03/14 Operation Section 4-6 © 2014 Alamo Group Inc. -
Page 51: Starting The Tractor
Start tractor only when properly seated in the Tractor seat. Starting a tractor in gear can result in injury or death. Read the Tractor operators manual for proper starting instructions. (SG-13) BSR Series Rakes 03/14 Operation Section 4-7 © 2014 Alamo Group Inc. -
Page 52: Connecting The Implement To The Tractor
The rake can attached to any tractor having a drawbar that conforms to ASAE-SAE standards of 330 to 559mm (13 to 22 in.) (A) from the ground. BSR Series Rakes 03/14 Operation Section 4-8 © 2014 Alamo Group Inc. -
Page 53: Attaching Rake To Tractor Drawbar
IMPORTANT: Scan this QR Code with your smart phone to link to the PAMI Safe Implement Hitching Manual for more information on correctly connecting agricultural tractors to implements. Or type in your internet browser the following web address: www.algqr.com/hme Ops-0008-MISC BSR Series Rakes 03/14 Operation Section 4-9 © 2014 Alamo Group Inc. -
Page 54: Attaching To Tractor Hydraulic System
Make sure all pins have cotter pins and washers. Serious injury may occur from not maintaining this machine in good working order. (SG-21) BSR Series Rakes 03/14 Operation Section 4-10 © 2014 Alamo Group Inc. -
Page 55: Tractor Pre-Operation Inspection/Service
Ensure the manual canister is secured to the equipment with the operator’s manual inside. • Ensure all safety signs are in place and legible. Replace missing, damaged, and illegible decals. OPS-U- 0011 BSR Series Rakes 03/14 Operation Section 4-11 © 2014 Alamo Group Inc. - Page 56 REMOVE the HOSE and have it tested at a Dealer. If oil does penetrate the skin, have the injury treated immediately by a physician knowledgeable and skilled in this procedure. (SG-15) BSR Series Rakes 03/14 Operation Section 4-12 © 2014 Alamo Group Inc.
- Page 57 • Make sure tires and wheel are in good condition. Make sure the wheel lug nuts are tight. OPS-RK-0005 BSR Series Rakes 03/14 Operation Section 4-13 © 2014 Alamo Group Inc.
- Page 58 The engine coolant fluid level is full The radiator is free of debris The air filter is in good condition Operator’s Signature:___________________________________________________ DO NOT OPERATE an UNSAFE TRACTOR or IMPLEMENT BSR Series Rakes 03/14 Operation Section 4-14 © 2014 Alamo Group Inc.
- Page 59 There is no evidence of Hydraulic leaks The tires and wheel(s) are in good condition Wheel lug nuts are tight Operator’s Signature:________________________________________________________ DO NOT OPERATE an UNSAFE TRACTOR or IMPLEMENT BSR Series Rakes 03/14 Operation Section 4-15 © 2014 Alamo Group Inc.
-
Page 60: Driving The Tractor And Implement
When operating in traffic always use the Tractor’s flashing warning lights and reduce your speed. Be aware of traffic around you and watch out for the other guy. (SG-19) BSR Series Rakes 03/14 Operation Section 4-16 © 2014 Alamo Group Inc. -
Page 61: Starting The Tractor
When operating in traffic, always use the Tractor’s flashing warning lights and reduce your speed. Be aware of traffic around you and watch out for the other guy. BSR Series Rakes 03/14 Operation Section 4-17 © 2014 Alamo Group Inc. -
Page 62: Driving The Tractor And Rake
(5-7 mph) will produce good results. A slower ground speed may be necessary for hills or rough terrain. For Sickle Mowed Crop: Rake in the same direction as mower travel. For Rotary Mowed Crop: Rake in opposite direction as mower travel. BSR Series Rakes 03/14 Operation Section 4-18 © 2014 Alamo Group Inc. -
Page 63: Preparing Rake For Field Operation
4. Put tractor SCV lever in the float position. 5. Lower Rake wheels. Rake is now ready for field use. BSR Series Rakes 03/14 Operation Section 4-19 © 2014 Alamo Group Inc. -
Page 64: Setting Working Width
When adjusting the angle of the wing arms with pin and holes, working width will change. NOTE: Windrow widths (A) and (B) are approximate. BSR Series Rakes 03/14 Operation Section 4-20 © 2014 Alamo Group Inc. -
Page 65: Adjusting Raking And Windrow Width
1. Take off lock-pin (B). 2. Slide frame (A) from standard position (D) to high capacity position (C). 3. Insert the lock-pin (B). Repeat on opposite side. BSR Series Rakes 03/14 Operation Section 4-21 © 2014 Alamo Group Inc. - Page 66 Be sure to pin the jack stand in place at the mount tube (B). Before sliding the frame in or out be sure to remove pin (C) and replace when desired width is attained. BSR Series Rakes 03/14 Operation Section 4-22 © 2014 Alamo Group Inc.
-
Page 67: Adjusting Raking Wheel Ground Pressure
Ground pressure is controlled by the position of each cam on each rake wheel support assembly. The cam can be adjusted at six positions from minimum ground pressure to maximum ground pressure. BSR Series Rakes 03/14 Operation Section 4-23 © 2014 Alamo Group Inc. -
Page 68: Adjusting Ground Wheel Pressure
NOTE: The clevis (E) can also be flipped upside down from position shown for more adjustment if needed. BSR Series Rakes 03/14 Operation Section 4-24 © 2014 Alamo Group Inc. -
Page 69: Flip-Up Raking - (Only For Bsr10 & Bsr12)
(FLIP-UP) and lock it in the raised position. 1. Remove and retain 5-16” nut (D), washers 5- 16” (B) and 3/8” washer (C), 5/16’x1” bolt (A) for re-installation. BSR Series Rakes 03/14 Operation Section 4-25 © 2014 Alamo Group Inc. - Page 70 (B) and let it hang. 3. Remount screw, washers, and nut in the same position (A). 4. Remove spring lock pin (A) and lock pin (B). BSR Series Rakes 03/14 Operation Section 4-26 © 2014 Alamo Group Inc.
- Page 71 OPERATION 5. Lift up from rake to maximum position. 6. Insert the lock pin (A) and spring lock pin (B). BSR Series Rakes 03/14 Operation Section 4-27 © 2014 Alamo Group Inc.
-
Page 72: Raking A Single Windrow Or Swath
3. If left-hand raking is desired, remove transport pin (A) Ops1969 from left-hand side and store as described in “Preparing Rake for Field Operation”. NOTE: Repeat process if right-hand raking is desired. 4. Lower raking wheel assembly. Lowering Wheel Assembly BSR Series Rakes 03/14 Operation Section 4-28 © 2014 Alamo Group Inc. -
Page 73: Optional Attachments
• to help prevent crops from sticking to the wheels • to help block heavy cross winds from interfering while raking BSR Series Rakes 03/14 Operation Section 4-29 © 2014 Alamo Group Inc. -
Page 74: Operating The Tractor And Implement
Stay alert and watch for trees, low hanging limbs, power lines, and other overhead obstacles and solid ground objects while you are operating. Use care to avoid hitting these items OPS-R-0028_A BSR Series Rakes 03/14 Operation Section 4-30 © 2014 Alamo Group Inc. -
Page 75: Shutting Down The Implement
Use the Tongue Jack for lifting the Implement only. Overloading the Tongue Jack can cause failure with possible serious bodily injury or even death. (STI-04) BSR Series Rakes 03/14 Operation Section 4-31 © 2014 Alamo Group Inc. - Page 76 5. Push tractor SCV lever to the float position. 6. Lower jackstand (B) and fasten with pin. 7. Adjust rake hitch to support weight of rake on jackstand. BSR Series Rakes 03/14 Operation Section 4-32 © 2014 Alamo Group Inc.
-
Page 77: Rake Storage
Keep the implement from sitting in water, dirt and other contaminants. • Use spray touch-up enamel where necessary to prevent rust and maintain the appearance of the rake. OPS-RK-0010 BSR Series Rakes 03/14 Operation Section 4-33 © 2014 Alamo Group Inc. -
Page 78: Transporting The Tractor And Implement
Use extreme caution and avoid hard applications of the tractor brakes when towing heavy loads at road speeds. Never tow the implement at speeds greater than 20 MPH (32 kph). OPS-U- 0018 BSR Series Rakes 03/14 Operation Section 4-34 © 2014 Alamo Group Inc. -
Page 79: Preparing Rake For Transport
10. Install transport lock pins (D) through arm support brackets. Fasten with spring-locking pins (C). BSR Series Rakes 03/14 Operation Section 4-35 © 2014 Alamo Group Inc. -
Page 80: Transporting On Public Roadways
Replace the SMV emblem if faded, damaged, or no longer reflective. OPS-U- 0020 BSR Series Rakes 03/14 Operation Section 4-36 © 2014 Alamo Group Inc. - Page 81 OPS- B- 0022 Reduce speed before turning or applying the brakes. Ensure that both brake pedals are locked together when operating on public roads. OPS-U- 0023 BSR Series Rakes 03/14 Operation Section 4-37 © 2014 Alamo Group Inc.
-
Page 82: Safety Lights
12.3 Safety Lights The Bush Hog BSR Series Hay Rakes are shipped from the factory with Safety Lights installed on the rakes. The Safety Lights attach to the tractor with a 7 pin connector provided on the wiring harness. Older tractor models may not have the female connector for the harness to plug into and should be installed to the tractor by a qualified person in order for the Safety Lights to function properly with the tractor light system. -
Page 83: Hauling The Tractor And Implement
If during transport a hard braking, sharp turning, or swerving action was performed, stop at the next safe location to inspect the security of the load. OPS-U- 0026 BSR Series Rakes 03/14 Operation Section 4-39 © 2014 Alamo Group Inc. -
Page 84: Troubleshooting Guide
Remote outlet valve not activated. Open remote hydraulic outlet valve. Hose from implement not properly Connect hose. connected to tractor. Hydraulic oil level too low in tractor. Check tractor operator’s manual. BSR Series Rakes 03/14 Operation Section 4-40 © 2014 Alamo Group Inc. -
Page 85: Maintenance Section
MAINTENANCE SECTION Maintenance Section 5-1 © 2014 Alamo Group Inc. - Page 86 MAINTENANCE Any repair work must be carried out with the machine at rest and disconnected from the tractor. Do not carry out welding without authorization and instruction from the manufacturer. Disconnect the machine from the tractor before any welding work. damage to battery could result.
-
Page 87: Lubrication
MAINTENANCE LUBRICATION • The recommended intervals are based on normal conditions. Severe or unusual conditions may require shorter intervals. • Perform each lubrication and maintenance illustrated in this section at the beginning of the season and at the end of the season. •... -
Page 88: Synthetic Lubricants
MAINTENANCE Synthetic Lubricants Conditions in certain geographical areas may require lubricant recommendations different from those printed in this manual. Some coolants and lubricants may not be available in your location. Consult your dealer to obtain information and recommendations. Synthetic lubricants may be used it they meet the performance requirements as shown in the manual. The temperature limits and service intervals shown in this manual apply to both conventional and synthetic oils. -
Page 89: Left-Hand And Right-Hand Pivots
MAINTENANCE Left-Hand and Right-Hand Pivots Every 50 Hours - Grease lightly Jackstand Every 100 Hours - Oil Threads RHP Series Rakes 03/14 Maintenance Section 5-5 © 2014 Alamo Group Inc. -
Page 90: Annual Maintenance
MAINTENANCE ANNUAL MAINTENANCE Repack Wheel Bearings: 1. Raise one side of machine and install support stands. 2. Remove wheel. 3. Remove hub cap cotter pin, and wheel nut. 4. Remove washer, bearing, and wheel hub. 5. Remove rear seal and bearing. 6. -
Page 91: Service
MAINTENANCE SERVICE Servicing Tires Safely Explosive separation of a tire and rim parts can cause serious injury or death. Do not attempt to mount a tire unless you have the proper equipment to perform the job. Always maintain the correct tire pressure. Do not inflate the tires above the recommended pressure. -
Page 92: Identifying Left-Hand And Right-Hand Rake Wheels
MAINTENANCE Replacing Wheel Tines To replace a tine: 1. Remove two round-head bolts (A), nuts, clip and tine. 2. Install new tine. Fasten with clip, round-head bolts (A) and nuts. Identifying Left-Hand and Right-Hand Rake Wheels To identify left-hand and right-hand rake wheels: 1. -
Page 93: Beginning Of Season
MAINTENANCE During extended periods of inactivity it is necessary to close the cylinders completely. This must be done in is such a way as to protect the rods from weather effects. Beginning of Season 1. Review operator’s manual and check adjustments. 2. - Page 94 MAINTENANCE RHP Series Rakes 03/14 Maintenance Section 5-10 © 2014 Alamo Group Inc.
- Page 95 TO THE OWNER/OPERATOR/DEALER To keep your implement running efficiently and safely, read your manual thoroughly and follow these directions and the Safety Messages in this Manual. The Table of Contents clearly identifies each section where you can easily find the information you need. The OCCUPATIONAL SAFETY AND HEALTH ACT (1928.51 Subpart C) makes these minimum safety...
- Page 96 BSR SERIES HAY RAKE BSR-SOM- 03/14 P/N 50074094 Printed U.S.A...
Need help?
Do you have a question about the BSR Series and is the answer not in the manual?
Questions and answers