Table of Contents
Advertisement
Advertisement
Table of Contents

Summary of Contents for JLL RE100
- Page 1 INSTRUCTION MANUAL Please read this book thoroughly before operating the bike.
-
Page 2: Table Of Contents
Preparing the site p. 9 Diagram p. 9 Content listing p. 10 Box contents p. 10 Tools pack p. 10 RE100 assembly p. 11 Adjusting the handlebars p. 13 Monitor configuration p. 13 Testing the bike operation p. 14 Specifications p. 14 3. - Page 3 5. ADDITIONAL INFORMATION Contact information p. 18 Disclaimer p. 18...
-
Page 4: Exploded Diagram
EXPLODED DIAGRAM... -
Page 5: Parts List
PARTS LIST... -
Page 6: Safety Instructions
Please contact JLL Fitness on 0800 6123 988 for advice on how to resolve the issue. -
Page 7: User Safety Precautions
9. To avoid bodily injury and/or damage to the product or property, ensure to follow safe procedures for lifting and moving the item. 10. Your product is intended for use in cool, dry conditions. You should avoid storage in extreme cold, hot or damp areas as this may lead to corrosion and other related problems. -
Page 8: Warning Stickers
• Read the instruction manual completely before using the bike. • Ensure all users wear appropriate footwear on JLL equipment. ® • As far as possible provide the following clearances: 0.5 m at each side and 2 m at the back. Be sure your bike is clear of walls, equipment and other hard surfaces. -
Page 9: Assembly
Assembly PREPARING SITE To find the ideal location to set up this bike, ensure that: • Area is well illuminated and well ventilated. • Surface is level. • There is enough space to access the unit and emergency dismount. If it is possible, keep the following clearances: 0.5 m at each side and 2 m at the back. -
Page 10: Content Listing
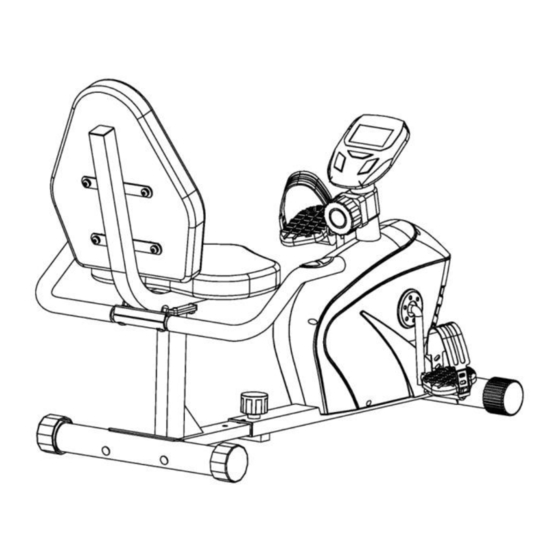
CONTENT LISTING See diagram (left) and content listing (below) for recumbent bike box contents. See Customer Service chapter for contact information if any parts are missing. BOX CONTENTS Rear Frame Seat Frame Manual Front Frame Stabilisers x2 Handles Tools Pack Back Rest Saddle Pedals R/L... -
Page 11: Re100 Assembly
Inside the box you will find a Tools Pack (Hex Allen Key, Multi-Tool, Washers and Bolts). See previous page. To assemble your JLL RE100 please follow these easy steps: STEP 1... - Page 12 STEP 5 Secure the handlebars to the seat frame using two carriage bolts, two flat washers and two cap nuts. Tighten using the multi-tool. Then connect the pulse wires, again aligning your pins. STEP 6 Fix the right and left pedals to the corresponding cranks.
-
Page 13: Adjusting The Handlebars
ADJUSTING THE LENGTH The distance between the saddle and the pedals can be adjusted depending on the individuals leg length. Pull the pop pin knob up to free the rear frame and lock it back into place by pressing it back down. MONITOR CONFIGURATION Main Display Mode Button... -
Page 14: Testing The Bike Operation
TESTING THE BIKE OPERATION Use the following instructions to test the full resistance of the bike and to check the machine for proper operation. 1. Sit on the bike and start pedaling, change the levels of resistance and check to make sure you feel a difference in difficulty. -
Page 15: Operation
Operation Read all instructions, warnings and safety procedures located in the Safety chapter before using the bike. HEART-RATE SENSORS Hold the sensor plates on the handlebars ensuring that your hands are clean. A heart- rate reading will show on the display. Factors that interfere with pulse signal are: •... -
Page 16: Maintenance
Maintenance Maintenance must be performed on a regular basis. Performing maintenance actions can aid in providing safe and trouble-free operation of all JLL equipment. ® are not responsible for performing regular inspection and maintenance actions for ® your machine. JLL representatives are available to answer any questions that you may ®... -
Page 17: Bike Cleaning
Depending on where the bike is placed, you may experience dry air, causing a common experience of static electricity. You can notice that by walking across a carpet and then touching a metal object. On your bike you may experience a shock due to the build-up of static electricity on your body and the discharge path of the bike. - Page 18 • Always seek professional advice before changing your diet or starting any exercise program. • JLL Fitness Ltd is not liable for any injuries or damages that may occur when assembling or using this exercise bike. • By reading this you assume full responsibility for any injuries or changes to your physical well-being.
- Page 20 WWW.JLLFITNESS.COM @JLLFitness Follow us on Facebook and Twitter © JLL Fitness Ltd . All Rights Reserved.


Need help?
Do you have a question about the RE100 and is the answer not in the manual?
Questions and answers