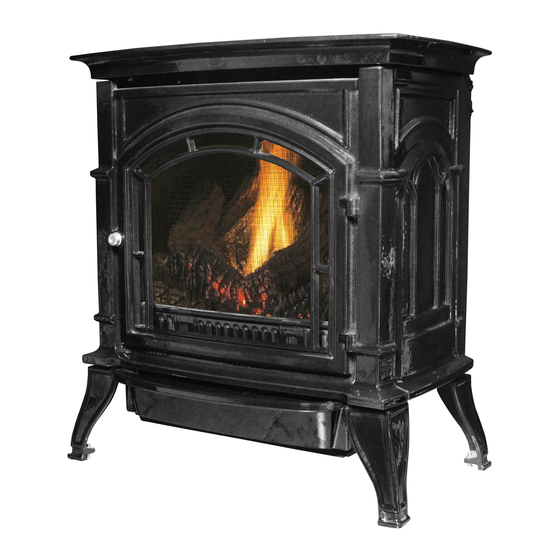
Ashley AGC500VF Installation And Operating Manual
Hide thumbs
Also See for AGC500VF:
- Installation and operating manual (29 pages) ,
- Owner’s instruction and operation manual (25 pages) ,
- Owner’s instruction and operation manual (25 pages)
Table of Contents
Advertisement
Quick Links
Installation and Operating Manual
If the information in this manual is not followed exactly, a fire or explosion may result causing property
•
Do not store or use gasoline or other flammable vapors and liquids in vicinity of this or any other appliance.
WHAT TO DO IF YOU SMELL GAS:
•
Do not try to light any appliance.
•
Do not touch any electrical switch; do not use any phone in your building.
•
Immediately call your gas supplier from a neighbor's phone. Follow gas supplier's instructions
•
If you cannot reach your gas supplier, call fire department.
•
Installation and service must be performed by a qualified installer, service agency or gas supplier.
This is an unvented gas-fired heater. It uses air (oxygen) from room in which it is installed. Provisions for
adequate combustion and ventilation air must be provided. Refer to section," Producing Adequate Air
For Combustion And Ventilation". This appliance may be installed in an aftermarket, permanently located,
manufactured (mobile) home, where not prohibited by local codes. This appliance is only for use with type
of gas indicated on rating plate. This appliance is not convertible for use with other gases.
Certified for installations in the USA
Approved for installation in mobile homes
AGC500VF
WARNING
damage, personal injury or loss of life.
INSTALLER: Leave this manual with appliance.
CONSUMER: Retain this manual for future reference.
Ce produit peut vous exposer à des produits chimiques, y compris le
monoxyde de carbone, qui est connu dans l'État de Californie pour causer
le cancer, des malformations congénitales et / ou d'autres problèmes de
This appliance is intended for supplemental heating.
reproduction. Pour plus d'informations, visitez www.P65warnings.ca.gov
CALIFORNIA PROPOSITION 65 WARNING:
This product can expose you to chemicals including carbon monoxide, which
is known to the State of California to cause cancer, birth defects and/or other
reproductive harm. For more information, go to www.P65warnings.ca.gov
852404C-3602F
Advertisement
Table of Contents

Related Manuals for Ashley AGC500VF


Summary of Contents for Ashley AGC500VF
- Page 1 Installation and Operating Manual AGC500VF WARNING If the information in this manual is not followed exactly, a fire or explosion may result causing property damage, personal injury or loss of life. • Do not store or use gasoline or other flammable vapors and liquids in vicinity of this or any other appliance.
-
Page 2: Important Safety Information
Congratulations! PLEASE READ THE INSTALLATION & OPERATING INSTRUCTIONS BEFORE USING APPLIANCE. Thank you and congratulations on your purchase of an Ashley stove. IMPORTANT: Read all instructions and warnings carefully before starting installation. Failure to follow these instructions may result in a possible fire hazard and will void the warranty. - Page 3 Important Safety Information 13. Avoid any drafts that alter burner flame patterns. Do not allow fans to blow directly into fireplace. Do not place a blower inside burn area of firebox. Ceiling fans may create drafts that alter burner flame patterns. Sooting and improper burning will occur.
-
Page 4: Product Features
Product Features Gas Pressures Natural Propane (LP) Regulator Pressure 3.5” w.c. 10.0” w.c. Pilot Regulator 3.5” w.c. Max. Gas Inlet Pressure 10.5” w.c. 13.0” w.c. Min. Gas Inlet Pressure 5.0" w.c. 11.0" w.c. On/Off Switch Max. Input Min. Input Fuel Control BTU/h BTU/h... -
Page 5: Getting Started
Getting Started Caution: Gloves are recommended when handling ceramic fiber logs to prevent skin irritation from loose fibers. Logs are fragile — handle with care. MAKE SURE YOU HAVE RECEIVED ALL PARTS Check your packing list to verify that all listed parts have been received. You should have the following: •... -
Page 6: Clearances And Height Requirements
Clearances And Height Requirements WARNING The dimensions shown are minimum clearances to maintain in installing this heater. Left and right clearances are determined when facing the front of the heater. Follow these instructions carefully to ensure safe installation. Failure to follow instructions exactly can create a fire hazard. The appliance cannot be installed on a carpet, tile or other combustible material. -
Page 7: Clearances/Height Requirements
Clearances/Height Requirements Alcove Installation NOTE: Maintain minimum side and back clearances when placing stove in alcove. Alcove Minimum Dimensions Height From Width Depth Hearth 52” 34” 36”... -
Page 8: Installation
Installation Caution! The appliance is very heavy. The assistance from a second person is strongly suggested. Please use proper lifting technique when positioning the appliance for assembly and installation. STEP 1 Remove the two (2) straps, and open the wrapping. Slide the bag to the bottom of the unit. - Page 9 STEP 3 Lift up on the front of the stove. Pivot the bottom out towards you. Pull down to remove front. Note: When handling the stove careful not to damage the porcelain finish the unit. BACK BACK Screen BACK Screen Screen STEP 4 Remove the two screws located...
-
Page 10: Connect Gas Line
Connect Gas Line WARNING Use new black iron or steel pipe. Internally tinned copper or copper tubing can be used per National Fuel Code, section 2.6.3, providing gas meets hydrogen sulfide limits, and where permitted by local codes. Gas piping system must be sized to provide minimum inlet pressure (Listed on Data Plate) at the maximum flow rate (BTU/hr). -
Page 11: Electrical Wiring (Millivolt)
Electrical Wiring (Millivolt) The millivolt valve is a self-powered combination gas control THAT DOES NOT REQUIRE 110V AC TO OPERATE . Caution: Label all wires prior to disconnection when servicing controls. Wiring errors can cause improper and dangerous operation. Verify proper operation after servicing. CONNECT OPTIONAL WALL SWITCH 1. -
Page 12: Log Placement
Log Placement Top Left Top Left Log #4 Log #4 Right Right Right Bottom Right Top Log #5 WARNING Bottom Bottom Log #3 Log #3 Log #3 The positioning of the logs is critical to the safe and clean operation of this heater. Sooting and other problems may result if the logs are not properly and firmly positioned in the appliance. -
Page 13: Pilot Flame
Flame Appearance Flames from the pilot, front and rear burner should be visually checked as soon as the heater is installed. In addition, periodically check the flames visually during operation. PILOT FLAME The pilot flame must always be present when the heater is in operation. It should just touch the top of the thermocouple tip for natural. -
Page 14: Operating Instructions
Operating Instructions OPERATING INSTRUCTIONS Avoid any drafts that alter burner flame patterns. Do not allow fans to blow directly into the stove. Do not place a blower inside the burn area of the stove. Ceiling fans may create drafts that alter flame patterns. Sooting and improper burning will result. -
Page 15: Millivolt Control Lighting Instructions
Operating Instructions MILLIVOLT CONTROL LIGHTING INSTRUCTIONS 1. STOP! Read the safety information label. 2. Make sure the manual shutoff valve is fully open. 3. This gas log set is equipped with an ignition device (piezo) which automatically lights the pilot. If piezo ignitor does not light the pilot, refer to instructions for “Match Lighting Instructions”. -
Page 16: Cleaning And Servicing
Cleaning And Servicing WARNING Turn off heater and allow to cool before cleaning. Disconnect electrical power before cleaning or servicing. CLEANING AND SERVICING Annual inspection and cleaning by your dealer or qualified service technician is recommended to prevent malfunction and/or sooting. Remove logs, handling carefully by holding gently at each end. -
Page 17: Troubleshooting
Troubleshooting WARNING Turn appliance OFF and allow to cool before servicing. Only a qualified service person should service and repair the heater. NOTE: All troubleshooting items are listed in order of operation. OBSERVED PROBLEM POSSIBLE CAUSE REMEDY 1. Replace ignitor. 1. - Page 18 Troubleshooting WARNING If the gas quality is bad, your pilot may not stay lit, the burners may produce soot and the heater may backfire when lit. If the gas quality or pressure is low, contact your local gas supplier immediately. OBSERVED PROBLEM POSSIBLE CAUSE REMEDY...
-
Page 19: Requirements For The Commonwealth Of Massachusetts
Requirements for the Commonwealth of Massachusetts This product must be installed by a licensed plumber or gas fitter when installed within the Commonwealth of Massachusetts. NOTE REGARDING VENTED PRODUCTS Flex line installation must not exceed 36 inches and must have a T shutoff valve. Any residence with a direct vent product must have a CO detector installed in the residence. - Page 20 Manufacturer Requirements GAS EQUIPMENT VENTING SYSTEM PROVIDED When the manufacturer of Product Approved side wall horizontally vented gas equipment provides a venting system design or venting system components with the equipment, the instructions provided by the manufacturer for installation of the equipment and the venting system shall include: •...
-
Page 21: Replacement Parts
Replacement Parts... - Page 22 Replacement Parts Ref. Part No. Description Qty. 40861 VF Grate 40860 VF Top 40857 Left Side 40856 Right Side 27225 Log Retainer, Side 27222 Log Support, Rear C42373 Rocker Switch 892537.13 Base Assembly 892537.7 Control Panel 892537.8 Control Cover 40854 610120 Front Screen Assy 40859...
- Page 23 Notes...
-
Page 24: How To Order Repair Parts
How To Order Repair Parts This manual will help you obtain efficient, dependable service from your Appliance dealer, and enable you to order repair parts correctly. Keep this manual in a safe place for future reference. When writing, always give the full model number which is on the nameplate attached to the heater.
Need help?
Do you have a question about the AGC500VF and is the answer not in the manual?
Questions and answers
I bought the hole system for the inside and after a part of this winter it will light but when i turn it to on it will light for a minute and turn off and the pilot goes out
The Ashley AGC500VF system lighting for a minute and then turning off with the pilot going out could be caused by:
1. The control knob not being pressed in long enough after lighting the pilot.
2. A loose thermocouple connection at the control valve.
3. The pilot flame not properly touching the thermocouple, which can be due to:
- Low gas pressure (contact gas supplier).
- A dirty or partially clogged pilot (clean with vacuum cleaner).
4. A damaged thermocouple (replace thermocouple).
5. A damaged control valve (replace control valve).
This answer is automatically generated