Advertisement
Table of Contents
- 1 Safety Warnings
- 2 Recommended Usage
- 3 Patents and Design Registration
- 4 Pack Contents
- 5 Specifications
- 6 Installation
- 7 Suitable Plumbing Systems
- 8 Operation
- 9 Adjusting the Temperature
- 10 Adjusting the Flow
- 11 User Maintenance
- 12 Fault Diagnosis
- 13 Spare Parts
- 14 Customer Service
- Download this manual
Advertisement
Table of Contents

Related Manuals for Mira Coda PRO ERD


Summary of Contents for Mira Coda PRO ERD
- Page 1 MIRA CODA PRO ERD THERMOSTATIC BAR VALVE INSTALLATION & USER GUIDE These instructions must be left with the user.
-
Page 2: Safety Warnings
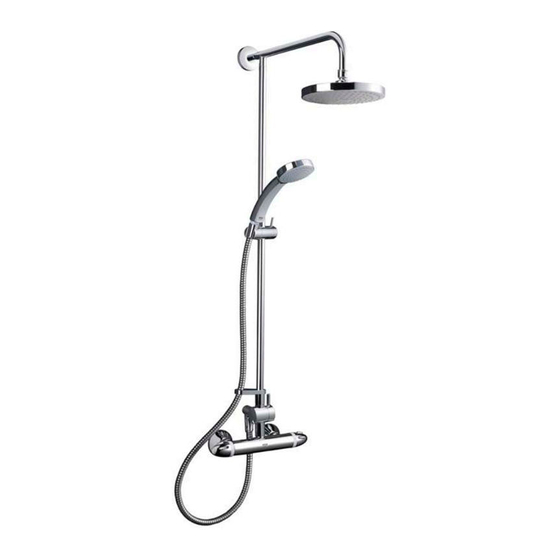
Mira thermostatic mixers are precision engineered The Mira Coda Pro ERD is supplied with a fixed and should give continued safe and controlled showerhead, rigid riser and diverter assembly, performance, provided: in addition to a single mode showerhead and 1. -
Page 3: Pack Contents
1 x Diverter Assembly (inc Nut, Olive & M4 x 5 mm Grubscrew) 1 x EV Fittings Kit 1 x 2 mm Hexagonal Wrench 1 x Flow Regulator (12 L/Min) 1 x Mira Coda Pro Documentation 1 x Guarantee Registration Document... -
Page 4: Specifications
Dimensions SPECIFICATIONS Pressures • Max Static Pressure: 10 Bar. • Max Maintained Pressure: 5 Bar. • Min Maintained Pressure: (Gas Water Heater): 1.0 Bar (for optimum performance supplies should be nominally equal). • Min Maintained Pressure (Gravity System): 0.1 Bar (0.1 bar = 1 Metre head from cold tank base to showerhead outlet). -
Page 5: Installation
5. Pipework dead-legs should be kept to a INSTALLATION minimum. 6. Decide on a suitable position for the mixer. Suitable Plumbing Systems The position of the mixer and the shower fittings must provide a minimum gap of 25 mm Gravity Fed: between the spill-over level of the shower tray/ The thermostatic mixer must be fed from a cold bath and the showerhead (refer to illustration). - Page 6 Important! 1.1 Pipes must be left a minimum of 50 mm long in front of the wall surface. 1.2 Connections are: Hot-Left, Cold-Right. This is very important as the Mira Coda Pro does not allow for reversed inlets. 1.3 Pipes must be straight and at 90° to the finished wall surface.
- Page 7 4. Place the wall bracket over the inlet pipes and mark the position of the 2 wall bracket fixing holes. Note! Consider the position of concealed pipework. 5. Mark the pipe distance 25 ± 5 mm from the finished wall. 25 mm 25 mm 6.
- Page 8 9. Caution! It is essential at this point that the supply pipework is thoroughly flushed through before connection to the bar valve. 10. Install the concealing plates,and tighten the concealing plates until they are flush with the finished wall. 11. Make sure that the sealing washer/filter is fitted, offer the bar valve up to the offset connectors and tighten the nuts.
- Page 9 Diverter and Rigid Riser Assembly Securing Bracket Installation Fixing Screws Rigid Riser 1. Fit the diverter onto the mixer outlet and Wall Plugs Overhead Arm tighten the M4 x 5 mm grubscrew with a 2 mm hexagonal key (supplied) Note! The diverter must be fitted as illustrated, Securing with the diverter knob at the right and the outlet Bracket Cover...
- Page 10 6. Slide the clamp bracket, hose retaining ring, Securing Bracket compression nut and olive onto the rigid riser rail and locate into the diverter outlet. 7. Make sure that the securing bracket cover is fitted onto the rigid riser arm, then fix the pipe to the securing bracket with the pin.
-
Page 11: Operation
COMMISSIONING OPERATION Maximum Temperature Setting Adjusting the Temperature Before using the shower the maximum temperature The temperature is controlled by rotating the must be checked to make sure that it is at a safe temperature knob. level. It has been preset to a safe showering For safety reasons, the temperature is limited by temperature under ideal conditions at the factory, an override stop. -
Page 12: User Maintenance
Lubricants USER MAINTENANCE Silicone based lubricants must only be used on If you require a Mira trained service engineer or the rubber seals. agent, refer to section: ‘Customer Services’. Caution! Oil based or other lubricant types may cause rapid deterioration of seals. -
Page 13: Spare Parts
SPARE PARTS Note! All spare parts are supplied individually unless stated otherwise. 1744.103 Non Return Valve and Filter 1744.104 Washers (x2) Filter Washer 1744.116 Concealing Plate (x2) 1744.115 1744.118 Fixing Kit Assembly Diverter Adaptor 1744.105 Non Return Valve Housing (x2) 1744.107 Flow Cartridge 1744.117... - Page 14 1663.289 Rigid Riser Arm 1660.162 Fixing Pack 1660.161 Fixed Showerhead 1660.163 Rigid Riser Rail (1 Piece) 1660.289 Rigid Riser Rail (2 Piece) 1663.190 Showerhead 1603.104 Flexible Hose 1660.172 Clamp Bracket 1660.178 Compression Nut & Olive 1660.165 1595.073 Diverter Assembly Hose Retaining Ring...
- Page 15 ACCESSORIES ACCESSORIES Genuine Mira accessories can be purchased direct from Customers Services (our contact details can be found on the back cover of this guide) or from approved stockists or merchants. Eco Showerhead Everclear Showerhead Logic Showerhead Holder White - 2.1668.001 White - 2.1616.030...
-
Page 16: Customer Service
If your product does not function correctly when you fi rst Fax: 01242 282595 use it, contact your installer to check that it is installed By Post: Mira Customer Services Dept, Cromwell Road, and commissioned in accordance with the instructions in Cheltenham, Gloucestershire, GL52 5EP this manual.
Need help?
Do you have a question about the Coda PRO ERD and is the answer not in the manual?
Questions and answers