
Related Manuals for Mira Coda Plus


Summary of Contents for Mira Coda Plus
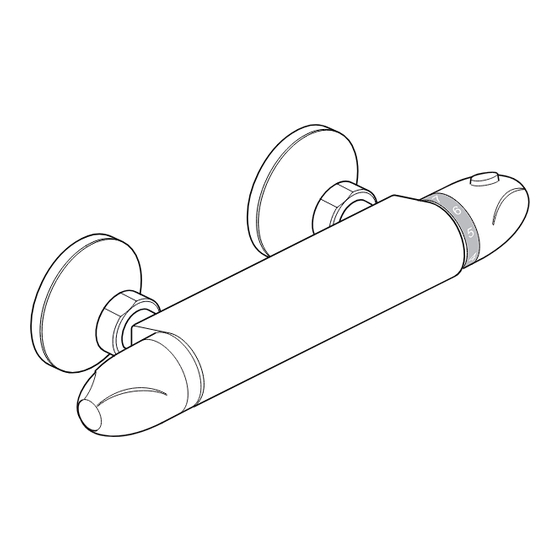
- Page 1 MIra Coda PlUs THErMosTaTIC Bar ValVE Installation & User Guide These instructions must be left with the user.
-
Page 2: Table Of Contents
ConTenTs Introduction ..................... 3 Guarantee .................... 4 recommended Usage ................4 Patent application:................4 safety : Warnings ..................5 Pack Contents ..................6 Specifications ..................7 Pressures ..................... 7 Temperatures ..................7 Thermostatic shut-down ..............7 Connections ..................7 dimensions ................... 7 Installation .................... -
Page 3: Introduction
Inlet filters are fitted to protect the thermostatic cartridge. The Mira Coda Plus is supplied complete with a patent applied for fixing kit which has been designed to make the installation of bar valves easier and more secure and has the following benefits over traditional ‘Z’... -
Page 4: Guarantee
Guarantee For domestic installations, Mira showers guarantee the Mira Coda Plus against any defect in materials or workmanship for a period of five years from the date of purchase (shower fittings for one year). For non-domestic installations, Mira showers guarantee the Mira Coda Plus against any defect in materials or workmanship for a period of one year from the date of purchase. -
Page 5: Safety : Warnings
Mira thermostatic mixers are precision engineered and should give continued safe and controlled performance, provided: They are installed, commissioned, operated and maintained in accordance with the manufacturer’s recommendations. -
Page 6: Pack Contents
(Ø6 mm) Bar Valve Fixing kit 2 x Wall Plugs 2 x Fixing screws 2 x Backplates 1 x Mira Coda Bar Valve 2 x olives 2 x Nuts 2 x offset Connectors 4 x screws 2 x Washers / Filters... -
Page 7: Specifications
sPeCIFICATIons Pressures • Max static Pressure: 10 Bar. • Max Maintained Pressure: 5 Bar. • Min Maintained Pressure: (Gas Water Heater): 1.0 Bar. (for optimum performance supplies should be nominally equal.) • Min Maintained Pressure (Gravity system): 0.1 Bar. (0.1 bar = 1 Metre head from cold tank base to shower handset outlet.) Temperatures 20°C and 50°C. -
Page 8: Dimensions
dimensions all dimensions in mm 100 Min to Wall 150 ± 5 115 Min to Wall Adjustment 5 mm 5 mm 5 mm 5 mm InsTALLATIon suitable Plumbing systems Gravity Fed: The thermostatic mixer must be fed from a cold water cistern (usually fitted in the loft space) and a hot water cylinder (usually fitted in the airing cupboard) providing nominally equal pressures. -
Page 9: General
General Installation must be carried out in accordance with these instructions, and must be conducted by designated, qualified and competent personnel. The installation must comply with the “Water supply regulations 1999 (Water Fittings)” or any particular regulations and practices, specified by the local water company or water undertakers. -
Page 10: Installation
Pipes must be left a minimum of 50 mm long. Connections are: Hot-Left, Cold-right. This is very important as the Mira Coda Plus does not allow for reversed inlets. If pipework is chased into a solid wall, in accordance with UK Water regulations, it must be accessible. - Page 11 Important! Make sure that there 5 mm is still horizontal movement on the 5 mm inlet pipes, if not, continue with the installation making sure that you complete section: ‘Installation with Fixed Pipework’ when instructed, this will avoid cracking tiles. Fit the installation template over the inlet pipes and mark the positions of the 4 wall bracket fixing holes.
- Page 12 Fit the wall brackets (with the arrow at the top) and olives onto the inlet pipes and loosely fit the nuts. Caution! Make sure that when fitting the nut and olive you do not push the pipe into the wall cavity. secure the wall brackets to the wall with the screws supplied.
- Page 13 13. Caution! It is essential at this point that the supply pipework is thoroughly flushed through before connection to the bar valve. 14. offer the bar valve up to the offset connectors, and if necessary using the finger grips, rotate the connectors anti-clockwise to adjust the centres. 15.
- Page 14 17. Using a spirit level make sure that the bar valve is level. If adjustment is required rotate the nut on the highest side anti-clockwise (up to ½ turn) until the valve is level. note! The nuts can be rotated anti-clockwise without disengaging from the offset connector until the stop point on the wall bracket is...
-
Page 15: Installation With Fixed Pipework
Installation with Fixed Pipework This section should be followed in installations where it has not been possible to achieve the 5 mm horizontal pipe movement required to allow automatic levelling of the bar valve. Fit the locking washers over the offset connectors. - Page 16 Tighten the concealing plates until they are flush with the finished wall. Make sure that the sealing washer/ filter is fitted in the correct orientation, offer the bar valve up to the offset connectors and tighten the nuts. Caution! do not overtighten. Caution! Take care not to damage the chrome plated surfaces.
-
Page 17: Commissioning
CoMMIssIonInG Maximum Temperature setting Before using the shower, the maximum temperature must be checked to make sure that it is at a safe level. It has been preset to a safe showering temperature under ideal conditions at the factory, appropriate for most systems. However, site conditions and personal preference may make it necessary to reset this temperature. -
Page 18: Operation
oPerATIon Adjusting the Temperature The temperature is controlled by rotating the temperature selector knob. For safety reasons, the temperature is limited by an override stop. To obtain a higher temperature, press the override button on the temperature selector knob and continue to rotate the knob. -
Page 19: Maintenance
MAInTenAnCe Fault diagnosis If you require a Mira trained service engineer or agent, refer to section: ‘Customer services’. symptom Cause / Rectification only hot or cold water Inlets reversed (hot supply to cold supply). rework inlet from the mixer outlet. pipework. outlet temperature too No hot or cold water reaching the mixer. -
Page 20: Lubricants
Lubricants silicone based lubricants must only be used on the rubber seals. Caution! oil based or other lubricant types may cause rapid deterioration of seals. Cleaning The chrome plated parts should be cleaned using a mild washing up detergent or soap solution, rinsed and then wiped dry with a soft cloth. -
Page 21: Maintaining The Non-Return Valves
Maintaining the non-return Valves The non-return valves are located in the thermostatic bar valve body, and are accessible through the inlet connectors. Caution! Make sure that the non-return valves are installed correctly to prevent crossflow or malfunction of the valve. With the water supplies turned off and the thermostatic bar valve removed, remove the sealing washer / filter. -
Page 22: Spare Parts
sPAre PArTs 1630.042 1712.038 Non-return Valve and Fixing Kit Filter Washer (x2) assembly 1712.045 1663.311 Filter Inlet Connector Washer (x2) 1712.039 1663.117 Concealing Flow Cartridge 1630.048 Plate outlet Connector 1630.047 Flow Knob assembly 1630.045 Temperature Knob assembly 1630.054 Temperature stop assembly 1663.114 Thermostatic Cartridge... -
Page 23: Accessories
ACCessorIes Genuine Mira accessories can be purchased direct from Customers services (our contact details can be found on the back cover of this guide) or from approved stockists or merchants. eco showerhead everclear showerhead Wall Mounted soap dish White - 2.1668.001 White - 2.1616.030... -
Page 24: Customer Service
You have the assurance of a the product. fully trained Mira Technician, genuine Mira spare parts and ● Water or electrical supply, waste and isolation issues. a 12 month guarantee on any chargeable work done.
Need help?
Do you have a question about the Coda Plus and is the answer not in the manual?
Questions and answers