Advertisement
Advertisement
Table of Contents

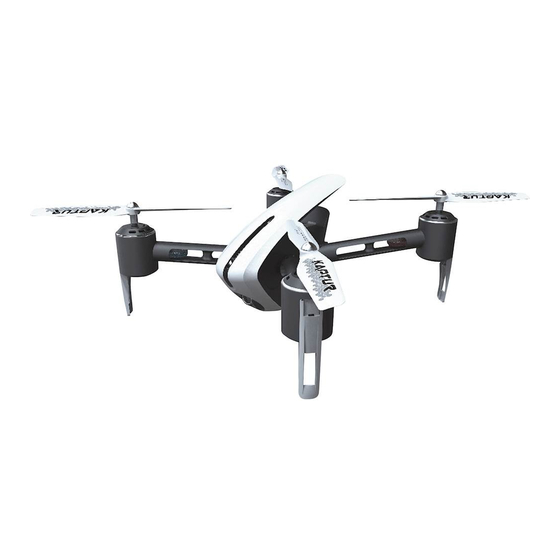
Summary of Contents for Protocol Kaptur
- Page 1 KAPTUR WI-FI DRONE WITH HD CAMERA...
- Page 3 THANK YOU. Thank you for your purchase of Protocol’s Kaptur Wi-Fi Drone with HD Camera. You are about to experience the best of what remote control flight has to offer. We strongly recommend that you take the time to read this manual thoroughly. It contains many tips and instructions on how to get the most out of this aircraft and maintain it for a long life.
-
Page 4: Table Of Contents
TABLE OF CONTENTS Safety & Precautions Parts Remote Battery, Blade Guard, & Phone Installation Charging the Drone Start-Up Procedure Operation Tips on 360° Flips Speed Modes Trim Adjustment Troubleshooting Flying Outdoors Shooting Photo/Video Replacement Parts & Limited Warranty... - Page 5 • Do not mix old and new batteries or mix different types of batteries. • Never attempt to modify function of vehicle or controller or attempt repairs using parts other than those supplied by Protocol. Spare parts are available at www.protocolny.com.
- Page 6 PARTS DRONE ON/OFF SWITCH 1. Canopy 2. Blade 3. Battery Compartment 4. Camera 5. ON/OFF Switch 6. Memory Card Slot BATTERY COMPARTMENT...
- Page 7 PARTS REMOTE SPARE PARTS INCLUDED 1. Power Switch Replacement Blades 2. Trim (press in) Screwdriver 3. Flip 360° 4. Forward/Backward 5. Bank Left/Right 6. Video 7. Photo 8. Throttle 9. Auto Take Off/Land 10. Phone Clamp (not installed) 11. Turn Left/Right 12.
-
Page 8: Remote Battery, Blade Guard & Phone Installation
REMOTE BATTERY, BLADE GUARD & PHONE INSTALLATION Unscrew and remove battery cover from controller. Insert 4 x ‘AA’ batteries according to indicated polarities. Replace and screw back in battery cover. 1. Install batteries carefully. 2. Do not mix old and new batteries. 3. -
Page 9: Charging The Drone
CHARGING THE DRONE BATTERY 1. Make sure the drone is turned off. 2. Press in on the two tabs and pull out the cartridge battery from the drone. 3. Connect the USB charging cable to the battery. 4. Plug the charger into a USB port. The USB light will flash green while charging and will turn steady once fully charged. -
Page 10: Start-Up Procedure
2. If after 30 seconds, it has not recognized the drone, turn off the controller and repeat Start-Up procedure. 3. If the Kaptur is unsteady in flight, it may not have been able to calibrate properly. Power down both drone and remote and restart pre-flight... - Page 11 OPERATION: FLYING THE DRONE *The lights on the drone may flash occasionally while the optical position sensor automatically locks into place. Once it is locked, the lights will remain steady while it has over 20% battery power. STARTING THE ENGINE: After synchronizing the drone, move the throttle up and release to go into Idle mode.
- Page 12 OPERATION: FLYING THE DRONE FIRST TIME FLYERS!!! TAKE YOUR TIME! GO SLOW! Practice hovering until you are comfortable with flight before attempting any other maneuvers. Make small movements letting the stick return to the center. If you start to lose control, don’t panic. Just press land. LEFT ROTATION RIGHT ROTATION Pull the throttle left or right,...
-
Page 13: Tips On 360° Flips
TIPS ON 360° FLIPS Once you have become skilled with the basics of drone flight, you can try some advanced maneuvers. At a height of at least 10 feet, press and hold the 360° Flip button and move the direction lever in any desired direction to execute the flip. *Make sure to execute the flip outdoors in a space that’s free of obstacles. - Page 14 TIPS ON 360° FLIPS FORWARD 360° FLIP Push the direction stick forward and the drone will perform a 360° flip in that direction. BACKWARD 360° FLIP Push the direction stick backward and the drone will perform a 360° flip in that direction.
-
Page 15: Speed Modes
At high speed the drone will pitch more than at low speed. Kaptur is quite fast at its high speed and requires more piloting skills to fly competently. For safety take time to develop advanced skills by practicing at low speed first. -
Page 16: Trim Adjustment
TRIM ADJUSTMENT LEFT MOVEMENT RIGHT MOVEMENT SIDEWAYS TRIM When the drone drifts to the left or right side unintentionally, you can correct it by pressing in the throttle and holding while moving the direction stick in the opposite direction until it evens out. BACKWARD FORWARD FORWARD/BACKWARD TRIM... -
Page 17: Troubleshooting
Response to 1. Controller battery power 1. Replace batteries in controller. control inputs nearly depleted. intermittent or erratic Kaptur will not 1. The aircraft was not 1. Re-synchronize aircraft hover or strafe on level ground during and controller. correctly synchronization. -
Page 18: Flying Outdoors
FLYING OUTDOORS HOW TO PREVENT FLY AWAYS To prevent “fly-away” situations (where drones seem to fly away out of control) it is important to first test and practice within close range before letting the drone fly too far away. Each drone is designed to turn off the engines if the radio signal is lost. It is important to know and test the range of your drone before flying. -
Page 19: Shooting Photo/Video
SHOOTING PHOTO/VIDEO 1. The memory card comes pre-inserted into the camera. 2. Set the camera in a desired position by pushing it up or down. Touch only the outer rim of the camera. Do not touch the lens. SHOOTING PHOTOS AND VIDEO 1. - Page 20 REPLACEMENT PARTS Thank you for your purchase of Protocol’s Kaptur Wi-Fi Drone with HD Camera. We know that accidents can sometimes happen and that is why we offer spare parts kits on our website: www.ProtocolNY.com. LIMITED WARRANTY At Protocol, we’re dedicated to bringing you innovative and well-designed products that make living fun and easy.


Need help?
Do you have a question about the Kaptur and is the answer not in the manual?
Questions and answers