Table of Contents
Advertisement
Advertisement
Table of Contents

Subscribe to Our Youtube Channel
Related Manuals for Protocol Dronium One AP


Summary of Contents for Protocol Dronium One AP
- Page 1 WWW. PROTOCOLNY.COM...
- Page 3 THANK YOU. Thank you for your purchase of Protocol’s Dronium One AP With Camera. You are about to experience the best of what remote control flight has to offer. We strongly recommend that you take the time to read this manual thoroughly.
- Page 4 Safety and Precautions Parts Remote Battery Installation Installing the Blade Guard Charging the Drone Power-On Procedure Altitude Sensor Calibration Operation Tips on 360° Flips Speed Modes Trim Adjustment Troubleshooting Flying Outdoors Shooting Photo/Video Replacement Parts & Limited Warranty...
- Page 5 Read and follow instructions on how to synchronize � electronics before each flight. To prolong engine life, allow a cool-down period between flights. � CAUTION:...
- Page 7 REMOTE 15. Take Off/Landing 1. 2.4G Antenna 16. Calibration 2. Power Switch 3. Trim Forward/Backward 4. Flip 360° 5. Forward/Backward 6. Bank Left/Right 7. Video 8. Photo 9. Trim Bank Left/Right 10. Indicator Light 11. Trim Turn Left/Right. The button on this unit is disabled as it was upgraded to auto trim for left/right turns.
- Page 8 Battery cover...
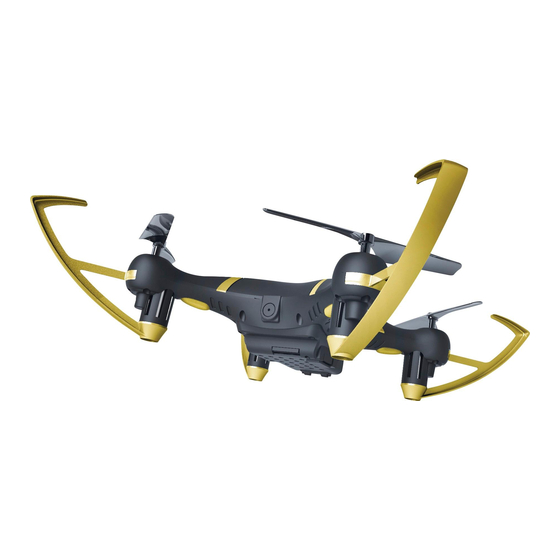
- Page 9 If not already installed, install the included blade guards to every corner and tighten the screws. Make sure the blade guards are secure and snug. NOTE: Loose blade guards may interfere with propeller movement and cause a crash. If the drone crashes, double check to make sure the blade guard is not loose.
- Page 10 If you purchased extra batteries, allow the engines to cool between flights in order to prolong engine life.
- Page 11 2. If after 30 seconds, it has not recognized the drone, turn off the controller and repeat Power-On procedure. 3. If the Dronium One AP is unsteady in flight, it may not have been able to calibrate properly. Power down both drone and remote and restart pre-flight procedure, including re-calibration of the altitude sensor.
- Page 12 ALTITUDE SENSOR CALIBRATION BEFORE STARTING THE ENGINES, CALIBRATE THE ALTITUDE SENSOR. DO THIS BEFORE EACH FLIGHT EVERY TIME! TO CALIBRATE ALTITUDE SENSOR Calibration Button* Fig. 1 * Press down once to calibrate. Lights will flash quickly during calibration and then go steady when completed. Don’t worry if you press it again as it will simply recalibrate again.
- Page 13 Starting the Engine; Engine Idle 1. After synchronizing and calibrating the drone, move the throttle and direction sticks to the lower left and lower right corners (blue lines) and release to go into Idle mode. The blades will rotate but the drone will not lift.
- Page 14 FIRST TIME FLYERS!!! TAKE YOUR TIME! GO SLOW! Practice hovering until you are comfortable with flight before attempting any other maneuvers. Make small movements letting the stick return to the center. If you start to lose control, don’t panic. Just press land. Pull the throttle left or right, the drone turns to the left or right.
- Page 15 TIPS ON 3D FLIPS Once you are familiar with the basics of drone flight, you can try some ad- vanced maneuvers! At a height of at least 10 feet, press the Flip mode button and move the direction lever in any desired direction to execute the flip. The remote will beep quickly when you are in stunt mode and will stop beeping once you have executed the flip.
- Page 16 TIPS ON 3D FLIPS...
- Page 17 The Dronium One AP features multiple speed modes. Choose the speed based on flight experience and level of comfort. At higher speeds, the drone will pitch more than at lower speeds. Dronium One AP is quite fast at its highest speed and requires more piloting skills to fly competently.
- Page 18 SIDEWAYS TRIM When the drone drifts to the left or right side unintentionally, you can correct it by pressing the trim button in the opposite direction until it evens out. FORWARD/BACKWARD TRIM When the drone drifts forward/backward unintentionally, you can correct it by pressing the trim button in the opposite direction until it evens out.
- Page 19 1. To synchornize, turn on aircraft first, place it on level ground, and then turn on controller. 2. Charge aircraft and/or replace batteries in controller 1. Re-synchronize aircraft and controller. 2. Recalibrate the Altitude Sensor. 3. Reset the trim buttons on the controller and re-trim flight controls.
- Page 20 HOW TO PREVENT FLY AWAYS To prevent “fly-away” situations (where drones seem to fly away out of con- trol) it is important to first test and practice within close range before letting the drone fly too far away. Each drone is designed land if the radio signal is lost. (But, this should not be considered a landing procedure or normal flight practice.) It is important to know and test the range of your drone before flying.
- Page 21 SHOOTING PHOTOS AND VIDEO 1. Turn on the drone, synchronize, and calibrate. 2. Photo: Push the Photo button and the camera will take a photo. The red indicator on the back of the drone will flash once as it’s taking the picture. 3.
Need help?
Do you have a question about the Dronium One AP and is the answer not in the manual?
Questions and answers