Table of Contents
Advertisement
Quick Links
SPECIFICATION
CONTROL DRAWING
NOTES:
1. DESCRIPTION: Installation Documentation - GRA 5500 Installation Manual
2. PAGE SIZE: Letter: Width = 8.5 inches, Height = 11 inches, Double-sided Tabloid: Height = 17.0 inches,
3. PAGINATION: 26 double-sided letter sheets, 4 double-sided tabloid sheets, 7 single-sided tabloid sheets.
4. MATERIAL: 24 pound bond. Approved equivalents allowed.
5. COLOR: Black ink on white paper stock.
6. BINDERY: Three-hole punch, shrink-wrap. Digital output preferred.
7. FOLDS: Z-Fold tabloid sheets at end of document.
8. ELECTRONIC ARTWORK: Shall conform to Garmin Archive, Filename: 190-01277-00.pdf
9. This part shall comply with Garmin Banned/Restrictive Substance List, GPN 001-00211-00
The following files have been archived under the above ARCHIVE FILENAME.
Filename
190-01277-00.pdf
release.fm
Manual Elements
*.*
CONFIDENTIAL
This drawing and the specifications contained herein are the property of Garmin Ltd. or its
subsidiaries and may not be reproduced or used in whole or in part as the basis for
manufacture or sale of products without written permission.
Drafter:
Checker:
Project Engineer:
Released By:
REV.
DATE
A
12/20/12
Initial release
AVIATION REVIEW REQUIRED
Width = 11 inches, Single-sided Tabloid: Width = 17.0 inches, Height = 11 inches,
File Contents
Portable Document Format, contains Installation Manual and Release
Specification
FrameMaker Format, Release Specification
FrameMaker, Formatted Files and Figures
Various supporting illustrations, drawings, and artwork
Date:
MJM
12/20/12
REVISIONS
DESCRIPTION
GRA 5500 Installation Manual
SIZE A
Part Number: 190-01277-00
Scale: N/A
AVIATION REVIEW REQUIRED
ECO NO.
- - -
Rev A
Sheet 1 of 1
Advertisement
Table of Contents

Subscribe to Our Youtube Channel
Related Manuals for Garmin GRA 5500


Summary of Contents for Garmin GRA 5500
- Page 1 Various supporting illustrations, drawings, and artwork CONFIDENTIAL This drawing and the specifications contained herein are the property of Garmin Ltd. or its subsidiaries and may not be reproduced or used in whole or in part as the basis for manufacture or sale of products without written permission.
- Page 2 GRA 5500 Radar Altimeter Installation Manual 190-01277-00 December, 2012 Revision A...
- Page 3 Garmin. Garmin hereby grants permission to download a single copy of this manual and of any revision to this manual onto a hard drive or other electronic...
- Page 4 California to cause cancer, birth defects, or reproductive harm. This Notice is being provided in accordance with California's Proposition 65. If you have any questions or would like additional information, please refer to our web site at www.garmin.com/prop65. 190-01277-00 GRA 5500 Installation Manual Rev.
- Page 5 1-1 – 1-4 Section 2 2-1 – 2-14 Section 3 3-1 – 3-18 Section 4 4-1 – 4-6 Appendix A A-1 – A-8 Appendix B B-1 – B-2 Appendix C C-1 – C-5 GRA 5500 Installation Manual 190-01277-00 Page ii Rev. A...
- Page 6 (iv) damage caused by service performed by anyone who is not an authorized service provider of Garmin; or (v) damage to a product that has been modified or altered without the written permission of Garmin. In addition, Garmin reserves the right to refuse warranty claims against products or services that are obtained and/or used in contravention of the laws of any country.
- Page 7 This page intentionally left blank GRA 5500 Installation Manual 190-01277-00 Page iv Rev. A...
-
Page 8: Table Of Contents
3.5 Unit Installation ....................... 3-2 3.5.1 Installation Procedure (see Figure 3-1) ................3-2 3.5.2 Removal Procedure (see Figure 3-1) ..................3-2 3.6 Downloading and Installing the GRA 5500 Retrofit Installation Tool ......3-4 3.7 Post Installation Configuration and Checkout Procedures ..........3-5 190-01277-00 GRA 5500 Installation Manual Rev. -
Page 9: Paragraph Page
PARAGRAPH PAGE 3.7.1 GRA 5500 Configuration/Checkout for Varying Installation Types ........3-5 3.7.2 Using the GRA 5500 Retrofit Installation Tool..............3-6 3.7.3 Zero-Foot Calibration......................3-16 3.7.4 Built-In Self-Test Functionality ..................3-16 3.8 Continued Airworthiness....................3-18 Section 4 SYSTEM INTERCONNECTS ............4-1 4.1 Pin Function List ......................4-1 4.1.1 P55001.......................... - Page 10 Figure 3-1 GRA 5500 Installation ..................3-3 Figure 3-2 GRA 5500 Retrofit Installation Tool (New Installation) ........3-7 Figure 3-3 GRA 5500 Retrofit Installation Tool Status Tab (Normal Operation) ....3-9 Figure 3-4 GRA 5500 Retrofit Installation Tool Configuration Tab........3-10 Figure 3-5 GRA 5500 Retrofit Installation Tool Software Tab...........
- Page 11 Appendix A Referenced Tables................A-1 Table A-1 Recommended Coaxial Length ................A-1 Table A-2 TNC Connectors ....................A-2 Table A-3 GRA 5500 Fault Descriptions ................A-3 Table A-4 “Various” POST (Power On Self-Test) Faults ............ A-7 GRA 5500 Installation Manual 190-01277-00 Page viii Rev.
-
Page 12: Section 1 General Description
Radar Altimeter as part of a Garmin Integrated Flight Deck and in retrofit/stand-alone applications. The GRA 5500 can be integrated into a variety of airframes under an appropriate TC or STC. Each airframe installation may vary. Use only approved (type or supplemental type) data for specific installation instructions in a particular aircraft. -
Page 13: Technical Specifications
1.4 Technical Specifications 1.4.1 Environmental Qualification Form It is the responsibility of the installing agency to obtain the latest revision of the GRA 5500 Environmental Qualification Form. This form is available directly from Garmin under the following part number: GRA 5500 Environmental Qualification Form, Garmin part number 005-00616-01 To obtain a copy of this form, see the dealer/OEM portion of the Garmin web site (www.garmin.com). -
Page 14: Performance Specifications
CFR part 43 or the applicable airworthiness requirements. The Appliance Project Identifier (API) for the GRA 5500 is GMN-00946. Documents submitted to the FAA and other regulatory agencies on behalf of this project will be filed under and referred to by this number. -
Page 15: Tso Compliance And Limitations
Installation Manual and a cockpit display of altitude information, comprise what Garmin considers to be a minimum generic GRA 5500 system installation. The GRA 5500 lacks a display and by itself is an incomplete system and cannot completely meet the requirements of TSO-C87a. -
Page 16: Section 2 Installation Overview
This section provides hardware equipment information for installing the GRA 5500, related hardware, and antennas. Installation of the GRA 5500 must follow the aircraft TC or STC requirements. Cabling is fabricated by the installing agency to fit each particular aircraft. The guidance of FAA advisory circulars AC 43.13-1B and AC 43.13-2B, where applicable, may be found useful for making retrofit installations... -
Page 17: Additional Equipment Required
28 VDC operation. Larger circuit breakers may be required for 14 VDC operation. 2.2.3 Approved Radar Altimeter Antennas The antennas listed in Table 2-4 are the only approved antennas for use with the GRA 5500 radar altimeter: Table 2-4 Approved Radar Altimeter Antennas Antenna Manufacturer... -
Page 18: Installation Considerations
GRA 5500. The GRA 5500 requires two antennas to be installed for each system installation. One antenna is used to transmit the radar signal, and the other is used to simultaneously receive the reflected signal. -
Page 19: Antenna Location Planning Guidance
(RX) antenna placement on the airframe. Stated performance specifications for the GRA 5500 can only be achieved when the system is installed in accordance with all the guidelines stipulated in this section and with all other instructions given in this Installation Manual. - Page 20 35° angle as shown. The hybrid configuration requires the minimum distances and maximum angles shown. It is essential that functional antenna numbering assignments (e.g. – TX1, RX2, etc.) are used during planning and installation in order to avoid confusion. 190-01277-00 GRA 5500 Installation Manual Rev. A Page 2-5...
-
Page 21: Figure 2-1 Standard Dual And Triple End-To-End System Layouts
Forward Forward 5” min. 5” min. 5” min. Dual End-to-End System Triple End-to-End System Figure 2-1 Standard Dual and Triple End-to-End System Layouts GRA 5500 Installation Manual 190-01277-00 Page 2-6 Rev. A... -
Page 22: Figure 2-2 Compact Dual And Triple End-To-End System Layouts
Forward Forward 10” 10” 5” 5” 10” 10” 10” 5” Dual End-to-End System Triple End-to-End System Figure 2-2 Compact Dual and Triple End-to-End System Layouts 190-01277-00 GRA 5500 Installation Manual Rev. A Page 2-7... -
Page 23: Figure 2-3 Dual And Triple Side-By-Side System Layouts
Forward 5” min. 5” min. Forward 5” min. 35° max. 35° max. Dual Side-by-Side System Triple Side-by-Side System Figure 2-3 Dual and Triple Side-by-Side System Layouts GRA 5500 Installation Manual 190-01277-00 Page 2-8 Rev. A... -
Page 24: Figure 2-4 Hybrid Triple System Layout
Forward 5” min. 35° max. 5” min. 35° max. Figure 2-4 Hybrid Triple System Layout 190-01277-00 GRA 5500 Installation Manual Rev. A Page 2-9... -
Page 25: Antenna Installation Considerations
• Prior to connecting the fabricated wiring harness to the GRA 5500, verify correct routing of aircraft power and aircraft power ground to the assigned pins and verify that aircraft power is available at the assigned pins after routing verification. -
Page 26: Antenna Coaxial Cables (Requirements And Fabrication Guidance)
Antenna Coaxial Cables (Requirements and Fabrication Guidance) The GRA 5500 requires a minimum of two coaxial cable assemblies (each coaxial cable assembly consists of a coaxial cable and a connector properly terminating each end of the coaxial cable) assembled with the same type of coaxial cable for connection from the radar altimeter antennas to the LRU transmitter (TX) and receiver (RX) ports. -
Page 27: Figure 2-5 Coaxial Cable Requirements
(Table A-2) used. Table A-2 references common sources for cable and connector part numbers. Figure 2-6 shows suggested installation instructions for typical TNC connectors. GRA 5500 Installation Manual 190-01277-00 Page 2-12 Rev. A... -
Page 28: Figure 2-6 Tnc Connector Installation
It is recommended that the nominal end-to-end coaxial cable (non-terminated) length for each assembly be recorded for the specific installation in the event that a particular coaxial cable assembly associated with an installed set should require replacement. 190-01277-00 GRA 5500 Installation Manual Rev. A Page 2-13... -
Page 29: Cooling Requirements
EQF categories for the GRA 5500 are not exceeded during normal operation of the aircraft. Guidance can be found in the Garmin Integrated Avionics System Thermal Management Plan document (GPN 190-00313-50) and the Garmin Integrated Avionics System Thermal Validation Procedure (GPN 190-00313-51). -
Page 30: Section 3 Installation Procedure
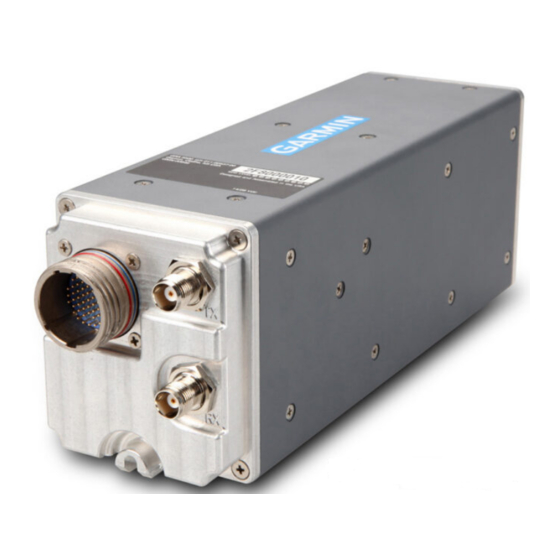
3.2 Wiring Harness Installation Allow adequate space for installation of cables and connectors. The installer shall supply and fabricate all of the cables. All electrical connections to the GRA 5500 are made through one 55 pin circular connector (Figure 4-1). -
Page 31: Backshell Assembly
3.5.1 Installation Procedure (see Figure 3-1) 1. Place the unit on the mounting rack, ensuring the GRA 5500 rear feet are aligned in the mounting rack slots. 2. Slide the GRA 5500 back until the feet are fully engaged with the mounting rack. -
Page 32: Figure 3-1 Gra 5500 Installation
2. Disengage the lockdown mechanism collar from the GRA 5500 hook and slide the GRA 5500 forward to remove from the mounting rack. UNIT HOOK ENGAGEMENT FEET 2 PLACES FEET ENGAGEMENT LOCATION 2 PLACES LOCKDOWN MECHANISM COLLAR LOCKDOWN MECHANISM KNOB... -
Page 33: Downloading And Installing The Gra 5500 Retrofit Installation Tool
GRA 5500 Retrofit Installation Tool, Garmin part number 006-A0451-00. This tool is also used to assist in the diagnosis and resolution of asserts found in the GRA 5500 assert log during the installation process and during post-installation flight operation. The tool is available for download from the Dealer Resource Center portion of the Garmin website (www.garmin.com). -
Page 34: Post Installation Configuration And Checkout Procedures
3.7 Post Installation Configuration and Checkout Procedures The following actions must be performed after initial installation of the GRA 5500 and any time after the equipment has been removed/disconnected and then reinstalled/reconnected: 1. GRA 5500 Configuration/Checkout for Varying Installation Types (Section 3.7.1) -
Page 35: Using The Gra 5500 Retrofit Installation Tool
5500 should affix a label on the GRA 5500 LRU marked with the software part number to meet TSO marking requirements. 3.7.2 Using the GRA 5500 Retrofit Installation Tool After the GRA 5500 Retrofit Installation Tool has been installed and the PC has been connected to the GRA 5500 (as described in Section 3.6), start the GRA 5500 Retrofit Installation Tool from the provided... -
Page 36: Figure 3-2 Gra 5500 Retrofit Installation Tool (New Installation)
When configuring a new GRA 5500 installation, the GRA 5500 Retrofit Installation Tool should look similar to Figure 3-2 (note the annunciated Calibration fault). NOTE If any other faults besides a Calibration fault are indicated, it will not be possible to perform the zero-foot calibration procedure. - Page 37 3.7.2.1 Zero-Foot Calibration Procedure Before the GRA 5500 is ready for normal operation, it is necessary to perform the following zero-foot calibration procedure. NOTE Before initiating the zero-foot calibration procedure, see Section 3.7.3 to ensure the GRA 5500 is physically ready to be calibrated.
-
Page 38: Figure 3-3 Gra 5500 Retrofit Installation Tool Status Tab (Normal Operation)
The status will also update to show the specific failure under that fault. Table A-3 for a comprehensive list of possible failures. Figure 3-3 GRA 5500 Retrofit Installation Tool Status Tab (Normal Operation) 190-01277-00 GRA 5500 Installation Manual Rev. -
Page 39: Figure 3-4 Gra 5500 Retrofit Installation Tool Configuration Tab
The configuration tab displays the unit’s current settings. After adjusting any settings, the “Save Configuration to Unit” button must be clicked to send the configuration values to the GRA 5500. Clicking the button labeled “Restore Defaults to Unit” restores all settings to their default, factory state. -
Page 40: Table 3-5 Arinc 429 Channel 1 Settings
Check to enable sending label 165 (Radio Altitude, BCD format) Enable Label 165 Uncheck to disable sending label 165 Check to enable sending label 377 (Equipment Identification) Enable Label 377 Uncheck to disable sending label 377 190-01277-00 GRA 5500 Installation Manual Rev. A Page 3-11... - Page 41 GRA 5500 Retrofit Installation Tool. Configuring a manual height offset for the GRA 5500 may be useful for installations when a “0 ft” reading is desired immediately at aircraft touchdown, instead of when the aircraft is completely at rest on the ground (such as after the landing gear is compressed or in installations where the radar altimeter antennas are mounted substantially forward of the main landing gear).
-
Page 42: Figure 3-5 Gra 5500 Retrofit Installation Tool Software Tab
Software Tab The software tab (see Figure 3-5) provides a list of currently installed software regions on the GRA 5500 as well as an interface to load new software regions to the GRA 5500. Figure 3-5 GRA 5500 Retrofit Installation Tool Software Tab... - Page 43 1. Depending on the method of receiving updated software region files, it may be required to extract the files to a directory on the PC that is/will be connected to the GRA 5500. The GRA 5500 Retrofit Installation Tool will only recognize Garmin Aviation binary region files (.bin).
- Page 44 Each region is shown with its corresponding Garmin part number and software release version. NOTE If the reported versions are not updated, restart the GRA 5500 by cycling aircraft power. If the reported versions are still not updated, the software update has failed. It may be necessary to repeat the software update procedure or return the unit to Garmin for service.
-
Page 45: Zero-Foot Calibration
3.7.3 Zero-Foot Calibration After the GRA 5500 is configured, but before it may be put into normal flight operation, a one-time zero- foot calibration procedure must be performed on the unit in order to “zero” the altitude outputs from the unit for the individual aircraft installation. - Page 46 “Test” and an altitude of 40 ft is output. Unlike the automated altitude self-test, this functionality is intentionally not transparent to the pilot or any user of radar altitude data from the GRA 5500 in order to be useful to the pilot or crew and not provide misleading data. •...
-
Page 47: Continued Airworthiness
250 ft AGL. 3.8 Continued Airworthiness Maintenance of the GRA 5500 is “on condition” only. NOTE It is the installer’s responsibility to properly document any Instructions for Continued Airworthiness as may be required by the local aircraft certification authorities. -
Page 48: Section 4 System Interconnects
RADAR ALT SYSTEM ID PROGRAM* 2 RESERVED (DO NOT CONNECT) SPARE RADAR ALTITUDE ALERT OUT* 2 RS422 IN 2 B SELF TEST INHIBIT* SIGNAL GROUND SIGNAL GROUND SIGNAL GROUND *Denotes Active Low (Ground to activate) 190-01277-00 GRA 5500 Installation Manual Rev. A Page 4-1... - Page 49 USB DATA HI RESERVED (DO NOT CONNECT) SIGNAL GROUND ARINC 429 OUT 1 A CONFIG MODULE POWER USB DATA LO ARINC 429 OUT 1 B *Denotes active low (ground to activate) GRA 5500 Installation Manual 190-01277-00 Page 4-2 Rev. A...
-
Page 50: Power Functions
4.2.1 Aircraft Power The GRA 5500 provides two aircraft power inputs which accept 14/28 VDC. AIRCRAFT POWER 1 and AIRCRAFT POWER 2 are “diode ORed” to provide redundant aircraft power connections, such as on aircraft with two electrical busses. For non-redundant operation, only one input need be connected. -
Page 51: Arinc 429
ARINC 429 OUT 1 B ARINC 429 OUT 2 A ARINC 429 OUT 2 B The ARINC 429 labels in Table 4-5 can be output from the unit and are configurable via the GRA 5500 Retrofit Installation Tool (see Section 3.7.2):... -
Page 52: Usb
4.4.1 Active Low Discrete Inputs The GRA 5500 provides four active-low discrete inputs. Two are used as configuration straps in dual and triple installations (in both GIFD and non-GIFD/retrofit installations). Two additional inputs are provided for optional manually-initiated self-test and self-test inhibit operation (discrete inputs used in non-GIFD/ retrofit installations only –... -
Page 53: Altitude Alert (Annunciator) Outputs
Each altitude alert pin will annunciate the active state if the altitude value output from the GRA 5500 is less than the configured value for the respective altitude alert pin and the status of the altitude is “Normal”. -
Page 54: Appendix A Referenced Tables
RG types are obsolete and are shown for reference only; replaced by M17 type numbers. RG393 is listed only for the purpose of re-using existing RG393 cable for retrofits. Antenna cable length shall not exceed 30 feet per cable. Calculation provided by cable manufacturer 190-01277-00 GRA 5500 Installation Manual Revision A Page A-1... -
Page 55: Table A-2 Tnc Connectors
Helicopter/Fixed Wing 190409 TNC Straight Helicopter/Fixed Wing 5225555-6 Tyco Electronics M17/128-RG400, M17/60-RG142 TNC Right Angle Helicopter/Fixed Wing 5225554-6 TNC Straight Helicopter/Fixed Wing 1-522550-3 Tyco Electronics M17/127-RG393 TNC Right Angle Helicopter/Fixed Wing 1-5225554-1 GRA 5500 Installation Manual 190-01277-00 Page A-2 Revision A... -
Page 56: Table A-3 Gra 5500 Fault Descriptions
Table A-3 identifies the various unit faults that can be encountered during normal operation of the GRA 5500. Use Table A-3 as a reference to determine the proper actions to take after a fault has been identified. Table A-3 GRA 5500 Fault Descriptions... - Page 57 Table A-3 GRA 5500 Fault Descriptions Fault Type Fault Name Description Cause Resolution Clock Generator is read to determine Clock Generator I2C correct frequency output. Internal Cycle power to unit. If fault persists, return unit to communication error Garmin for service.
- Page 58 Check antenna installation and all cable The self-test signal is connections connections. not within the Main RF Self-Test Download the assert log and send to Garmin for acceptable frequency Internal failure diagnosis. If fault persists, return unit to Garmin for range service.
- Page 59 Return unit to qualified temperature range as is too hot/cold temperature greater specified in Environmental Qualification Form Main Temp than 100° C or less (EQF). If fault persists, return unit to Garmin for Internal failure than -60° C service. Temperature Installed unit location...
-
Page 60: Table A-4 "Various" Post (Power On Self-Test) Faults
Table A-4 identifies the various unit faults that can be encountered during the initial Power On Self-Test (POST) of the GRA 5500. Use Table A-4 as a reference to determine the proper actions after a fault has been identified. Table A-4 “Various” POST (Power On Self-Test) Faults... - Page 61 This page intentionally left blank GRA 5500 Installation Manual 190-01277-00 Page A-8 Revision A...
-
Page 62: Figure B-1 Gra 5500 Outline Drawing
NOTES: DIMENSIONS: INCHES[mm]. DIMENSIONS ARE SHOWN FOR REFERENCE ONLY. 2X .630 16.00 2X 7.000±.005 177.80±0.13 MOUNTING HOLES FOR #10 PAN HEAD OR HEX HEAD FASTENERS. Figure B-1 GRA 5500 Outline Drawing 190-01277-00 GRA 5500 Installation Manual Revision A Page B-1... -
Page 63: Appendix B Outline And Installation Drawings
CIRCULAR CONN SHELL SIZE 17 4.76 120.8 SOME PARTS NOT SHOWN; REFER TO 190-00313-12 FOR ADDITIONAL PARTS LISTS GRA 5500 MOUNTING RACK 011-02567-00 MOUNTING SHELF Figure B-2 GRA 5500 Connector/Rack Assembly Drawing 190-01277-00 GRA 5500 Installation Manual Revision A Page B-2... -
Page 64: Appendix C Interconnect Examples
TX ANTENNA RX ANTENNA NOTES: 1. THIS INTERCONNECT EXAMPLE DRAWING APPLIES TO BOTH GIFD (GARMIN INTEGRATED FLIGHT DECK) AND NON-GIFD (RETROFIT) INSTALLATIONS. 2. UNLESS OTHERWISE NOTED, ALL STRANDED WIRE MUST CONFORM TO MIL-W-22759/16 OR EQUIVALENT. 3. UNLESS OTHERWISE NOTED, ALL SHIELDED WIRE MUST CONFORM TO MIL-C-27500 OR EQUIVALENT. -
Page 65: Figure C-2 Garmin Integrated Flight Deck Interconnect Example
APPENDIX C Interconnect Examples THIS INTERCONNECT EXAMPLE DRAWING APPLIES ONLY TO GARMIN INTEGRATED FLIGHT DECK (GIFD) INSTALLATIONS. GRA 5500 RADAR ALTIMETER P55001 P412 GSD 41 DATA CONCENTRATOR MAIN2 RS-485/RS-422 4 A RS422 IN 1 A MAIN2 RS-485/RS-422 4 B RS422 IN 1 B... -
Page 66: Figure C-3 Non-Garmin Integrated Flight Deck (Retrofit) Interconnect Example
APPENDIX C Interconnect Examples THIS INTERCONNECT EXAMPLE DRAWING APPLIES ONLY TO NON-GARMIN INTEGRATED FLIGHT DECK (RETROFIT) INSTALLATIONS. P55001 GRA 5500 DISPLAY UNIT AND/OR RADAR ALTIMETER OTHER ARINC 429 RECEIVERS ARINC 429 IN A ARINC 429 OUT 1 A ARINC 429 IN B... -
Page 67: Figure C-4 Gra 5500 Usb Dongle Cable
3. TRIM ALL EXPOSED INDIVIDUAL 24 AWG AND 28 AWG WIRES AND THE TINNED 28 AWG DRAIN WIRE BACK TO THE OUTER BLACK INSULATION. 6. CRIMP PINS ON TO THE INDIVIDUAL WIRES AND THE DRAIN WIRE USING BEST SHOP PRACTICES. Figure C-4 GRA 5500 USB Dongle Cable 190-01277-00 GRA 5500 Installation Manual... -
Page 68: Figure C-5 Gra 5500 Configuration Module Interconnect Example
CLOCK NOTE: USE OF A CONFIGURATION MODULE IN GARMIN INTEGRATED FLIGHT DECK (GIFD) INSTALLATIONS IS NOT REQUIRED. USE OF A CONFIGURATION MODULE IN GARMIN INTEGRATED FLIGHT DECK (GIFD) INSTALLATIONS IS NOT REQUIRED. FOR NON-GIFD (RETROFIT) INSTALLATIONS, USE OF A CONFIGURATION MODULE IS OPTIONAL TO RETAIN CONFIGURATION FOR NON-GIFD (RETROFIT) INSTALLATIONS, USE OF A CONFIGURATION MODULE IS OPTIONAL TO RETAIN CONFIGURATION SETTINGS OUTSIDE OF THE INDIVIDUAL LRU.
Need help?
Do you have a question about the GRA 5500 and is the answer not in the manual?
Questions and answers