Table of Contents
Advertisement
Advertisement
Table of Contents
Troubleshooting

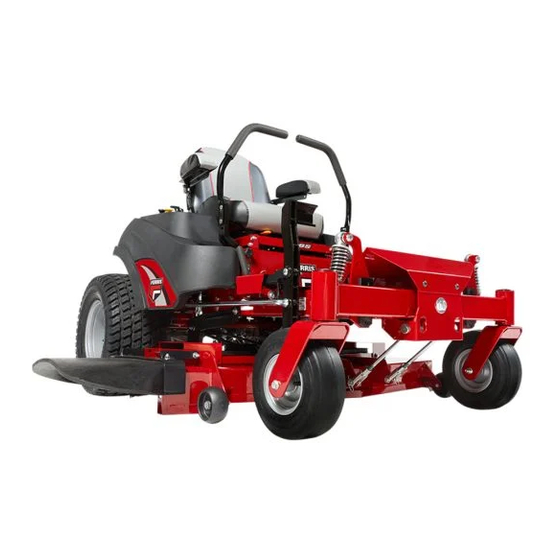
Related Manuals for Ferris 400 Series


Summary of Contents for Ferris 400 Series
-
Page 2: Table Of Contents
Table of Contents: Suspension Adjustment..........30 Parking Brake Adjustment..........30 General Information.............. 3 Deck Leveling Adjustment..........30 Identifying Your Unit............3 Mower Deck Drive Belt Replacement......31 Operator Safety..............4 Transmission Drive Belt Replacement......32 California Proposition 65..........4 Cleaning the Battery and Cables........32 Operating Safely...............4 Battery Service............... -
Page 3: General Information
Your unit may vary from the images displayed. LEFT and RIGHT are as seen from the operator's position. Ferris is a registered trademark of Briggs & Stratton Corporation. Ferris 5375 North Main Street Munnsville, NY 13409-4003 ... -
Page 4: Operator Safety
Read the Manual The Illustrated Parts Lists for this machine can be downloaded from ferrismowers.com. Please provide model and serial number when ordering replacement parts. Operator Safety California Proposition 65 WARNING This product can expose you to chemicals including gasoline, engine exhaust, which is known to the State of California to cause cancer and carbon monoxide, which The operator’s manual contains important safety information is known to the State of California to cause birth defects... - Page 5 Thrown Objects Do not mow in reverse unless absolutely necessary. Always look down and behind before and while traveling in reverse even with the mower blades disengaged. Slope Operation This unit has spinning mower blades. These blades can pick You could be seriously injured or even killed if you use this up and throw debris that could seriously injure a bystander.
-
Page 6: Slope Identification Guide
Retaining Walls, Drop-Offs, and Water WARNING Do not operate on slopes greater than 10 degrees. 1. Use a straight edge at least two (2) feet long (A, Figure 2). A 2x4 or a straight piece of metal works well. 2. Angle finder tools. a. - Page 7 11. Never leave a running unit unattended. Always disengage 2. Always observe safe refueling and fuel handling practices the PTO, set parking brake, stop engine, and remove when refueling the unit after transportation or storage. keys before dismounting. 3. Never store the unit (with fuel) in an enclosed poorly 12.
- Page 8 5. Do NOT operate down slope towards or near water, and the mowing activity. Never assume that children will retaining walls, or drop-offs. remain where you last saw them. 6. Avoid starting, stopping, or turning on a slope. If machine 1.
-
Page 9: Safety Decals
13. Replace all fuel tank caps and fuel container caps 21. Disengage drive attachments, stop the engine, remove securely. the key, and disconnect the spark plug wire(s) before: clearing attachment blockages and chutes, performing Service & Maintenance service work, striking an object, or if the unit vibrates abnormally. - Page 10 B.) Part Number: 7101665 - Decal, Danger, Do Not Operate without Deflector A.) Part Number: 5106564 - Decal, Main Safety C.) Part Number: 5103184 - Decal, Warning, Hand in Belt (Located under seat plate on cross rail.) ferrismowers.com...
-
Page 11: Safety Icons
Safety Icons the alert symbol to indicate the likelihood and the potential severity of injury. In addition, a hazard symbol may be used to represent the type of hazard. DANGER indicates a hazard which, if not avoided, will result in death or serious injury. ... -
Page 12: Zero-Turn Rider Controls
specific sequences. To learn what combination and sequence of controls to use for various tasks see the Operation section. Zero-Turn Rider Controls Cutting Height Adjustment Pin Deck Lift Lock Lever Ground Speed Control Levers: These levers control the ground speed and direction of the rider. The left lever controls the left rear drive wheel and the right lever controls the right rear drive wheel. -
Page 13: Instrument Control Panel
Instrument Control Panel Moving a lever forward (A) from the NEUTRAL position (B) increases the FORWARD speed of the associated wheel, and pulling back (C) on a lever increases the REVERSE speed. Moving a levers outwards (D) from the NEUTRAL position locks the levers in the NEUTRAL position. -
Page 14: Operation
the parking brake. Pull the parking brake lever back, out away from the operator, and allow it to travel forward to disengage the parking brake. Note: To start the unit the parking brake must be engaged. Disengage Releases the parking brake. Engage Locks the parking brake. -
Page 15: Checks Before Starting
In the event of an emergency the engine can be stopped by simply turning the ignition switch to STOP. Use this WARNING method only in emergency situations. For normal engine shut Do NOT load this zero-turn rider on a trailer or truck using down follow the procedure given in Stopping the Rider. - Page 16 Reverse Travel Practice LOOK DOWN & BEHIND, then gradually move both ground speed control levers evenly BACK from neutral. Slow down and repeat. NOTE: Practice backing up for several minutes before attempting to do so near objects. The rider turns sharply in FIRST place your hands onto the levers as shown. reverse as well as forward, and backing up straight takes practice.
-
Page 17: Mowing
As you become more familiar and experienced with operating the Zero Turn rider, you will learn more maneuvers that will make your mowing time easier and more enjoyable. Remember, the more you practice, the better your control of the Zero Turn will be! Mowing 1. - Page 18 • Avoid mowing after rain or even heavy dew, and never mulch when the grass is wet (moist grass does not mulch well, and clumps beneath the mower deck). Mowing Patterns Always start mowing on a smooth, level area. The size and type of area to be mowed will determine the best mowing pattern to use.
-
Page 19: Pushing The Rider By Hand
The remainder of the mowing should be done in the opposite The best mulching action typically results from cutting only direction so that the clippings are dispersed OUT onto the the top ½ inch to 3/4 inch of grass blade. This provides area of lawn previously cut. -
Page 20: Attaching A Trailer
rear of the rider and push it towards the rear tire. Repeat this process for the other side of the rider. WARNING 4. Disengage the parking brake. The rider can now be Never store the unit, with gasoline in engine or fuel tank, pushed by hand. -
Page 21: Maintenance Schedule
manual to prevent the possibility of fire from the ignition ZERO-TURN RIDER AND MOWER MAINTENANCE of gasoline fumes. Remember, gasoline fumes can travel Every 400 Hours or Yearly to distant sources of ignition and ignite, causing risk of See dealer for hydraulic oil and filter change. explosion and fire. -
Page 22: Adding Fuel
Adding Fuel Carbureated Models: The fuel filter is located in the fuel line between fuel tank and carburetor, near the fuel pump. Fuel Injected Models: The fuel filter is located in the fuel line WARNING between the fuel tank and fuel pump. Fuel and its vapors are extremely flammable and explosive. ... -
Page 23: Engine Maintenance
3. Place a small pan under the oil drain hose to catch the oil. Using the appropriate tools, remove the oil drain cap from the oil drain hose and drain the engine oil. 4. After draining, replace the cap and wipe up any spilled oil. Reinstall the oil drain hose to its storage position so it is retained during normal operation. - Page 24 Not all greases are compatible. Red grease (p/n 5022285) is recommended, automotive-type high-temperature, lithium grease may be used when this is not available. Oil: • Discharge chute pivots (B, Figure 23). • Ground speed control lever and neutral linkage rod pivots (A, Figure 25). ...
-
Page 25: Servicing The Mower Blades
Inspecting the Mower Blades DANGER Thrown objects hazard Avoid injury: a worn or damaged mower blade can break and a piece of the blade could be thrown into the operator's area or bystander's area resulting in serious personal injury or death. •... - Page 26 Sharpening the Mower Blades WARNING Thrown objects and fire hazard Grinding mower blades throws sparks and fine metal particles that are capable of igniting gasoline and gasoline vapors, and that can injure unprotected eyes. Be sure all flammable materials are cleared from the area where grinding will occur.
-
Page 27: Seat And Ground Speed Control Lever Adjustments
2. Tighten the blade mounting bolt to 50 - 60 ft. lbs. (68 - 81 Nm) of torque while holding onto the pulley bolt (D) with a wrench. 3. Tighten the pulley bolt to 50 - 60 ft. lbs. (68 - 81 Nm) of torque while holding onto the blade mounting bolt with a wrench. -
Page 28: Checking Tire Pressures
2. Place the cutting height adjustment pin (C) into the hole for the desired cutting height. Note: Make sure the pin is inserted into the holes in both upper and lower plates of the adjustment bracket. Checking Tire Pressures 3. Depress the deck lift foot pedal and then push the deck Tire pressure should be checked periodically (see Figure 36), lift lock lever towards the right to release the lock. -
Page 29: Neutral Adjustment
3. To re-install the floor pan: Reverse the removal Return-to Neutral Adjustment procedure. Prior to performing this procedure the Neutral Adjustment Neutral Adjustment procedure must be completed. Each ground speed control lever on this machine is connected to a transmission by two linkage rods and a WARNING pivoting arm. -
Page 30: Suspension Adjustment
Note: It is important to note that after every adjustment of the Note: The spanner wrench was included in the literature neutral linkage rod, the ground speed control lever must be packet for the machine. pulled rearward and released to properly check the return-to- Parking Brake Adjustment neutral adjustment. -
Page 31: Mower Deck Drive Belt Replacement
are correct. Turning the nut clockwise will raise the deck, 2. Lower the mower deck to the lowest cutting position and counter-clockwise will lower the deck. remove the floor pan from the machine. 3. Remove the left hand spindle cover (A, Figures 44 and 45) and the right hand spindle cover (B) from the mower deck to gain access to the mower deck drive belt (C). -
Page 32: Transmission Drive Belt Replacement
exposed when the left hand spindle cover was removed). 11. Loosen the jam nut (C) on the spring anchor eye bolt (D). Carefully release the tension on the idler arm. 12. Turn the adjustment nut (E) until the measurement is 5. -
Page 33: Battery Service
steps under Cleaning the Battery & Cables in the Regular Maintenance Section. WARNING Keep open flames and sparks away from the battery. Charging a Completely Discharged Battery • Be careful when handling the battery. • Avoid spilling electrolyte. WARNING • Keep flames and sparks away from the battery. •... -
Page 34: Troubleshooting
8. Start the engine of the vehicle with the booster battery. Wait a few minutes, then attempt to start the engine of the WARNING vehicle with the discharged battery. For your personal safety, use extreme care when jump 9. If the vehicle does not start after cranking for ten starting. -
Page 35: Troubleshooting Charts
Problem: Excessive oil consumption. WARNING Too much oil in crankcase. Drain excess oil. Remove ignition key prior to performing maintenance on the Engine exhaust is black. unit. To avoid serious injury, perform maintenance on the unit Cause Remedy or mower deck only when the engine is stopped and the Dirty air filter. -
Page 36: Troubleshooting Common Cutting Problems
Problem: Excessive mower vibration. Problem: Scalping Mower blades are not balanced. Remove, sharpen, and balance Deck is not leveled correctly. Correctly level the deck. blades. See Servicing the Mower Tire pressure is low or uneven. Check and inflate the tires. Blades. -
Page 37: Specifications
Specifications Models with 48" Mower Decks Overall Length 69- 7/8" (177,5 cm) Specifications are correct at time of printing and are subject to change without notice. Overall Width (with discharge 53" (134,6 cm) chute up) ENGINE Overall Width (with discharge 58-1/2" (148,9 cm) chute down) ... - Page 38 Briggs & Stratton products. ABOUT YOUR WARRANTY Warranty service is available only through Ferris Authorized Service Dealers. This warranty only covers defects in materials or workmanship. It does not cover damage caused by improper use or abuse, improper maintenance or repair, normal wear and tear, or stale or unapproved fuel.
- Page 39 Notes...
Need help?
Do you have a question about the 400 Series and is the answer not in the manual?
Questions and answers
Do you have to remove the engine to replace the clutch on a Ferris 400S model #5901704