Ferris IS2000Z Series Operator's Manual
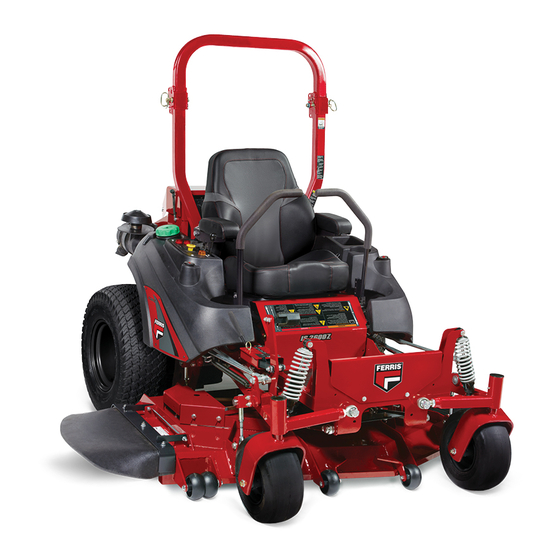
Is2000z series zero-turn riding mower
Hide thumbs
Also See for IS2000Z Series:
- Operator's manual with setup instructions (44 pages) ,
- Operator's manual (56 pages) ,
- Operator's manual (48 pages)
Table of Contents
Advertisement
Advertisement
Table of Contents
Troubleshooting

Subscribe to Our Youtube Channel
Related Manuals for Ferris IS2000Z Series


Summary of Contents for Ferris IS2000Z Series
-
Page 2: Table Of Contents
Deck Lift Rod Timing Adjustment ........30 Table of Contents : Deck Leveling Adjustment ..........31 Identification Tag Location ..........3 Deck Lift Assist Springs ..........32 Product Identification Tag (Stamped) ....... 3 Mower Belt Replacement ..........32 Operator Safety ..............3 Hydraulic Pump Drive Belt Replacement ....... -
Page 3: Identification Tag Location
© 2012 Briggs & Stratton Corporation, Milwaukee, WI, USA. All Unit Serial Number: rights reserved. Mower Deck Model Number: Mower Deck Serial Number: Ferris is a trademark of Briggs & Stratton Power Products Group, Dealer Name: Date Purchased: Briggs & Stratton Power Products Group, LLC. ENGINE REFERENCE DATA Engine Make: 5375 N. -
Page 4: Operating Safety
Operating Safety Children Tragic accidents can occur with children. Do not allow them anywhere near the area of operation. Children are often attracted to the unit and mowing activity. Never assume that children will remain where you last saw them. If there is a risk that children Congratulations on purchasing a superior-quality piece of lawn may enter the area where you are mowing, have another and garden equipment. -
Page 5: Moving Parts
Thrown Objects Roll Bar Use Keep the roll bar in the raised position and fasten the seat belt. There is no roll over protection when the roll bar is down! Do not This unit has spinning mower blades. These blades can pick up jump off if the mower tips (it is safer to be secured by the seat and throw debris that could seriously injure a bystander. - Page 6 Fuel and Maintenance • Data indicates that operators, age 60 years and above, are involved in a large percentage of riding mower-related injuries. These operators should evaluate their ability to operate the riding mower safely enough to protect themselves and others from serious injury. Preparation Always disengage all drives, shutoff the engine, and remove the •...
-
Page 7: Slope Operation
• Turn off the PTO switch to disengage the blades when not Slope Operation mowing. Slopes are a major factor related to loss-of-control and tip-over accidents, which can result in severe injury or death. All slopes • Never operate with guards not securely in place. Be sure all require extra caution. - Page 8 Towed Equipment (Ride-On Units) • Never remove the gas cap or add fuel with the engine running. Allow the engine to cool before refueling. • Tow only with a machine that has a hitch designed for towing. Do not attach towed equipment except at the hitch point. •...
- Page 9 • Stop and inspect the equipment if you strike an object. radiator cap while the engine is running. Stop the engine Repair, if necessary, before restarting. and wait until it is cool. Even then, use extreme care when removing the cap. •...
-
Page 10: Safety Decals
1) Check to make sure the machine GVW (Gross Vehicle • The seat belt like the ROLL BAR, needs to be periodically Weight), including attachments, restrained payload, fuel and inspected to verify that the integrity has not been operator, is not in excess of the maximum weight specified compromised through normal machine use, misuse, age on the ROLL BAR label. -
Page 11: Safety Icons
Safety Icons * Located behind ROPS on the frame of the unit. ** Located near the hydraulic pump fans. Qty: 2 - Models w/ 61" Decks; Qty: 1 - Models w/ 52" Decks Callout Description Alert Read the Manual Amputation - Rotating Parts Pinch Point Fire Hazard Amputation - Hand in Blade... -
Page 12: Safety Alert Symbol And Signal Words
• Operator moves ground speed control levers out of their Callout Description neutral positions before disengaging parking brake. Amputation - Foot in Blade Test 4 - Blade Brake Check Thrown Objects Maximum Slope Angle for Safe Operation Mower blades and mower drive belt should come to a complete stop within seven (7) seconds after electric PTO switch is turned Overhead Obstacles off (or operator rises off seat). - Page 13 Fuel Tank Cap: To remove the cap, turn counterclockwise. Fuel Tank Cap Fuel Level Guage Retractable Seat Belt Fuel Level Gauge: Displays the fuel level in the tank. Removable Floor Plate (S/N: 2016269736 & Above) Retractable Seat Belt: The seat belt is used to secure the operator to the seat.
-
Page 14: Operation
Ignition Switch: The ignition switch starts and stops the engine, it has three positions: WARNING • Never operate on slopes greater than 15°. Icon Name Description Stops the engine and shuts off the • Select slow ground speed before driving onto a slope. Use electrical system. -
Page 15: Starting The Engine
• Make sure that the fuel selector valve in an "ON" position. We suggest you begin with the Smooth Travel procedure to the right, and then advance through the forward, reverse, and turning maneuvers. Starting the Engine You must release the parking brake prior to moving the control levers inward. -
Page 16: Advanced Driving
While traveling forward allow one handle to gradually return back toward neutral. Repeat several times. Gradually move both ground speed control levers — evenly NOTE: To prevent pivoting directly on the tire tread, it is best to FORWARD from neutral. Slow down and repeat. keep both wheels going at least slightly forward. -
Page 17: Mowing
Height of Grass Often cutting height is a matter of personal preference. Typically, you should mow the grass when it is between three and five inches high. The proper cutting height range for a specific lawn will depend upon several factors, including the type of grass, the amount of rainfall, the prevailing temperature, and the lawn’s overall condition. -
Page 18: Mowing Methods
Where possible, make one or two passes around the outside of the area discharging the grass INTO the lawn to keep the cut grass off fences and walks. When and How Often to Mow The time of day and condition of the grass greatly affect the results you’ll get when mowing. -
Page 19: Pushing The Rider By Hand
Mulching consists of a mower deck which cuts and re-cuts clippings into tiny particles and which then blows them down INTO the lawn. These tiny particles decompose rapidly into by-products your lawn can use. UNDER PROPER CONDITIONS, your mulching mower will virtually eliminate noticeable clippings on the lawn surface. -
Page 20: Attaching A Trailer
Excessive towed loads can cause loss of traction and loss of control on slopes. Reduce towed weight when operating on slopes. The surface being driven on greatly impacts traction and stability. Wet or slippery surfaces can greatly reduce traction and the ability to stop or turn. Carefully evaluate the surface conditions before operating the unit and trailer, and never operate on slopes greater than 10°. -
Page 21: Maintenance Schedule
• If the unit can’t be stored on a reasonable level surface, 6. Check crankcase oil level and add proper oil if necessary. chock the wheels. If any condensation has developed during storage, drain crankcase oil and refill. • Clean all grass and dirt from the mower. 7. -
Page 22: Replacing The Fuel Filter
Changing the Engine Oil and Filter This series of mower has different engine options: Briggs & Stratton Commercial Turf (A, Figure 20), Briggs & Stratton Big Block (B) and Kawasaki (C). Please reference figure 20 as the location of the components listed for this procedure may vary by specific engine option. -
Page 23: Inspect Muffler And Spark Arrester
Inspect Muffler and Spark Arrester Inspect the muffler for cracks, corrosion, or other damage. Remove the spark arrester, if equipped, and inspect for damage or carbon blockage. If replacement parts are required, make sure to use only original equipment replacement parts. WARNING Replacement parts must be the same and installed in the same position as the original parts or fire could result. -
Page 24: Lubricate The Front Casters
Use grease fittings when present. Disassemble parts to apply grease to moving parts when grease fittings are not installed. Not all greases are compatible. Red grease (p/n 5022285) is recommended, automotive-type, high-temperature, lithium grease may be used when this is not available. control handle pivots seat plate pivots deck lift pivots... -
Page 25: Servicing The Mower Blades
3. Remove the 1/4-28 grease fitting and reinstall the 1/4-28 • More than .5" (12,7 mm) of the mower blade metal has bolt. been removed from previous sharpening or wear (A, Figure 29) 4. Repeat the process for the other side of the machine. •... -
Page 26: Seat Adjustment
4. The mower blade should have a maximum of 1/64" (0,40 mm) cutting edge (B) or less. Balancing the Mower Blades CAUTION Thrown objects hazard An unbalanced mower blade can create excessive vibration and damage the unit, or cause mower blade failure resulting in thrown debris. -
Page 27: Ground Speed Control Lever Adjustment
To Adjust the Handle Placement Loosen the jam nuts and adjust the placement bolt (B) in or out to properly adjust the lever end spacing. To Adjust the Handle Height Remove the mounting hardware and reposition the handle either Forward and Backward Adjustment: up or down from its original position. -
Page 28: Mowing Height Adjustment
WARNING DO NOT adjust the tractor for a faster overall speed forward or reverse than it was designed for. Mowing Height Adjustment The cutting height adjustment pin (A, Figure 38) controls the mower cutting height. The cutting height is adjustable between 1-3/4”... -
Page 29: Neutral Adjustment
Neutral Adjustment Adjustment - Ball Joint Fastened Neutral Return Rods If the tractor "creeps" while the ground speed control levers are locked in the NEUTRAL, then it may be necessary to adjust the linkage rod. WARNING To avoid serious injury, perform adjustments only with engine NOTE: Perform this adjustment on a hard, level surface such stopped, key removed and tractor on level ground. -
Page 30: Deck Lift Rod Timing Adjustment
4. With the parking brake engaged, measure the compressed spring length. The spring should measure in the range of 1-15/16" - 2" (4,9 - 5,1 cm) when compressed. 5. If the spring is not within this range release the parking brake and turn the adjustment nut (B) to compress or release the spring. -
Page 31: Deck Leveling Adjustment
2. To ensure that the deck is in the lowest position, push the Determining if the Deck Leveling Needs to Be pedal by hand towards the rear of the unit and install the Adjusted height adjustment pin in the 3” (7.6 cm) position to hold in place. -
Page 32: Deck Lift Assist Springs
2. Loosen the nuts (C) and allow the rear of the deck to rest on the 2 X 4's. Slide the chains in the slots until the chains are tight and tighten the nuts. 3. Repeat the process for the other side of the unit. 4. - Page 33 2. Lower the mower deck to its lowest cutting position and remove the mower deck guards. WARNING Use extreme caution when rotating the idler arm with the breaker bar, due to the increased tension in the spring as the idler arm is being rotated. Injury may result if the breaker bar is prematurely released while the spring is under tension.
-
Page 34: Hydraulic Pump Drive Belt Replacement
perform the Adjust the Mower Belt Idler Tensioner Spring 5. Loosen the adjustment nut (I) to release the majority of the Length procedure. belt tension. Use caution and remove the nut to completely release the tension. 6. Remove the old belt and replace it with a new one (A). Make sure the V-side of the belt runs in the grooves of the crankshaft pulley and pump pulleys (B &... -
Page 35: Battery Maintenance
1. Disconnect the cables from the battery, negative [-] cable first (B, Figure 59). WARNING Spring loaded components can kick back causing injury. Use two hands when adjusting the shock springs. This will prevent the wrench from slipping while pressure is being applied. - Page 36 battery will not accept a normal charge until it becomes Callout Description warm. To Starter Switch 3. Always unplug or turn the charger off before attaching or Starting Vehicle Battery removing the clamp connections. To Ground 4. Carefully attach the clamps to the battery in proper polarity Jumper Cable (usually red to [+] positive and black to [-] negative).
-
Page 37: Troubleshooting
Troubleshooting the Rider Engine knocks Low oil level. Check / Add oil as WARNING required. Any procedure other than the preceding could result in: Using wrong grade oil. See engine manual. (a) personal injury caused by electrolyte squirting out the Excessive oil Engine running too hot. -
Page 38: Troubleshooting Common Cutting Problems
Troubleshooting the Mower Problem: Stepped Cutting Excessive belt wear or Bent or rough pulleys. Repair or replace. breakage Using incorrect belt. Replace with correct belt. Incorrect belt tension. Fixed Belt Tensioners: Replace spring if worn; Adjustable Belt Tensioners: Adjust to correct tension. -
Page 39: Specifications
Specifications 30 Gross HP* Briggs & Stratton Commercial Turf Make Briggs & Stratton Specifications Model 49M977-0114-G5 NOTE: Specifications are correct at time of printing and are Displacement 49.43 Cu. in (810 cc) subject to change without notice. Electrical System 12 volt, 16 amp. Alternator; Battery: 340 cca ENGINE Oil Capacity... - Page 40 Inflation Pressure 25 psi (1.72 bar) TRANSMISSIONS Side Serial Number Wheel Motor Pump LH & RH 2014450933 & HGM-12E-3131 PG-3H Below 2014450934 - TF0240LS080AAKZ PG-3H 2015714710 TF0240LS081AAKZ PG-3H 2015714711 & TF0240LS080AAKZ PK-3HCQ Above TF0240LS081AAKZ PK-3KCQ Type Pump and Wheel Motor Hydraulic Fluid Mobil 1™...
- Page 41 Notes...
-
Page 42: Limited Warranty
ABOUT YOUR WARRANTY We welcome warranty repair and apologize to you for being inconvenienced. Warranty service is available only through FERRIS Authorized Service Dealers. Most warranty repairs are handled routinely, but sometimes requests for warranty service may not be appropriate. This warranty only covers defects in materials or workmanship. It does not cover damage caused by improper use or abuse, improper maintenance or repair, normal wear and tear, or stale or unapproved fuel. -
Page 43: Your Warranty Rights And Obligations
California, U.S. EPA, and Briggs & Stratton Corporation Emissions Control Warranty Statement September 2012 Your Warranty Rights And Obligations The California Air Resources Board, U.S. EPA, and Briggs & Stratton (B&S) are pleased Owner’s Warranty Responsibilities: to explain the emissions control system warranty on your Model Year 2012--2013 As the engine/equipment owner, you are responsible for the performance of the ...
Need help?
Do you have a question about the IS2000Z Series and is the answer not in the manual?
Questions and answers
What is the belt # to order replacement on the is2000z