Table of Contents
Advertisement
Advertisement
Table of Contents

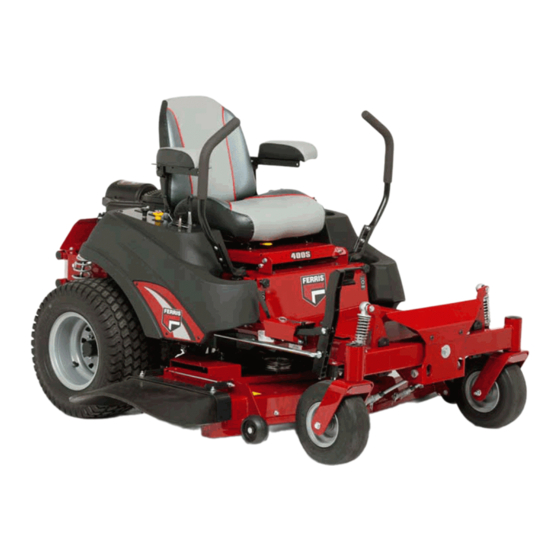
Summary of Contents for Ferris 400S Series
-
Page 2: Quick Setup List
To register the product: log onto www.thepowerportal.com, select the appropriate brand, click “Sales & Marketing”, select the “Product Registration” link, and then select “New Product Registration”. Fill out and submit the online product registration form. Ferris is a registered trademark of Briggs & Stratton Corporation. ferrismowers.com... -
Page 3: Setup Procedures
Setup Procedures The items in this section provide the information necessary to fully assemble, test, and prepare the unit, that these instructions were included with, for delivery to your customer. The Quick Setup List provided on page 2 of this booklet to help you identify and check that the items have been performed. -
Page 4: Install The Seat
2. Connect the black negative battery cable (A) to the negative battery post. 9. Center a jack underneath the rear bumper (E) of the Install the Ground Speed Control Levers machine and raise the rear of the machine until the holes This procedure is only necessary if the ground speed control in the bottom of the shocks align with the holes in the rear levers are not factory-installed on your unit. -
Page 5: Check / Fill Transmission Oil Level
1. Use the dipstick (C) to check the engine oil level. If necessary add engine oil through the engine oil fill (D). Check the engine manufacturer’s owner’s manual for the oil recommendations. 3. Position the seat so that it's back two mounting bolts are 1/2"... -
Page 6: Check Tire Pressures
Check Blade Bolt and Pulley Bolt Torque WARNING Avoid injury! Mower blades are sharp. • Mower blades are sharp. For your personal safety, do NOT handle mower blades with bare hands. • Careless or improper handling of blades may result in serious injury. -
Page 7: Deck Leveling Adjustment
Deck Leveling Adjustment WARNING Wear heavy gloves when handling or working around cutting blades. Blades are extremely sharp and can cause severe injury. 1. Park the machine on a flat, level surface such as a concrete floor. Engage the parking brake, disengage the PTO, turn the ignition switch to OFF, and remove the ignition key. - Page 8 44" Mower Deck: stationary idler pulley (H), and the adjustable idler pulley (I). WARNING Use extreme caution when rotating the idler arm, due to the increased tension in the spring as the idler arm is being rotated. Injury may result if the idler arm is prematurely released while the spring is under tension.
- Page 9 • Rear transmission cradle pivots (A, Figure 16). • Front caster wheel axles (A, Figure 18). Use grease fitting when present. Disassemble parts to apply grease to moving parts when grease fittings are not installed. Not all greases are compatible. Red grease (p/n 5022285) is recommended, automotive-type high-temperature, lithium grease may be used when this is not available. ...
-
Page 10: Adding Fuel
Adding Fuel WARNING Starting the Engine Fuel and its vapors are extremely flammable and explosive. Fire or explosion can cause severe burns or death. WARNING When Adding Fuel • If you do not understand how a specific control functions, or have not yet thoroughly read the Features •... -
Page 11: Functional Tests
Seat And Ground Speed Control Lever If the unit does not pass a test, do not operate the unit. Under no circumstance should you attempt to defeat the purpose of Adjustments the safety system. The seat and ground speed control levers should be adjusted so that the ground speed control levers can be moved Functional Tests through their full range of motion without contacting the... -
Page 12: Cutting Height Adjustment
Speed Balancing (Tracking) Adjustment If the rider drifts to the right or left when the ground speed Cutting Height Adjustment control levers are in the maximum forward position, the top speed of each of these levers can be balanced. Only adjust The deck lift pedal adjusts the mower cutting height. -
Page 13: Return-To Neutral Adjustment
2. Place the cutting height adjustment pin (C) into the hole • If the machine creeps backward, turn the upper linkage rod counter-clockwise (while standing at the for the desired cutting height. rear of the machine, facing forward). Note: Make sure the pin is inserted into the holes in both 3. -
Page 14: Purging The Air From The Hydraulic System
the machine), re-position the set collar so the neutral and move smoothly forward and reverse at normal speeds, return spring is less compressed. then the transaxles/transmissions are considered purged. • if the ground speed control lever stops it's return Suspension Adjustment motion before the notch (while standing at the rear of the machine), re-position the set collar so that the The shock assemblies (A, Figure 26 - front shown, rear...


Need help?
Do you have a question about the 400S Series and is the answer not in the manual?
Questions and answers