Table of Contents
Advertisement
Advertisement
Table of Contents

Related Manuals for Ferris ISX2200


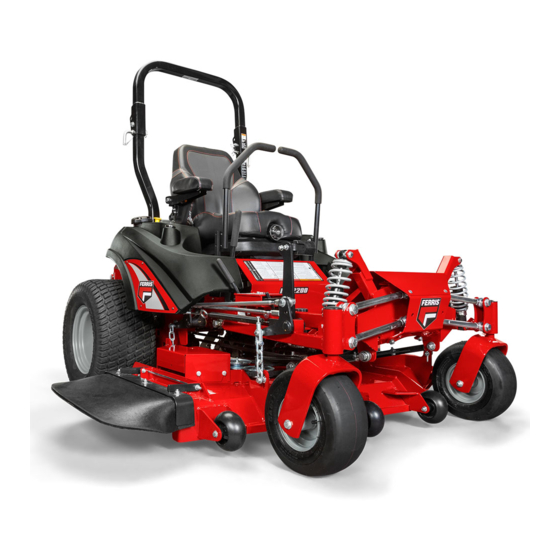
Summary of Contents for Ferris ISX2200
-
Page 2: Table Of Contents
Table of Contents: Maintenance Schedule............29 Specifications..............30 General Information.............. 3 Warranty................30 Identifying Your Unit ............3 Warranty Statement............30 CE Identification Tag Markings........... 3 Operator Safety..............4 California Proposition 65..........4 Operating Safely...............4 Slope Identification Guide..........6 Safety Rules and Information...........6 Safety Decals.............. -
Page 3: General Information
Engine Code / Serial Number: position. The Illustrated Parts Lists for this machine can be Ferris is a registered trademark of Briggs & Stratton, LLC. downloaded from ferrismowers.com. Please provide model Identifying Your Unit and serial number when ordering replacement parts. ... -
Page 4: Operator Safety
Operator Safety Read the Manual California Proposition 65 WARNING This product can expose you to chemicals including gasoline engine exhaust, which is known to the State of California to cause cancer and carbon monoxide, which is known to the State of California to cause birth defects or other reproductive harm. - Page 5 operate on a slope greater than 15 degrees (a 5.4 foot rise attempt to alter or bypass the system. See your dealer over a 20 foot length). immediately if the system does not pass all the safety interlock system tests found in this manual. Avoid turning down slopes;...
-
Page 6: Slope Identification Guide
Slope Identification Guide Check for overhead clearances before driving under any objects. Do not allow the roll bar to contact low overhanging obstacles such as tree branches and guide wires. Fuel and Maintenance Always disengage all drives, shutoff the engine, and remove the key before doing any cleaning, refueling, or servicing. ... - Page 7 Training conditions can affect the machines stability. Use caution when operating near drop-offs. • Read, understand, and follow all instructions in the • Do not mow in reverse unless absolutely necessary. manual and on the unit before starting. If the operator(s) Always look down, behind and to the side before or mechanic(s) can not read English it is the owner’s changing directions. ...
- Page 8 • OSHA regulations may require the use of hearing • Do not use grass catcher on steep slopes. protection when exposed to sound levels greater than 85 • Do not mow slopes if you cannot back up them. dBA for an 8 hour time period. Towed Equipment (Ride-On Units) CAUTION •...
- Page 9 • Never fill containers inside a vehicle or on a truck bed first and the positive last. Reconnect positive first and with a plastic bed liner. Always place containers on the negative last. ground away from your vehicle before filling. •...
- Page 10 Roll Bar Instructions • EVERY 100 HOURS - Inspect the ROLL BAR structure and mounting hardware for: For models equipped with factory-installed Roll Over 1) Any cracks in the structure (structural members and/or Protection System (ROPS). welds). 2) Significant corrosion on any part of the ROLL BAR WARNING structure or hardware.
-
Page 11: Safety Decals
1) Check for dirt or debris in the retraction mechanism. If dirt or debris is found, it should be removed. 2) Check to make sure the retraction mechanism retracts easily and completely. 3) Check for damage to any part of the seat belt (A, Figure 3) such as nicks, cuts, loose stitching, or fraying. ... -
Page 12: Safety Icons
Safety Icons Danger: Fire Hazard: Keep unit free of grass, leaves and excess Warning: Read and understand oil. Do not add fuel while engine is the Operator’s Manual before using hot or running. Stop engine, remove this machine. Know the location key and allow to cool for at least ... -
Page 13: Safety Icons For Optional Jack Kit Accessory
Operational SAFETY Checks Warning: Low Overhanging Obstacles Hazard - Check for Test 1 - Engine SHOULD NOT crank if: overhead clearances before driving under any objects. Stay clear. Do • PTO switch is engaged, OR NOT allow roll bar to contact low •... -
Page 14: Zero-Turn-Rider Controls
Zero-Turn-Rider Controls Cutting Height Adjustment Storage Hole for Cutting Height Adjustment Pin Deck Lift Lock Lever Ground Speed Control Levers: These levers control the ground speed and direction of the rider. The left lever controls A. Deck Lift Pedal the left rear drive wheel and the right lever controls the right B. -
Page 15: Instrument Control Panel
The parking brake must be disengaged before attempting to Transmission Oil Fill: Transmission oil is added through the move the ground speed control levers from the NEUTRAL hydraulic oil tanks. It also serves as extra holding capacity position. for oil as the transmissions heat up and the hydraulic oil expands. -
Page 16: Operation
While recording PTO hours, the hour meter also records Slow throttle speed. engine hours; however, the hour meter only displays PTO hours when recording PTO hours. Ignition Switch: The ignition switch starts and stops the To stop recording PTO hours, push the PTO switch down to engine, it has three positions: disengage the PTO clutch. -
Page 17: Checks Before Starting
immediately, and consult engine operator's manual. Warm up the engine by running it for at least a minute WARNING before engaging the PTO switch or driving the rider. Do NOT load this zero-turn rider on a trailer or truck using 4. - Page 18 Reverse Travel Practice LOOK DOWN & BEHIND, then gradually move both ground speed control levers evenly BACK from neutral. Slow down and repeat. NOTE: Practice backing up for several minutes before attempting to do so near objects. The rider turns sharply in FIRST place your hands onto the levers as shown. reverse as well as forward, and backing up straight takes practice.
-
Page 19: Mowing
As you become more familiar and experienced with operating the Zero Turn rider, you will learn more maneuvers that will make your mowing time easier and more enjoyable. Remember, the more you practice, the better your control of the Zero Turn will be! Mowing 1. - Page 20 • Avoid mowing after rain or even heavy dew, and never mulch when the grass is wet (moist grass does not mulch well, and clumps beneath the mower deck). Mowing Patterns Always start mowing on a smooth, level area. The size and type of area to be mowed will determine the best mowing pattern to use.
-
Page 21: Pushing The Rider By Hand
The remainder of the mowing should be done in the opposite The best mulching action typically results from cutting only direction so that the clippings are dispersed OUT onto the the top ½ inch to 3/4 inch of grass blade. This provides area of lawn previously cut. -
Page 22: Raise And Lower The Roll Bar
1. Pull the hair pin clips (A, Figure 20) out of the retainer pins (B). 2. Rotate the retainer pins so that the handle of the pin is 4. Disengage the parking brake. The zero-turn rider can now pointing up (C). be pushed by hand. -
Page 23: Attaching A Trailer
Attaching a Trailer The maximum weight of a towed trailer should be less than 200 lbs (91kg). Secure the trailer with an appropriately sized clevis pin (A, Figure 21) and clip (B). 2. Fill the fuel tank to the bottom of the filler neck. This will allow for fuel expansion. ... -
Page 24: Electronic Fuel Injection (Efi) System - Efi Models
Electronic Fuel Injection (EFI) System - EFI Models 3. Before removing the tank cap (C), make sure that the EFI is an electronically-controlled fuel management system area around the tank cap and fill neck of the tank is free which is monitored by an Electronic Control Unit (ECU). A of dust, dirt, and other debris. -
Page 25: Checking Tire Pressures
times), as air is purged from the unit, the oil level will • discharge chute hinge drop. Generally, all moving metal parts should be oiled where 3. Stop the engine and engage the parking brake. contact is made with other parts. Keep oil and grease off belts and pulleys. -
Page 26: Lubricating The Forefront Suspension Control Arms
2. Grease the front caster. 3. Remove the 1/4-28 grease fitting and reinstall the 1/4-28 bolt. Lubricating the ForeFront Suspension 4. Repeat the process for the other side of the machine. Control Arms Seat Adjustment Interval: Every 50 hours. The seat can be adjusted forward and back. Move the lever Lubricate the ends of the four (4) ForeFront™... -
Page 27: Speed Balancing Adjustment
WARNING DO NOT adjust the tractor for a faster overall speed forward or reverse than it was designed for. Cutting Height Adjustment The cutting height adjustment pin (A, Figure 33) controls the mower's cutting height. The cutting height is adjustable between 1-1/2" (3,8 cm) and 5” (12,7 cm) in 1/4” (0,64 cm) increments. ... -
Page 28: Foot Pedal Adjustment
4. Slowly release the deck lift foot pedal until it comes to rest against the cutting height adjustment pin. To set the cutting height at 5" (12,7 cm): 1. While sitting in the operator’s seat, press the deck lift foot pedal forward until it locks into the 5"... -
Page 29: Maintenance Schedule
8. Start the engine and let it run slowly. DO NOT run at high 1. Drain crankcase oil while engine is hot and refill with a speed immediately after starting. Be sure to run engine grade of oil that will be required when unit is used again. only outdoors or in well ventilated area. ... -
Page 30: Specifications
Specifications Warranty Specifications are correct at time of printing and are subject to If your unit is equipped with a dual function hour meter that change without notice. displays both engine hours and PTO hours, the warranty is based on the engine hours as displayed by the hour meter. ENGINE Warranty Statement For complete engine specifications see the engine... - Page 31 Briggs & Stratton products. ABOUT YOUR WARRANTY Warranty service is available only through Ferris Authorized Service Dealers. This warranty only covers defects in materials or workmanship. It does not cover damage caused by improper use or abuse, improper maintenance or repair, normal wear and tear, or stale or unapproved fuel.
Need help?
Do you have a question about the ISX2200 and is the answer not in the manual?
Questions and answers
How do I access the battery on the Ferris ISX-2200 Zero Turn Mower
To access the battery on the Ferris ISX2200 Zero Turn Mower, remove the cover and disconnect the battery cable. After performing any needed service, reconnect the cable and replace the cover. Be careful not to overtighten the bolts to avoid stripping.
This answer is automatically generated