Table of Contents
Advertisement
Advertisement
Table of Contents

Subscribe to Our Youtube Channel
Related Manuals for Benchmark Scientific Accuris SmartReader 96


Summary of Contents for Benchmark Scientific Accuris SmartReader 96
- Page 1 SmartReader MR-9600 User Manual Version 3.1...
- Page 2 Please check the instrument as well as all included accessories when you first open the packaging. If you find anything damaged or missing, please contact Benchmark Scientific or your local distributor immediately. BENCHMARK SCIENTIFIC PO Box 709 Edison, NJ 08818 Phone: 908-769-5555 Website: www.benchmarkscientific.com...
- Page 3 Safety warnings and guidelines 1 Important information for safe use Users should have a clear understanding of how to use this instrument before operation, please read this user manual carefully prior to operation. Improper operation of this instrument may cause injury or electric shock. Please read the manual carefully and operate safely according to the guidelines.
- Page 4 The operator should not open or repair the Instrument by himself. This may void the warranty and cause damage to the instrument. If service is required, please contact Benchmark Scientific or your local distributor to arrange repair. Before powering on, confirm that the electrical supply available matches the voltage required for the instrument as specified on the serial number plate.
-
Page 5: Table Of Contents
Contents Safety warnings and guidelines ........................ II Contents ..............................IV Chapter 1 Introduction ........................1 Chapter 2 Features ..........................2 Chapter 3 Instrument Overview ......................3 Chapter 4 Installation .......................... 5 1. Initial check ..........................5 2. Installation ............................ 5 3. - Page 6 3. Maintenance ..........................36 4. Date and Time ..........................37 Section 5 Help ........................... 38 Chapter 6 Maintenance ........................39 Chapter 7 Trouble shooting ....................... 43 Chapter 8 Accessories ........................44...
-
Page 7: Chapter 1 Introduction
MR-9600 Microplate Reader User Manual Chapter 1 Introduction Chapter 1 Introduction This MR-9600 microplate reader is an instrument for EIA test, measuring concentration, absorbance, measuring positive or negative reaction between antibody and antigen in samples by reading enzymatic color change – Enzyme Linked Immunosorbent Assay (ELISA). Key Features and Benefits: Easy-to-use controls: 7 inch, color touch screen and 3 external keys. -
Page 8: Chapter 2 Features
MR-9600 Microplate Reader User Manual Chapter 2 Features Chapter 2 Features Operating conditions Ambient operating temperature: 4C~45C Relative humidity: ≤70% Input Power: AC100-240V, 50-60Hz, 2A Specifications Model MR-9600 Parameter Light source 6V, 10W, Quartz-Halogen lamp Light source est. life 300 hours Wavelength 400~750nm Four standard filters included: 405,450,492,630nm. -
Page 9: Chapter 3 Instrument Overview
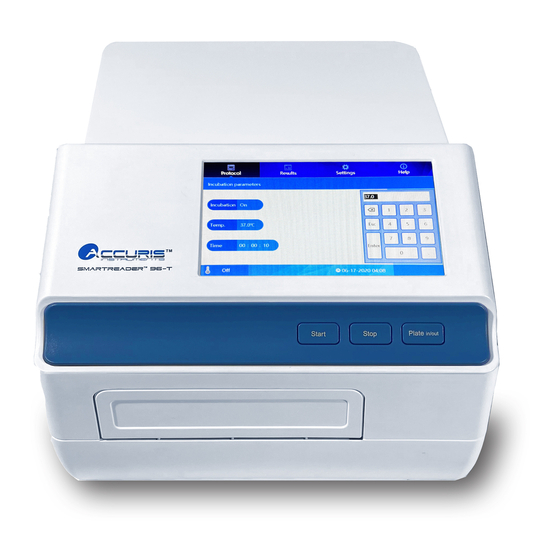
MR-9600 Microplate Reader User Manual Chapter 3 Instrument Overview Chapter 3 Instrument Overview Before first use of this instrument, please read this chapter carefully. Structure 结构示意 Top rear panel Touch screen Top front panel Control button bar Housing Front door Bottom plate Plate holder Input Buttons... - Page 10 USB Ports: For connection of keyboard, mouse and USB drive. (the upper port is for printer connection) Data port: for PC connection. (contact Benchmark Scientific for updated software and features) Ethernet port: for PC connection. (contact Benchmark Scientific for updated software and features) Rear door panel: can opened to replace light source and access optical filter wheel.
-
Page 11: Chapter 4 Installation
MR-9600 Microplate Reader User Manual Chapter 4 Installation Chapter 4 Installation 1. Initial check Each MR-9600 is thoroughly tested before shipping, but please check again when you receive the instrument and contact your local distributor or manufacturer if: ⚫ The outer package is damaged ⚫... -
Page 12: Chapter 5 Operation Guide
MR-9600 Microplate Reader User Manual Chapter 5 Operation guide Chapter 5 Operation guide Section 1 Instrument self-check This chapter introduces default protocol operation, beginning with self-check after power on. Refer to the picture below: Fig 1: Start up screen... -
Page 13: Protocol Interface
MR-9600 Microplate Reader User Manual Chapter 5 Operation guide Section 2 Protocol interface After the self-check, the software enters into the main Protocol interface. There are 4 tabs in the software: Protocol, Results, Settings and Help. You can choose the tabs using the touch screen, or using a connected mouse. Fig 2 You can create, save, measure, set parameters. - Page 14 MR-9600 Microplate Reader User Manual Chapter 5 Operation guide Fig 3 ③ Save current protocol After creating a new name and protocol settings, click ”Save”, and the protocol will be saved to memory. Note: If a new protocol is used to read a plate, and data is saved, the main parameters will be grayed out and cannot be changed.
- Page 15 MR-9600 Microplate Reader User Manual Chapter 5 Operation guide Fig 4 ⑥ Click “Batch OP” (Fig 5) to enter the interface for batch deleting, importing and exporting protocol files. delete the chosen protocol file (Fig 7). Click “USB Drive” to exchange protocol files between internal disk drive and external USB Drive (see Fig 6 to 8 ).
- Page 16 MR-9600 Microplate Reader User Manual Chapter 5 Operation guide Fig 5 Fig 6...
-
Page 17: Input Buttons
MR-9600 Microplate Reader User Manual Chapter 5 Operation guide Fig 7 Fig 8 1.2 Input Buttons Click to run a protocol Click to stop a running protocol Click to open or close the plate drawer... -
Page 18: Running A Protocol
MR-9600 Microplate Reader User Manual Chapter 5 Operation guide 1.3 Running a Protocol Measurement: ① Choose a Demo protocol, set parameters as need, or press to choose an existing a protocol or press to set up a new protocol (see below for creating a new protocol). ②... -
Page 19: Protocol Setting
MR-9600 Microplate Reader User Manual Chapter 5 Operation guide Note: During a reading, a dialog box will indicate “measuring now”, and all buttons are disabled, except for “Stop” which can be used to interrupt the measurement. ④ Measurement will take approximately 15 seconds, and upon completion the display will switch to the “Report”... - Page 20 MR-9600 Microplate Reader User Manual Chapter 5 Operation guide Fig 12 ② Filter 1 setting Click to the right side of “Filter 1” to choose the filter wavelength. See Fig 13. Fig 13 There are 4 standard filter included: 405nm, 450nm, 492nm, 630nm, choose a filter for the Filter 1 wavelength.
- Page 21 MR-9600 Microplate Reader User Manual Chapter 5 Operation guide Fig 14 Note: For a single wavelength measurement, choose “Off” for filter 2. ④ Measurement speed setting: There are two speeds: Fast or Normal. Click to the right side of ”Mode” to choose the running speed, see figure 15.
-
Page 22: Layout
MR-9600 Microplate Reader User Manual Chapter 5 Operation guide 2.2 Layout 2.2.1 Layout ① In the “Plate layout” interface, press “Layout” to set up the layout of the sample plate. On the right side there are some buttons “ Concentration”, “Delete all”, “OK”, “Back”, see Fig 16 ②... - Page 23 MR-9600 Microplate Reader User Manual Chapter 5 Operation guide Fig 17 There are 12 standard values available, and several wells can be set with the same number. : QC control well. The setting procedure is the same as that for standard sample position. (See Fig 18) Fig 68 There are 9 available QA control values, and you may set several wells with same number.
-
Page 24: Standard Concentration
MR-9600 Microplate Reader User Manual Chapter 5 Operation guide : Empty position, for the corresponding positions on the microplate without a sample, the measurement result will show EP rather than data. : Negative control position. : Positive control position. ④ After setting all position types, press “OK” to return to the “Protocol” interface. If there are standard samples, input the standard sample concentrations before starting the plate reading. -
Page 25: Shake Setting
MR-9600 Microplate Reader User Manual Chapter 5 Operation guide Fig 20 Note: Make sure the No. (number) for each of the standards is corresponding correctly to the position of the standards as set up in the layout, any mistake will affect the curve fitting and measurement result. ③... - Page 26 MR-9600 Microplate Reader User Manual Chapter 5 Operation guide the wells and to also to mix the samples. ① On the “Protocol” interface, click “Shake” to enter the “Shaking parameters” interface. Fig 22 ② Click “Shake” to choose “On” or “Off”, see Fig 23: Fig 23 ③...
-
Page 27: Calculate
MR-9600 Microplate Reader User Manual Chapter 5 Operation guide Fig 24 ④ Click “Time” to set the shaking time, input numbers to set HH/MM/SS, See Fig 25 Fig 25 ⑤ There are two options in “Mode” setting: “First” and “Each”. Choose “First” to shake only before the first reading in a multiple reading. -
Page 28: Kinetic Setting
MR-9600 Microplate Reader User Manual Chapter 5 Operation guide 2.4.1 Kinetic setting ① On the “Protocol” interface, click ”Calculate” to enter “Calculation parameters”. Click Kinetic and choose On or Off. Fig 26 ② When Kinetic is “On”, you may click “Readings”, and input the number of desired measurement readings. -
Page 29: Preprocess Setting (Double Wavelength)
MR-9600 Microplate Reader User Manual Chapter 5 Operation guide shows the average rate of absorbance changing in each well. When the type is set for “time to change”, the three parameters at right are active, see Fig 28, Set parameters according to experimental requirements. Baseline select: There are two options in “Baseline select”... -
Page 30: Curves Fitting
MR-9600 Microplate Reader User Manual Chapter 5 Operation guide Fig 29 Choose the preprocess calculation desired when testing 2 wavelengths. Choices include : M1-M2, M1/M2, M1+M2, M1*M2, M2-M1, M2/M1 (M1 and M2 represent the measurement values for the first and second wavelengths) . 2.4.3 Curves fitting In the “Calculation parameters”... -
Page 31: Interpret
MR-9600 Microplate Reader User Manual Chapter 5 Operation guide value data and the standard concentration values. 2.5 Interpret For interpret(qualitative analysis) results which relative to Positive and Negative Controls. ① In the “Protocol” interface, click “Interpret”. Choose “On” Fig 31 ②... - Page 32 MR-9600 Microplate Reader User Manual Chapter 5 Operation guide Fig 32 ① Click “ABS” to choose ABS or conc. (concentration), as the quality control variables ② Click the button “On” / “Off” to turn on or off the quality control. Fig 33 ③...
-
Page 33: Results
MR-9600 Microplate Reader User Manual Chapter 5 Operation guide Section 3 Results The “Results” interface shows measurement results as well as the history data of the latest measurements. After a measurement in the Protocol interface, the display will switch to the “Results” screen automatically, showing the current protocol measurement result. - Page 34 MR-9600 Microplate Reader User Manual Chapter 5 Operation guide Export interface for a typical “end point” reading: Fig 35 Export Interface for Kinetic Reading Data Fig 36 Click to print data if connect to thermal printer(Optional)
-
Page 35: Interpret Result
MR-9600 Microplate Reader User Manual Chapter 5 Operation guide 1.2 Interpret Result Click to show the current interpreted measurement results. Fig 37 “+ ” “++ ” “++ ” “+ ” Symbol above each ABS means positive. in red = standard positive, blue = weak positive. -
Page 36: Curve
MR-9600 Microplate Reader User Manual Chapter 5 Operation guide Fig 38 1.4 Curve Press “Curve” to view the curve of the concentration value vs. ABS reading value. Fig 39 shows a curve fitting with Linear/Linear setting (linear scale for Absorbance on the y-axis, linear scale for concentration on the x-axis). -
Page 37: Kinetic Results Interface
MR-9600 Microplate Reader User Manual Chapter 5 Operation guide Fig 40 2. Kinetic Results interface 2.1 Kinetic Raw data Fig 41 The picture above showing the ABS values for measurement Cycle 1. Use to scroll through the cycles. indicates the cycle No., click this button and input cycle No. -
Page 38: Kinetic Analysis
MR-9600 Microplate Reader User Manual Chapter 5 Operation guide 2.2 Kinetic Analysis Fig 42 indicates the data processing method of kinetics measurement. (See section 2, 2.4.1 Kinetics setting) 2.3 Kinetic Curve Fig 43 The kinetic curve can be displayed for each sample position, showing ABS detection value vs cycle number. - Page 39 MR-9600 Microplate Reader User Manual Chapter 5 Operation guide Press to shift sample position on microplate, (ie, A1, A2, A3, etc) when at A1, click to view the absorbance curve for all sample positions simultaneously. See Fig 44. Fig 44...
-
Page 40: Settings
MR-9600 Microplate Reader User Manual Chapter 5 Operation guide Section 4 Settings The Settings interface allows changing the Language, setting filter values (if a filter is added or removed), maintenance, printer settings, quality control, screen calibration, and date and time setting. Click “Settings”... -
Page 41: Filter
MR-9600 Microplate Reader User Manual Chapter 5 Operation guide Fig 47 Select the language needed and press OK to complete. Currently English and Chinese are available. 2. Filter This instrument is equipped with four standard filters which have positions on the filter wheel from 1-4. -
Page 42: Maintenance
MR-9600 Microplate Reader User Manual Chapter 5 Operation guide ② Click the blank position No., input the wavelength using the pop up window (Fig 49). Fig 49 In case of a wrong input, double click to input again. The instrument is equipped standard with 1-4 filters installed, and the wavelengths are as picture above. -
Page 43: Date And Time
“Keep in” or “Keep out”. “Keep in” means the microplate drawer will stay closed after a measurement, while “Keep out” means the microplate drawer will open after a measurement. If other maintenance settings need to be adjusted, contact Benchmark Scientific. 4. Date and Time Click “Data&time”... -
Page 44: Help
MR-9600 Microplate Reader User Manual Chapter 5 Operation guide Click “OK” to complete the setting. Section 5 Help This area provides a brief introduction and overview for every function button as (fig 53). Fig 53 Click “Protocol”, “Results”, “Settings” to review a summary of each function. ... -
Page 45: Chapter 6 Maintenance
If used properly, according to this instruction manual, the main electronic and mechanical parts will not need regular maintenance. Light source replacement: Contact Benchmark Scientific for information on ordering a new Halogen Lamp if replacement is required. Replacement steps: (make sure to switch off power, and unplug the instrument before starting) - Page 46 MR-9600 Microplate Reader User Manual Chapter 6 Maintenance Light source connector Light source Light source fixing plate Light source assembly part Fig 54 Fig 55 Adding an optical filter The SmartReader 96 Instrument is equipped with four standard filters inside. If other wavelengths are needed, additional filters can be installed.
- Page 47 MR-9600 Microplate Reader User Manual Chapter 6 Maintenance Filter wheel Screw Light incident direction Fig 56 Fig 57...
- Page 48 MR-9600 Microplate Reader User Manual Chapter 6 Maintenance Note: ⚫ The SmartReader Instrument is equipped with four standard filter inside, please ignore these steps if additional filters are not needed. ⚫ Do not touch the filters with bare hands to avoid fingerprints or smudging which can lead to inaccurate readings.
-
Page 49: Chapter 7 Trouble Shooting
MR-9600 Microplate Reader User Manual Chapter 7 Trouble shooting Chapter 7 Trouble shooting Trouble analysis and trouble shootings Trouble Analysis Trouble shooting Check power supply, Check cable plug status, Instrument will not start Problem with power input Check fuse, Check voltage of outlet Power to lamp failure, Check power before replacement, Lamp will not turn on... -
Page 50: Chapter 8 Accessories
For removing filter wheel Cross screwdriver SATA 62307 fixing plate. Performance test statement Packing List The MR9600 is equipped with four filters: 405nm, 450nm, 492nm, 630nm. Contact Benchmark Scientific or your local distributor for information and pricing on additional filters. - Page 51 Memo...
Need help?
Do you have a question about the Accuris SmartReader 96 and is the answer not in the manual?
Questions and answers