Table of Contents
Advertisement
Quick Links
Advertisement
Table of Contents

Related Manuals for Benchmark Scientific Accuris


Summary of Contents for Benchmark Scientific Accuris
- Page 1 Automatic Cell Counter Instruction manual Accuris Instruments A division of Benchmark Scientific PO Box 709, Edison, NJ 08818 Tel: 908-769-5555 E-mail: info@accuris-usa.com Website www.accuris-usa.com Copyright © 2020, Benchmark Scientific. All rights reserved.
-
Page 3: Package Contents
• Check that all items listed above are included in your package. • Examine the device carefully for any damage during shipping. • Contact your local distributor or info@accuris-usa.com if any items are missing or damaged. • Any loss or damage claims must be filed with the carrier. -
Page 4: Safety Instruction
• Place the device in an area where there is 10 cm clearance from other objects to allow for proper air-cooling. • Do not disassemble the device. If service is needed, contact Accuris Instruments or an authorized distributor. • Use authorized accessories only. -
Page 5: Product Specifications
Product specifications Voltage AC 100~240 V, 50~60 Hz Current Max. 1.0 A, 50 W Objective lens Light source 4 W Green LED 5Mega pixels high resolution Camera monochrome CMOS image sensor Weight 5 Kg QuadCount Size (W × L × H) 163 ×... -
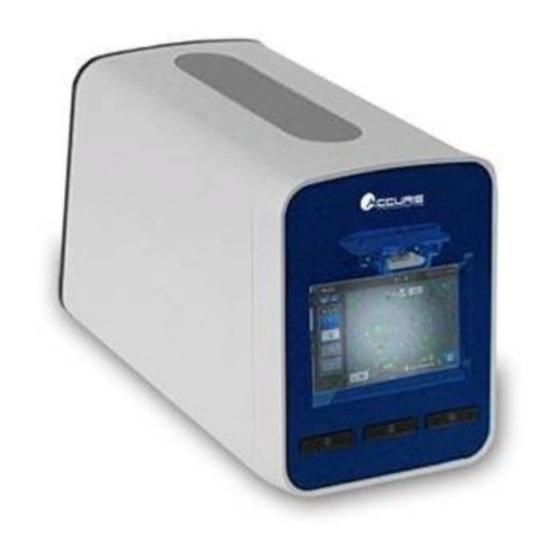
Page 6: Device Overview
Device overview Slide holder door Touch screen LCD display Button 1(Insert/Eject slide holder) Button 2(Home screen) Button 3(Setting screen) Front view • Slide holder door – Slide holder is ejected from / inserted into the device. • Touch LCD display – Preview, automatic cell counting processes and the results are displayed. •... - Page 7 USB Port - Keypad Power Switch - Barcode Scanner - Thermal Printer - USB Memory Power Cable Socket Ethernet Port - PC Interface Rear view • 3 USB ports – Keypad, Barcode scanner, Thermal printer (optional), or USB memory are connected to these ports.
-
Page 8: Table Of Contents
Table of contents Package contents Safety instruction Product specifications Device overview Introduction QuadCount™– Automatic cell counter QuadSlides™ (50 slides for 200 tests per a box, Cat. No. E5750-S1) Getting started Pre-requirements Basic installation Power up and initial display General operation Sample preparation Basic operation Preview prior to counting... - Page 9 C. Creating a Preset D. Editing a Preset Selecting Channels F. Entering a Channel ID The result screen Analyzing by Histogram View results images Printout Cell Count Result using Thermal Printer Exporting the Report to a USB memory stick Exporting Data (all history) to a USB memory stick Showing channel ID names Setting screen Checking Firmware information and Updating Firmware...
-
Page 10: Introduction
Introduction QuadCount™– Automatic Cell Counter The QuadCount™ is a fully automated cell counting system based on a brightfield microscopy technique for mammalian cell counting. The QuadCount™ utilizes a high-powered LED light source, CMOS image detection (5 Mega pixels), precise X-Y-Z stages and on-slide image processing technologies for fast and accurate cell analysis. -
Page 11: Quadslides™ (50 Slides For 200 Tests Per A Box, Cat. No. E5750-S1)
QuadSlides™ Slides (50 slides for 200 tests per a box, Cat. No. E7500-S1) The QuadSlide™ is a disposable plastic hemocytometer that includes 4 sample channels engraved with Neubauer Improved pattern. Each channel has an enclosed structure of 100um depth and a hydrophilic surface. -
Page 12: Getting Started
Getting started Pre-requirements For normal and stable operation of the device, the following environmental conditions should be met. • Room temperature between 20 ~ 35 °C (68 to 95 °F) It is not recommended to operate the device at low temperature condition (below 10 °C) In cold conditions, warm up the device for a minimum of 10 minutes before use. -
Page 13: Basic Installation
Basic installation 1. Unbox the QuadCount™ and place the device on a flat, level and dry surface. 2. Plug accompanying power cable into the power cable socket. 3. Connect any optional peripherals (keypad, barcode scanner, or thermal printer) to the USB port if desired. -
Page 14: Power Up And Initial Display
Power up and initial display 1. Once the main power is switched on, the boot image is displayed on the LCD touch screen. When booting is completed, the initializing process starts internal motorized stages start moving. 2. Initializing progress is displayed while processing. -
Page 15: General Operation
General Operation Sample Preparation Required materials: Cell suspension, 0.4% trypan blue, micro tube 1.5ml, pipette, tips, and QuadSlides™. Preparation should be done in a clean area to avoid dust contamination (dust on the slides or in the samples will greatly reduce counting accuracy). STEP 1. -
Page 16: Basic Operation
Basic Operation STEP 1. Insert a QuadSlide™ loaded with the samples into the slide holder. NOTE: Make sure the arrow on the slide points toward the instrument. STEP 2. Press Start button to start counting procedures. The slide holder will retract automatically, and auto-focusing is performed prior to counting each sample. - Page 17 STEP 3. The counting progress is indicated as shown in following image. For completion of each sample, the count results (unit: x10 /mL) are displayed. Home STEP 4. Once counting is complete, the slide holder is ejected automatically. Remove the QuadSlide™ from the slide holder.
-
Page 18: Preview Prior To Counting
Preview prior to counting On the screen where you can see the cells, tap the screen twice to make the icons disappear. To get icons back again, tap the screen twice. STEP 1. Load a slide and press Review button. STEP 2. - Page 19 STEP 4. See the cell image of the selected channel. STEP 5. Press Mark , and the detection mark is displayed. Live/Dead definition can be modified at this stage. STEP 6. Counting...
-
Page 20: Stopping While Counting
Stopping While Counting STEP 1. To stop the instrument during counting, Press the STOP button. STEP 2. A confirmation message box is displayed as shown the following image. Press the Continue button to confirm stopping. STEP 3. Once stop counting is confirmed, all remaining processes are stopped, and the slide holder is ejected automatically. -
Page 21: Set Counting Option
Set counting options The following operations can be performed from the Home screen. Setting options for counting User : 1/2/3 Auto-saved data and presets can be managed per user. Count mode : Quick/Normal/Precise Total counting area (number of snapshots) is different for each count mode. Quick mode: ≈... -
Page 22: Changing User Group
A. Changing User Group The QuadCount™ provides personalized history of results to user groups (1,2 and 3). The user group is useful to manage user presets and numerous results autosaved after counting. The auto-saved results (review screen) are accessible only to the user group that was active at the time the results were captured. -
Page 23: Setting Count Mode 23
B. Setting the Count mode The QuadCount™ provides three counting modes (Quick/Normal/Precise mode) according to the counting area. The QuadCount™ is designed to capture multiple frames per channel using an XYZ stage. Each single image frame covers a volume of 0.15 µL. The more pictures taken, the higher the accuracy of results. -
Page 24: Creating A Preset
STEP 2. Select the Count mode. NOTE: The setting is applied to all enabled channels. C. Creating a Preset Users can manage User Preset items. (5 User presets are available per User group) The 3 fixed presets cannot be removed or edited. STEP 1. - Page 25 STEP 3. Select one of 3 fixed presets (Universal, Small, Angular), and press the blank text box beside Index. STEP 4. Type the names of Index and Preset ID. primary T primary T...
- Page 26 STEP 5. Adjust the 3 parameters according to requirements. (Gating size, Aggregation level, Live/Dead definition). STEP 6. Ready to count with a customized preset.
-
Page 27: Editing A Preset
D. Editing a Preset STEP 1. To edit your own preset, press Preset button. STEP 2. Select the preset button which you created. STEP 3. Adjust the parameters of your preset. - Page 28 STEP 4. Press the Save button to keep the changed parameters. STEP 5. To delete your own preset, press Delete button. primaryT...
-
Page 29: Selecting Channels
E. Selecting Channels Four channels in the QuadSlide™ can be individually enabled or disabled. STEP 1. Press the Channel numbers to be disabled/enabled. (Disabled: Gray box, Enabled: White box) STEP 2. Press the Start button to count immediately. -
Page 30: Entering A Channel
F. Entering Channel ID Naming/Identifying a channel can be accomplished with the Channel ID option. Select “Channel ID” as shown below and enter the desired channel name. (The name might often be the specific cell type.) The ID can consist of a maximum of 20 alphanumeric characters and some special characters. STEP 1. - Page 31 JurkatT STEP 4. Press Back button. Channel ID JurkatT Hela U937 STEP 5. Ready to count.
- Page 32 To fill in all channel IDs for the same cell type STEP 1. Press All button. Channel ID STEP 2. Enter the desired name (or cell type and press OK button. JurkatT STEP 3. Confirm that the ID has automatically populated for all 4 channels, then press Back button. Channel ID JurkatT_1 JurkatT_2...
- Page 33 Using accessory input devices: barcode scanner, USB keypad or USB keyboard (optional) Keypad and barcode scanner are optional. Contact your local distributor if required. Connect the input device to the USB port on the back side of the device. When properly connected and recognized, an icon appears on the status bar.
- Page 34 STEP 2. Touch the top blank text box and enter 4 channel IDs using the connected keypad or the barcode scanner (refer to the above table). The maximum channel ID length is 20 alphanumeric characters or some special characters. Channel ID STEP 3.
-
Page 35: The Result Screen
The Result screen The following operations are performed on the result screen after counting. After completing the cell counts, histograms of cell size distribution and result images are provided. While viewing histogram, it is possible to modify cell size gating parameters. The QuadCount™ can generate both histograms for individual channels and also a combined histogram of all channels. -
Page 36: Analyzing By Histogram
▪ Press button to see the result images of selected channels. ▪ Return to default : The changed settings return to the default settings. ▪ Create preset : The adjusted settings can be saved as a new preset. ▪ Save in the current preset : The changed settings can be saved in current preset (This is not available in a fixed preset). - Page 37 STEP 3. Move both columns and adjust the cell size gating. 12 - 26 STEP 4. Check the results table of total cells, quantity of live, and viability %.
-
Page 38: View Results Images
B. View Results Images The QuadCount™ provides the results images after counting. One or more images are acquired and analyzed per channel, and the number of images depends on the count mode selected. The “Result image” screen shows the analyzed images with live cells circled in green and dead cells circled in red. STEP 1. - Page 39 STEP 3. Press Data icon. STEP 4. Review the number of Live cells and Viability %.
-
Page 40: Printout Cell Count Result Using Thermal Printer
C. Printout Cell Count Results using a Thermal Printer The QuadCount™ can use a thermal printer to printout the counting result. The Thermal printer is optional. Contact Accuris Instruments or your local distributor for ordering information. Step 1. Connect the thermal printer to the USB port at the back side of the device. -
Page 41: Exporting The Report To A Usb Memory Stick
D. Exporting a Report to a USB memory stick A report of the counting results can be exported as a PDF to a USB memory stick. The PDF report shows general information, the cell image and the histogram of cell size distribution. Please use the USB memory stick included with the QuadCount™... - Page 42 Step 3. Once the progress dialog box disappears and the notification message (“Export success”) is displayed on status bar, you can remove the USB memory stick from USB port. NOTE: If the USB memory stick is removed before the “exporting” message disappears, the results file may be corrupted.
-
Page 43: Exporting Data (All History) To A Usb Memory Stick
E. Exporting Data (all history) to a USB memory stick The results, recorded in a current user group (All history), can be exported to a USB memory stick. Results data are saved automatically in the device memory of activated user group. By using the “Exporting Data”... - Page 44 Step 3. The auto-saved results are displayed for the selected user group. Connect a USB Memory stick to the USB port at the back side of the instrument. Confirm that the icon is present on the status bar, indicating it is recognized. Press Export CSV button.
- Page 45 Step 5. Once the progress dialog box disappears and the notification message “Exported all data” is displayed on status bar, remove the USB memory from USB port. NOTE: If the USB memory stick is removed before the “data is exporting” message disappears, the results file may be corrupted.
-
Page 46: Showing Channel Id Names
F. Showing channel ID names Step 1. To see each of Channel ID names, press Channel ID. To go back to the channel numbers, press Back. -
Page 47: Setting Screen
Setting screen... -
Page 48: Checking Firmware Information And Updating Firmware
A. Checking Firmware information and Updating Firmware Step 1. Press F/W info & Update, and connect a USB memory stick that contains the appropriate firmware update files. Step 2. Choose the firmware category to update (Main or Display). If USB the memory stick is not connected or it does not contain the update program files, a message will be displayed. - Page 49 Step 5. The device will restart automatically with updated firmware version. Confirm that the version(s) have updated properly. Step 6. After about 1 minute and the initialization is complete, switch the power to off and then back on again for stable operation. NOTE: When the following message “Please wait…”...
-
Page 50: Bead Quality Control
B. Bead Quality Control (Refer to the instructions included with the Bead QC kit for additional details.) Step 1 Press the Bead QC button. Step 2 Load a standard slide with the appropriate bead mixtures added to the sample chambers and press the START button. - Page 51 Step 3 Counting Check the image STOP Step 4 Check the resulting data. Check the image Check the image Check the image Check the image Home Step 5 Check the Histogram and Bead image. 12 - 34...
-
Page 52: Setting Date And Time
Step 6 Return to Home screen. C. Setting the Date and Time STEP 1. Press Time button. STEP 2. Adjust date and time accordingly. - Page 53 STEP 3. Press Set button to save the adjusted values. STEP 4. Return to the Home screen.
-
Page 54: Maintenance And Cleaning
Maintenance and Cleaning The QuadCount™ instrument does not require regular maintenance or regular replacement of parts or components. Clean the external surface of the device using a soft cloth. Isopropyl alcohol or deionized water can be used together for cleaning the housing. Do not allow cleaning liquids or solutions to enter the housing. -
Page 55: Trouble Shooting
Mix cell suspension and trypan blue 1:1. Too Bright or dark cell image If the problem is not resolved, contact Accuris or your local distributor. Try again using another slide. The grid pattern or line is visible If the problem occurs frequently, contact your local in the result images. -
Page 56: Examples Of Errors And Inaccurate Results
If trypan blue or media is contaminated or contains any debris which is similar in size and shape to cells, this will causes inaccurate result. Appendix B. Examples of errors and inaccurate results 1. “Too Low” error 2. “Too High” error... - Page 57 3. “Sample error” Cells are severely aggregated The sample loaded into the slide has dried out Contaminated stain solution Cells mixed with contaminated trypan blue (Comparative image) Cells mixed with filtered trypan blue...
-
Page 58: The Contents Of Result Data Exported As A .Csv File
Appendix C. The contents of Results Data exported as a .csv file: History table (Excel data) consists of following items. User Selected user group File created Date and time when file was created Channel No. Channel number Channel ID Channel ID name Date Measurement date Time... -
Page 59: Example And Explanation Of Pdf Report
Appendix D. Example and explanation of PDF report... - Page 60 QuadCount Instruction Manual Website: http://www.accuris-usa.com E-mail: info@accuris-usa.com Accuris Instruments (a division of Benchmark Scientific) PO Box Edison, NJ 08818. PH: 908.769.5555 FAX: 732.313.7007 The information in this manual is described as correctly as possible and is applicable to the latest firmware versions, but it may be changed without prior consent or notification.
Need help?
Do you have a question about the Accuris and is the answer not in the manual?
Questions and answers