Advertisement
Quick Links
ALI-QVR5016H 16-Channel AHD, Analog, HD-TVI, 960H and IP Camera Recorder Quick Setup Guide
This guide provides instructions to initially setup the ALI-QVR5016H digital video recorder (DVR) for AHD, HD-TVI, and 960H analog and
IP cameras. For information about using your QVR and its extensive capabilities, refer to the Alibi Embedded Network Video Recorder
Firmware V3.4.x User Manual provided at www.alibisecurity.com/resources.
For more information, refer to these documents - available from your equipment vendor:
ALIBI™ Tools Utility Installation and User Manual
•
ALIBI™ Witness Smartphone App for Android - Quick Start Guide
•
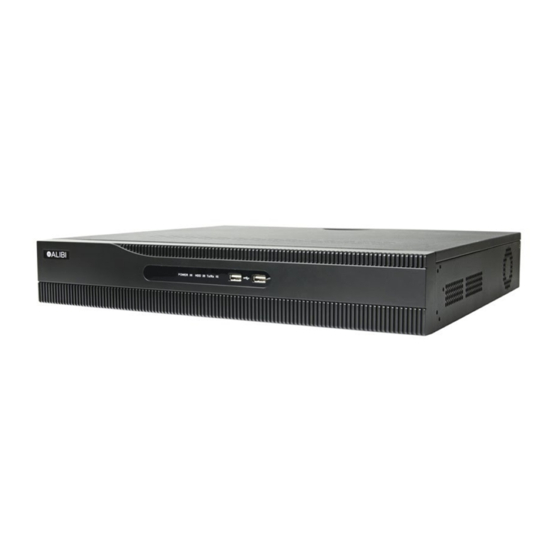
DVR Front Panel
Power LED
ALI-QVR5015H front panel
Item
Usage
Power LED
Indicator turns green when DVR is powered up.
Status
STATUS indicator lights in red when HDD is reading / writing.
TX / RX
LED indicator blinks green when network connection is functioning properly.
USB Interface
This port can be used for a USB mouse or USB flash memory devices.
DVR Back panel
CVBS, VGA Audio Out
CVBS Video Out
Camera Audio In
Audio Line In
Camera video inputs
USB
Video Out - HDMI (2), VGA
Item
Description
eSATA
Connects external SATA HDD, CD/DVD-RW
RS-232 Interface
DB9 (male) connector for RS-232 devices
1
Status
USB Interface
TX / RX
eSATA
RS-485,
Alarms IN/OUT
RS-232
Power connector
LAN (2)
Ground
ON / OFF switch
Item
VIDEO OUT
(CVBS, VGA, HDMI)
LINE IN
RS-485, ALARMS IN/OUT
Power connector
ON / OFF Switch
GROUND
LAN Interface
USB interface
AUDIO OUT
HD-TVI video inputs
RS-485, ALARMS IN/OUT
Item
Fan outlet
RS-485 (T+, T-, R+. R-)
KB
ALARM IN (1 through 16)
ALARM OUT
(1-G through 4-G)
Description
CVBS - BNC connector for video output
VGA - DB15 connector for VGA compatible monitor. See specifications for supported resolutions.
HDMI - Two HDMI connectors for an HDMI compatible monitors. See specifications for supported resolutions.
RCA connector for audio input
See below, next topic
AC 100V ~ 240V power supply.
Switch for powering the device on or off
Terminal for ground. Connect to earth ground before powering on the DVR.
2 x 10/100/1000BASE-T Ethernet network interface
Universal Serial Bus (USB) ports for additional devices such as USB mouse and USB Hard Disk Drive (HDD).
CVBS AUDIO OUT - RCA connector for audio output. This connector is synchronized with CVBS video output
VGA AUDIO OUT - RCA connector for audio output. This connector is synchronized with VGA video output
HD-TVI interface for video input
Description
T+ and T- pins connect to R+ and R- pins of PTZ receiver respectively.
Controller port:
D+, D- pin connects to Ta, Tb pin of controller.
For cascading devices, the first DVR's D+, D- pin should be connected with the D+, D- pin of the next DVR
Alarm inputs 1 - 16. Alarm input is tied to ground through the alarm sensor. See
2
for more information.
Alarm outputs 1 - 4 with ground terminations. See
"Step 3. Connect alarm devices to the DVR" on page 2
"Step 3. Connect alarm devices to the DVR" on page
for more information.
ALI-QVR5016H_SQ
170707
Advertisement

Related Manuals for ALIBI ALI-QVR5016H


Summary of Contents for ALIBI ALI-QVR5016H
- Page 1 ALI-QVR5016H 16-Channel AHD, Analog, HD-TVI, 960H and IP Camera Recorder Quick Setup Guide This guide provides instructions to initially setup the ALI-QVR5016H digital video recorder (DVR) for AHD, HD-TVI, and 960H analog and Item Description IP cameras. For information about using your QVR and its extensive capabilities, refer to the Alibi Embedded Network Video Recorder...
-
Page 2: Installing The System
DVR , and are labeled 1 - G, 2 - G, 3 - G, 4 - G (G = ground termination). Cameras and cables compatible with the DVR. The Video in ports on the back panel support most analog CCTV camera brands and Alibi •... - Page 3 These jumpers shunt pin pairs J1, J2, J3, and J4 for alarm outputs 1, 2, 3, 4 respectively. Use an external relay for safety. By default, the Setup Wizard will open automatically. Refer to the Alibi Embedded Network Video Recorder Firmware V3.4.x User Manual for incomplete instructions for using the Wizard and configuring and using your DVR.
- Page 4 External interface 2 USB 2.0 on the front panel 1 USB 3.0 on the rear panel For additional information about using your system, refer to the ALIBI Embedded Network Video Recorder Firmware V3.4.x User Serial interface 1 RS-232 serial interface 1 RS-485 serial interface, full-duplex 1 RS-485 keyboard interface Manual provided electronically with your system.
Need help?
Do you have a question about the ALI-QVR5016H and is the answer not in the manual?
Questions and answers