Cornelius ED250 Installation Instructions
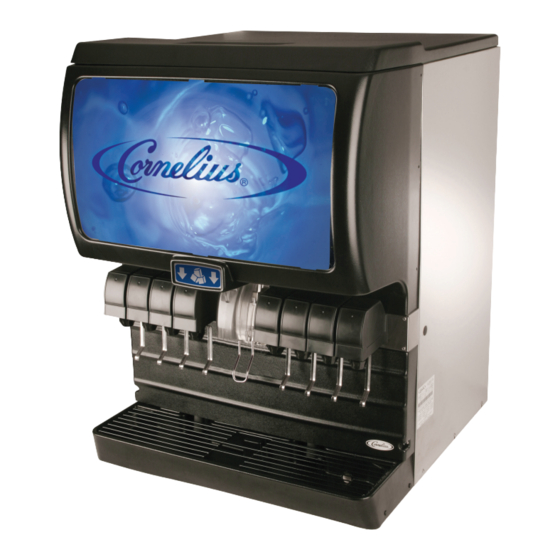
Merchandiser graphic on dispenser with icemaker adaptor
Hide thumbs
Also See for ED250:
- Training manual (48 pages) ,
- Specifications (20 pages) ,
- Installation instructions (2 pages)
Advertisement
Table of Contents
Installation Instructions for Merchandiser Graphic on Dispenser with Icemaker Adaptor
!
WARNING:
Disconnect power to the unit before servicing. Follow all lock out/tag out procedures established by the user. Verify all power is off to the unit before performing
any work.
Failure to comply could result in serious injury, death or damage to the equipment.
ED250 Model:
1. Remove ice maker lid from the top of the dispenser. 2. Lift up on the merchandiser and disengage the
4. Bend the top lip of the merchandiser back slightly to
release the diffuser and graphic.
Release Date: 10/15/2012
©2012, IMI Cornelius Inc.
hooks from the sheet metal cabinet.
5. Replace the graphic in the diffuser.
www.cornelius.com
3. Place the merchandiser face down on a counter.
Loosen the three screws holding the retainer tabs.
6. Insert the diffuser with the graphic by bending the
top lip of the merchandiser to engage the retainer.
Position retainers and tighten the three screws.
Publication Number: 620909201PNB
Revision: A
Advertisement
Table of Contents

Related Manuals for Cornelius ED250


Summary of Contents for Cornelius ED250
- Page 1 6. Insert the diffuser with the graphic by bending the release the diffuser and graphic. top lip of the merchandiser to engage the retainer. Position retainers and tighten the three screws. Release Date: 10/15/2012 Revision: A www.cornelius.com ©2012, IMI Cornelius Inc. Publication Number: 620909201PNB...
- Page 2 Reverse the process by inserting the graphic tabs into the mer- chandiser. NOTE: For IDC255 units, the merchandiser and lid do not need to be removed in order to replace the graphic. www.cornelius.com ©2012, IMI Cornelius Inc. Publication Number: 620909201PNB...
Need help?
Do you have a question about the ED250 and is the answer not in the manual?
Questions and answers