Table of Contents
Advertisement
Quick Links
Advertisement
Table of Contents

Subscribe to Our Youtube Channel
Related Manuals for Rice Lake iDimension 100XL


Summary of Contents for Rice Lake iDimension 100XL
- Page 1 Presented By Dallas Ft Worth Austin Houston NicolScales.com 800.225.8181 Contact Us Nicol Scales & Measurement is an ISO Accredited Calibration Company that has provided calibration, repair and sales of all types of weighing and measurement products since 1931.
- Page 2 100XL Workstation Assembly Guide PN 178199...
- Page 3 All information contained within this publication is, to the best of our knowledge, complete and accurate at the time of publication. Rice Lake Weighing Systems reserves the right to make changes to the technology, features, specifications and design of the equipment without notice.
- Page 4 SAFETY AND REGULATORY INFORMATION CAUTION! Regulatory Information Do not open the scanning head! The warranty and certification is void if this This product is a Class 1 Laser Product according stipulation is ignored. The device may only be to IEC 60825-1:2007 Ed. 2.0 and complies with opened by authorized persons. 21 CFR 1040.1 pursuant to Laser Notice No. 50. A laser source with a diffraction optical element is embedded in the product, which produces a ▲ If you are having problems, contact Postea maximum output power of 1.1 mW at the Customer Support by emailing aperture with a maximum wavelength of 825 support@postea.com. nm. FCC DISPOSAL This equipment has been tested and found to comply → Observe environmental regulations when with the limits for a Class A digital device, pursuant to disposing of QubeVu. part 15 of the FCC Rules. These limits are designed to provide reasonable protection against harmful interference when the equipment is operated in a Copyright Note commercial environment. This equipment generates, Copyright 2016 © Postea, Inc. All rights uses, and can radiate radio frequency energy and, if reserved. not installed and used in accordance with the The information in this document is the property instruction manual, may cause harmful interference to of POSTEA, INC. and should be treated as radio communications. Operation of this equipment in confidential. POSTEA, INC reserves the right to a residential area is likely to cause harmful make changes and improvements to any of the...
-
Page 5: Table Of Contents
Table of Contents 1. Introduction ........................4 2. QubeVu At A Glance ......................5 2.1. Rear Scan Head ........................ 6 2.2. Accessories ........................7 3. Mounting Considerations ....................8 4. Before You Begin ......................9 5. Checklist ........................10 6. Defining QubeVu On Your Network ................11 7. QubeVu Manager ......................12 7.1. Start QubeVu Manager ....................12 7.2. Standard Features of QubeVu Manager ................14 7.2.1 Navigation .......................... 1 4 7.2.2 Status ............................. 1 4 7.2.3 Status Messages ........................ 1 4... -
Page 6: Introduction
Introduction Thank you for purchasing QubeVu DimStation XL. This document describes how to set up QubeVu for the first time. QubeVu is designed to capture dimensions, barcodes and images of items placed under the scanning head. Parcels (boxes), flats, documents and irregular shapes can be supported. QubeVu DimStation XL Quick Start Guide... -
Page 7: Qubevu At A Glance
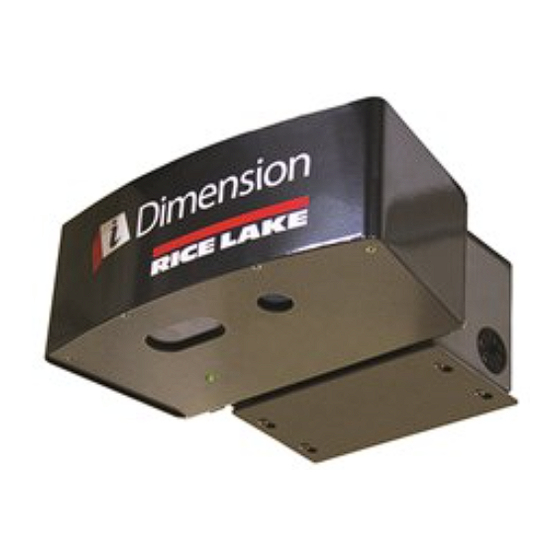
QubeVu At A Glance Scan Head Shroud Power Supply QubeVu DimStation XL Quick Start Guide... -
Page 8: Rear Scan Head
2.1. Rear Scan Head Ethernet Port Power Input • Ethernet port • 3 x USB ports (Labeled USB #1, #2, #3) • 2 x USB powered ports (Labeled Power Only #1, #2) • Power Input QubeVu DimStation XL Quick Start Guide... -
Page 9: Accessories
2.2. Accessories Calibration object Ethernet cable Tools for assembling QubeVu US-power supply and cord. *Note for other countries: Power is 110V/240V but you may need to supply a different cord for your country’s plug requirements. Power supply mounting brackets QubeVu DimStation XL Quick Start Guide... -
Page 10: Mounting Considerations
Mounting Considerations QubeVu DimStation XL is designed to be attached to a variety of mounts, e.g. floor stands, wall mounts, ceiling mounts etc. Regardless of how it is mounted, the following must be considered to ensure best performance. • The scan head must be leveled. • The scan head must be positioned centrally over the measuring platform, from the sensor’s perspective. • The scan head must be mounted at either 1.5 metres or 2 metres above the measuring platform. This distance is measured from the sensor lens glass to the measuring platform. QubeVu DimStation XL Quick Start Guide... -
Page 11: Before You Begin
Before You Begin Before you begin, please make sure that: QubeVu is placed in its final operating position. You have a computer nearby with either a wireless or Ethernet connection, running a browser that supports HTML5 (Internet Explorer 9, Firefox 16, Safari 5) You have the calibration object available. If mounted at a height other than 1.5 meters above the measuring platform, you have accurately measured that distance. QubeVu DimStation XL Quick Start Guide... -
Page 12: Checklist
Checklist Before using QubeVu for the first time, you will need to perform the following tasks: Task Refer to this section Define QubeVu as a network device Section 6 Login to QubeVu Manager Tools Section 7.2 Configure for 2 meter Mount Height Section 8 Network configuration Section 9 Set QubeVu system date and time Section 10 Calibrate the QubeVu cameras Section 11 Define the Work area and Zone of Interest for Section 12 scanning Modify configuration items (as needed) As instruction by Postea Support Test results Section 13 QubeVu DimStation XL Quick Start Guide... -
Page 13: Defining Qubevu On Your Network
Defining QubeVu On Your Network QubeVu is installed as a network device and can be configured with a static IP address or using DHCP. Talk to your network administrator to determine the best approach for your enterprise network. QubeVu is shipped with a dual IP configuration. The network interface will lease an IP address from any available DHCP server, however it also has a fixed, failsafe IP address of 169.254.1.1. If your preference is to use DHCP your network administrator can advise the IP address leased by QubeVu. Configure PC network settings to connect to QubeVu on 169.254.1.1 • Connect QubeVu to a computer using a standard Ethernet cable. • Configure your computer’s Ethernet interface with an IP address of 169.254.1.10 Consult with your network administrator if you are unsure how to change your computer’s IP address. Verify connectivity Before you begin, verify that you can communicate with QubeVu from your computer. • Use the “ping” command to confirm connectivity. • Ping 169.254.1.1 If the ping command does not show QubeVu is responding this may be due to an issue with your network configuration. Make sure that wireless networking is turned off and then try the ping command again. If this is still unsuccessful contact your network administrator for further assistance. -
Page 14: Qubevu Manager
QubeVu Manager You do not need to install anything on your computer – just connect QubeVu to your computer or corporate network using a standard Ethernet cable and the QubeVu Manager Tools will run via any compatible browser. 7.1. Start QubeVu Manager QubeVu has been defined as a network device during the initial installation and setup. Your QubeVu Administrator will have the details of how to connect via an IP address or host name. - Page 15 you do so. Click on the checkmark to continue. The QubeVu Manager main menu. QubeVu DimStation XL Quick Start Guide...
-
Page 16: Standard Features Of Qubevu Manager
7.2. Standard Features of QubeVu Manager 7.2.1 Navigation There is a navigation menu in the upper left section of the page that will help you keep track of your current location and provide links back to each preceding page. For example, in the image below, the user is in the Calibration screen, and can select “Admin Tools” to return to the Admin Tools menu, or “QubeVu Manager” to return to the home page. 7.2.2 Status In the upper right corner of all pages is an area that displays the status of the device you are connected to. • User “admin” is logged in • The device named “QubeVu” is running. • Its IP address is 192.168.2.128 7.2.3 Status Messages Running – This device is running in normal operations mode. -
Page 17: Restart/Reboot Qubevu 1
Configuring – QubeVu is in “configuration” mode. Edits for some settings will require switching to “Configuration mode”. This should happen automatically when the user selects “edit” and will return back to normal operation mode after a “save”. Stopped – QubeVu has stopped running. This status will be displayed during a Restart/Reboot while the system is re-starting. Wait for the status to return to “Running” before continuing. 7.2.4 Restart/Reboot QubeVu When you select the Restart button from any screen in QubeVu Manager, you are given the option to “Restart or Reboot” QubeVu. Restarting will restart the QubeVu Service that is running on the device. Reboot will reboot the full operating system on the device. Rebooting QubeVu can take a few minutes. QubeVu DimStation XL Quick Start Guide... -
Page 18: Edit/Cancel/Save Buttons
7.2.5 Edit/Cancel/Save Buttons For a number of the tools, on the right-hand side of a number of screens are the Edit, Cancel and Save buttons. Edit – When available, this button will switch QubeVu into Configuration mode. (Status will change to “Configuring”). Configuration mode will stay on until you either “Save” or “Reboot”. Be sure to change back to “Running” before exiting from QubeVu Manager. -
Page 19: Login To Qubevu Manager
7.3. Login To QubeVu Manager Go to the QubeVu Manager home page, and select “Admin Tools” to login. Select “Admin Tools” The default username and password is: Username: admin Password: password You will have an opportunity to change this later. The QubeVu Manager Admin Tools main menu. The Setup Menu. QubeVu DimStation XL Quick Start Guide... -
Page 20: Configuring For 2M Mount Height
Configuring For 2 meter mount height For best performance QubeVu DimStation XL can be mounted at either 1.5 meter or 2 meter above the measuring platform. This distance is measured from the sensor lens glass. If your QubeVu DimStation XL is mounted at 1.5 meter please proceed to section 8 Define Network Settings. For other mount heights follow the steps below. Browse to the Setup"Measurement Settings screen. Measure the distance from the sensor lens glass on the underside of the scan head to the measuring platform and enter that number into the Depth camera height (mm) field. Change the value in the Depth max (mm) field to a number greater than the Depth camera height value. Click SAVE. When mounted at 2 meter the correct values are: Depth camera height (mm): 2000 Depth max (mm): 2300 QubeVu DimStation XL Quick Start Guide... -
Page 21: Define Network Settings
Define Network Settings Use the Network Tool to define the network settings for your enterprise network. Select “Network” from the Setup menu There are 2 tabs for 1. Network Settings – define QubeVu as a network device in your enterprise network. 2. Network Security – define the security settings for QubeVu in your enterprise network. 9.1. Network Settings Tab The Configuration Menu, when accessed via the optional touch screen monitor, presents more configuration options than when accessed via the Operator display on a PC. The options presented are to accommodate stand-alone deployments. All options are also available from the Admin Tools menu in QubeVu Manager as described from section 4 in this document. Network Settings tab Network Settings DHCP Verify with your network administrator if QubeVu should be set up on your network using Dynamic Host Configuration Protocol (DHCP). If DHCP is checked on, you must also define a unique hostname for this QubeVu DimStation XL Quick Start Guide... - Page 22 device. You will use this name to access the device from the Manager Tools in the future. A host name can be up to 15 characters. For example, http://<hostname>/ IP Address If DHCP was checked, you will not enter an IP address. If DHCP is not checked, define a unique IP address for each QubeVu that you install. Consult with your network administrator if you need help assigning a new IP address. If you are using fixed IP addresses, you can access QubeVu Manager by either the hostname or the IP address: • http://<hostname>/ • http://<ip address>/ Subnet Mask The default subnet mask is 255.255.255.0. Consult with your network administrator for the correct setting. Gateway The default gateway is 0.0.0.0. Consult with your network administrator for the correct setting. Hardware address Each QubeVu has been assigned a unique hardware address. You should not change this setting. Hostname The default hostname is the alphanumeric part of the device serial number. Up to 15 characters are allowed for the hostname. QubeVu DimStation XL Quick Start Guide...
-
Page 23: Network Security Tab
9.2. Network Security Tab Network Security settings allow you to enable more secure and encrypted communications with QubeVu using the HTTPS protocol. By default, communication with QubeVu is via HTTP. When you click on the Network Security tab, the current settings are displayed. Click on “Enable HTTPS” to enable HTTPS, and enter the file name of your key file, certificate file and the key pass phrase. When you are ready, select Upload to transfer the information from your local machine to QubeVu. Network Security Tab QubeVu DimStation XL Quick Start Guide... -
Page 24: Set The Date, Time & Time Zone
10. Set The Date, Time & Time Zone The Date/Time tab allows you to change QubeVu’s date and time setting. The date and time are used to timestamp configuration changes that affect the Legal for Trade certification. Select “Date/Time” tab from the Setup"General Settings screen. QubeVu’s current date and time are displayed. Click on the Date icon to change the date. QubeVu DimStation XL Quick Start Guide... - Page 25 The calendar and time settings from your local computer are displayed. Click “Now” to select the current date and time. Or, you can enter the hour, minutes and seconds directly. Use the Time Zone field to select your time zone. Click “Done” to apply the settings. QubeVu DimStation XL Quick Start Guide...
-
Page 26: Calibration
11. Calibration Before you begin: # If you are using a scale, place the scale onto the platform, and put the calibration object on top of the scale. # If you are not using a scale, place the calibration object directly onto the platform and skip to section 11.2 11.1. Define The Scale Select Setup from the Admin Tools menu. QubeVu DimStation XL Quick Start Guide... - Page 27 Select General Settings from the Setup menu. Review the descriptions for Scale Type and Scale comm parameters below. Change these field values to match your scale. Click on Save when done. QubeVu will automatically restart to apply the changes. Scale Type Scale type is selectable from a drop-down list. If you do not see your scale listed below, contact Postea Customer Support for assistance. AUTO QubeVu will attempt to identify the scale and, if identified, will use that scale. NONE No scale attached to QubeVu. EXTERNAL No scale attached to QubeVu and the application must trigger the QubeVu either from a barcode scan or using the ScaleService API to notify QubeVu of a change in weight. QubeVu DimStation XL Quick Start Guide...
- Page 28 USBHID A scale which uses the USBHID protocol is connected to QubeVu. METTLERTOLEDO A scale which uses the Mettler Toledo standard protocol is connected to QubeVu. MTSICS A scale which uses the MTSICS (“METTLER TOLEDO Standard Interface Command Set”) protocol is connected to QubeVu. NCI A scale which uses the Weigh-Tronix/NCI protocol is connected to QubeVu. PENNSYLVANIA7300 The Pennsylvania 7300 scale is connected to QubeVu. Scale comm params This field provides an input box into which any required parameters needed to control communication with the scale can be entered. For serial scale connections - namely METTLERTOLEDO, MTSICS, NCI & PENNSYLAVANIA7300, other than the default values (which can be left empty), the following format is expected: For serial scale connections, The following format is expected: METTLERTOLEDO, MTSICS, <BAUD RATE>,<PARITY>,<BITS>,<STOPBITS> NCI & PENNSYLAVANIA7300 E.g. 9600,N,8,1 Valid values: BAUD RATE: 1200, 2400, 4800, 9600, 14400,...
- Page 29 <VENDOR ID>,<PRODUCT ID> E.g.: 0x0EB8,0xF000 QubeVu DimStation XL Quick Start Guide...
-
Page 30: Calibration
11.2. Calibration Select Calibration from the Admin Tools menu. Select Camera Calibration from the Calibration menu. If QubeVu status is not already set to “Configuring”, select Edit to start the calibration process. QubeVu DimStation XL Quick Start Guide... - Page 31 Select the Depth Confidence tab. Hold down the left mouse button and drag the mouse to draw a rectangle around the calibration object. Select the tab for Low Resolution. Hold down the left mouse button and drag the mouse to draw a rectangle around the calibration object Press the Calibrate button QubeVu DimStation XL Quick Start Guide...
- Page 32 Calibration successful. Both tabs must show the green check mark for Calibration to be successful. Review each tab to ensure that the calibration object was successfully captured, and no other object has mistakenly been placed in the view of the cameras. QubeVu DimStation XL Quick Start Guide...
-
Page 33: Define The Zone Of Interest And Other Work Areas
12. Define The Zone Of Interest And Other Work Areas Return to the Admin Tools menu, and select Calibration Select Calibration Settings. Select the Zone of Interest tab. Press the Edit button to switch to Configuration mode. This will take a minute while the device resets QubeVu DimStation XL Quick Start Guide... - Page 34 NOTE that QubeVu Status has now changed to “Configuring”. When you CANCEL or SAVE, QubeVu will be reset back to “Running”. Click blue Zone of Interest button Hold down the left mouse button, and draw a rectangle to define the Zone of Interest The Zone of Interest represents the area to be used for the detection of an item to be dimensioned Click orange Work Area button Hold down the left mouse button, and draw a rectangle around the Work Area QubeVu DimStation XL Quick Start Guide...
- Page 35 The Work Area represents the area around the QubeVu platform within which the QubeVu device will detect the motion of placing an item for dimensioning. Work Area also provides a maximum area for the detection flats When you are ready, click on Save QubeVu will request confirmation of the Save action. Click on OK to save the changes or Cancel to abandon the saving of the changes QubeVu DimStation XL Quick Start Guide...
-
Page 36: Test Your Changes
13. Test Your Changes Use the Demo application to test your changes. Return to QubeVu Manager Main Menu. Select Displays. Select Demo Display. QubeVu DimStation XL Quick Start Guide... - Page 37 Place an item on the QubeVu platform or onto your scale to test that the device is operating correctly. CONGRATULATIONS! QubeVu is now set up and ready to use. QubeVu DimStation XL Quick Start Guide...
- Page 39 Specifications subject to change without notice. Rice Lake Weighing Systems is an ISO 9001 registered company. 230 W. Coleman St. • Rice Lake, WI 54868 • USA U.S. 800-472-6703 • Canada/Mexico 800-321-6703 • International 715-234-9171 • Europe +31 (0)26 472 1319 www.ricelake.com...
Need help?
Do you have a question about the iDimension 100XL and is the answer not in the manual?
Questions and answers