Table of Contents
Advertisement
Quick Links
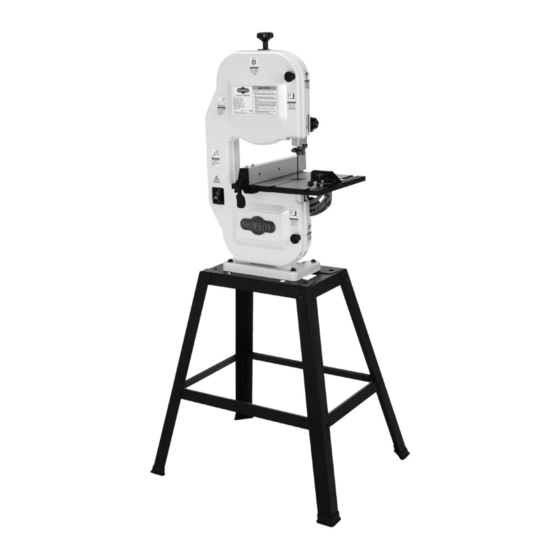
MODEL W1749
9" BANDSAW
Optional
Model W1750
Stand shown
OWNER'S MANUAL
Phone: (360) 734-3482 • Online Technical Support: tech-support@shopfox.biz
COPYRIGHT © MAY, 2006 BY WOODSTOCK INTERNATIONAL, INC.
WARNING: NO PORTION OF THIS MANUAL MAY BE REPRODUCED IN ANY SHAPE OR FORM WITHOUT
THE WRITTEN APPROVAL OF WOODSTOCK INTERNATIONAL, INC.
Printed in China
#8169BL
Advertisement
Table of Contents

Related Manuals for Shop fox W1749


Summary of Contents for Shop fox W1749
- Page 1 MODEL W1749 9" BANDSAW Optional Model W1750 Stand shown OWNER'S MANUAL Phone: (360) 734-3482 • Online Technical Support: tech-support@shopfox.biz COPYRIGHT © MAY, 2006 BY WOODSTOCK INTERNATIONAL, INC. WARNING: NO PORTION OF THIS MANUAL MAY BE REPRODUCED IN ANY SHAPE OR FORM WITHOUT THE WRITTEN APPROVAL OF WOODSTOCK INTERNATIONAL, INC.
- Page 2 ����������������������������������������������������������������������� �������������������������������������������������������������� ���������������������������������������������������������������������� �������������������������������������������������������������������� ������������������������ ����������������������������������������������������������������������� ������������������������������������������������������������������������ ������������������������������������������������������������������� ����������������������������������������������������������������� ���������������������������������������������������������������������� ����������������������������������������������� ���������������������������������������������������������������� �������������������������������������������������������������������� ������� �������������������������������������������������������������������� ����������������������������������������������������������������������� ���������������������������������������������������������������������� ������������������������������������� �� ���������������������������� �� ������������������������������������������������������������������ �� ���������������������������������������������������� ������������������������������������������������������������������ ������������������������������������������������������������������ �������������������������������������������������������������������� ��������������������������������������������������������������������� ��������������������������...
-
Page 3: Table Of Contents
Contents INTRODUCTION ....................3 Woodstock Technical Support ................3 Specifications ....................3 Controls and Features ..................4 SAFETY ......................5 Standard Safety Instructions ................5 Additional Safety Instructions for Bandsaws ............7 Avoiding Potential Injuries ................8 ELECTRICAL ......................9 110V Operation ..................... 9 Extension Cords .................... - Page 4 Lubrication ....................37 SERVICE ......................38 General .....................38 Checking and Tensioning V-Belt ................38 Replacing V-Belt ...................39 Adjusting Wheel Brush ...................39 W1749 Wiring Diagram ..................40 Electrical Components ...................40 Troubleshooting ...................41 PARTS ......................43 Parts List ....................44 Label Placement ..................45 USE THE QUICK GUIDE PAGE LABELS TO SEARCH OUT INFORMATION FAST!
-
Page 5: Introduction
W1749 9" Bandsaw INTRODUCTION Woodstock Technical Support Your new SHOP FOX Bandsaw has been specially designed to provide many years of trouble-free ser- ® vice. Close attention to detail, ruggedly built parts and a rigid quality control program assure safe and reliable operation. -
Page 6: Controls And Features
W1749 9" Bandsaw Controls and Features To familiarize yourself with the controls and features of your bandsaw, use this list and see Figures 1 & 2. Controls A. Elevation Height Knob: Moves the blade guide assembly to the desired height. -
Page 7: Safety
W1749 9" Bandsaw SAFETY READ MANUAL BEFORE OPERATING MACHINE. FAILURE TO FOLLOW INSTRUCTIONS BELOW WILL RESULT IN PERSONAL INJURY. Indicates an imminently hazardous situation which, if not avoided, WILL result in death or serious injury. Indicates a potentially hazardous situation which, if not avoided, COULD result in death or serious injury. - Page 8 W1749 9" Bandsaw 10. NEVER LEAVE WHEN MACHINE IS RUNNING. Turn power off and allow all moving parts to come to a complete stop before leaving machine unattended. 11. DO NOT USE IN DANGEROUS ENVIRONMENTS. DO NOT use machinery in damp, wet locations, or where any flammable or noxious fumes may exist.
-
Page 9: Additional Safety Instructions For Bandsaws
W1749 9" Bandsaw Additional Safety Instructions for Bandsaws READ and understand this USE this and other machinery with caution entire instruction manual and respect. Always consider safety first, before using this machine. as it applies to your individual working Serious personal injury conditions. -
Page 10: Avoiding Potential Injuries
W1749 9" Bandsaw Avoiding Potential Injuries Figure 3. NEVER start motor with wheel covers open. Figure 4. DO NOT place hands in the line of cut. Figure 6. Always keep hands clear of blade. Figure 7. Unplug saw before changing blades. -
Page 11: Electrical
W1749 9" Bandsaw ELECTRICAL 110V Operation The SHOP FOX Model W1749 is wired for 110 volt ® operation. The motor supplied with your new bandsaw is rated at HP and will draw approximately 2.5 amps. A 5-15 plug is included for your machine and is intended to be plugged into a matching 5-15 receptacle. -
Page 12: Set Up
For any missing parts, find the part number in the back SHOP FOX Model W1749 has been carefully pack- ® of this manual and contact Woodstock aged for safe transporting. If you notice the machine has International, Inc. -
Page 13: Inventory
The following is a description of the main components NOTICE SHOP FOX shipped with the Model W1749. Lay the ® components out to inventory them. If ordering replacement parts, refer to the parts list and diagram in the back of Note: Some parts and hardware may already be the manual. -
Page 14: Machine Placement
We recommend mounting the Model W1749 to a work- bench or securing it to a Shop Fox Model W1750 Stand, which is sold separately. To mount the bandsaw to a bench, do these steps: 1. -
Page 15: Trunnion
W1749 9" Bandsaw Trunnion The trunnion supports the table and allows it to tilt 45˚ right. To install the trunnion, do these steps: 1. DISCONNECT BANDSAW FROM POWER! 2. Place the trunnion onto the bandsaw, making sure the slot under the teeth fits over the table adjust- Figure 12. -
Page 16: Table
W1749 9" Bandsaw Table To install the table, do these steps: 1. DISONNECT BANDSAW FROM POWER! 2. Carefully slide the groove in the table past the blade, and align the holes in the table and top of the trunnion. 3. Using a Phillips head screwdriver and 10mm wrench, fasten the table to the trunnion with the ⁄... -
Page 17: Positive Stop
W1749 9" Bandsaw Positive Stop The positive stop allows the table to be quickly and accu- Jam Nut rately returned to the horizontal (0º) position after being adjusted to a different angle. To set the positive stop, do these steps: Positive Stop 1. -
Page 18: Dust Collection
W1749 9" Bandsaw Dust Collection DO NOT operate this bandsaw without an adequate dust collection system. This saw creates substantial amounts of wood dust while operating. Failure to use a dust collection system can result in short and long-term respiratory illness. -
Page 19: Blade Tracking
W1749 9" Bandsaw Blade Tracking Perform this adjustment if the blade tracking does not match the tracking shown Figure 25. In this procedure you will tilt the upper wheel in or out slightly so the blade tracks slightly to the front of the rubber tire center line. -
Page 20: Test Run
W1749 9" Bandsaw Test Run Once the assembly is complete and you have finished the Blade Tracking procedure on Page 17, you need to test run the bandsaw to continue with the remainder of the adjustments. To test run the bandsaw, do these steps: 1. -
Page 21: Tensioning Blade
W1749 9" Bandsaw Tensioning Blade A properly tensioned blade is essential for making accu- rate cuts and is required before making many bandsaw adjustments. (Everytime you replace the blade, you should perform this procedure because all blades tension differently.) To tension the bandsaw blade, do these steps: 1. -
Page 22: Adjusting Blade Guides
W1749 9" Bandsaw Adjusting Blade Guides The blade guides provide side-to-side support to help Guide keep the blade straight while cutting. Blocks Always adjust the upper and lower blade guide blocks away from the blade before removing, installing or track- ing a new blade. -
Page 23: Adjusting Support Bearings
W1749 9" Bandsaw Adjusting Support Bearings NOTICE Whenever changing a blade or adjusting tension and tracking, the upper and lower support bearings and guide blocks must be properly adjusted before operation. The support bearings are positioned behind the blade for support during cutting operations. -
Page 24: Aligning Table
W1749 9" Bandsaw Aligning Table To ensure cutting accuracy when the table is first installed, the table should be aligned so that the miter slot is parallel to the bandsaw blade. To align the table so the miter slot is parallel to the... -
Page 25: Aligning Fence
W1749 9" Bandsaw Aligning Fence The fence is designed to be lifted off the table quickly and repositioned with accuracy on either side of the blade. The fence is most often used between the blade UNPLUG the bandsaw, and the bandsaw body. -
Page 26: Miter Gauge
W1749 9" Bandsaw Miter Gauge The miter gauge needs to be calibrated to the blade when it is first mounted in the miter slot. To calibrate the miter gauge, do these steps: 1. DISCONNECT BANDSAW FROM POWER! 2. Place one edge of a machinist's square against the face of the miter gauge and the other against the blade face as shown in Figure 37. -
Page 27: Operations
W1749 9" Bandsaw OPERATIONS General The Model W1749 will perform many types of operations that are beyond the scope of this manual. Many of these operations can be dangerous or deadly if performed incorrectly. The instructions in this section are written with the understanding that the operator has the necessary knowl- edge and skills to operate this bandsaw. -
Page 28: On/Off Switch
W1749 9" Bandsaw Basic Cutting Tips Here are some basic tips to follow when operating the bandsaw: • Replace, sharpen, and clean blades as necessary and make adjustments periodically to keep the saw always running in top condition. Safety •... -
Page 29: Blade Lead
W1749 9" Bandsaw Blade Lead Bandsaw blades commonly wander off of the cut line when sawing, as shown in Figure 41. This is called blade lead. Blade lead is commonly caused by too fast of a feed rate, a dull or abused blade, or improper tension. If your blade is sharp/undamaged and you still have blade lead, perform the following instructions. -
Page 30: Ripping
W1749 9" Bandsaw Table Tilt The bandsaw table will tilt 45˚ to the right to provide a range of cutting options. To tilt the table, do these steps: 1. DISCONNECT BANDSAW FROM POWER! Table 2. Loosen the table tilt lock knob and the table adjust- Adj. -
Page 31: Crosscutting
W1749 9" Bandsaw Crosscutting Crosscutting is the process of cutting across the grain of wood. For plywood and other processed wood, crosscut- ting simply means cutting across the width of the mate- rial. To make a 90˚ crosscut, do these steps: 1. - Page 32 W1749 9" Bandsaw To resaw a workpiece, do these steps: 1. Verify that the bandsaw is setup properly and that the fence is parallel to the blade. 2. Adjust the upper blade guide so it is just above the workpiece with a minimum amount of blade exposed.
-
Page 33: Cutting Curves
W1749 9" Bandsaw Cutting Curves NOTICE When cutting curves, simultaneously feed and turn the stock carefully so that the blade follows the layout line The list below displays blade widths and without twisting. If a curve is so abrupt that it is neces-... -
Page 34: Blade Information
� � � � � � � � � unique to the brand of your bandsaw and the distance between wheels. The Model W1749 is designed for blades � � � � �� � � that are 59 ⁄ " long. - Page 35 W1749 9" Bandsaw Tooth Style When selecting blades, another option to consider is the Raker Hook shape, gullet size, teeth set and teeth angle—otherwise known as “Tooth Style." Figure 49 shows the three main categories of tooth style: Raker: This style is considered to be the standard •...
- Page 36 W1749 9" Bandsaw Blade Breakage Many conditions may cause a bandsaw blade to break. Blade breakage is unavoidable, in some cases, since it is the natural result of the peculiar stresses that bandsaw blades are subjected to. Blade breakage is also due to avoidable circumstances.
- Page 37 W1749 9" Bandsaw Blade Changes NOTICE DO NOT over-tension the blade, or UNPLUG the bandsaw power leave the blade tensioned when not in cord and wait until all working use. If you ignore this notice, you will parts have come to a complete shorten the life of the blade.
- Page 38 W1749 9" Bandsaw To replace a blade, do these steps: 1. Slide the blade through the table slot, ensuring that the teeth are pointing forward and down (Figure 51) toward the table. Note: If the teeth will not point downward in any orientation, the blade is inside-out.
-
Page 39: Maintenance
General SHOP FOX Regular periodic maintenance on your ® Model W1749 will ensure its optimum performance. Make a habit of inspecting your machine each time you use it. Check for the following conditions and repair or replace when necessary: •... -
Page 40: Service
W1749 9" Bandsaw SERVICE General This section covers the most common service adjustments or procedures that may need to be made during the life of your machine. If you require additional machine service not included in this section, please contact Woodstock International Technical Support at (360) 734-3482 or send e-mail to: tech-support@shopfox.biz. -
Page 41: Replacing V-Belt
W1749 9" Bandsaw 4. Push the center of the V-belt. If deflection is Wheel approximately ⁄ ", then tension is correct. If the V-belt Pulley ", repeat Steps 2–3 until deflection is more than ⁄ correct. Replacing V-Belt To replace the V-belt, do these steps:... -
Page 42: W1749 Wiring Diagram
W1749 9" Bandsaw W1749 Wiring Diagram Electrical Components ��������� ����� �� ����� �� ����� �� ��� �� ���� Capacitor �� �� �� ��������� �� ������ ������� �� ������ �������������������� Switch Power � � Cord �� �� �� �� Figure 56. W1749 switch wiring. -
Page 43: Troubleshooting
W1749 9" Bandsaw Troubleshooting This section covers the most common problems and corrections with this type of machine. WARNING! DO NOT make any adjustments until power is disconnected and moving parts have come to a complete stop! TROUBLESHOOTING PROBLEM POSSIBLE CAUSE CORRECTIVE ACTION Motor will not start. - Page 44 W1749 9" Bandsaw Cutting Operations PROBLEM POSSIBLE CAUSE CORRECTIVE ACTION Machine slows when oper- 1. Feeding workpiece too fast. 1. Reduce feed rate. See Basic Cutting Tips on Page ating. 2. Replace blade (Page 36). 2. Blade is dull. Ticking sound when the 1.
-
Page 45: Parts
W1749 9" Bandsaw PARTS -43-... -
Page 46: Parts List
W1749 9" Bandsaw Parts List REF PART # DESCRIPTION REF PART # DESCRIPTION X1749001 MAIN BODY XPK23M KEY 5 X 5 X 25 X1749002 BASE XPSS03 SET SCREW 1/4-20 X 3/8 XPW02 FLAT WASHER 3/8 X1749054 BLADE GUIDE SUPPT. BRACKET GUARD... -
Page 47: Label Placement
BLADE CUT DIRECTION LABEL XLABEL-03S KEEP DOOR CLOSED LABEL (SMALL) X1749108 SHOP FOX LOGO PLATE XLABEL-04 ELECTRICITY LABEL XLABEL-18S UNEXPECTED STARTUP HAZARD LABEL (SMALL) X1749111 MODEL NUMBER LABEL XLABEL-08S READ MANUAL LABEL (SMALL) XPAINTSF701 PAINT FOR SHOP FOX MACHINES -45-... - Page 48 Warranty SHOP FOX Woodstock International, Inc. warrants all machinery to be free of defects from work- ® manship and materials for a period of two years from the date of original purchase by the original owner. This warranty does not apply to defects due directly or indirectly to misuse, abuse, negligence or accidents, lack of maintenance, or reimbursement of third party expenses incurred.
- Page 49 2. How long have you been a woodworker/metalworker? _____ 0-2 Years _____ 2-8 Years ____ 8-20 Years _____ 20+ Years 3. How many of your machines or tools are Shop Fox ® _____ 0-2 _____ 3-5 ____ 6-9 _____ 10+ 4.
- Page 50 FOLD ALONG DOTTED LINE Place Stamp Here WOODSTOCK INTERNATIONAL INC. P.O. BOX 2309 BELLINGHAM, WA 98227-2309 FOLD ALONG DOTTED LINE TAPE ALONG EDGES--PLEASE DO NOT STAPLE...
Need help?
Do you have a question about the W1749 and is the answer not in the manual?
Questions and answers