Table of Contents
Advertisement
Quick Links
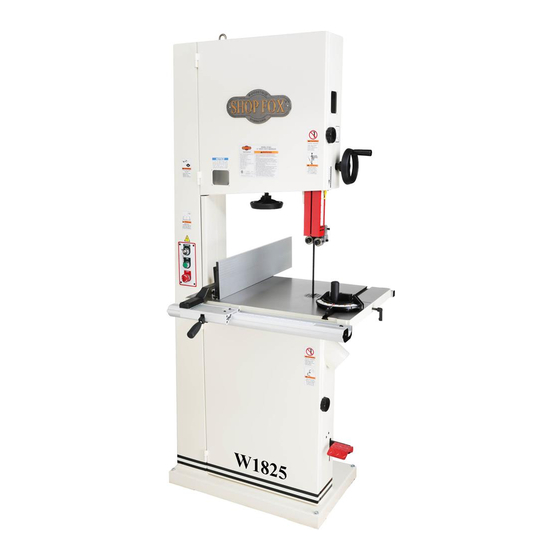
MODEL W1825
19" HEAVY DUTY
BANDSAW
OWNER'S MANUAL
(FOR MODELS MANUFACTURED SINCE 07/15)
Phone: (360) 734-3482 • Online Technical Support: tech-support@shopfox.biz
COPYRIGHT © JUNE, 2012 BY WOODSTOCK INTERNATIONAL, INC. REVISED NOVEMBER, 2017 (AB)
WARNING: NO PORTION OF THIS MANUAL MAY BE REPRODUCED IN ANY SHAPE OR FORM WITHOUT
THE WRITTEN APPROVAL OF WOODSTOCK INTERNATIONAL, INC.
V2.11.17
#14950KN Printed in Taiwan
Advertisement
Table of Contents

Related Manuals for Shop fox W1825


Summary of Contents for Shop fox W1825
- Page 1 MODEL W1825 19" HEAVY DUTY BANDSAW OWNER'S MANUAL (FOR MODELS MANUFACTURED SINCE 07/15) Phone: (360) 734-3482 • Online Technical Support: tech-support@shopfox.biz COPYRIGHT © JUNE, 2012 BY WOODSTOCK INTERNATIONAL, INC. REVISED NOVEMBER, 2017 (AB) WARNING: NO PORTION OF THIS MANUAL MAY BE REPRODUCED IN ANY SHAPE OR FORM WITHOUT THE WRITTEN APPROVAL OF WOODSTOCK INTERNATIONAL, INC. V2.11.17 #14950KN Printed in Taiwan...
- Page 2 This manual provides critical safety instructions on the proper setup, operation, maintenance, and service of this machine/tool. Save this document, refer to it often, and use it to instruct other operators. Failure to read, understand and follow the instructions in this manual may result in fire or serious personal injury—including amputation, electrocution, or death.
- Page 3 General .......... 32 PARTS..........64 Disabling Switch ........ 32 W1825 Main ........64 Basic Controls ........33 W1825 Table and Fence ....... 67 Operation Overview ......34 W1825 Guides ........69 Basic Cutting Tips ......34 Label Placement ....... 70 Workpiece Inspection ......
-
Page 4: Introduction
Model W1825 (For Machines Mfd. Since 07/15) INTRODUCTION Woodstock.Technical.Support This machine has been specially designed to provide many years of trouble-free service. Close attention to detail, ruggedly built parts and a rigid quality control program assure safe and reliable operation. -
Page 5: Machine Specifications
Number of Speeds..................... 1 Power Transfer ..................Belt Drive Bearings............. Shielded and Permanently Lubricated Main Specifications Operation Bandsaw Size....................19 in. Blade Speeds.................. 1700, 3500 FPM Table Tilt................Left 5, Right 45 deg. Model W1825 Machine Specifications, Page 1 of 3... - Page 6 ISO 9001 Factory ....................Yes Country Of Origin ..................... Taiwan Warranty ....................... 2 Years Serial Number Location ............ID Label on Upper Wheel Cover Customer Assembly & Setup Time ................1 Hour Model W1825 Machine Specifications, Page 2 of 3...
-
Page 7: Controls And Features
Model W1825 (For Machines Mfd. Since 07/15) Controls.and.Features Hinged Wheel Cover Blade Tracking Window Tension Indicator Window Guide Post Handwheel Cutting Height Scale Blade Tension Handwheel Guide Post Key Switch, Start and Stop Miter Gauge Buttons Dust Port 4" Fence Locking Lever... -
Page 8: Safety
Model W1825 (For Machines Mfd. Since 07/15) SAFETY For.Your.Own.Safety, Read.Manual.Before.Operating.Machine The. purpose. of. safety. symbols. is. to. attract. your. attention. to. possible. hazardous. conditions.. This. manual.uses.a.series.of.symbols.and.signal.words.intended.to.convey.the.level.of.importance.of.the. safety.messages..The.progression.of.symbols.is.described.below..Remember.that.safety.messages.by. themselves. do. not. eliminate. danger. and. are. not. a. substitute. for. proper. accident. prevention. mea- sures—this.responsibility.is.ultimately.up.to.the.operator! - Page 9 Model W1825 (For Machines Mfd. Since 07/15) WEARING.PROPER.APPAREL..Do not wear FORCING.MACHINERY..Do not force machine. It clothing, apparel, or jewelry that can become will do the job safer and better at the rate for entangled in moving parts. Always tie back which it was designed.
-
Page 10: Additional Safety For Bandsaws
Model W1825 (For Machines Mfd. Since 07/15) Additional.Safety.for.Bandsaws CUTTING.TECHNIQUES. Plan your operation so BLADE.CONDITION. Do not operate with dull, the blade always cuts to the outside of the cracked or badly worn blade. Dull blades workpiece. DO NOT back the workpiece away... -
Page 11: Electrical
Model W1825 (For Machines Mfd. Since 07/15) ELECTRICAL Circuit.Requirements This machine must be connected to the correct size and type of power supply circuit, or fire or electrical damage may occur. Read through this section to determine if an The. machine. must. be. properly. set. up. -
Page 12: Grounding Requirements
Model W1825 (For Machines Mfd. Since 07/15) Grounding.Requirements This machine MUST be grounded. In the event of certain types of malfunctions or breakdowns, grounding provides a path of least resistance for electric current to travel—in The. machine. must. be. properly. set. up. -
Page 13: Setup
Keep. machine. disconnected. from. Shop Fox dealer immediately. power.until.instructed.otherwise. Inventory The following is a description of the main components shipped with the Model W1825. Lay the components out to inventory them. Crate.Contents.(Figure.3):. A. Miter Gauge ..........1 B. Table ............1 C. -
Page 14: Cleaning Machine
Model W1825 (For Machines Mfd. Since 07/15) Cleaning.Machine To prevent corrosion during shipment and storage of your machine, the factory has coated the bare metal surfaces of your machine with a heavy-duty rust prevention compound. Gasoline.and.petroleum. products.have.low.flash. If you are unprepared or impatient, this compound can points.and.can.explode. - Page 15 Model W1825 (For Machines Mfd. Since 07/15) Weight.Load Physical.Environment Refer to the Machine.Specifications for the The physical environment where your machine is weight of your machine. Make sure that the operated is important for safe operation and the surface upon which the machine is placed will longevity of its components.
-
Page 16: Lifting & Moving
Model W1825 (For Machines Mfd. Since 07/15) Lifting.&.Moving Take special care when moving this bandsaw. Leave it This. is. a. heavy. machine.. Serious. per- attached to the pallet until it is in or close to its final sonal. injury. may. occur. if. safe. moving. -
Page 17: Mounting To Shop Floor
Model W1825 (For Machines Mfd. Since 07/15) Mounting.to.Shop.Floor Although not required, we recommend that you mount your new machine to the floor. Because this is an optional step and floor materials may vary, floor mounting hardware is not included. Generally, you can either bolt Anchor Stud your machine to the floor or mount it on machine mounts. -
Page 18: Assembly
Model W1825 (For Machines Mfd. Since 07/15) Assembly To assemble the bandsaw, do these steps: 1. Loosen the blade tension by rotating the quick release tension lever clockwise, as shown in Figure.9. Loosen Tighten 2. Open the upper and lower covers and remove the blade. - Page 19 Model W1825 (For Machines Mfd. Since 07/15) 9. Attach the sliding plate to the underside of the table, with the channel positioned to the right, using Table (2) M6-1 x 12 cap screws, 6mm lock washers, and 6mm flat washers, as shown in Figures.13–14.
- Page 20 Model W1825 (For Machines Mfd. Since 07/15) 16. Attach the rear fence rail to the table with the (2) Rear View M6-1 x 16 cap screws, as shown in Figure.17. 17. Attach the front rail with the (2) M6-1 x 20 hex bolts, 6mm lock washers, and 6mm flat washers, (see Figure.17).
- Page 21 Model W1825 (For Machines Mfd. Since 07/15) 20. Place an 8mm flat washer on the lock handle, 20 Place an 8mm flat washer on the lock handle, slide it through the hole in the fence, then thread Resaw Fence slide it through the hole in the fence, then thread...
-
Page 22: Blade Tracking
(see Figure.23). Figure 23. Center tracking profiles. The wheels on the W1825 were aligned at the factory, so center tracking is the only adjustment that needs to be performed when the saw is new. This adjustment is... - Page 23 Model W1825 (For Machines Mfd. Since 07/15) 4. Spin the upper wheel by hand at least three times and watch how the blade rides on the crown of the wheel. Refer to Figure 23 for an illustration of this concept.
-
Page 24: Connecting Power
Model W1825 (For Machines Mfd. Since 07/15) Dust.Collection Recommended.CFM.at.each.Dust.Port:..400.CFM Do not confuse this CFM recommendation with the rating of the dust collector. To determine the CFM at the dust port, you must take into account many variables, including the CFM rating of the dust collector, the length... -
Page 25: Test Run
Model W1825 (For Machines Mfd. Since 07/15) Test.Run Once assembly is complete, the next step is to test run your machine to make sure it runs properly and is ready Always. disconnect. the. bandsaw. from. for regular operation. power. b efore. i nvestigating. or. a ttempting. -
Page 26: Tensioning Blade
Model W1825 (For Machines Mfd. Since 07/15) Tensioning.Blade A properly tensioned blade is essential for making Improper blade tension is unsafe, accurate cuts, maximizing the life of the blade, and produces inaccurate and inconsistent making other bandsaw adjustments. However, it will not... - Page 27 Model W1825 (For Machines Mfd. Since 07/15) The.Deflection.Method The deflection method is more subjective than the flut- With extended use, the blade tensioning ter method. Each blade will deflect differently and every system may need to be reset. Refer to user will determine what "moderate pressure"...
-
Page 28: Adjusting Blade Guide Bearings
Model W1825 (For Machines Mfd. Since 07/15) Adjusting.Blade.Guide. Bearings The blade guides provide side-to-side support to keep the blade straight while cutting. The blade guides are Guide Block adjustable in two ways—forward/backward and side- Assembly Cap to-side. Make sure the blade is tracking properly and... -
Page 29: Adjusting Support Bearings
Model W1825 (For Machines Mfd. Since 07/15) NOTICE Whenever.changing.a.blade.or.adjusting.tension. Lower and.tracking,.the.upper.and.lower.blade.support. Guide Bearing bearings.and.guide.bearings.must.be.properly. adjusted.and.locked.before.cutting.operations.. To.adjust.the.lower.blade.guides,.do.these.steps: 1. DISCONNECT BANDSAW FROM POWER! 2. Familiarize yourself with the lower blade guide Guide Block controls shown in Figures.33. Assembly Cap Screw Figure 33. Lower blade guide controls. - Page 30 Model W1825 (For Machines Mfd. Since 07/15) 3. Loosen the guide block assembly cap screws and Bandsaw rotate the blade guide assembly side-to-side, until Blade the blade is perpendicular with the face of the Support support bearing, as illustrated in Figure 36.
-
Page 31: Aligning Table
Model W1825 (For Machines Mfd. Since 07/15) Aligning.Table To ensure cutting accuracy, the table should be aligned so that the miter slot is parallel with the bandsaw blade. This procedure works best with the widest blade possible installed. Make sure the blade is properly tensioned before aligning the table. -
Page 32: Aligning Fence
Model W1825 (For Machines Mfd. Since 07/15) Aligning.Fence To ensure cutting accuracy when the fence is first installed, the fence should be aligned with the miter slot. To.align.the.fence.parallel.with.the.miter.slot,.do.these. steps: 1.. DISCONNECT BANDSAW FROM POWER! 2. Make sure the miter slot is aligned with the bandsaw blade (see Page.29). -
Page 33: Positive Stop
Model W1825 (For Machines Mfd. Since 07/15) Positive.Stop To.calibrate.the.positive.stop,.do.these.steps: 1.. DISCONNECT BANDSAW FROM POWER! 2. Adjust the blade tension until the mark on the blade Positive tension scale is between 4 and 6. Stop Bolt 3. Loosen the table lock lever and the hex nut that Table locks the positive stop bolt in place (see Figure.44). -
Page 34: Operations
Model W1825 (For Machines Mfd. Since 07/15) OPERATIONS General This machine will perform many types of operations that are beyond the scope of this manual. Many of these operations can be dangerous or deadly if performed incorrectly. The instructions in this section are written with the understanding that the operator has the necessary knowledge and skills to operate this machine. -
Page 35: Basic Controls
Model W1825 (For Machines Mfd. Since 07/15) Basic.Controls A. Blade.Tension.Scale: Allows for easy monitoring of blade tension. B. Blade.Tension.Handwheel: Tensions blade in gradual increments. C. Blade.Tracking.Window: Allows for easy monitoring of blade tracking (refer to Page.20). D. Fence,.Rails,.and.Miter.Gauge: Allows for controlled cutting at various angles. -
Page 36: Operation Overview
Model W1825 (For Machines Mfd. Since 07/15) Operation.Overview Basic.Cutting.Tips The purpose of this overview is to provide the novice Here.are.some.basic.tips.to.follow.when. machine operator with a basic understanding of how operating.the.bandsaw: the machine is used during operation, so the machine controls/components discussed later in this manual are •... -
Page 37: Workpiece Inspection
Model W1825 (For Machines Mfd. Since 07/15) Workpiece.Inspection Some wood workpieces are not safe to cut or may require modification before they are safe to cut. Before.cutting,.get.in.the.habit.of.inspecting.all. workpieces.for.the.following: •. Foreign.Objects.(see Figure.49):.Nails, staples, dirt, rocks and other foreign objects are often embedded in wood. -
Page 38: Table Tilt
Model W1825 (For Machines Mfd. Since 07/15) Table.Tilt To.tilt.the.table,.do.these.steps: 1.. DISCONNECT BANDSAW FROM POWER! 2. Loosen the table tilt lock lever shown in Figure.51. 3. To tilt the table to the right, turn the table tilt Table Tilt handwheel clockwise (see Figure.51). -
Page 39: Blade Length
Model W1825 (For Machines Mfd. Since 07/15) Blade.Selection Selecting the right blade for the cutting task requires knowledge about blade characteristics and cutting priorities (i.e. speed, finish, etc.). Blade.Terminology A. Kerf: The amount of material removed by the blade during cutting. -
Page 40: Blade Material
Model W1825 (For Machines Mfd. Since 07/15) Blade Material Bandsaw blades must meet two requirements: flexibility and hardness. The flexibility of a blade allows it to travel on the wheel as a band, while hardness allows the teeth to cut and hold an edge. Modern materials technology has allowed bandsaw blades to meet these requirements in various ways. -
Page 41: Tooth Pitch
Model W1825 (For Machines Mfd. Since 07/15) Blade.Selection.Chart Blade Width Cutting Operation Narrow (1/8"–1/4") Medium (3/16"–1/2") Wide (1/2"–3/4") Resawing Ripping Thin Stock Ripping Thick Stock Ripping Round Stock Crosscutting Thin Stock Crosscutting Thick Stock Crosscutting Round Stock Mitre Cut Tenons... -
Page 42: Blade Care
Model W1825 (For Machines Mfd. Since 07/15) Blade.Breakage Blade.Care.&. Break-In Many conditions may cause a bandsaw blade to break. Blade breakage is unavoidable, in some cases, since it is Blade Care the natural result of the peculiar stresses that bandsaw blades must endure. -
Page 43: Changing Blades
Model W1825 (For Machines Mfd. Since 07/15) Changing.Blades Removing.Blade 1. DISCONNECT BANDSAW FROM POWER! 2. Release the blade tension by moving the quick- release lever to the left. 3. Remove the table insert and table pin. 4.. Adjust the upper and lower guide bearings as far away as possible from the blade. -
Page 44: Blade Speed
Model W1825 (For Machines Mfd. Since 07/15) Blade.Speed The blade speed can be adjusted to 1700 or 3500 FPM. Speed adjustments are made by changing the V-belt position on the motor and wheel pulleys. Most woodcutting can be performed successfully at the higher blade speed. -
Page 45: Crosscutting
Model W1825 (For Machines Mfd. Since 07/15) Crosscutting Crosscutting is the process of cutting across the grain NEVER place fingers or hands in the of wood. For plywood and other processed wood, line of cut. In the event that something... -
Page 46: Resawing
Model W1825 (For Machines Mfd. Since 07/15) Resawing Resawing (Figure 65) is cutting a board into two or more Keep.your.hands.clear.of.the.blade. thinner boards. The maximum board width that can be When.resawing.thin.pieces.the.blade resawn is limited by the maximum cutting height of the may.tear.through.the.surface.of.the... -
Page 47: Maintenance
Model W1825 (For Machines Mfd. Since 07/15) MAINTENANCE General For optimum performance from your machine, follow this maintenance schedule: Daily • Check/correct loose mounting bolts. • Check/correct damaged saw blade. • Check/correct worn or damaged wires. • Correct any other unsafe condition. -
Page 48: Lubrication
Model W1825 (For Machines Mfd. Since 07/15) Lubrication Since all bearings are sealed and permanently lubricated, simply leave them alone until they need to be replaced. Do not lubricate them. This machine does need lubrication in other places. Do not over-lubricate. Too much lubrication will attract dirt and sawdust. - Page 49 Model W1825 (For Machines Mfd. Since 07/15) Table Tilt Rack and Pinion Assembly Lubricant Frequency Quantity Multi-Purpose As Needed Thin Coat GL2 Grease 1.. DISCONNECT BANDSAW FROM POWER! 2. With the table perpendicular to the blade, and using a rag and mineral spirits, wipe off all existing grease and sawdust buildup from the rack.
-
Page 50: Service
Model W1825 (For Machines Mfd. Since 07/15) SERVICE General This section covers the most common service adjustments or procedures that may need to be made during the life of your machine. If you require additional machine service not included in this section, please contact Woodstock International Technical Support at (360) 734-3482 or send e-mail to: tech-support@shopfox.biz. - Page 51 Model W1825 (For Machines Mfd. Since 07/15) Tensioning.V-Belt 1. Follow Steps.1-2 in Checking.and.Tensioning. V-Belts on Page.48. 2. Loosen the motor pivot and adjustment cap screws shown in Figure.72. 3. Adjust the belt tension: Pivot Cap Screw — If the belt is too loose, pivot the motor down.
-
Page 52: Adjusting Tension Lever
Model W1825 (For Machines Mfd. Since 07/15) Adjusting.Tension.Lever The quick-release tension lever is setup for use with the pre-installed 143" blade. However, replacement blades Tension may vary slightly in actual length even if they are sold Adjustment as 143". If you install a different blade, you may need to... -
Page 53: Adjusting Guide Post Travel
Model W1825 (For Machines Mfd. Since 07/15) Adjusting.Guide.Post. Travel The guide post assembly should remain parallel with the Blade blade front-to-back and side-to-side along its length of travel. If it does not, follow these instructions to correctly adjust it. Tools Needed: Machinist's Square ..........1... - Page 54 Model W1825 (For Machines Mfd. Since 07/15) Checking/Adjusting. Guide. Post. Parallel. with. Blade.Front-to-Back Distance "A" 1. DISCONNECT BANDSAW FROM POWER! 2. Loosen the guide post lock knob, lower the blade guide assembly to within 1" of the table top, then tighten the lock knob.
-
Page 55: Replacing Brake Shoe
Model W1825 (For Machines Mfd. Since 07/15) Replacing.Brake.Shoe The brake shoe should be replaced when it takes noticeably longer to stop the blade when the foot brake is pushed or if the foot brake makes metal-to-metal grinding sounds. Contact Woodstock International Technical Support at (360) 734-3482 to order the replacement brake shoe. -
Page 56: Aligning Wheels
Model W1825 (For Machines Mfd. Since 07/15) Aligning.Wheels Components.and.Hardware.Needed:. 3½" Wood 2x4 60" Long..........1 Tools.Needed: Wrench 13mm ...........1 Hex Wrench 4mm ..........1 Hex Wrench 6mm ..........1 19" Tape Measure ............1 Coplanarity Gauge (see Figure.83) ......1 Straightedge .............1 Fine Ruler ............1 Wheel alignment is one of the most critical factors for optimal performance from your bandsaw. - Page 57 Model W1825 (For Machines Mfd. Since 07/15) —.If the wheels are coplanar (Figure.85, A), the straightedge will evenly touch the top and bottom of both wheels. —.If the wheels are not coplanar (Figure.85, B), Not Parallel Coplanar place the straightedge on the lower wheel first...
- Page 58 Model W1825 (For Machines Mfd. Since 07/15) Adjusting.Lower.Wheel Only do this procedure if you cannot make the wheels coplanar with the tracking knob or by shimming the Top Tilt upper wheel. Make sure the upper wheel is adjusted as Set Screw...
-
Page 59: Calibrating Fence Pointer
Model W1825 (For Machines Mfd. Since 07/15) Calibrating.Fence.Pointer This bandsaw is equipped with a fence measurement system that includes a fence pointer, which must be calibrated to ensure the fence scale is accurate. To.calibrate.the.pointer,.do.these.steps: 1.. Make sure the fence is installed on the left-hand side of the blade. -
Page 60: Correcting Blade Lead
Model W1825 (For Machines Mfd. Since 07/15) Correcting.Blade.Lead The bandsaw blade may wander off the cut line when sawing, as shown in Figure 91. This is called blade lead. Blade lead is commonly caused by too fast of a feed rate, a dull or abused blade, or improper tension. -
Page 61: Troubleshooting
Model W1825 (For Machines Mfd. Since 07/15) Troubleshooting This section covers the most common problems and corrections with this type of machine. WARNING!.DO.NOT.make.any.adjustments.until.power.is.disconnected.and. moving.parts.have.come.to.a.complete.stop! PROBLEM POSSIBLE.CAUSE CORRECTIVE.ACTION Motor will not start. 1. Stop button engaged. 1. Reset Stop button. 2. Low voltage. - Page 62 Model W1825 (For Machines Mfd. Since 07/15) PROBLEM POSSIBLE.CAUSE CORRECTIVE.ACTION Miter bar binds in 1. Miter slot dirty or gummed up. 1. Carefully clean miter slot. miter slot. Table does not tilt 1. Pointer or scale calibrated incorrectly. 1. Calibrate pointer/scale at true 90 degrees (Page to 90 degrees.
- Page 63 Model W1825 (For Machines Mfd. Since 07/15) PROBLEM POSSIBLE.CAUSE CORRECTIVE.ACTION Sawdust buildup 1. Clogged dust port. 1. Clean out dust port. inside cabinet. 2. Low CFM (airflow) from dust collection 2. Repair duct for leaks or clogs, move dust collector system.
-
Page 64: Electrical Safety Instructions
Model W1825 (For Machines Mfd. Since 07/15) Electrical.Safety.Instructions These pages are current at the time of printing. However, in the spirit of improvement, we may make changes to the electrical systems of future machines. Study this diagram carefully. If you notice differences between your machine and these wiring diagrams, call Woodstock International Technical Support at (360) 734-3482. -
Page 65: Wiring Diagram
Model W1825 (For Machines Mfd. Since 07/15) Wiring.Diagram Ground 220V 6-15 Plug (As Recommended) Control Panel Magnetic Switch Assembly (Viewed from Behind) Power Switch L1/1 L2/3 L3/5 NO13 Contactor SDE MA-18 NC15 NC16 Foot Brake T1/2 T2/4 T3/6 NO14 Switch... -
Page 66: Parts
Model W1825 (For Machines Mfd. Since 07/15) PARTS W1825.Main -64-... - Page 67 Model W1825 (For Machines Mfg. Since 07/15) PART # DESCRIPTION PART # DESCRIPTION XPSS01M SET SCREW M6-1 X 10 XPCAP06M CAP SCREW M6-1 X 25 XPFS07M FLANGE SCREW M5-.8 X 10 X1825060 STAR HANDLE X1825003 BUSHING XPLN03M LOCK NUT M6-1 X1825004 LIFTING EYE BOLT M10-1.5...
- Page 68 Model W1825 (For Machines Mfd. Since 07/15) PART # DESCRIPTION PART # DESCRIPTION X1825100 BUSHING XPLW04M LOCK WASHER 8MM XPCAP31M CAP SCREW M8-1.25 X 25 XPCAP02M CAP SCREW M6-1 X 20 XPCAP06M CAP SCREW M6-1 X 25 X1825161 MAG SWITCH ASSY 3HP 1-PH 220V...
-
Page 69: W1825 Table And Fence
Model W1825 (For Machines Mfg. Since 07/15) W1825.Table.and.Fence 125-20 125-30 125-28 125-24 125-18 125-14 125-19 125-16 125-11 125-4 125-12 125-2 125-27 125-13 125-23 125-22 125-15 125-25 125-9 125-26 125-10 125-5 125-7 125-3 125-8 125-21 125-6 125-1 125-29 125-17 125-20 6-28... - Page 70 Model W1825 (For Machines Mfd. Since 07/15) PART # DESCRIPTION PART # DESCRIPTION X1825006 TRUNNION ASSEMBLY 51-15 XPFH31M FLAT HD SCR M4-.7 X 8 XPW01M FLAT WASHER 8MM 51-16 X1825051-16 RACK XPLN04M LOCK NUT M8-1.25 51-17 X1825051-17 PINION GEAR 15T XPCB10M CARRIAGE BOLT M8-1.25 X 85...
-
Page 71: W1825 Guides
Model W1825 (For Machines Mfg. Since 07/15) W1825.Guides 9-18 9-19 9-11 9-10 9-19 9-12 9-13 9-14 9-15 9-17 9-16 153-5 152-3 152-11 152-2 153-6 152-8 152-1 152-7 153-7 152-4 153-10 153-8 152-5 152-6 153-11 153-9 152-9 152-8 152-10 PART #... -
Page 72: Label Placement
Model W1825 (For Machines Mfd. Since 07/15) Label.Placement PART # DESCRIPTION PART # DESCRIPTION X1825201 MODEL NUMBER LABEL XPPAINT-1 TOUCH-UP PAINT, SHOP FOX WHITE X1825202 SHOP FOX NAMEPLATE LARGE X1825211 TABLE LOCK LABEL XLABEL-57A GLASSES/RESPIRATOR LABEL X1825212 WOODSTOCK STRIPE LABEL... - Page 73 Model W1825 (For Machines Mfd. Since 07/15)
- Page 74 Fold along dotted lIne place stamp Here Woodstock international inc. p.o. box 2309 bellingham, Wa 98227-2309 Fold along dotted lIne tape along edges--please do not staple...
-
Page 75: Warranty
Woodstock International, Inc. will repair, replace, or arrange for a dealer refund at its expense and at its option, the Shop Fox machine or machine part, which in proper and intended use has proven to be defective, provided that the original owner returns the product prepaid to an authorized warranty or repair facility as designated by our Bellingham, Washington office with proof of their purchase of the product within two years, and provides Woodstock International, Inc.
Need help?
Do you have a question about the W1825 and is the answer not in the manual?
Questions and answers