Table of Contents
Advertisement
Quick Links
MODEL W1878
9" BENCHTOP BANDSAW
OWNER'S MANUAL
(FOR MODELS MANUFACTURED SINCE 4/21)
Phone: (360) 734-3482 • Online Technical Support: techsupport@woodstockint.com
COPYRIGHT © MAY, 2021 BY WOODSTOCK INTERNATIONAL, INC.
WARNING: NO PORTION OF THIS MANUAL MAY BE REPRODUCED IN ANY SHAPE OR FORM WITHOUT
THE WRITTEN APPROVAL OF WOODSTOCK INTERNATIONAL, INC.
#21815MN Printed in China
Advertisement
Table of Contents

Subscribe to Our Youtube Channel
Related Manuals for Shop fox W1878


Summary of Contents for Shop fox W1878
- Page 1 MODEL W1878 9" BENCHTOP BANDSAW OWNER'S MANUAL (FOR MODELS MANUFACTURED SINCE 4/21) Phone: (360) 734-3482 • Online Technical Support: techsupport@woodstockint.com COPYRIGHT © MAY, 2021 BY WOODSTOCK INTERNATIONAL, INC. WARNING: NO PORTION OF THIS MANUAL MAY BE REPRODUCED IN ANY SHAPE OR FORM WITHOUT THE WRITTEN APPROVAL OF WOODSTOCK INTERNATIONAL, INC. #21815MN Printed in China...
- Page 2 This manual provides critical safety instructions on the proper setup, operation, maintenance, and service of this machine/tool. Save this document, refer to it often, and use it to instruct other operators. Failure to read, understand and follow the instructions in this manual may result in fire or serious personal injury—including amputation, electrocution, or death.
-
Page 3: Table Of Contents
Contents INTRODUCTION........2 ACCESSORIES........39 Woodstock Technical Support ....2 Bandsaw Accessories ......39 Machine Specifications ......3 MAINTENANCE........41 Identification ........5 General .......... 41 Controls & Components ......6 Cleaning & Lubricating ......41 SAFETY..........8 Redressing Rubber Tires ....... 41 Standard Machinery Safety Instructions .. -
Page 4: Introduction
Model W1878 (For Machines Mfd. Since 4/21) INTRODUCTION Woodstock.Technical.Support This machine has been specially designed to provide many years of trouble-free service. Close attention to detail, ruggedly built parts and a rigid quality control program assure safe and reliable operation. -
Page 5: Machine Specifications
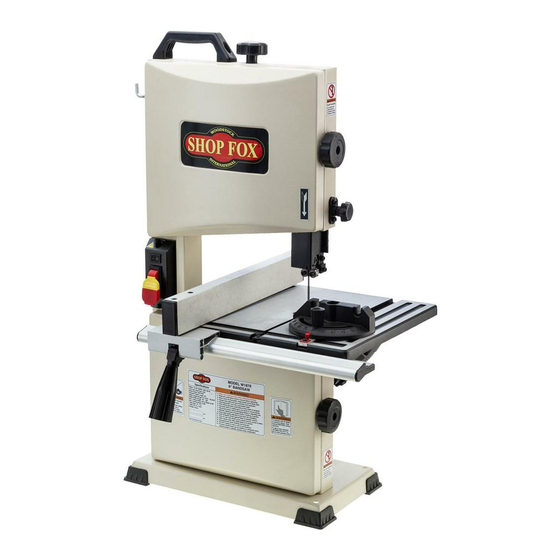
Bandsaw Size....................9 in. Max Cutting Width (Left of Blade)..............8‐7/8 in. Max Cutting Width (Left of Blade) w/Fence............5 in. Max Cutting Height (Resaw Height)............... 3‐5/8 in. Blade Speeds..................2460 FPM Model W1878 Machine Specifications, Page 1 of 3... - Page 6 Extruded Aluminum Rip Fence with Camlock Handle 2" Dust Port Lower Wheel Brush to Prevent Build‐Up of Dust/Pitch on Wheel LED Work Light Made in an ISO 9001 Factory Carrying Handle for Easy Portability Model W1878 Machine Specifications, Page 2 of 3...
-
Page 7: Identification
Model W1878 (For Machines Mfd. Since 4/21) Identification Identification Become familiar with the names and locations of the controls and features shown below to better understand the instructions in this manual. Worklamp Blade Tension Upper Wheel Cover Switch Knob Storage Clip... -
Page 8: Controls & Components
Model W1878 (For Machines Mfd. Since 4/21) Controls.&.Components Refer to Figures.1–4 and the following descriptions to become familiar with the basic controls and components of this machine. Understanding these items and how they work will help you understand the rest of the manual and stay safe when operating this machine. - Page 9 Model W1878 (For Machines Mfd. Since 4/21) J.. Blade.Tension.Adjustment.Knob:.Rotate to adjust blade tension (refer to Page.24 for more information). K.. Tracking.Knob:.Rotate to adjust blade tracking (refer to Page.19 for more information). Figure.3. Blade tension and tracking controls. L.. Trunnion.w/Table.Tilt.Scale:.Functions as a tilting base for table.
-
Page 10: Safety
Model W1878 (For Machines Mfd. Since 4/21) SAFETY SAFETY For.Your.Own.Safety, Read.Manual.Before.Operating.Machine The. purpose. of. safety. symbols. is. to. attract. your. attention. to. possible. hazardous. conditions.. This. manual.uses.a.series.of.symbols.and.signal.words.intended.to.convey.the.level.of.importance.of.the. safety.messages..The.progression.of.symbols.is.described.below..Remember.that.safety.messages.by. themselves. do. not. eliminate. danger. and. are. not. a. substitute. for. proper. accident. prevention. mea- sures—this.responsibility.is.ultimately.up.to.the.operator! - Page 11 Model W1878 (For Machines Mfd. Since 4/21) WEARING.PROPER.APPAREL..Do not wear FORCING.MACHINERY..Do not force machine. It clothing, apparel, or jewelry that can become will do the job safer and better at the rate for entangled in moving parts. Always tie back which it was designed.
-
Page 12: Additional Safety For Bandsaws
Model W1878 (For Machines Mfd. Since 4/21) Additional.Safety.for.Bandsaws Serious. cuts,. amputation,. or. death. can. occur. from. contact. with. the. moving. saw. blade. during. operation.or.if.blade.breakage.occurs..To.reduce.this.risk,.anyone.operating.this.machine.MUST. completely.heed.the.hazards.and.warnings.below. HAND.PLACEMENT..Placing hands or fingers in GUARDS/COVERS. Blade guards and covers pro- line with blade during operation may result in tect operator from the moving bandsaw blade. -
Page 13: Electrical
Model W1878 (For Machines Mfd. Since 4/21) ELECTRICAL Circuit.Requirements This machine must be connected to the correct size and type of power supply circuit, or fire or electrical damage may occur. Read through this section to determine if an The machine must be properly set up adequate power supply circuit is available. -
Page 14: Grounding Requirements
Model W1878 (For Machines Mfd. Since 4/21) Grounding.Requirements This machine MUST be grounded. In the event of certain types of malfunctions or breakdowns, grounding provides GROUNDED 120V 5-15 RECEPTACLE a path of least resistance for electric current to travel—in order to reduce the risk of electric shock. -
Page 15: Setup
Model W1878 (For Machines Mfd. Since 4/21) SETUP Unpacking This machine has been carefully packaged for safe This machine presents transportation. If you notice the machine has been serious injury hazards damaged during shipping, please contact your authorized to untrained users. Read Shop Fox dealer immediately. -
Page 16: Hardware Recognition Chart
Model W1878 (For Machines Mfd. Since 4/21) Hardware.Recognition.Chart USE THIS CHART TO IDENTIFY HARDWARE DURING THE INVENTORY/ASSEMBLY ⁄ " ⁄ " ⁄ " PROCESS. ⁄ " ⁄ " ⁄ " ⁄ " ⁄ " ⁄ " ⁄ " ⁄ "... -
Page 17: Machine Placement
Model W1878 (For Machines Mfd. Since 4/21) Machine.Placement Bench.Mounting Workbench.Load Number.of.Mounting.Holes......4 Diameter.of.Mounting.Hardware.Needed..⁄ " Refer to the Machine.Specifications for the weight and footprint specifications of your The base of this machine has mounting holes machine. Some workbenches may require... -
Page 18: Assembly
Model W1878 (For Machines Mfd. Since 4/21) Assembly Before beginning the assembly process, refer to Items. Adjustment Lock Needed.for.Setup and gather everything you need. Knob Lever Ensure all parts have been properly cleaned of any heavy-duty rust-preventative applied at the factory (if applicable). - Page 19 Model W1878 (For Machines Mfd. Since 4/21) 6. Use lock lever to secure table perpendicular to blade, then aim indicator to "0" on table tilt scale and tighten screw (see Figure.13). Lock Lever Indicator Aimed Table Tilt At "0" When Table...
- Page 20 Model W1878 (For Machines Mfd. Since 4/21) 9. Insert "D" nut into slot shown in Figure.16. "D" Nut Slot 10. Thread M6-1 x 24 fence rail knob up through middle notch of fence rail, into "D" nut (see Figure.16), and tighten.
-
Page 21: Adjustment Overview
Wheel Bandsaw wheels are either flat or crowned and both shapes track differently. The W1878 has crowned wheels. As the wheels spin, a properly tracking blade naturally tracks at the center of the wheel (see Figure.19). - Page 22 (refer to Wheel.Alignment on Page.44.for detailed instructions). The wheels on the W1878 were aligned at the factory, so center tracking is the only adjustment that needs to be performed when the saw is new. This adjustment is necessary before turning the saw on or performing other adjustments.
- Page 23 Model W1878 (For Machines Mfd. Since 4/21) To.adjust.blade.tracking,.do.these.steps: 1. DISCONNECT MACHINE FROM POWER! 2. Adjust upper and lower blade guides away from blade and raise upper guides all the way up (refer to.Adjusting.Blade.Guide.Bearings on Page.27 for detailed instructions). Note: When adjusting the blade tracking for the...
-
Page 24: Dust Collection
Model W1878 (For Machines Mfd. Since 4/21) Dust.Collection Recommended.CFM.at.Dust.Port:....100.CFM Do not confuse this CFM recommendation with the rating of the dust collector. To determine the CFM at the dust port, you must consider these variables: (1) CFM rating of... -
Page 25: Test Run
Model W1878 (For Machines Mfd. Since 4/21) Test.Run Once assembly is complete, test run the machine to ensure it is properly connected to power and safety components are functioning properly. Serious. injury. or. death. can. result. from. using. this. machine. BEFORE. -
Page 26: Tensioning Blade
Model W1878 (For Machines Mfd. Since 4/21) Tensioning.Blade The.Flutter.Method Using the flutter method, you intentionally A properly tensioned blade is essential for loosen the blade until it just passes the point of making accurate cuts, maximizing the blade being too loose (when it begins to flutter). Then life, and making other bandsaw adjustments. - Page 27 Model W1878 (For Machines Mfd. Since 4/21) The.Deflection.Method 4.. Using moderate pressure, push center of blade sideways. The deflection method is much more subjective than the flutter method. Each blade will deflect — If blade deflects approximately ⁄ ", it is differently and every user will determine what properly tensioned.
-
Page 28: Adjusting Blade Support Bearings
Model W1878 (For Machines Mfd. Since 4/21) Adjusting.Blade.Support. Bearings The support bearings are positioned behind the blade Support Bearing near the blade guides and prevent the blade from pushing backward during cutting operations. Proper adjustment of the support bearings helps you make accurate cuts and prevents the blade teeth from coming in contact with the blade guides while cutting. -
Page 29: Adjusting Blade Guide Bearings
Model W1878 (For Machines Mfd. Since 4/21) Adjusting.Blade.Guide. Bearings Properly adjusting the blade guides provides side-to-side Guide Bearing Guide Block support to help keep the blade straight while cutting. Adjustment Cap Screw Cap Screws There are blade guide bearings on the upper and lower blade guide assemblies. -
Page 30: Calibrating Miter Slot With Blade
Model W1878 (For Machines Mfd. Since 4/21) 3. Loosen both guide bearing adjustment cap screws (see Figure.27), then position guide bearings so they evenly and lightly touch sides of blade (see Figure. 30) without deflecting it one way or the other. -
Page 31: Calibrating Fence With Miter Slot
Model W1878 (For Machines Mfd. Since 4/21) 4. Use fine ruler to measure distance between straightedge and miter slot at front and back of table (see Figure.31.on.Page.28). — If the distances are the same, no further adjustments are required. — If the distances are different, continue with Step.6. -
Page 32: Operations
Model W1878 (For Machines Mfd. Since 4/21) OPERATIONS General This machine will perform many types of operations that are beyond the scope of this manual. Many of these operations can be dangerous or deadly if performed incorrectly. The instructions in this section are written with the understanding that the operator has the necessary knowledge and skills to operate this machine. -
Page 33: Workpiece Inspection
Model W1878 (For Machines Mfd. Since 4/21) Workpiece.Inspection A properly adjusted bandsaw can be safer to operate than most other saws and performs many types of cuts with ease and accuracy. It Some workpieces are not safe to cut or may is capable of performing the following types of require modification before they are safe to cut. -
Page 34: Disabling Switch
Model W1878 (For Machines Mfd. Since 4/21) Disabling.Switch Children or untrained people can be killed or seriously injured by this machine. This risk increases with unsupervised operation. To help prevent unsupervised operation, disable and lock the switch before leaving machine unattended! Place key in a well-hidden or secure location. -
Page 35: Tilting Table
Model W1878 (For Machines Mfd. Since 4/21) Tilting.Table Lock The table can be tilted to make angled or beveled cuts. Lever A simple tilt scale is provided on the trunnion for a quick gauge (see Figure.36). For more accurate results use a protractor. - Page 36 Model W1878 (For Machines Mfd. Since 4/21) Tooth.Style Figure.38 illustrates the three main blade tooth styles: Raker: Considered to be the standard because the • tooth size and shape are the same as the tooth Raker Skip Hook gullet. The teeth on raker blades usually are very numerous, have no angle, and produce cuts by scraping the material.
-
Page 37: Changing Blade
Model W1878 (For Machines Mfd. Since 4/21) Changing.Blade Blade changes entail removing the existing blade, installing the new blade, then properly adjusting the blade tension, tracking, and guides. Disconnect.bandsaw.from. power. BEFORE. changing. To.change.blade,.do.these.steps: blade.. Serious. personal. injury. could. occur. if. -
Page 38: Ripping
Model W1878 (For Machines Mfd. Since 4/21) Ripping "Ripping" means cutting with the grain of the wood stock. For plywood and other processed wood, ripping simply means cutting down the length of the workpiece. Beveled ALWAYS.use.a.push.stick.when.ripping. rip cuts may be performed by tilting the table. -
Page 39: Crosscutting
Model W1878 (For Machines Mfd. Since 4/21) Crosscutting Crosscutting is the process of cutting across the grain of wood. For plywood and other processed wood, crosscutting simply means cutting across the width of the material. Crosscuts can be 90° or angled using the miter gauge. -
Page 40: Cutting Curves
Model W1878 (For Machines Mfd. Since 4/21) Cutting.Curves When cutting curves, simultaneously feed and turn the stock carefully so the blade follows the layout line without twisting. If curves are sharp or tight, use a narrower blade with more TPI (teeth per inch) and make The.list.below.displays.blade.widths. -
Page 41: Accessories
Model W1878 (For Machines Mfd. Since 4/21) ACCESSORIES Bandsaw.Accessories The following bandsaw accessories may be available through your local Woodstock International Inc. Dealer. If you do not have a dealer in your area, these products are also available through online dealers. - Page 42 Model W1878 (For Machines Mfd. Since 4/21) 62".Replacement.Blades Model Width Type Gauge D4949 ⁄ " Claw 0.025 D4950 ⁄ " Claw 0.025 D4951 ⁄ " Raker 0.025 D4952 ⁄ " Raker 0.025 D4953 ⁄ " Raker 0.025 D4954 ⁄ "...
-
Page 43: Maintenance
Clean/vacuum dust buildup inside cabinet and off motor. Cleaning.&.Lubricating Cleaning the Model W1878 is relatively easy. Vacuum excess wood chips and sawdust, and wipe off the remaining dust with a dry cloth. If any resin has built up, use a resin dissolving cleaner to remove it. -
Page 44: Service
Model W1878 (For Machines Mfd. Since 4/21) SERVICE General This section covers the most common service adjustments or procedures that may need to be made during the life of your machine. If you require additional machine service not included in this section, please contact Woodstock International Technical Support at (360) 734-3482 or send e-mail to: techsupport@woodstockint.com. -
Page 45: Replacing Belt
Model W1878 (For Machines Mfd. Since 4/21) Tensioning.Belt Tool.Needed. Hex Wrench 6mm ..........1 To.properly.tension.belt,.do.these.steps: 1. DISCONNECT MACHINE FROM POWER! Motor Mount Cap Screws 2. Loosen motor mount cap screws shown in Figure.45. 3. Push motor to the right (as viewed from back of machine) until you feel moderate tension, then re-tighten both cap screws. -
Page 46: Wheel Alignment
Model W1878 (For Machines Mfd. Since 4/21) Wheel.Alignment Wheel alignment is important for optimal performance from your bandsaw. Wheels are properly aligned when they are parallel with each other and in the same plane or “coplanar” (see the illustration in the figure to the right). - Page 47 Model W1878 (For Machines Mfd. Since 4/21) 3. With blade on and properly tensioned, hold a straightedge close to center of both wheels. Make sure straightedge fully extends across the rims of both wheels, as shown in Figure.48. 4.. Check wheel alignment, and adjust tracking knob to bring both wheels into alignment as much as possible.
- Page 48 Model W1878 (For Machines Mfd. Since 4/21) Adjusting.Lower.Wheel.Shaft.Position If the lower wheel is tilted laterally (side to side), perform the following procedure to make it coplanar with the upper wheel. There are four adjustment bolts with hex nuts in the lower wheel bracket, shown in Figure.50, that adjust the...
-
Page 49: Blade Lead
Model W1878 (For Machines Mfd. Since 4/21) Blade.Lead Bandsaw blades may wander off the cut line when sawing, as shown in Figure.53. This is called blade lead. Blade lead is usually caused by too fast of a feed rate, a dull or abused blade, or improper blade tension. -
Page 50: Troubleshooting
Model W1878 (For Machines Mfd. Since 4/21) Troubleshooting The following troubleshooting tables cover common problems that may occur with this machine. If you need replacement parts or additional troubleshooting help, contact our Technical Support. Note: Before contacting Tech Support, find the machine serial number and manufacture date, and if available, your original purchase receipt. - Page 51 Model W1878 (For Machines Mfd. Since 4/21) Operations PROBLEM POSSIBLE.CAUSE CORRECTIVE.ACTION Blade or teeth 1. Blade tension incorrect. 1. Adjust blade tension (Page.24). break/crack. 2. Blade incorrect for application. 2. Use correct blade for application. 3. Excessive feed rate/pressure. 3. Reduce feed rate/pressure.
- Page 52 Model W1878 (For Machines Mfd. Since 4/21) Operations.(Cont.) PROBLEM POSSIBLE.CAUSE CORRECTIVE.ACTION Cut is crooked or 1. Feeding pressure too high or cutting too fast. 1. Adjust feed rate and cutting speed as required. blade wanders (blade lead). 2. Blade tension too loose.
-
Page 53: Electrical Safety Instructions
Model W1878 (For Machines Mfd. Since 4/21) Electrical.Safety.Instructions These pages are current at the time of printing. However, in the spirit of improvement, we may make changes to the electrical systems of future machines. Compare the manufacture date of your machine to the one stated in this manual, and study this section carefully. -
Page 54: Wiring Diagram
Model W1878 (For Machines Mfd. Since 4/21) Wiring.Diagram Wiring Bandsaw Body Work Lamp Lamp Switch DKLD AN18 6(6)A AC127V ON/OFF Switch LED- LED Driver DKLD AN17 LED-5V700 Read 125V 20A Hopestar Page 51 120V ~ 5.5W STOP E337681 Before Wiring... -
Page 55: Parts
Model W1878 (For Machines Mfd. Since 4/21) PARTS Main 16 15 58 57 122-1 122-5 122-2 122-6 122-7 122-3 122-8 122-4 -53-... - Page 56 Model W1878 (For Machines Mfd. Since 4/21) Main.Parts.List REF PART # DESCRIPTION REF PART # DESCRIPTION X1878001 KNOB M8-1.25 X 25, DIA 50, 5-LOBE X1878051 LOCK NUT M6-1 X1878002 FLAT WASHER 8MM X1878052 DOOR LOCK CAM KNOB X1878003 COMPRESSION SPRING 2.5 X 14 X 64 X1878053 CAP SCREW M6-1 X 16 X1878004 CARRIAGE BOLT M8-1.25 X 80...
- Page 57 Model W1878 (For Machines Mfd. Since 4/21) Main.Parts.List.(Cont.) PART # DESCRIPTION REF PART # DESCRIPTION X1878101 FLAT WASHER 4MM 124 X1878124 MOTOR PULLEY X1878102 LED DRIVER HOPESTAR LED-5V700 120V 5.5W 125 X1878125 FLAT WASHER 5MM X1878103 CAP SCREW M4-.7 X 12 126 X1878126 CAP SCREW M5-.8 X 12...
-
Page 58: Labels & Cosmetics
Model W1878 (For Machines Mfd. Since 4/21) Labels.&.Cosmetics W1878 WARNING ACCIDENTAL INJURY HAZARD! Disconnect power supply before adjustments, setup or maintenance! WARNING INJURY HAZARD Keep door closed while blade is in motion. Disconnect power before opening door. WARNING! EYE/LUNG INJURY... -
Page 59: Warranty
Woodstock International, Inc. will repair, replace, or arrange for a dealer refund, at its expense and option, the Shop Fox machine or machine part proven to be defective for its designed and intended use, provided that the original owner returns the product prepaid to an authorized warranty or repair facility as designated by our Bellingham, Washington office with proof of their purchase of the product within two years, and provides Woodstock International, Inc.
Need help?
Do you have a question about the W1878 and is the answer not in the manual?
Questions and answers