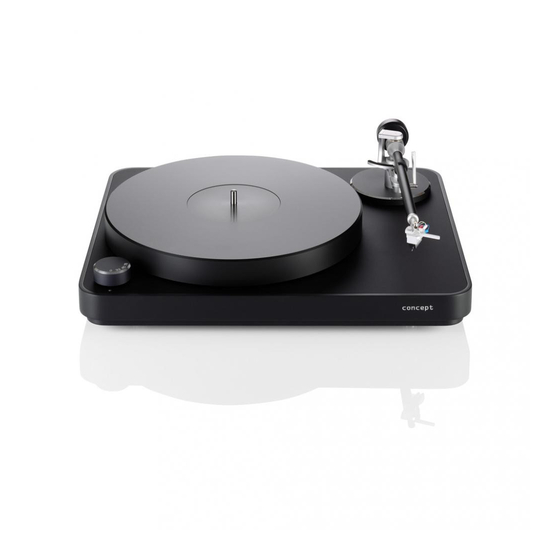
Clearaudio CONCEPT User Manual
Hide thumbs
Also See for CONCEPT:
- User manual (36 pages) ,
- User manual (11 pages) ,
- User manual (18 pages)

Related Manuals for Clearaudio CONCEPT


Summary of Contents for Clearaudio CONCEPT
- Page 1 User manual Bedienungsanleitung © clearaudio electronic GmbH, 2018/08 Made in Germany...
- Page 2 (EMC) and low-voltage appliances. EQUIPMENT MAINS SETTING Your Clearaudio product has been prepared to comply with the household power and safety requirements that exist in your area. This product can be connected to 230 V or 110 V AC (50 Hz and 60 Hz).
-
Page 3: Table Of Contents
User manual / Bedienungsanleitung Contents 1. Packaging overview..........4 2. List of components..........4 3. Set-up..............5 - 6 4. Important notes........... 7 - 8 5. Service..............8 - 9 6. Technical data............10 Warranty information..........20 - 21 Made in Germany... -
Page 4: Packaging Overview
User manual / Bedienungsanleitung 1. Packaging overview concept Clearaudio has developed a special secure packaging for your turntable which ensures safe transportation. Please keep the original packaging as it will be required if you need to ship the turntable. First layer:... -
Page 5: Set-Up
Setting up the turntable is easy. The turntable chassis, tonearm and cartridge are already assembled and all key parameters have been pre-adjusted and tested at the Clearaudio factory. concept turntable needs a set-up space of at least 17 x 14 inches. -
Page 6: Set-Up
User manual / Bedienungsanleitung As all key parameters have been adjusted at the Clearaudio factory, all you need to do is to level the turntable using the level gauge provided. Pic. 6: Levelling the turntable concept If your turntable is not in a perfectly level... -
Page 7: Important Notes
Pic. 9: Adjustment of the tonearm height Clearaudio assumes no liability for incorrect handling or any damage caused, if non qualified persons attempt these adjustments. 4.3 Adjustment of the anti-skating... -
Page 8: Service
Pic. 11: Speed setting controls on the rear 5. Service If any servicing or repair on a Clearaudio product is necessary, please contact your dealer / distributor or contact Clearaudio directly. We can advise you of your nearest service location. - Page 9 Otherwise serious damage can occur. Please also ensure that you fully retract the turntable feet. Clearaudio assumes no liability for any damage that may occur due to incorrect packing. Made in Germany...
-
Page 10: Technical Data
OFC - copper Cartridge body: Aluminium Aluminium-magnesium alloy with ceramic surface layer Warranty: 2 years* 2 years* * Provided that the warranty card is correctly completed and returned to Clearaudio within 14 days of purchase. © clearaudio electronic GmbH, 2018/08... - Page 11 Störfreiheit (EMC) und denen über Niederspannungsgeräte. GERÄTENETZEINSTELLUNG Ihr clearaudio Produkt wurde so konstruiert, dass es der Haushaltsleistung und den Sicherheitsbestimmungen in Ihrer Region genügt. Dieses Produkt kann mit 110 V (50 Hz) oder mit 230 V (60 Hz) Wechselstrom betrieben werden.
- Page 12 User manual / Bedienungsanleitung Inhaltssverzeichnis 1. Verpackungsübersicht.......... 13 2. Lieferumfang............13 3. Aufbau und Inbetriebnahme........ 14 - 15 4. Wichtige Informationen........16 - 17 5. Service..............17 - 18 6. Technische Daten..........19 Garantie-Informationen........... 20 - 21 © clearaudio electronic GmbH, 2018/08...
-
Page 13: Verpackungsübersicht
User manual / Bedienungsanleitung 1. Verpackungsübersicht concept Clearaudio hat eine spezielle Verpackung für Ihr Laufwerk entwickelt, welche einen sicheren Transport gewährleistet. Bitte heben Sie diese Verpackung für eventuelle Transporte auf. Obere Verpackungsebene: concept Laufwerkskörper mit integrierter Motoreinheit, Tonarm und Tonabnehmer... -
Page 14: Aufbau Und Inbetriebnahme
Achse des Lagers setzen. Abb. 4: Aufsetzen des Plattentellers Entfernen Sie nun bitte auch vorsichtig den Sicherheitsstreifen und weitere Sicherungs- materialien vom Tonarm und dem Tonabnehmer. Abb. 5: Entfernen des Klebestreifens © clearaudio electronic GmbH, 2018/08... - Page 15 Stromquelle. Die Tonarmkabel verbinden Sie mit Ihrer Phonovorstufe (roter Stecker = rechter Kanal, schwarzer Stecker = linker Kanal). Ihr clearaudio concept Plattenspieler ist nun komplett aufgebaut und spielbereit! Abb. 8: Netzadapter des Laufwerks Clearaudio wünscht Ihnen viel Freude beim Musikhören! Made in Germany...
-
Page 16: Wichtige Informationen
Ihr Fachhändler findet die Anti-Skating-Schraube auf der concept Unterseite des Laufwerks. Abb. 10: Einstellung des Anti-Skating Clearaudio übernimmt keine Haftung für Schäden, die durch persönliches Handhaben enstehen. Bitte wenden Sie sich immer an Ihren Fachhandel! © clearaudio electronic GmbH, 2018/08... -
Page 17: Service
(in der Nähe des Netzanschlusses) Abb. 11: Platzierung der Trimmer 5. Service Wenden Sie sich in einem Servicefall bitte zunächst an Ihren clearaudio Fachhändler. Erst, wenn dort der Fehler bestätigt und nicht behoben werden kann, senden Sie das Gerät an die unten aufgeführte Anschrift: clearaudio electronic GmbH www.clearaudio.de... - Page 18 Bitte entfernen Sie zum Transport den Plattenteller vom Laufwerk (sh. oben) und sichern Sie den den Tonarm und den Nadelschutz des Tonabnehmers zusätzlich mit einem Klebestreifen. Clearaudio kann für Schäden, die beim Transport entstehen und die durch falsches Einpacken verursacht wurden, keine Haftung übernehmen.
-
Page 19: Technische Daten
Micro Line Nadelnachgiebigkeit: 15 μ/mN 9 μ/mN Material der Spulen: Kupfer Kupfer Systemkörper: Aluminium Aluminium-Magnesium Legierung mit keramischer Beschichtung Garantie 2 Jahre* 2 Jahre* * Nur bei korrekt ausgefüllter und eingesandter Garantiekarte an clearaudio innerhalb von 14 Tagen. Made in Germany... -
Page 20: Warranty Information
User manual / Bedienungsanleitung To achieve the full Clearaudio warranty, it is necessary that you fill out and send the corresponding part of the warranty registration certificate /card back to Clearaudio, within two weeks after purchase. Only if the product is returned in its original packing Clearaudio can provide the warranty of 2 years. - Page 21 ESPAÑOL GARANTIA Para obtener información acerca de la garantia póngase en contacto con su distribuidor Clearaudio. GUARDE SU RECIBO DE COMPRA Su recibo de compra es su prueba permanente de haber adquirido un aparato de valor, Este recibo deberá guardarlo en un lugar seguro y utilizarlo como referencia cuando tenga que hacer uso del seguro o se ponga en contacto con Clearaudio.
- Page 22 User manual / Bedienungsanleitung © clearaudio electronic GmbH, 2018/08...
- Page 23 User manual / Bedienungsanleitung Made in Germany...
- Page 24 Handmade in Germany Clearaudio electronic is not responsible for typographical errors in descriptions. Technical specifications subject to change or improvement without prior notice. Product availability is as long as stock lasts. Copies and reprints of this documents, including extracts, require written consent from Clearaudio electronic GmbH;...
Need help?
Do you have a question about the CONCEPT and is the answer not in the manual?
Questions and answers