Armstrong 4280 Installation And Operating Instructions Manual
End suction horizontal
pumping units with
permanent magnet 1-10
hp motor
Hide thumbs
Also See for 4280:
- Installation and operating instructions manual (10 pages) ,
- Installation and operating instructions (4 pages) ,
- Service work instructions (4 pages)

Related Manuals for Armstrong 4280


Summary of Contents for Armstrong 4280
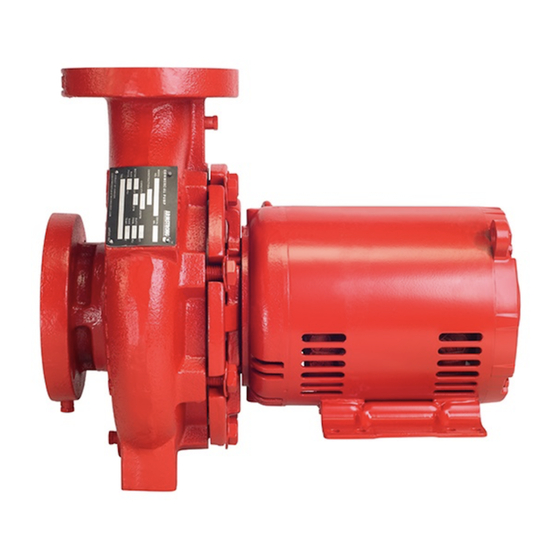
- Page 1 Design Envelope 4200H & 4280 End suction horizontal pumping units with permanent magnet 1-10 hp motor Installation and operating instructions File No: 103.82 Date: september 21 , 2018 Supersedes: 103.82 Date: june 18 , 2018...
-
Page 3: Table Of Contents
2.4.1 battery 6.3.2 mechanical seal replacement instruc- 2.4.2 ethernet and wifi connectivity tions for close-coupled pumping units 2.4.3 can bus wiring (series 4380, 4280 & 4372) 2.4.4 rs 485 wiring 6.4 system cleanliness 2.4.5 networking options warnings and alarms 3.0 networking controls alarm summary for interfaces modbus ip &... -
Page 4: Introduction
1.1. 4 vibr ation levels Armstrong end-suction horizontal pumps are designed to meet vibration levels set by Hydraulic Institute Standard hi Pump Vibration 9.6.4. Standard levels are as detailed below Factory 5.3 mm/s (0.21 in/s) 200 kW (268 bhp) & above Factory 4.3 mm/s (0.17 in/s) below 200 kW (268 bhp) -
Page 5: Storage
1.1.6 warr anty Armstrong’s warranty period for Design Envelope pumps is [ 18] months from date of shipment, or [ 12] months from date of installation, whichever comes first. Please refer to File 9 .10us / 9 .10c for full terms and conditions. To receive an ad-... -
Page 6: Mechanical Installation
i n s ta l l at i o n & Design Envelope 4 20 0h & 4 28 0 o p e r at i n g i n s t r u c t i o n s End Suction Horizontal Pumping Units important: fig 1. -
Page 7: System Installation
Design Envelope 4 20 0h & 4 28 0 i n s ta l l at i o n & End Suction Horizontal Pumping Units o p e r at i n g i n s t r u c t i o n s 1. -
Page 8: Installation For Seismic Mounts
i n s ta l l at i o n & Design Envelope 4 20 0h & 4 28 0 o p e r at i n g i n s t r u c t i o n s End Suction Horizontal Pumping Units Turn the cast knob clockwise to increase Take 2 full counter-clockwise turns on each leveling bolt and... -
Page 9: Electrical Setup
The size of the leakage current to the ground depends on the Armstrong Flo-Trex valves may be used in place of isolation following factors, in order of priority: valves and non-return check valves. Flo-Trex valves use plug 1 Switching frequency &... -
Page 10: Start / Stop Of Pump
i n s ta l l at i o n & Design Envelope 4 20 0h & 4 28 0 o p e r at i n g i n s t r u c t i o n s End Suction Horizontal Pumping Units 2 .1. -
Page 11: Electrical Specification
Design Envelope 4 20 0h & 4 28 0 i n s ta l l at i o n & End Suction Horizontal Pumping Units o p e r at i n g i n s t r u c t i o n s 1 Power supply (smps) including signal isolation of VDCbus, Some of the harmonic currents might disturb communication indicating the intermediate voltage. -
Page 12: Electrical Installation
i n s ta l l at i o n & Design Envelope 4 20 0h & 4 28 0 o p e r at i n g i n s t r u c t i o n s End Suction Horizontal Pumping Units 2.3 electrical installation Externals... -
Page 13: The Main Cover Disassembly
Design Envelope 4 20 0h & 4 28 0 i n s ta l l at i o n & End Suction Horizontal Pumping Units o p e r at i n g i n s t r u c t i o n s 2 .3 .3 the main cover disassembly warning Before removing the system must be disconnected... -
Page 14: Control Terminal Wiring
i n s ta l l at i o n & Design Envelope 4 20 0h & 4 28 0 o p e r at i n g i n s t r u c t i o n s End Suction Horizontal Pumping Units 2 .3 . - Page 15 1 Armstrong Tier 3 training or equivalent Login to the web interface (Check Web Interface in section 4.4) 2 Ability to terminate simple control wiring 3 Ability to configure Armstrong controls Go to Setting ...
- Page 16 i n s ta l l at i o n & Design Envelope 4 20 0h & 4 28 0 o p e r at i n g i n s t r u c t i o n s End Suction Horizontal Pumping Units set ting speed control through differential set ting speed control through differential...
-
Page 17: Digital Output
Design Envelope 4 20 0h & 4 28 0 i n s ta l l at i o n & End Suction Horizontal Pumping Units o p e r at i n g i n s t r u c t i o n s set ting the differential pressure (dp) sensor through lcd Set the current\ voltage DP sensor setting: • Set Sensor Signal Intervals... -
Page 18: Design Envelope Pump
i n s ta l l at i o n & Design Envelope 4 20 0h & 4 28 0 o p e r at i n g i n s t r u c t i o n s End Suction Horizontal Pumping Units 2. -
Page 19: Networking Controls
Design Envelope 4 20 0h & 4 28 0 i n s ta l l at i o n & End Suction Horizontal Pumping Units o p e r at i n g i n s t r u c t i o n s 3 .0 networking controls For connection to the building automation system (ba s), the pump needs to be properly configured to the network. -
Page 20: Modbus Ip & Rtu
i n s ta l l at i o n & Design Envelope 4 20 0h & 4 28 0 o p e r at i n g i n s t r u c t i o n s End Suction Horizontal Pumping Units 3 .1 modbus ip &... - Page 21 Design Envelope 4 20 0h & 4 28 0 i n s ta l l at i o n & End Suction Horizontal Pumping Units o p e r at i n g i n s t r u c t i o n s function code change start...
- Page 22 Divide the number by 1 0 0 to get Firmware uint16 00.00 the major. Minor version of the version depc. Hardware The pump control module uint16 — version hardware version. Modbus Version of the Armstrong uint16 — version Modbus version...
-
Page 23: Bacnet Ip & Ms/Tp
Design Envelope 4 20 0h & 4 28 0 i n s ta l l at i o n & End Suction Horizontal Pumping Units o p e r at i n g i n s t r u c t i o n s 3 . - Page 24 i n s ta l l at i o n & Design Envelope 4 20 0h & 4 28 0 o p e r at i n g i n s t r u c t i o n s End Suction Horizontal Pumping Units object id object name read/ write comments...
-
Page 25: Operation
Check rotation arrow prior to operating the unit. The Warranty rotation of all Armstrong 4 20 0h & 4 28 0 Vertical Does not cover any damages to the equipment resulting from in-line units is clockwise when viewed from behind the failure to observe the above precautions. -
Page 26: Touch Screen
i n s ta l l at i o n & Design Envelope 4 20 0h & 4 28 0 o p e r at i n g i n s t r u c t i o n s End Suction Horizontal Pumping Units 4 .3 touch screen 4 .3 . -
Page 27: General Settings
Design Envelope 4 20 0h & 4 28 0 i n s ta l l at i o n & End Suction Horizontal Pumping Units o p e r at i n g i n s t r u c t i o n s 4 .3 . -
Page 28: Manual/Auto Mode
i n s ta l l at i o n & Design Envelope 4 20 0h & 4 28 0 o p e r at i n g i n s t r u c t i o n s End Suction Horizontal Pumping Units 4 .3 .5 manual /auto mode... -
Page 29: Pump Control
Design Envelope 4 20 0h & 4 28 0 i n s ta l l at i o n & End Suction Horizontal Pumping Units o p e r at i n g i n s t r u c t i o n s 4 .3 .6 pump control Activate Energy Performance Bundle... - Page 30 i n s ta l l at i o n & Design Envelope 4 20 0h & 4 28 0 o p e r at i n g i n s t r u c t i o n s End Suction Horizontal Pumping Units Single...
- Page 31 Design Envelope 4 20 0h & 4 28 0 i n s ta l l at i o n & End Suction Horizontal Pumping Units o p e r at i n g i n s t r u c t i o n s Pressure Sensor Control Pump is now setup for Pres- sure Sensor Control.
- Page 32 i n s ta l l at i o n & Design Envelope 4 20 0h & 4 28 0 o p e r at i n g i n s t r u c t i o n s End Suction Horizontal Pumping Units Pump is now setup for 2 Sensor Control...
-
Page 33: Alarms & Warnings
The control card has specified correct. Check the settings an invalid vfd parameter. on the control card. If the alarm persists after cycling power to the pump, contact an Armstrong Technical Service representative. 4 .3 .8 trend-gr aph Head / Time Power / Time... -
Page 34: Web Interface
i n s ta l l at i o n & Design Envelope 4 20 0h & 4 28 0 o p e r at i n g i n s t r u c t i o n s End Suction Horizontal Pumping Units 4 . -
Page 35: Control Modes
Design Envelope 4 20 0h & 4 28 0 i n s ta l l at i o n & End Suction Horizontal Pumping Units o p e r at i n g i n s t r u c t i o n s 5 .0 control modes 5 . -
Page 36: Quadratic Curve Control With Maximum Flow Protection
Sensorless Pump Control (pspc) pre-programmed in the This configuration is ideal for hvac hydronic systems where controls at Armstrong factories. For all other models (except pumps are generally oversized and a flow limit is required for twin pumps), pspc can be enabled aftermarket; please contact system equipment stability and resulting energy savings. -
Page 37: 100% Capacity Split Units
Design Envelope 4 20 0h & 4 28 0 i n s ta l l at i o n & End Suction Horizontal Pumping Units o p e r at i n g i n s t r u c t i o n s Note that activating Duty-Standby mode effectively disables the energy efficient staging of Parallel Sensorless operation. -
Page 38: Maintenance
(See Armstrong files 43 . 85 and 43 . 86 for seal environ- and the unit should be properly drained before starting mental instructions). -
Page 39: Mechanical Seal Replacement Instruc- Tions For Rigid Split- Coupled Pumping Units (Series 4300, 4200H & 4322)
Design Envelope 4 20 0h & 4 28 0 i n s ta l l at i o n & End Suction Horizontal Pumping Units o p e r at i n g i n s t r u c t i o n s 6.3 .1 mechanical seal replacement instruc- Remove the mechanical seal rotating assembly (62) -
Page 40: Mechanical Seal Replacement Instruc- Tions For Close-Coupled Pumping Units (Series 4380, 4280 & 4372)
Remove drain plug tions for close-coupled pumping units ( 35) from the bottom of the casing and drain the pump. (series 4380, 4280 & 4372) Prepare assembly for removal Secure the motor ( 10) by lifting straps to an overhead chain fall or similar lifting device. - Page 41 Design Envelope 4 20 0h & 4 28 0 i n s ta l l at i o n & End Suction Horizontal Pumping Units o p e r at i n g i n s t r u c t i o n s h Remove mechanical seal from motor shaft the seal which will ensure that the faces are mated properly.
-
Page 42: System Cleanliness
One or more of the parameters to control the vsd are not correct. Check the settings on the control card. If the alarm persists after cycling power to the pump, contact an Armstrong Technical Service representative. vsd startup An error occurred during the startup of the motor. -
Page 43: Warning Summary For Interfaces
3 phases. If the warning persists, contact an Armstrong Technical Service representative. Internal vsd voltage An internal voltage generated by vsd is out of range. If the warning persists, contact an Armstrong Technical Service representative. -
Page 44: Fuse And Wire Recommendation
End Suction Horizontal Pumping Units 8.0 fuse and wire recommendation Armstrong recommends ul 2 48 -12 Listed Class rk1 current- limiting and Fast-acting fuses for upstream protection of instal- lations within the nec /ul jurisdiction. -
Page 45: Pump Manager
Design Envelope 4 20 0h & 4 28 0 i n s ta l l at i o n & End Suction Horizontal Pumping Units o p e r at i n g i n s t r u c t i o n s 9.0 pump manager cloud smart... - Page 46 t o r o n t o 23 bertrand avenue toronto, ontario canada m1l 2p3 +1 416 755 2291 b u f f a l o 93 east avenue north tonawanda, new york u.s.a. 14120 -6594 +1 716 693 8813 b i r m i n g h a m heywood wharf, mucklow hill halesowen, west midlands...
Need help?
Do you have a question about the 4280 and is the answer not in the manual?
Questions and answers
Where can i find a seal kit with brass bushing for my 4280 suction pump