
Subscribe to Our Youtube Channel
Related Manuals for Black Box Boxilla


Summary of Contents for Black Box Boxilla
- Page 1 USER MANUAL BXAMGR BOXILLA™ KVM & AV/IT MANAGER 24/7 TECHNICAL SUPPORT AT 1.877.877.2269 OR VISIT BLACKBOX.COM BOXILLA AV l IT MANAGER...
-
Page 2: Table Of Contents
4.2 LED Identification ....................................17 4.3 Installation Safety ....................................18 4.4 Serial Configuration of IP Address ...............................18 4.5 Browser Configuration of IP Address ..............................19 4.6 Mounting Boxilla in a Rack ..................................20 4.6.1 Rackmount Safety Considerations ................................20 5. BOXILLA CONFIGURATION ................................ 22 5.1 Supported Browsers....................................22 5.2 Login ........................................22... - Page 3 NEED HELP? LEAVE THE TECH TO US LIVE 24/7 TABLE OF CONTENTS TECHNICAL SUPPORT 1.877.877.2269 7. DEVICES ....................................... 31 7.1 Devices — Settings ....................................31 7.1.1 Create/Edit/Delete Templates ..................................32 7.1.2 Edit System Properties ....................................35 7.1.3 Edit Individual Device Settings ..................................37 7.1.4 Apply Bulk Updates to Appliances .................................38 7.2 Devices —...
- Page 4 1.877.877.2269 11. SYSTEM ...................................... 85 11.1 System — Upgrading Boxilla Unit Firmware ............................90 11.2 System — License Page — Boxilla Licensing .............................90 11.2.1 How to Request a License ....................................91 11.2.2 How to Upload a License File ..................................92 11.3 System – Administration — Certificates Upload ..........................93 11.4 System —...
- Page 5 TECHNICAL SUPPORT 1.877.877.2269 APPENDIX A. REPLACING YOUR BOXILLA ..........................105 APPENDIX B. BOXILLA AND EMERALD OR EMERALD OR INVISAPC PROTOCOLS ............... 106 Overview ........................................106 APPENDIX C: REGULATORY INFORMATION ..........................107 C.1 FCC and IC Statements ..................................107 C.2 Safety and EMC Approvals and Markings/Patent Information .......................107 C.2.1 Safety and EMC Approvals and Markings ..............................107...
-
Page 6: Symbols Used In This Manual
NEED HELP? LEAVE THE TECH TO US LIVE 24/7 SYMBOLS USED IN THIS MANUAL TECHNICAL SUPPORT 1.877.877.2269 INSTRUCTIONS This symbol is intended to alert the user to the presence of important operating and maintenance (servicing) instructions in the literature accompanying the appliance. DANGEROUS VOLTAGE This symbol is intended to alert the user to the presence of uninsulated dangerous voltage within the product’s enclosure that may be of sufficient magnitude to constitute a risk of electric shock to persons. - Page 7 NEED HELP? LEAVE THE TECH TO US LIVE 24/7 SYMBOLS USED IN THIS MANUAL TECHNICAL SUPPORT 1.877.877.2269 POWER OFF This symbol indicates the principal on/off switch is in the off position. PROTECTIVE GROUNDING TERMINAL This symbol indicates a terminal that must be connected to earth ground prior to making any other connections to the equipment. 1.877.877.2269 BLACKBOX.COM...
-
Page 8: Specifications
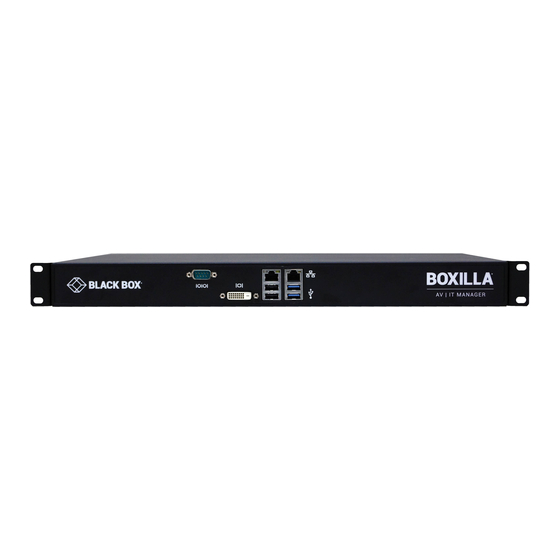
NEED HELP? LEAVE THE TECH TO US LIVE 24/7 CHAPTER 1: SPECIFICATIONS TECHNICAL SUPPORT 1.877.877.2269 TABLE 1-1. SPECIFICATIONS SPECIFICATION DESCRIPTION Approvals CE, FCC Connectors 10/100/1000 Ethernet (RJ-45) , Serial (DB9), (4) USB 2.0, DVI Power AC input: 120–240 V, 50–60 Hz Power Dissipation <75 W (PSU rated for 250 W) System: 1.73"H x 17.3"W x 10.6"D (4.4 x 44 x 26.8 cm);... -
Page 9: Product Overview
(i.e., a domain managed by a different manager). Boxilla is used to configure users, connections, hotkeys and other parameters. The database created on the Boxilla is synchronized to each Receiver on a Boxilla user login. If the Boxilla for the managed domain is not reachable (e.g. -
Page 10: Overview Of Boxilla Concepts
DKM KVM Matrix Switches. The core design of the Emerald or InvisaPC architecture is that there is no single point of failure. This means that even if Boxilla goes off-line, the Emerald or InvisaPC system will continue to function—allowing users to login, make connections and operate the system as normal. -
Page 11: Boxilla Managed Domain
Boxilla creates a managed domain—a set of devices it manages. Devices that are members of this managed domain can only be managed by this Boxilla unit. Devices in a managed domain can only connect to other devices in the managed domain. No other manager or unmanaged device can configure or connect to devices in this managed domain. - Page 12 NEED HELP? LEAVE THE TECH TO US LIVE 24/7 CHAPTER 2: PRODUCT OVERVIEW TECHNICAL SUPPORT 1.877.877.2269 FIGURE 2. BOXILLA DASHBOARD EXAMPLE 1.877.877.2269 BLACKBOX.COM...
-
Page 13: Boxilla Screen Layout
2.3 BOXILLA SCREEN LAYOUT Boxilla is designed to provide quick access to key operational functions. This is achieved by the use of the Main Menu and Quick Access Toolbar as shown in Figure 3. The Main Menu provides access to: Š... -
Page 14: Modes Of Operation
1.877.877.2269 A common feature of tables in Boxilla is that they can be sorted by each column (alphabetically either ascending or descending). Click on the column’s label (e.g. Connection Name) and the table will be sorted by that column in ascending order. Click on the same column label again and the order will be reversed. -
Page 15: Applications
In this deployment, there are several Receivers and Transmitters and a Boxilla manager as well as virtual desktops. See www.blackbox.com for the full catalog of available Emerald or InvisaPC products. -
Page 16: Initial Installation
Quick Start Guide Once the contents of the Boxilla package have been verified, the first task is to configure the IP address of the unit. This can be set in two ways: (1) using the serial port and (2) using the network port via a browser. -
Page 17: Led Identification
3. Power up the unit by turning on the power switch on the back of the unit. 4.2 LED IDENTIFICATION Two LEDs are built into the RJ-45 connectors on the Boxilla Manager. The definition of the operation of these LEDs is shown in Table 4-3. -
Page 18: Installation Safety
4.4 SERIAL CONFIGURATION OF IP ADDRESS The default IP address for Boxilla on leaving the factory is 192.168.1.24 and needs to be configured to an appropriate address for where it will be deployed. To access the serial menu, connect to the DB9 connector on the front of the unit. The serial port has a fixed configuration of: Š... -
Page 19: Browser Configuration Of Ip Address
FIGURE 9. BOXILLA LOGIN SCREEN NOTE: Only the Network port pointed to in Figure 6 (on the right-hand side one when you look at the Boxilla unit from the front) is currently operational. The other port is reserved for a future feature. -
Page 20: Mounting Boxilla In A Rack
1.877.877.2269 4.6 MOUNTING BOXILLA IN A RACK The Boxilla unit is designed to be easy to mount within a standard 19” rack. The unit requires just a 1U space within the rack. To mount the Boxilla unit within a rack: 1. - Page 21 NEED HELP? LEAVE THE TECH TO US LIVE 24/7 CHAPTER 4: INITIAL INSTALLATION TECHNICAL SUPPORT 1.877.877.2269 FIGURE 12. ESD CONNECTION 1.877.877.2269 BLACKBOX.COM...
-
Page 22: Boxilla Configuration
NOTE: For the best experience, always use the latest versions of supported browsers. 5.2 LOGIN Ensure the Boxilla unit is powered up. Wait two minutes after applying power before attempting to access to allow the system to boot up. Using a computer located anywhere within the network, open a web browser (see supported browsers list above) and enter the default IP address for the Boxilla server: 192.168.1.24 . - Page 23 NEED HELP? LEAVE THE TECH TO US LIVE 24/7 CHAPTER 5: BOXILLA CONFIGURATION TECHNICAL SUPPORT 1.877.877.2269 FIGURE 14. BOXILLA INITIAL SCREEN ON LOGIN 1.877.877.2269 BLACKBOX.COM...
- Page 24 NEED HELP? LEAVE THE TECH TO US LIVE 24/7 CHAPTER 5: BOXILLA CONFIGURATION TECHNICAL SUPPORT 1.877.877.2269 You are strongly recommended to change the default admin password as one of your first actions: Š Click on System button on the main menu and then select the Users tab as shown in Figure 15.
-
Page 25: Important First Configuration Steps
FIGURE 16. EDIT ADMIN USER 5.3 IMPORTANT FIRST CONFIGURATION STEPS There are several important configuration steps that must be carried out when starting a new Boxilla server for the first time. 1. Set the IP address for the Boxilla Server. -
Page 26: Discovery-Adding Devices
IP address. To start adding devices to Boxilla, click on the Discovery button on the main menu. The Discovery page is displayed as shown in Figure 17. - Page 27 Š Managed—this device is part of the domain managed by this Boxilla manager Š Š ManagedOther—this device is part of a domain managed by another Manager—and cannot be managed by this Boxilla manager Š Š Orphaned—there is a conflict between the reported state on the Manager and that of the device. This may occur where the device Š...
- Page 28 FIGURE 19. EDIT DEVICE SCREEN Once the IP address has been specified, an unmanaged device can now be set to be part of this Boxilla’s managed domain. This is done by clicking on the Manage option shown in Figure 18. This causes the device’s state to change from UnManaged to Managed.
-
Page 29: Discovery-Manually Adding Devices
Enter the IP address of the device to be added and click on “Get Information.” This causes Boxilla to retrieve the device’s information if reachable. If Boxilla has no valid path on the network to the device (or IP address is not for an Emerald or InvisaPC device), the system will return a message of “device not reachable.”... -
Page 30: Discovery-What Happens To A Device When Managed
Boxilla and no router is between the two subnets. Use PING to verify the device can be reached. Š Automatic discovery may not find the device if it is on a different subnet to Boxilla and the router does not allow Multicast UDP Š... -
Page 31: Devices
Figure 22 shows the Device—Settings Page. This page shows all the devices that are part of the managed domain. Boxilla constantly polls devices to determine their state and operational statistics. The state of a device in the table can be: Š Online—means the device is contactable from Boxilla during recent polling cycles;... -
Page 32: Create/Edit/Delete Templates
NEED HELP? LEAVE THE TECH TO US LIVE 24/7 CHAPTER 7: DEVICES TECHNICAL SUPPORT 1.877.877.2269 The configuration of RX and TX settings is managed via an internal workflow reflected in the Status field in the Device Settings screen. Valid values include: Waiting, Configuring, Configured, Failed, Retrieving, Failed_Retrieve and Idle. Idle –... - Page 33 NEED HELP? LEAVE THE TECH TO US LIVE 24/7 CHAPTER 7: DEVICES TECHNICAL SUPPORT 1.877.877.2269 Š Video Source Opt: Select from Off, DVI Optimized, VGA - High-Performance, VGA - Optimized, VGA - Low Bandwidth (only applied in Š case of a single-head transmitter). Š...
- Page 34 NEED HELP? LEAVE THE TECH TO US LIVE 24/7 CHAPTER 7: DEVICES TECHNICAL SUPPORT 1.877.877.2269 FIGURE 25. EDIT TEMPLATE SCREEN To delete a device template, click on the red -Template button at the top of the Devices —> Settings screen. The Delete Appliance Template screen pops up.
-
Page 35: Edit System Properties
NEED HELP? LEAVE THE TECH TO US LIVE 24/7 CHAPTER 7: DEVICES TECHNICAL SUPPORT 1.877.877.2269 7.1.2 EDIT SYSTEM PROPERTIES To edit the system properties, click on the blue System Properties button at the top right of the Devices Settings screen. The System Properties Settings screen with editable options pops up. - Page 36 NEED HELP? LEAVE THE TECH TO US LIVE 24/7 CHAPTER 7: DEVICES TECHNICAL SUPPORT 1.877.877.2269 Absolute mouse: This feature can be used to enable interoperability with KM switches with built-in “Glide & Switch” capability such as ServSwitchTC and Freedom. For normal usage, where mouse is directly connected to Receiver, then the Default or Basic options should be used. OSD option: FIGURE 28.
-
Page 37: Edit Individual Device Settings
NEED HELP? LEAVE THE TECH TO US LIVE 24/7 CHAPTER 7: DEVICES TECHNICAL SUPPORT 1.877.877.2269 7.1.3 EDIT INDIVIDUAL DEVICE SETTINGS To edit the individual device settings, click on the Video Settings or Misc Settings in the middle of the Devices —> Network Settings screen. -
Page 38: Apply Bulk Updates To Appliances
NEED HELP? LEAVE THE TECH TO US LIVE 24/7 CHAPTER 7: DEVICES TECHNICAL SUPPORT 1.877.877.2269 FIGURE 30. DEVICE OPTIONS The Ping button on the page allows any IP device (not just Emerald or InvisaPC devices) to be pinged to check its reachability. 7.1.4 APPLY BULK UPDATE SETTINGS To update the individual device settings all at once, click on the Bulk Update button in the middle of the Devices —>... -
Page 39: Devices-Upgrade
SUPPORT 1.877.877.2269 7.2 DEVICES—UPGRADE Boxilla centrally upgrades devices that are part of its managed domain. The administrator performs this via the Devices— Upgrade page shown in Figure 32. 7.2.1 DEVICES— UPGRADE—RELEASES The Releases tab shows the list of available versions of firmware that can be used to upgrade devices. The administration selects the firmware to be used for upgrades. -
Page 40: Devices- Upgrade-Select Devices
NOTE: We recommend that the administrator not move to a different page once starting an upgrade to allow the upgrade process to be monitored. It the administrator does change to a different page, the upgrade will continue in the background. What is mandatory is that Boxilla and devices being upgraded stay powered up. 1.877.877.2269... -
Page 41: Devices-Global
7.3 DEVICES—GLOBAL Boxilla controls global configuration settings for the managed domain. These are settings that apply across all devices in the same way. The administrator changes the parameters to the desired settings and clicks apply to have the changes take effect. This is done on the Devices—Settings page as shown in Figure 34. -
Page 42: Rdp Connection Resolution
NEED HELP? LEAVE THE TECH TO US LIVE 24/7 CHAPTER 7: DEVICES TECHNICAL SUPPORT 1.877.877.2269 Open OSD: “Hotkey” O Switch to previous target: “Hotkey” P The “Functional Hot-Key” is used to enable or disable the use of function keys after the hot-key. When the Functional Hot-key is disabled, only the Hot-Key is required to bring up the OSD on an Emerald or InvisaPC Receiver. -
Page 43: Devices-Statistics
NEED HELP? LEAVE THE TECH TO US LIVE 24/7 CHAPTER 7: DEVICES TECHNICAL SUPPORT 1.877.877.2269 If the user is validated, the Active Directory Server will return a valid VM pool-name to the device. The device sends this pool-name information to the Connection Broker which then allocates a Virtual Machine to the User provided a VM is available. The following settings need to be set when “Web Access Server”... -
Page 44: Connections
NEED HELP? LEAVE THE TECH TO US LIVE 24/7 CHAPTER 8: CONNECTIONS TECHNICAL SUPPORT 1.877.877.2269 Connections define the properties for the flow of keyboard, mouse, video, audio and USB traffic between an Emerald or InvisaPC Receiver and an Emerald or InvisaPC Transmitter or Virtual Machine. Connections are created and then allocated to Users to provide them access to Transmitters or Virtual Machines. -
Page 45: Connections-Add Connection
NEED HELP? LEAVE THE TECH TO US LIVE 24/7 CHAPTER 8: CONNECTIONS TECHNICAL SUPPORT 1.877.877.2269 USB Redirection: When set, this enables non-keyboard and non-mice devices to be redirected for this connection. Persistent Connection: When turned on, Persistent Connection will constantly try to connect to the Receiver until successful. - Page 46 NEED HELP? LEAVE THE TECH TO US LIVE 24/7 CHAPTER 8: CONNECTIONS TECHNICAL SUPPORT 1.877.877.2269 FIGURE 37. ADD CONNECTION—TX The other parameters on this screen are: Š Connection Name: this is a unique name for the new connection. The name can be between 1 and 32 characters. The name can be Š...
- Page 47 NEED HELP? LEAVE THE TECH TO US LIVE 24/7 CHAPTER 8: CONNECTIONS TECHNICAL SUPPORT 1.877.877.2269 FIGURE 39. ADD CONNECTIONS—PROPERTIES The extra parameters that can be defined are: Š Connection Type: This defines the connection as being private to this user when the connection is made or is open to be shared Š...
-
Page 48: Connections-Add Connection Template
NEED HELP? LEAVE THE TECH TO US LIVE 24/7 CHAPTER 8: CONNECTIONS TECHNICAL SUPPORT 1.877.877.2269 When Connection Type is Private, the following parameters are shown in the New Connection screen: Connection Type (Private), Connection Name, Host IP address, Extended Desktop, USB Redirection, Audio, and Persistent Connection. FIGURE 40. -
Page 49: Connections-Delete Connection Template
Select the template(s) to be deleted and click on delete. Boxilla will only display the list of connection templates that are not currently assigned to connections. If you wish to delete a template that is associated with a connection, you will first need to remove the template from the connection. - Page 50 NEED HELP? LEAVE THE TECH TO US LIVE 24/7 CHAPTER 8: CONNECTIONS TECHNICAL SUPPORT 1.877.877.2269 Once a connection group has been added, you will see the following screen. FIGURE 44. UPDATED CONNECTION GROUP SCREEN You can manage connections by adding or removing connections to or from the connections group. FIGURE 45.
- Page 51 NEED HELP? LEAVE THE TECH TO US LIVE 24/7 CHAPTER 8: CONNECTIONS TECHNICAL SUPPORT 1.877.877.2269 You can add / manage groups from individual Users under Users -> Manage. Once a user logs in at the appliance GUI, all the assigned connections (both individual and group connections) with be visible to the user. FIGURE 46.
- Page 52 NEED HELP? LEAVE THE TECH TO US LIVE 24/7 CHAPTER 8: CONNECTIONS TECHNICAL SUPPORT 1.877.877.2269 To dissolve a connection group (Map Connections from Connection Group to Individual Connections): FIGURE 48. DISSOLVE CONNECTION GROUP SCREEN Once you confirm with OK, a success message will be prompted. FIGURE 49.
- Page 53 NEED HELP? LEAVE THE TECH TO US LIVE 24/7 CHAPTER 8: CONNECTIONS TECHNICAL SUPPORT 1.877.877.2269 FIGURE 50. DELETE THE CONNECTION GROUP Confirm with OK and a confirmation message about deletion is displayed. FIGURE 51. CONFIRM DELETION The maximum number of connection groups is 10 and once it is reached, the add group button gets disabled. FIGURE 52.
-
Page 54: Connections-Active
CHAPTER 8: CONNECTIONS TECHNICAL SUPPORT 1.877.877.2269 IMPORTANT NOTE: Boxilla restricts the total number of User Connections across the system to 22500 unique User Connections. Boxilla supports: Š 150 users, each supporting a maximum of 150 unique connections Š Š 150 users, each supporting a maximum of 10 Connection Groups each group supporting a maximum of 15 unique connections Š... -
Page 55: Connections-Viewer
NEED HELP? LEAVE THE TECH TO US LIVE 24/7 CHAPTER 8: CONNECTIONS TECHNICAL SUPPORT 1.877.877.2269 FIGURE 53. ACTIVE CONNECTIONS 8.4 CONNECTIONS—VIEWER On the Connections drop-down menu, click on Viewer. The Emerald or InvisaPC Connection Matrix screen appears. FIGURE 54. CONNECTIONS—VIEWER SCREEN 1.877.877.2269 BLACKBOX.COM... -
Page 56: Make Connections
Click on the Make Connections button, and the Add Source screen pops up. NOTE: It is only possible to connect InvisaPC Receivers to InvisaPC Transmitters and Emerald Receivers to Emerald Transmitters. Boxilla does not support connection interoperablity between Emerald and InvisaPC devices. FIGURE 55. ADD SOURCE BUTTON Select a source from the list and press Activate Selected. -
Page 57: Manage Presets
NEED HELP? LEAVE THE TECH TO US LIVE 24/7 CHAPTER 8: CONNECTIONS TECHNICAL SUPPORT 1.877.877.2269 8.4.2 MANAGE PRESETS Click on the Manage Presets button, and the Manage Presets screen pops up. Under this page all the existing presets will be listed. In Emerald or InvisaPC Viewer —... - Page 58 NEED HELP? LEAVE THE TECH TO US LIVE 24/7 CHAPTER 8: CONNECTIONS TECHNICAL SUPPORT 1.877.877.2269 The icons on the sources screen are: FIGURE 59. ICONS ON THE SOURCES SCREEN FIGURE 60. SELECT DESTINATIONS SCREEN 1.877.877.2269 BLACKBOX.COM...
- Page 59 Boxilla. Under manage presets, we have a snapshot option, which will automatically save the current active connections as a “ Preset”.
-
Page 60: Users
They cannot change any configuration settings. The Boxilla has one default user —admin, which is a member of the administrator group. This user is defined by default and cannot be deleted. Boxilla currently supports up to 1,000 individual users. -
Page 61: Add User
NEED HELP? LEAVE THE TECH TO US LIVE 24/7 CHAPTER 9: USERS TECHNICAL SUPPORT 1.877.877.2269 9.2.1 ADD USER To create a user, click on the +User button at the top of the page and this opens up the new user wizard. The initial page of this wizard is shown in Figure 64. -
Page 62: Manage User Connections
NEED HELP? LEAVE THE TECH TO US LIVE 24/7 CHAPTER 9: USERS TECHNICAL SUPPORT 1.877.877.2269 9.2.2 MANAGE USER CONNECTIONS The new user must be allocated Connections that he/she can access. This is done by clicking on “Manage Connection” option on the “•••” icon in the required user row. The required connections are selected from the available Connections—click on the connection in the Non-Selected List and then click the “->”... - Page 63 NEED HELP? LEAVE THE TECH TO US LIVE 24/7 CHAPTER 9: USERS TECHNICAL SUPPORT 1.877.877.2269 FIGURE 66. CONNECTION FAVORITES SCREEN #4 Listing Connection Favorites: When a user log in they can view their assigned favorites. FIGURE 67. CONNECTION FAVORITES SCREEN #5 1.877.877.2269 BLACKBOX.COM...
-
Page 64: Delete User
NEED HELP? LEAVE THE TECH TO US LIVE 24/7 CHAPTER 9: USERS TECHNICAL SUPPORT 1.877.877.2269 9.2.4 DELETE USER To remove a user from the system, click on the “•••” icon on the row of the user to be deleted and click on the delete option. 9.3 USER—ACTIVE The User—Active page shows a list of all the users logged in to an Emerald or InvisaPC Receiver. -
Page 65: Manage Groups
NEED HELP? LEAVE THE TECH TO US LIVE 24/7 CHAPTER 1: HEADLINE CHAPTER 9: USERS TECHNICAL SUPPORT 1.877.877.2269 9.4 MANAGE GROUPS You can add/manage groups from individual Users under Users -> Manage. Once the users are mapped under a group, all the connections and users associated to the group will get listed at the appliance’s GUI. - Page 66 NEED HELP? LEAVE THE TECH TO US LIVE 24/7 CHAPTER 9: USERS TECHNICAL SUPPORT 1.877.877.2269 FIGURE 70. USER GROUP ALLOCATION SCREEN 1.877.877.2269 BLACKBOX.COM...
-
Page 67: Dkm Integration
InvisaPC Connection name. When the DKM Connection (vCPU to CON) is established, the DKM switch will echo this operation onto the network. This will be picked up by Boxilla and Boxilla will initiate the desired connections between the InvisaPC Receiver and the InvisaPC Transmitter/VM. - Page 68 NEED HELP? LEAVE THE TECH TO US LIVE 24/7 CHAPTER 1: HEADLINE CHAPTER 10: DKM INTEGRATION TECHNICAL SUPPORT 1.877.877.2269 FIGURE 72. CREATE A VIRTUAL CPU OPTION You will then have the option to name your Virtual CPU. IMPORTANT: This name must be the same as the InvisaPC Connection name that you want it to be associated with. FIGURE 73.
- Page 69 NEED HELP? LEAVE THE TECH TO US LIVE 24/7 CHAPTER 1: HEADLINE CHAPTER 10: DKM INTEGRATION TECHNICAL SUPPORT 1.877.877.2269 Next, navigate to “Virtual CPU Devices,” which appears under the “Assignment” tab on the main menu on the left side of the application window. Here you can assign your new Virtual CPU to the real CPU that‘s physically connected into your InvisaPC receiver.
- Page 70 NEED HELP? LEAVE THE TECH TO US LIVE 24/7 CHAPTER 1: HEADLINE CHAPTER 10: DKM INTEGRATION TECHNICAL SUPPORT 1.877.877.2269 Next, click “Save Online Changes.” This pushes the changes down to the DKM switch so even if it reboots it will hold onto the new settings.
- Page 71 Next, you must Enable LAN Echo. This will enable the switch to echo the results of the connection initiations to the network, where Boxilla can put them up and set up the corresponding InvisaPC Connections. FIGURE 76. ENABLE LAN ECHO 1.877.877.2269...
-
Page 72: Steps To Add Switches
SUPPORT 1.877.877.2269 10.3 STEPS TO ADD SWITCHES Under Boxilla, to add the DKM switch, navigate to DKM —Switches and click the “Add Switch” blue button on the top right of the screen. FIGURE 77. ADD SWITCH SCREEN The Add new switch box will appear on the page. The only critical detail here is the IP address. Fill in the details and press Save. - Page 73 NEED HELP? LEAVE THE TECH TO US LIVE 24/7 CHAPTER 1: HEADLINE CHAPTER 10: DKM INTEGRATION TECHNICAL SUPPORT 1.877.877.2269 Once the switch is added successfully, it gets listed with an online status. FIGURE 79. ONLINE STATUS OF SWITCH If you wish to revert, select Delete from the dropdown list within options to delete the switch entry. FIGURE 80.
- Page 74 FIGURE 81. SEARCH FOR A SWITCH Once the switch is added successfully, all DKM CONs and DKM CPUs (physical) connected will be listed on Boxilla. Also any Virtual CPUs configured on the DKM switch will be listed. Boxilla will automatically update with any new DKM CONs, DKM CPUs and Virtual CPUs that may be added in the future.
- Page 75 1.877.877.2269 The “Last Updated” text at the bottom of the screen is the last time Boxilla audited the DKM switch. Find the Virtual CPU in the “Ports” list on the DKM-Switches page. Click the options button on the right hand side to “Attach to InvisaPC Connection.”...
- Page 76 NEED HELP? LEAVE THE TECH TO US LIVE 24/7 CHAPTER 1: HEADLINE CHAPTER 10: DKM INTEGRATION TECHNICAL SUPPORT 1.877.877.2269 To start a connection you have two options: 1. Manual connections using “Add custom Source,” which lasts until the connection is broken. 2.
-
Page 77: Add Custom Source
NEED HELP? LEAVE THE TECH TO US LIVE 24/7 CHAPTER 1: HEADLINE CHAPTER 10: DKM INTEGRATION TECHNICAL SUPPORT 1.877.877.2269 10.4 ADD CUSTOM SOURCE Under Viewer, click “Make a Connection” and select one or multiple sources from the list of available sources to activate, which will create connections with the selected sources. - Page 78 NEED HELP? LEAVE THE TECH TO US LIVE 24/7 CHAPTER 1: HEADLINE CHAPTER 10: DKM INTEGRATION TECHNICAL SUPPORT 1.877.877.2269 FIGURE 87. MANAGE PRESETS BUTTON Search of available destinations can be completed within the “Add Destinations” popup box. FIGURE 88. ADD DESTINATION POPUP BOX 1.877.877.2269 BLACKBOX.COM...
- Page 79 NEED HELP? LEAVE THE TECH TO US LIVE 24/7 CHAPTER 10: DKM INTEGRATION TECHNICAL SUPPORT 1.877.877.2269 FIGURE 89. ADD DESTINATION POPUP BOX, ACTIVATE SELECTED BUTTON Select the Destinations from the available destinations and click next FIGURE 90. ADD DESTINATION RESULTING CONNECTION SCREEN 1.877.877.2269 BLACKBOX.COM...
- Page 80 NEED HELP? LEAVE THE TECH TO US LIVE 24/7 CHAPTER 10: DKM INTEGRATION TECHNICAL SUPPORT 1.877.877.2269 Once Activated, connections get listed under the Viewer screen. FIGURE 91. VIEWER SCREEN Active connections are listed under the Connections link. Each connection has the option of remotely breaking it. FIGURE 92.
-
Page 81: Presets
NEED HELP? LEAVE THE TECH TO US LIVE 24/7 CHAPTER 10: DKM INTEGRATION TECHNICAL SUPPORT 1.877.877.2269 10.5 PRESETS Under Viewer, click “Manage Presets,” then click “Create Custom” and select one or more available sources. FIGURE 93. CREATE CUSTOM PRESETS Next, select one or more destinations from the list of available destinations. FIGURE 94. - Page 82 2. Activation via Manage Presets: All presets can be activated with the “Activate Selected” option in “Manage Presets.” This is mandatory for any preset that is the fourth or later one created, as there is no other method to activate these presets from within Boxilla. 1.877.877.2269...
- Page 83 NEED HELP? LEAVE THE TECH TO US LIVE 24/7 CHAPTER 10: DKM INTEGRATION TECHNICAL SUPPORT 1.877.877.2269 FIGURE 96. CREATE CUSTOM PRESETS COMPLETED SCREEN Connections started via Presets will be displayed in the work area with the following options: 1. Detach Source: Break the connection by detaching the source. 2.
-
Page 84: Attaching Virtual Cpus To Invisapc Rx
FIGURE 98. DESELECT A SOURCE/DESTINATION 10.6 ATTACHING VIRTUAL CPUS TO INVISAPC RX Virtual CPU based connections from a DKM switch can be connected to a directly managed InvisaPC RX on Boxilla by attaching them. FIGURE 99. VIRTUAL CPUS CONNECTED TO INVISAPC SCREEN 1.877.877.2269... -
Page 85: System
SUPPORT 1.877.877.2269 The System button in the main menu brings up the System —> Administration —> Upgrade screen shown next. This screen allows the Boxilla unit itself to be managed: Š upgrade the firmware; Š FIGURE 100. UPGRADE FIRMWARE SCREEN Š... - Page 86 NEED HELP? LEAVE THE TECH TO US LIVE 24/7 CHAPTER 11: SYSTEM TECHNICAL SUPPORT 1.877.877.2269 Š generate your own self-signed certificate; Š Š backup/restore the database (go to System —> Adminstration —> Backup/Restore); Š FIGURE 102. BACKUP/RESTORE DATABASE SCREEN Š check system information (go to System —> Administration —> System Info page): Š...
- Page 87 NEED HELP? LEAVE THE TECH TO US LIVE 24/7 CHAPTER 11: SYSTEM TECHNICAL SUPPORT 1.877.877.2269 Š set thresholds for alerts (go to System —> Settings —> Thresholds page): Š FIGURE 104. SET THRESHOLDS FOR ACTIVE ALERTS SCREEN Š change network settings (go to System —> Settings —> Network page): Š...
- Page 88 Š set system time (or Clock) (go to System —> Settings —> Clock page): Š FIGURE 106. SYSTEM CLOCK SCREEN Š create/edit Boxilla users (go to System —> Administration —> Boxilla Users page): Š FIGURE 107. CREATE/EDIT BOXILLA USERS SCREEN 1.877.877.2269...
- Page 89 LEAVE THE TECH TO US LIVE 24/7 CHAPTER 11: SYSTEM TECHNICAL SUPPORT 1.877.877.2269 The administrator can reboot the Boxilla unit by clicking on the Reboot button on the top right of the System —> Administration screen. FIGURE 108. SYSTEM SCREEN—UPGRADE 1.877.877.2269 BLACKBOX.COM...
-
Page 90: System-Upgrading Boxilla Unit Firmware
This will cause the new firmware to be added to the Backup Image table (i.e., the firmware file is copied onto the Boxilla unit). To initiate the upgrade of the the Boxilla unit, click on Activate on “•••” icon options on the row of the firmware to be used to upgrade the unit. -
Page 91: How To Request A License
To procure a new license file, generate the info file from your current system using Generate Info File option within License link. The info file will be downloaded onto the local machine. Provide the info file to Black Box Technical Support (contact us at 877-877-2269 or info@blackbox.com) to generate the license file for you. -
Page 92: How To Upload A License File
NEED HELP? LEAVE THE TECH TO US LIVE 24/7 CHAPTER 11: SYSTEM TECHNICAL SUPPORT 1.877.877.2269 11.2.2 HOW TO UPLOAD A LICENSE FILE Once you receive the license file, upload the new license. FIGURE 111. UPLOAD LICENSE SCREEN 1.877.877.2269 BLACKBOX.COM... -
Page 93: System-Administration - Certificates Upload
Certificate Authority (CA). The new system allows the users to upload these files into Boxilla so they can upload the other key into their browser. This will then act as an authenticated certificate and the user will no longer get the security warning. - Page 94 NEED HELP? LEAVE THE TECH TO US LIVE 24/7 CHAPTER 11: SYSTEM TECHNICAL SUPPORT 1.877.877.2269 FIGURE 113. UPLOAD CERTIFICATE BUTTON FIGURE 114. SELECT THE CERTIFICATE FILE A green alert on the page indicates that the certifcate is uploaded. 1.877.877.2269 BLACKBOX.COM...
- Page 95 NEED HELP? LEAVE THE TECH TO US LIVE 24/7 CHAPTER 11: SYSTEM TECHNICAL SUPPORT 1.877.877.2269 FIGURE 115. GREEN ALERT To delete any existing certificates, click on the delete cert button under certificates tab. FIGURE 116. DELETE BUTTON A popup message will be displayed once the certificate is deleted. FIGURE 117.
-
Page 96: System-Backup/Restore
When the Backup button is clicked, a complete backup of the Boxilla unit is created and added to the Backup table with a timestamp. This file is still on the Boxilla unit. To save this backup external to unit, click on Download on the “•••” icon options on the row on the Backup table to be downloaded. -
Page 97: System - Settings -Thresholds
NEED HELP? LEAVE THE TECH TO US LIVE 24/7 CHAPTER 11: SYSTEM TECHNICAL SUPPORT 1.877.877.2269 11.6 SYSTEM — SETTINGS —THRESHOLDS The System —> Settings—> Threshold tab shows the level used to define an alert for various measurements recorded on a connection and enables the Administrator to change them. -
Page 98: System-Settings-Network
11.7 SYSTEM—SETTINGS—NETWORK The System —> Settings —> Network tab shows the IP settings for the Boxilla unit and enables the Administrator to change the IP settings for the Boxilla unit (enter IP address, Net Mask and Gateway in IPv4 format and click Apply). -
Page 99: System - Administration - Boxilla Users
1.877.877.2269 11.9 SYSTEM — ADMINISTRATION — BOXILLA USERS The System —> Administration — Boxilla Users tab shows a table of users for the Boxilla unit (not the same as users for the managed domain) as shown below, System Users. FIGURE 122. SYSTEM USERS FIGURE 123. -
Page 100: Alerts
SUPPORT 1.877.877.2269 Alerts in Boxilla log significant events within the Boxilla and its managed domain. Alerts can be normal events such as users logging in, a user making a connection, a user disconnecting or logging out. Alerts are classified as Info, Warning or Critical. Normal events are Info Alerts. Events that may be indicate an unusual activity level is classified as a Warning Alert. -
Page 101: Alerts- History
NEED HELP? LEAVE THE TECH TO US LIVE 24/7 CHAPTER 12: ALERTS TECHNICAL SUPPORT 1.877.877.2269 12.1 ALERTS— HISTORY Alert history is a time-stamped log of events across the system. This history can be examined by either looking at all Alerts, or filtering them down to just Critical, Warning or Info by selecting the appropriate tab on the Alerts—History screen as shown in Figure 124. -
Page 102: Dashboard
The Ring shows the number of devices in the managed domain that are online and offline. A device is considered online if Boxilla can contact it over the network—and offline if not contactable. -
Page 103: Active Connections
NEED HELP? LEAVE THE TECH TO US LIVE 24/7 CHAPTER 13: DASHBOARD TECHNICAL SUPPORT 1.877.877.2269 4. Dropped Frames— the current number of dropped frames summed across all active connections in frames-per-seconds. The graph portion of the Dropped Frames indicator shows the minimum, maximum and average number of Dropped Frames across all active connection over the last 24 hours and a graph of Dropped Frames across all active connection over the last 24 hours. -
Page 104: Active Logins
NEED HELP? LEAVE THE TECH TO US LIVE 24/7 CHAPTER 13: DASHBOARD TECHNICAL SUPPORT 1.877.877.2269 13.3 ACTIVE LOGINS The Active Logins section of the dashboard displays the current active logins in the managed domain. The table portion provides a sortable list of the active connections. Each column can be used to sort the table— in ascending or descending order—just click on column header to sort and click again to invest sort order. -
Page 105: Appendix A. Replacing Your Boxilla
3. Use a computer connected to the same switch to login to the new Boxilla Unit. 4. Set the IP address of the Boxilla unit to match that of the original unit. (Ideally, you have all this done in advance of failure.) 5. -
Page 106: Appendix B. Boxilla And Emerald Or Emerald Or Invisapc Protocols
For management purposes, some other ports are used. The Black Box Discovery protocol uses UDP Multicast Group 224.0.1.249 (port 39150). This is sent by the Manager to discover Emerald or InvisaPC devices in the network. The router must allow UDP Multicast forwarding to allow devices on a subnet different than where the Manager is located to be discovered. -
Page 107: Appendix C: Regulatory Information
NEED HELP? LEAVE THE TECH TO US LIVE 24/7 APPENDIX C: REGULATORY INFORMATION TECHNICAL SUPPORT 1.877.877.2269 C.1 FCC AND IC STATEMENTS Federal Communications Commission and Industry Canada Radio Frequency Interference Statements This equipment generates, uses, and can radiate radio-frequency energy, and if not installed and used properly, that is, in strict accordance with the manufacturer’s instructions, may cause interference- to radio communication. -
Page 108: Appendix D: Disclaimer/Trademarks
D.1 DISCLAIMER Black Box Corporation shall not be liable for damages of any kind, including, but not limited to, punitive, consequential or cost of cover damages, resulting from any errors in the product information or specifications set forth in this document and Black Box Corporation may revise this document at any time without notice. - Page 109 NEED HELP? LEAVE THE TECH TO US LIVE 24/7 NOTES TECHNICAL SUPPORT 1.877.877.2269 _________________________________________________________________________________________________ __________________________________________________________________________________________________ __________________________________________________________________________________________________ __________________________________________________________________________________________________ __________________________________________________________________________________________________ __________________________________________________________________________________________________ __________________________________________________________________________________________________ __________________________________________________________________________________________________ __________________________________________________________________________________________________ __________________________________________________________________________________________________ __________________________________________________________________________________________________ _________________________________________________________________________________________________ __________________________________________________________________________________________________ __________________________________________________________________________________________________ __________________________________________________________________________________________________ __________________________________________________-________________________________________________ _________________________________________________________________________________________________ __________________________________________________________________________________________________ 1.877.877.2269 BLACKBOX.COM...
- Page 110 NEED HELP? LEAVE THE TECH TO US LIVE 24/7 NOTES TECHNICAL SUPPORT 1.877.877.2269 _________________________________________________________________________________________________ __________________________________________________________________________________________________ __________________________________________________________________________________________________ __________________________________________________________________________________________________ __________________________________________________________________________________________________ __________________________________________________________________________________________________ __________________________________________________________________________________________________ __________________________________________________________________________________________________ __________________________________________________________________________________________________ __________________________________________________________________________________________________ __________________________________________________________________________________________________ _________________________________________________________________________________________________ __________________________________________________________________________________________________ __________________________________________________________________________________________________ __________________________________________________________________________________________________ __________________________________________________-________________________________________________ _________________________________________________________________________________________________ __________________________________________________________________________________________________ 1.877.877.2269 BLACKBOX.COM...
- Page 111 NEED HELP? LEAVE THE TECH TO US LIVE 24/7 NOTES TECHNICAL SUPPORT 1.877.877.2269 _________________________________________________________________________________________________ __________________________________________________________________________________________________ __________________________________________________________________________________________________ __________________________________________________________________________________________________ __________________________________________________________________________________________________ __________________________________________________________________________________________________ __________________________________________________________________________________________________ __________________________________________________________________________________________________ __________________________________________________________________________________________________ __________________________________________________________________________________________________ __________________________________________________________________________________________________ _________________________________________________________________________________________________ __________________________________________________________________________________________________ __________________________________________________________________________________________________ __________________________________________________-________________________________________________ _________________________________________________________________________________________________ __________________________________________________________________________________________________ 1.877.877.2269 BLACKBOX.COM...
- Page 112 NEED HELP? LEAVE THE TECH TO US LIVE 24/7 TECHNICAL SUPPORT 1.877.877.2269 © COPYRIGHT 2018 BLACK BOX CORPORATION. ALL RIGHTS RESERVED. BXAMGR_USER_REV2.1.PDF...
Need help?
Do you have a question about the Boxilla and is the answer not in the manual?
Questions and answers