
Related Manuals for Delta RPI E5


Summary of Contents for Delta RPI E5
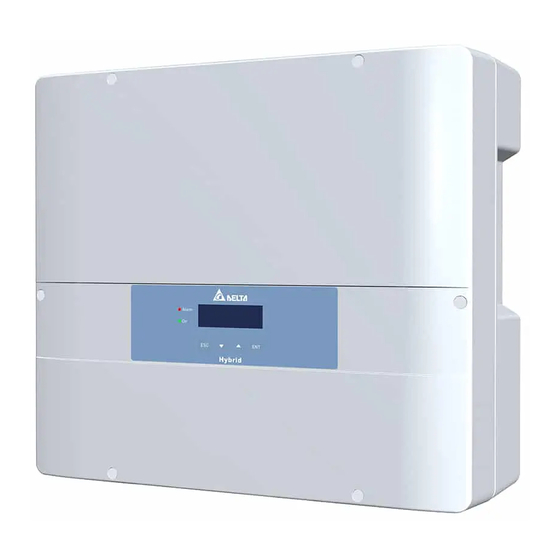
- Page 1 The power behind competitiveness Hybrid Inverter Operation and Installation Manual www.deltaww.com...
-
Page 3: Table Of Contents
Table of Contents ........1 General Information ....... . . ... - Page 4 ....... . . 5.3.6.3 Selling first mode ....... . . ...
- Page 5 Figure ......Figure 1-1 : Storage system operation illustration ....... . . Figure 2-1 : Unpack the inverter .
- Page 6 ......Figure 5-13 : Peak cut mode current flows ......Figure 5-14 : Peak cut mode behavior .
- Page 7 Table ........Table 2-1 : Packing list .
- Page 8 Safety Instructions This manual uses the following instructions for conveying important safety related information. CAUTION ! - Machine and equipment damage may occur if this hazardous situation is not avoided. WARNING ! - Death and serious injury may occur if this hazardous situation is not avoided. - Repair work on the device should ONLY be carried out by the manufacturer.
-
Page 9: 1 General Information
General Information 1 General Information 1.1 About this Manual This manual is to provide the explanation and procedures for installing, operating, maintaining, and troubleshooting of E5 hybrid inverter. 1.2 Product Description This device is a hybrid inverter with following features: • Integrated energy management system •... -
Page 10: 2 Product Overview
Product Overview 2 Product Overview 2.1 Unpack the Inverter The unpacking procedure of E5 inverter is shown as Figure 2-1. Figure 2-1 : Unpack the inverter 2.2 Checking Unit and Accessories Unforeseeable events causing damage or movement may occur during shipment. Please check following items upon receiving your inverter. -
Page 11: Figure 2-2 : Packing List
Product Overview ⑧ ① ⑨ ⑩ ② ⑤ ⑥ ⑦ ③ ④ Figure 2-2 : Packing list E5 Hybrid inverter Object Description Hybrid Inverter 1 pc E5 hybrid inverter The Instruction to provide the information of safety, User Manual 1 pc Installation, specification, etc. -
Page 12: Product Label
Product Overview 2.3 Product Label Please refer to Figure 2-3 for the location of product label. You can identify the model number and the specifications by the information on the product label. In Australia and New Zealand, users can also identify the supported Demand Response Modes (DRMs) of E5 here. -
Page 13: Exterior Objects
Product Overview 2.4 Exterior Objects The Inverter’s exterior objects are shown in Figure 2-4. The detailed input / output interfaces illustration is shown in Figure 2-5. LCD / LED Display and Buttons Input / Output Interfaces Label Grounding Hole Figure 2-4 : Inverter’s exterior objects BT Connector Manual bypass switch Standalone Button... -
Page 14: 3 Installation
Installation 3 Installation CAUTION ! - The unit should not be installed in a direct sunlight. - Servicing of batteries should be performed or supervised by personnel knowledgeable about batteries and the required precautions. WARNING ! - Do not install the unit near or on flammable surfaces. - Please mount the unit tightly on a solid / smooth surface. -
Page 15: Figure 3-1 : Mounting Bracket Dimension
Installation Figure 3-1 : Mounting bracket dimension Recommended Keep >30 cm from floor and Recommended water if installed this way Figure 3-2 : Recommended installation... -
Page 16: Figure 3-3 : Screw The Mounting Bracket
Installation Figure 3-3 : Screw the mounting bracket M4 Screw M4 Screw Figure 3-4 : Attach to the bracket and fasten with screws... -
Page 17: Figure 3-5 : Proper Installation Gaps
Installation CAUTION ! - The bracket supplied with the unit is specially designed and should be the only mounting device used for the unit. - It is recommended to install the inverter in a suitable location which offers non-obscured and safe access, in turn ensuring easy access for service and maintenance. -
Page 18: 4 Wiring
Wiring 4 Wiring WARNING:SHOCK HAZARD! - Whenever a PV array is exposed to sunlight, a shock hazard may exist due to output wires or exposed terminals. To reduce the risk of shock during installation, cover the array with an opaque (dark) material and ensure that the AC/DC disconnect switch in the inverter is set to OFF before commencing any wiring. -
Page 19: Figure 4-1 : Connection Of System For Floating Solar Array And Battery
Wiring AC Wiring L(Grid) BT Wiring N(Grid) PV Wiring N(Load) Parallel or Separate L(Load) Communication Wiring CAN and RS-485 Figure 4-1 : Connection of system for floating solar array and battery... -
Page 20: Ac Connection
AC wiring. The connection between Grid N and Load N is used to eliminate the floating voltage between Load N and PE. E5 can still works without the Grid N and Load N connection. Delta E5 Distribution Panel Grid... -
Page 21: Ac Plug Assembly
Wiring 4.2.3 AC Plug Assembly The AC wiring system diagram is shown in Figure 4-3. It recommended users follow the diagram connecting the AC wiring. The connection between Grid N and Load N is used to eliminate the floating voltage between Load N and PE. E5 can still works without the Grid N and Load N connection. -
Page 22: Figure 4-5 : Ac Plug Illustration For E5
Wiring Assemble the AC plug and wires as the procedures shown in Figure 4-5. The sequence of L(Grid), N(Grid), L(Load), N(Load) and PE must be connected correctly. The AC voltage should be L-N 230 Vac ± 10%. 1. Fixed this part 3. -
Page 23: Ac Plug Shield Assembly
Wiring 4.2.4 AC Plug Shield Assembly AC plug shield is a cover to prevent users loosens the AC plug easily and cause electrical shock. To assemble the AC plug shield, please follow the instruction below. 1. There has a slot at well installed AC plug's upper side. Please refer to the dotted line in Figure 4-6. -
Page 24: Dc Connection (From Pv Array)
Wiring 4.3 DC Connection (from PV Array) WARNING ! - When undertaking DC wiring, please ensure the correct polarities are connected. - When undertaking DC wiring please ensures that the power switch on the PV array is OFF. CAUTION ! - The maximum open circuit voltage of PV array should not exceed 600Vdc. -
Page 25: Battery Connection
Wiring 4.4 Battery Connection WARNING ! - When undertaking battery wiring, please ensure the correct polarities are connected. - When undertaking battery wiring, please ensures that the power switch on the battery side is OFF. - There is an internal disconnection device and a battery management system (BMS) in the battery box. -
Page 26: Can Connection
Wiring 4.5 CAN Connection The communication interface between E5 and battery is CAN bus. The physical connection type is RJ45 socket. To meet the IP65 class, please use the RJ45 connector of E5 accessory. Figure 4-9 describes the parts of RJ45 connectors. Figure 4-9 : Overview of RJ45 Connectors To assemble the connector, please follow the procedure below: 1. -
Page 27: Figure 4-11 : Suitable Cables For Rj45 Connector
Wiring RJ-45 cable without cable connector boots plug cover (soft plastic) is recommended as indicated in Figure 4-11. Figure 4-11 : Suitable cables for RJ45 connector The terminal configuration of CAN connection as specified in Table 4-5. Assignment VCC (+24V) Battery Fault Sensor CANH CANL... -
Page 28: Communication Module Connections
Wiring 4.6 Communication Module Connections Please refer to Figure 4-12 for the Communication Module illustration. The module provides VCC, RS-485, dry contact, and EPO terminals for different use. Dry Contact Terminal Resistor -485 EPO & Digital Inputs & DRMs Figure 4-12 : Communication module 4.7 RS-485 Connection The pin definition and data format of RS-485 is shown in Table 4-6. -
Page 29: Digital Input / Drm & Epo Functions
Wiring 4.8 Digital Input / DRM & EPO Functions Communication Module has 1 set of emergency power off function (EPO). When the VCC and INV OFF pins are short-circuited, inverter will shut down immediately. The module also provides 6 sets of digital input function (K1~K6). Please refer to Table 4-7 for the digital input definition. -
Page 30: Multiple Inverter Combinations
Wiring 4.10 Multiple inverter combinations E5 can be used in single-phase parallel combination system. In this application, inverter may be parallel connected to a same AC grid. It recommended connecting the RS-485, EPO, and digital input together of all E5s for an easily and immediately remote control. -
Page 31: Figure 4-15 : Epo & Digital Input & Drms Parallel Connection
Wiring EPO Button (VCC) K0 (EPO) K1 (0% Power) K2 (30% Power) INV_1 K3 (60% Power) K4 (100% Power) (VCC) K0 (EPO) K1 (0% Power) K2 (30% Power) INV_2 K3 (60% Power) K4 (100% Power) (VCC) K0 (EPO) K1 (0% Power) K2 (30% Power) INV_N K3 (60% Power) -
Page 32: 5 Turning On The Hybrid Inverter
Turning On the Hybrid Inverter 5 Turning On the Hybrid Inverter WARNING:BURN HAZARD! - The enclosure temperature may exceed 70°C while inverter is operation. A dangerous burn hazard is present in this situation. 5.1 LCD Flow Chart E5 includes a 4x20 character type LCD display and 2 LED to indicate inverter’s status. -
Page 33: First Startup
Turning On the Hybrid Inverter Condition Green LED Red LED Countdown or Standalone FLASH Power ON Error or Fault AC/DC switch off Bootloader mode FLASH Table 5-1 : LED indicator 5.2 First Startup At first startup, you have to supply AC power and turn on the AC/DC switch. After a while, LCD display will come live and ask you to set language, country (electricity regulation), and operation mode. -
Page 34: Home Page
Turning On the Hybrid Inverter 5.3 Home Page When inverter is operating normally, the LCD display will show home page on screen. In this page, you can get the information about inverter operation status, PV power, BT power (charge/ discharge), load power, and grid power (purchase/ selling). -
Page 35: Energy Log
Turning On the Hybrid Inverter 5.3.2 Energy Log Energy log can be separate into load power log and PV power log; each log can record its own day / month / year power. Meter Load Power ► ► Energy Log PV Power Event Log Inverter Info. -
Page 36: Inverter Information
Turning On the Hybrid Inverter 5.3.4 Inverter Information This page can helps you to recognize your inverter. There are serial number, installation date, firmware version, setting country, inverter operation mode, BT SOH, and BT Capacity information in this page. Please be noticed that inverter operation mode shown in this page is not the same as the operation mode set by user. -
Page 37: Operation Mode
Turning On the Hybrid Inverter 5.3.6 Operation Mode Hybrid inverter has 6 normal operation modes for users to choose. Each mode has different behavior between PV, battery, grid, and home load. The following are the description of these modes. In some area, the detail behavior of each operation mode may be different due to the local electricity regulations. -
Page 38: Self-Consumption Mode
Turning On the Hybrid Inverter 5.3.6.1 Self-consumption mode Self-consumption mode is standard hybrid inverter mode. In this mode, PV power is supplied in following priority : 1. Supply for home load. 2. Charge the battery until it is full. 3. Feed-in the remaining power to grid. When there is no PV power, battery starts to discharge and supply home load until it’s empty. -
Page 39: Peak Cut Mode
Turning On the Hybrid Inverter 5.3.6.2 Peak cut mode When home load consumption exceeds the Peak Cut Power you set in Function Setting page, battery will discharge to assist the power usage. PV Array Electrical Grid Hybrid Inverter Input Input or output Battery Home Load... -
Page 40: Selling First Mode
Turning On the Hybrid Inverter 5.3.6.3 Selling first mode Selling first mode is a standard PV inverter mode combining with 6 time settings. In normal operation, power generated by PV array will all feed-in to home load and grid. If users have set the time settings, inverter will change behavior in these time intervals. -
Page 41: Charge First Mode
Turning On the Hybrid Inverter 5.3.6.4 Charge first mode In this mode, PV power is supplied for battery charging first. After battery is fully charged, the remaining PV power then feed-in to home load and grid. Battery will not discharge in this mode even if there is no PV power. Users in Australia and New Zealand can charge the battery from grid power by using this mode due to the permission of electricity regulations. -
Page 42: Figure 5-19 : Charge First Mode Behavior (For Au & Nz)
Turning On the Hybrid Inverter PV power Home load power usage Excess PV power PV power used for home load consumption 00:00 07:00 12:00 19:00 24:00 Figure 5-19 : Charge first mode behavior (for AU & NZ) -
Page 43: Discharge First Mode
Turning On the Hybrid Inverter 5.3.6.5 Discharge first mode In this mode, battery will not be charged any more. All the PV power is feed-in to home load and grid. Battery keeps discharging when there is no PV power until it is empty. PV Array Electrical Grid Hybrid Inverter... -
Page 44: Without Battery Mode
Turning On the Hybrid Inverter 5.3.6.6 Without battery mode If your battery was damaged for some reason, you can disconnect the battery wiring and choose without BT mode. In this mode, hybrid inverter acts like a basic grid-tie PV inverter. PV Array Electrical Grid Hybrid Inverter... -
Page 45: Special Modes
Turning On the Hybrid Inverter 5.3.6.7 Special Modes In addition to the 5 modes above, hybrid inverter still have 3 special modes. These modes cannot be enabled by user but will be enabled automatically by inverter in some special condition. •... -
Page 46: Figure 5-26 : Forced Charge Mode Current Flows
Turning On the Hybrid Inverter • Forced charge mode Although battery stops any action when SOC (state of charge) reach 0%, the self-discharge phenomenon may still causing SOC lower than 0%. At this time, hybrid inverter will force battery charging from PV power and grid power until the battery SOC reaching 30%. -
Page 47: Function Setting
Turning On the Hybrid Inverter 5.3.7 Function Setting In function settings page, you can assign SOC limit, peak cut power, and BT charge / discharge time interval. • SOC Limit You can assign the lower limit of battery SOC. Battery will stop discharging when its SOC reach this limit. -
Page 48: Install Settings
Turning On the Hybrid Inverter 5.3.8 Install Settings CAUTION ! - The settings in Install Settings page can only be adjusted by qualified installers or engineers. Changing these settings may result in damage to the inverter and other equipment. Install Settings page is for installer only. To enter this page, installer has to key in installer password. -
Page 49: Figure 5-29 : Install Settings
Turning On the Hybrid Inverter • Wi-Fi Settings If you connect the inverter to a remote controller via Wi-Fi interface, you may use these functions to reset the Wi-Fi module settings. • Return to Factory This option is used to return factory settings. The entire energy log will be cleared. -
Page 50: 6 Maintenance
Maintenance 6 Maintenance Warning!Electric Shock - Before any maintenance, please make sure you are well insulated to avoid risk of electric shock. In order to ensure the normal operation of inverter, please check and clean the unit regularly. Once there are any impaired or loose parts, please contact your inverter installer. -
Page 51: 7 Error Message And Trouble Shooting
Error message and Trouble Shooting 7 Error message and Trouble Shooting ERROR Code Message Cause Action Check the grid frequency. If grid frequency is not in acceptable range, Grid frequency over the limit of contact the utility operator to modify it. AC Freq High If grid frequency lies in acceptable range electricity regulation. - Page 52 Error message and Trouble Shooting ERROR Code Message Cause Action Check the grid voltage. If grid voltage is not in acceptable range, Grid voltage over the limit of ask the utility operator to modify it. AC Volt High If grid voltage lies in acceptable range but electricity regulation.
- Page 53 Error message and Trouble Shooting Fault Code Message Cause Action Check the power supply line for direct DC component in grid current current. DC Injection over the limit Contact the utility operator to improve the grid quality. Check the temperature of installation Internal temperature too high Temp High environment.
- Page 54 Error message and Trouble Shooting Fault Code Message Cause Action HW Bus OVR Internal fault Contact your inverter supplier. HW Bus OVR Internal fault Contact your inverter supplier. Grid current >135% rated and AC Cur. High Contact your inverter supplier. keep over 50ms Grid current >125% rated and AC Cur.
-
Page 55: 8 De-Commissioning
De-Commissioning 8 De-Commissioning WARNING ! - To avoid injuries, please follow the procedures to unload the inverter. If it is necessary to put the device out of operation for maintenance or storage, please follow the procedures below: At inverter side: 1. -
Page 56: 9 Technical Data
Technical Data 9 Technical Data Model GENERAL Mounting bracket Enclosure Aluminum with powder coating Operating temperature -25℃~60℃ full power up to 40℃ Operating Altitude 0 to 2000m (0 to 6666 ft.) Relative humidity 0% – 100% non-condensing. Environmental category Outdoor, wet locations Protection degree IP65 (Electronics) Pollution degree... - Page 57 Technical Data Model DC INPUT (Solar side) Number of inputs 2 pairs MC4 Rated current 12Adc x 2 Maximum short circuit 15A / 15A current per MPPT (Isc) BT INPUT Operating voltage 40Vdc – 450Vdc Maximum allowed charge / discharge current Nominal charge/discharge current According to the battery specification Battery type...
- Page 58 Technical Data Model SYSTEM INFORMATION / COMMUNICATION Black-on-white character type LCD display User interface 365 days data logger and real time clock 30 events record External communication 2 RS-485 connections REGULATIONS & DIRECTIVES CE conformity Grid interface VDE-AR-N 4105, AS4777, G59/3, EN 50438 Emission EN 61000-6-3 Harmonics...
- Page 60 5013241204 Version 05170803...
Need help?
Do you have a question about the RPI E5 and is the answer not in the manual?
Questions and answers