Sign In
Upload
Download
Table of Contents
Contents
Add to my manuals
Delete from my manuals
Share
URL of this page:
HTML Link:
Bookmark this page
Add
Manual will be automatically added to "My Manuals"
Print this page
×
Bookmark added
×
Added to my manuals
Manuals
Brands
horsch Manuals
Farm Equipment
LEEB 4 LT
Operating instructions manual
horsch LEEB 4 LT Operating Instructions Manual
Hide thumbs
1
2
3
4
5
6
7
8
9
Table Of Contents
10
11
12
13
14
15
16
17
18
19
20
21
22
23
24
25
26
27
28
29
30
31
32
33
34
35
36
37
38
39
40
41
42
43
44
45
46
47
48
49
50
51
52
53
54
55
56
57
58
59
60
61
62
63
64
65
66
67
68
69
70
71
72
73
74
75
76
77
78
79
80
81
82
83
84
85
86
87
88
89
90
91
92
93
94
95
96
97
98
99
100
101
102
103
104
105
106
107
108
109
110
111
112
113
114
115
116
117
118
119
120
121
122
123
124
125
126
127
128
129
130
131
132
133
134
135
136
137
138
139
140
141
142
143
144
145
146
147
148
149
150
151
152
153
154
155
156
157
158
159
160
161
162
page
of
162
Go
/
162
Contents
Table of Contents
Troubleshooting
Bookmarks
Table of Contents
Foreword
Table of Contents
1 Safety
Notes on Representation
Qualification and Training of Personnel
Work Place of the Operator
Danger Caused by Failing to Comply with the Safety Notes
Safety Conscious Working
Safety Notes for the Operator
Safety and Accident Prevention Instructions
Coupling and Uncoupling the Machine
Working with the Machine
Changing Equipment
Transporting the Machine
Hydraulic System
Electrical System
Towed Machines
Brake System
Pneumatic Brake System
Tyres
Handling Crop Protection Agents
Operating the Crop Protection Sprayer
Maintenance
Loading and Unloading
Unauthorized Conversion and Manufacture of Spare Parts
Impermissible Operating Modes
Spare Parts and Wear Items as Well as Auxiliary Materials
Working in the Vicinity of High Voltage Power Lines
Phone and Radio Equipment
Danger Caused by Residual Energy
Cleaning and Waste Disposal
Intended Use
Specified Equipment
Consequential Damage
Effects When Using Certain Crop Protection Products
Danger Zones and Danger Points
Personal Protection Equipment
Organizational Measures
Operating Instructions
Safety Notes on the Machine
Instruction Sticker
Safety Stickers
Position of Safety Stickers
2 Product Description
Overview
Safety and Protective Features
Fluid Circuit LT CCS - Components
Fluid Circuit LT CCS Pro - Components
Supply Lines between Tractor and Machine
Traffic-Compliant Equipment
Technical Data
Dimensions
Permissible Total Weight and Tyres
Nose Development Data
Necessary Tractor Equipment
3 Design and Function
Control Unit
Connections
Folding Boom
Nozzles
Spraying Line
Spraying Control
CCS - Continuous Inside Cleaning
Fluid Circuit - Function
Induction Hopper
Spraying Pump
Piston Diaphragm Pump
Hand Washing Tank
Agitator
Filter
External Cleaning System (Optional)
Hydraulic Connections
Coupling Hydraulic Hoses
Uncoupling Hydraulic Hoses
Pulling Tool (Optional)
Lifting Points
Transport, Document and Safety Container
Pneumatic Brake System
Automatic Load Dependent Brake Pressure Regulator (ALB)
Connecting the Brake System
Disconnecting the Brake System
Drawbar
Automatic Ackerman Steering
Adjusting the Mechanical Steering End Stop
Suspension
Hydraulic Support
Working Platform with Ladder
Fresh Water Tank
Main Control Terminal
Multi-Function Handle
Assignment of Multi-Function Handle
PTO-Shaft Pump (Optional)
Nightlight (Optional)
Hydraulic Compressor
4 Design and Function of the Spraying Boom
Folding Boom Control
Boomcontrol
Boomcontrol Modes
Folding and Unfolding
Folding Variants - Folding Boom
Adjusting the Spraying Height
Transport Lock
Slope Compensation / Pendulum Lock
Collision Protection
Spraying Line
Circulation System
Cleaning Nozzle Tube and Nozzles
Nozzle Body
Single Nozzle Body with
Pneumatic Control Valve
Multiple Nozzle Body Manual 3-Fold
Multiple Nozzle Body Pneumatic
Border Nozzles, Electric (Option)
Assembling and Cleaning Nozzles
Assembling Nozzles
Changing Nozzles
Cleaning Nozzles
Disassembling the Diaphragm Valve in Case of Dripping Nozzles
5 Commissioning
Check Suitability of the Tractor
Safeguarding Tractor / Machine
Initial Commissioning of the Service Brake System
Assemble the Wheels
Adjusting the Hydraulic System on the Hydraulic Valve Block
6 Transport Travels
Safety Notes
Transport Lock
Folding Boom Rest
Package Lock
Locking of Slope Compensation
Locking of Parallelogram
7 Coupling and Uncoupling the Machine
Coupling the Machine
Uncoupling the Machine
Manoeuvring the Uncoupled Machine
8 Working with the Machine
Preparing for Spraying
Preparing the Spraying Mixture
Calculating Filling / Refilling Quantities
Filling Table for Residual Areas
Filling with Water
Filling the Spraying Mixture Tank through the Filler Connection
Direct Filling (External Filling)
Filling through the Filling Dome
Filling the Fresh Water Tank through the Filler Connection
Flushing in Preparations
Induction Hopper
Flushing in Liquid Preparations During the Filling Process
Flushing in Liquid Preparations
Full or Partly Filled Solution Tank
Flushing in Powdery Preparations and Carbonyl Diamide
Pre-Cleaning the Canister with Spraying Mixture
Pre-Cleaning the Canister with Fresh Water
Spraying Operation
Special Notes for Spraying Operation
Adjusting the Spraying Height
Spraying Pressure, Nozzle Size, Application Quantity, Travel Speed, Agitator
Spraying
Measures for Windward Drift Reduction
Spraying with 25 CM Nozzle Spacing and Reduced Target Area Distance
Emptying the Spraying Mixture Tank Via the Pressure Outlet
Residual Quantities
Technical Residual Quantity
Eliminating Residual Quantities
Draining off Technical Residual Quantities
Diluted Residual Quantities
Draining the Fresh Water Tank
Troubleshooting
9 Sprayer Cleaning, Maintenance
Cleaning
CCS - Continuous Inside Cleaning (Continuous Cleaning System)
Cleaning the Filters
Cleaning the Sprayer with the Tank Empty
Cleaning the Sprayer with the Tank Filled
Folding Boom Cleaning with "Air Valve" (Option)
10 Putting into Storage
At the End of the Spraying Season
Drainage
Draining of Solution Container
Drainage of Spraying Pump
Draining the Fresh Water Tank
Putting the Sprayer System in to Winter Storage
Before the New Season
11 Maintenance and Care Plan
Lubrication Instructions
Overview of Lubrication Points Basic Machine
Overview of Lubrication Points Middle Section
Overview of Lubrication Points Spraying Boom
Drawbar
High Pressure Cleaner (Optional)
Ball-And Socket-Coupling
Axle and Brake
General Visual Inspection
Checking the Wheel Hub Bearing Play (Workshop Work)
Replacing the Grease of the Wheel Hub Bearing
Brake Lining Inspection
Brake Adjustment
Air Vessel
Test Instructions for Twin-Line Brake System (Workshop Work)
Tyres / Wheels
Air Pressure in Tyres
Assembling Tyres (Workshop Work)
Maintenance - Hydraulics
Identification of Hydraulic Hoses
Maintenance Intervals
Inspection Criteria for Hydraulic Hoses
Assembly and Disassembly of Hydraulic Hoses
Oil Change PTO-Shaft Pump
Calibrating the Flow Meter
Notes on Crop Sprayer Test
Pump Capacity Test
Flow Meter Test
Electric Lighting System
12 Nozzle Selection
General
Procedure
With Diagram and Universal Table
With Table of Application Quantities
Pressure Ranges of Different Nozzles
13 Liquid Fertiliser Operation
Conversion Table for Spraying Liquid Fertiliser AHL
14 Waste Disposal
15 Tightening Torques
Index
Advertisement
Quick Links
Download this manual
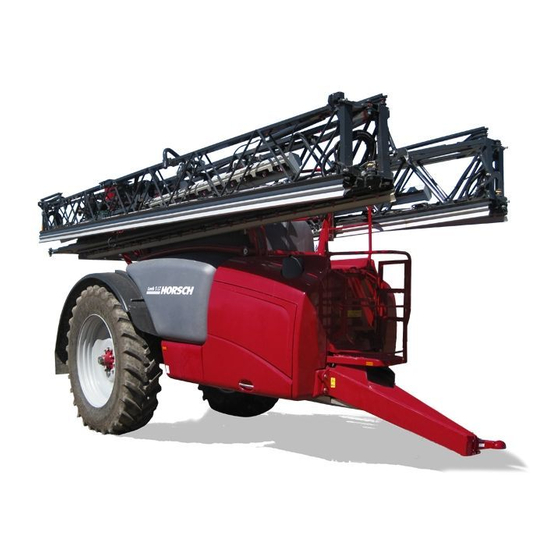
OPERATING INSTRUCTIONS
LEEB 4 / 5 LT
READ CAREFULLY PRIOR TO STARTING UP!
KEEP OPERATING INSTRUCTIONS IN A SAFE PLACE!
ART.:
80900208
ISSUE:
03/2016
Table of
Contents
Previous
Page
Next
Page
1
2
3
4
5
Advertisement
Table of Contents
Need help?
Do you have a question about the LEEB 4 LT and is the answer not in the manual?
Ask a question
Questions and answers
Related Manuals for horsch LEEB 4 LT
Farm Equipment horsch LEEB 5 LT Operating Instructions Manual
(162 pages)
Farm Equipment Horsch LEEB LT Short Instruction
For filling and spraying variant eco, ccs and ccs pro (4 pages)
Farm Equipment horsch LEEB LT Operating Instructions Manual
Terminal (127 pages)
Farm Equipment horsch Leeb 8 GS Operating Instructions Manual
(188 pages)
Farm Equipment horsch Leeb 6 GS Operating Instructions Manual
(154 pages)
Farm Equipment horsch LEEB 12 TD Operating Instructions Manual
(181 pages)
Farm Equipment horsch Leeb 5.280 VL Operating Instructions Manual
Self-propelled crop protection sprayer (308 pages)
Farm Equipment horsch Leeb VL Instructions Manual
(137 pages)
Farm Equipment horsch LEEB PT 330 Operating Instructions Manual
(203 pages)
Farm Equipment Horsch Express 4 KR Operating Instructions Manual
(78 pages)
Farm Equipment horsch Panther 460 Owner's Manual
Planting systemfarm equipment (98 pages)
Farm Equipment horsch Maestro SW Series Owner's Manual
Dry fertilizer (106 pages)
Farm Equipment horsch SW 750 Owner's Manual
Seed wagon (104 pages)
Farm Equipment horsch 500 Owner's Manual
Commodity cart (100 pages)
Farm Equipment horsch SW 600 Owner's Manual
Seed wagon (100 pages)
Farm Equipment horsch SW 12000 SD Operating Instructions Manual
(52 pages)
This manual is also suitable for:
Leeb 5 lt
Table of Contents
Save PDF
Print
Rename the bookmark
Delete bookmark?
Delete from my manuals?
Login
Sign In
OR
Sign in with Facebook
Sign in with Google
Upload manual
Upload from disk
Upload from URL


Need help?
Do you have a question about the LEEB 4 LT and is the answer not in the manual?
Questions and answers