Table of Contents
Advertisement
Quick Links
Advertisement
Table of Contents

Related Manuals for X-Rite MA 3


Summary of Contents for X-Rite MA 3
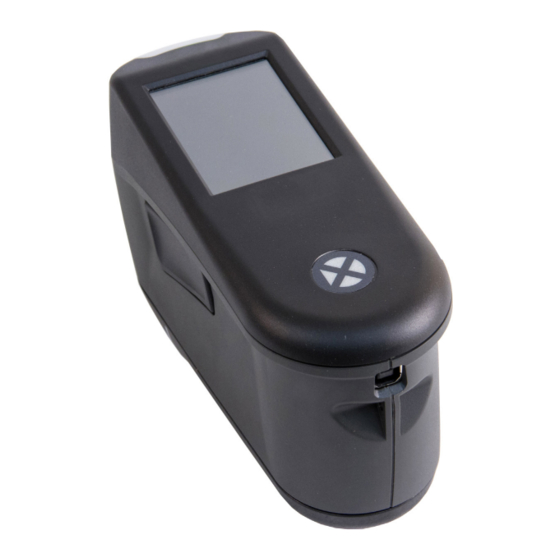
- Page 1 MA 3 Spectrophotometer User Guide...
- Page 2 CAN ICES-3 (A) / NMB-3 (A) Equipment Information Use of this equipment in a manner other than that specified by X-Rite, Incorporated may compromise design integrity and become unsafe. To avoid discomfort, do not look directly into the measurement optics when the instrument is on.
- Page 3 S P E C T R O P H O T O M E T E R Firmware consists of source code of: Copyright 2006, Atmel Corporation All rights reserved Redistribution and use in source and binary forms, with or without modification, are permitted provided that the following conditions are met: - Redistributions of source code must retain the above copyright notice, this list of conditions and the disclaimer below.
- Page 4 X-Rite, Incorporated. Patents: www.xrite.com/ip “© 2017, X-Rite, Incorporated. All rights reserved” X-Rite® is a registered trademark of X-Rite, Incorporated. All other logos, brand names, and product names mentioned are the properties of their respective holders. Warranty Information X-Rite warrants this Product against defects in material and workmanship for a period of twelve (12) months from the date of shipment from X-Rite’s facility, unless mandatory law provides for longer periods.
-
Page 5: Table Of Contents
S P E C T R O P H O T O M E T E R Table of Contents Introduction and Setup Packaging Powering On Charging the Battery User Interface Navigating the Screen Scrolling through Settings and Jobs Measure Button Contact Sensors, Indicators and LEDs Home Screen Job List Mode... -
Page 6: Introduction And Setup
Safety strap connection, optional Packaging Your instrument packaging should contain all the items listed below. If any of these items are missing or damaged, contact X-Rite or your Authorized Representative. • MA 3 instrument • Screen protector • USB interface cabling •... -
Page 7: Charging The Battery
S P E C T R O P H O T O M E T E R When first powered up, the instrument goes through a startup procedure and displays a splash screen before the main screen appears. Splash Screen Home Screen Charging the Battery General... -
Page 8: User Interface
S P E C T R O P H O T O M E T E R USER INTERFACE Navigating the Screen The instrument features a graphical touch screen display. All functionality is accessed directly through the screen. Scrolling through Settings and Jobs The Up (▲) and Down (▼) arrows appears on screens when some settings or jobs cannot be accessed from the main view. -
Page 9: Contact Sensors, Indicators And Leds
S P E C T R O P H O T O M E T E R Contact Sensors, Indicators and LEDs To aid in proper positioning and ensure repeatability of sample measurements, the instrument incorporates three contact sensors that are arranged around the measurement port. These sensors require an even amount of contact to be applied across all three sensors before a measurement is triggered. -
Page 10: Home Screen
S P E C T R O P H O T O M E T E R Home Screen When the instrument is powered-up, the home (top level) screen appears after the startup procedure is complete. Select the modes by tapping the icons located on the display screen. Header bar Job mode Connect/Disconnect... -
Page 11: Settings Mode
S P E C T R O P H O T O M E T E R SETTINGS MODE Settings mode is used to adjust and view the instrument’s settings. You should review the current settings before using the instrument for the first time. However, you can go back and change these settings at any time. Entering Settings Mode 1. -
Page 12: Measurement Option
S P E C T R O P H O T O M E T E R Measurement Option This option is used to set auto measure mode. Manual Measure: When set to Manual, you must press the Measure button or tap the screen once all three contact sensor indicators turn green in the display to take a measurement. -
Page 13: Factory Reset Option
S P E C T R O P H O T O M E T E R Factory Reset Option This option is used reset the instrument to its factory default settings. All stored sample will also be deleted when activated. Select Yes to reset to the factory default settings or select No exit the setting without resetting. -
Page 14: Calibration Mode
S P E C T R O P H O T O M E T E R CALIBRATION MODE The instrument must be calibrated on the white tile every 14 days. Measurements with expired calibration are still possible, but with a warning at the beginning of each job. Refer to the Cleaning section in the Appendices for information on cleaning the calibration reference. - Page 15 S P E C T R O P H O T O M E T E R 3. When ready, tap Calibration and then tap Yes to start calibration. Do not touch the instrument throughout the measurement sequence. Current calibration status NOTE: If an error message appears after white calibration, try measuring the white tile again.
-
Page 16: Job List Mode
S P E C T R O P H O T O M E T E R JOB LIST MODE The Job List mode is used to measure and delete sample data. The instrument stores measurements as jobs (multiple measurements per job). Each job must complete all required measurements before the next job can be selected. -
Page 17: Deleting Jobs
S P E C T R O P H O T O M E T E R 5. Hold the instrument steady and press the Measure button or tap the screen to initiate a measurement in case the instrument is configured in Manual Mode. If the instrument is configured in Automatic Mode, the measurement will be triggered as soon as (with a one-second delay) the instrument is correctly positioned on the check zone and all pins are in contact (green indicators on UI). - Page 18 S P E C T R O P H O T O M E T E R 2. Tap Delete Data or Delete Job in the screen to continue. If Delete Data is selected, only the data will be deleted and not the job. 3.
-
Page 19: Appendices
APPENDICES Service Information X-Rite provides repair service to their customers. Because of the complexity of the circuitry, all warranty and non warranty repairs should be referred to an authorized service center. For non warranty repairs, the customer shall pay shipping and repair cost to the authorized service center, and the instrument shall be submitted in the original carton, as a complete unaltered unit, along with all the supplied accessories. - Page 20 S P E C T R O P H O T O M E T E R 2. Lift up on the right side panel and remove. 3. Unplug the battery connector and remove the old battery pack. 4. Plug in the battery connector and insert the new battery pack into the clip. 5.
-
Page 21: Troubleshooting
S P E C T R O P H O T O M E T E R Troubleshooting Prior to contacting X-Rite support department for instrument problems, try the applicable solution(s) described below. If the condition persists, contact us using one of the methods listed in the Service Information section. -
Page 22: Instrument Specifications
S P E C T R O P H O T O M E T E R Contact sensor(s) are not Open a new job to show the 3 sensor indicators working correctly. Sensors on the screen and place the instrument on a flat may be stuck due to dirt or surface and then lift it. - Page 23 8105 Regensdorf Switzerland Phone (+41) 44 842 24 00 Fax (+41) 44 842 22 22 Asia Pacific Headquarters X-Rite Asia Pacific Limited Suite 2801, 28th Floor, AXA Tower Landmark East, 100 How Ming Street Kwun Tong, Kowloon, Hong Kong Phone (852)2568-6283 Fax (852)2885 8610 for a local office near you.
Need help?
Do you have a question about the MA 3 and is the answer not in the manual?
Questions and answers