Table of Contents
Advertisement
Quick Links
Advertisement
Table of Contents
Troubleshooting

Related Manuals for AmeriWater CENTURION 1500+


Summary of Contents for AmeriWater CENTURION 1500+
- Page 1 CENTURION 1500 OPERATING MANUAL P/N 98-2010 REV. C...
-
Page 3: Document History
Revision C December 2017 CENTURION 1500 OPERATING MANUAL For L998374/5 DOCUMENT HISTORY Revision Date of Change January 2013 January 2016 December 2017... -
Page 4: Table Of Contents
CONTENTS DOCUMENT HISTORY ................3 PREFACE ..................1 CONTACT US .................. 2 HEALTH AND SAFETY ............... 3 Explanation of expressions ..................3 Explanation of labels ..................... 3 3.2.1 Rear panel labels ....................4 Safety considerations .................... 7 Intended Use ......................8 3.4.1 Operating staff ...................... - Page 5 TROUBLESHOOTING ............... 27 Troubleshooting Guide ............... 28 9.1.1 Warning & alarm messages .................. 28 9.1.2 Electrical & mechanical faults ................33 9.1.3 Water quality non-compliance ................34 10.0 CONSUMABLES AND SPARES ............35 11.0 Technical specification ............... 36 11.1 Services/ connections and physical properties ............ 36 11.1.1 Electrical specifications/connections ..............
-
Page 6: Preface
1.0 PREFACE Note: The Centurion 1500 is an accessory in a Medical Electrical (ME) System in which the dialysis equipment comprises the Medical Electrical Equipment. This Operating Manual provides all of the information and instructions needed to operate the Centurion 1500 single patient reverse osmosis unit. -
Page 7: Contact Us
CONTACT US Should you require any additional information relating to the servicing, maintenance, spares and consumables, simply contact your Healthcare provider or AmeriWater or refer to the relevant accompanying manuals and guides detailed in Section 1.0 PREFACE: AmeriWater: Tel No. 800-535-5585 (Or your local authorized AmeriWater distributor dealer or Healthcare provider) Useful Telephone Nos. -
Page 8: Health And Safety
Refer to Manual: is used when reference should be made to the manual to obtain advice and or information before carrying out a task. Please read the information given in the operating instructions carefully before proceeding. If in doubt contact AmeriWater or your Healthcare provider... -
Page 9: Rear Panel Labels
Trip Hazard: There are a number of water and electrical connections from the rear of the unit to the renal replacement equipment and general services. To warn anyone from inadvertently tripping over these service lines the label above is used as a visual warning. Hot Surface: This label is used to indicate that the surface labelled may be hot to touch under certain circumstances during the operation of the unit and in particular during the heat disinfection cycle. - Page 10 Placed above the main cooling fan, the label is used to warn user not to cover the vent which is essential for safe operation. This label identifies the model of the unit, its part number, unique serial no. year of manufacture, the original manufacturer’s details, supply mains rating, feedwater pressure range and temperature.
- Page 11 Supply mains On/Off isolating switch I = Power On O = Power Off This label identifies the position of the unit’s two external fuses. UNDER NO CIRCUMSTANCES try to remove or replace these fuses, always refer to your Healthcare provider. Refer to Section 11.1.2 for Fuse details The supply mains electrical power lead is plugged in at this point.
-
Page 12: Safety Considerations
• If the unit’s performance becomes impaired and any remedial work appears to be outside the scope of this manual, do not operate the unit and seek advice from AmeriWater or your Healthcare provider. • The unit must only be serviced and maintained by AmeriWater or by your Healthcare provider. -
Page 13: Intended Use
3.4 Intended Use The AmeriWater Centurion 1500+ Reverse Osmosis Systems are water treatment systems intended for use in hemodialysis applications. They are designed to pre-treat and purify potable water for use in making dialysate for hemodialysis and to meet current AAMI and Federal (U.S.) standards. The device is intended to be a component in a complete water purification system, and is not a complete water treatment system. -
Page 14: Residual Dangers
Alternatively press the red “STOP” button on the touch-screen twice. Unless safe to do so Do Not restart the unit until you have spoken to AmeriWater or your Healthcare provider for advice or assistance, contact telephone numbers can be found in Section 2. -
Page 15: Disposal Of Consumables
AmeriWater or the location of the unit is changed without notification to AmeriWater. -
Page 16: About Your Centurion 1500
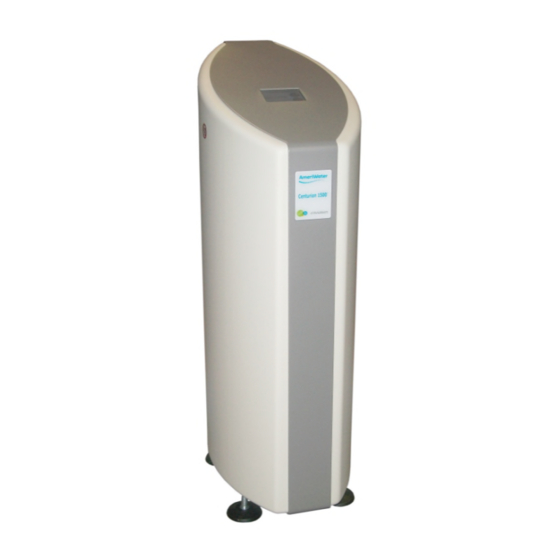
ABOUT YOUR CENTURION 1500+ General views of the Centurion 1500 unit Side view Front view Rear view Overview The Centurion 1500 water purification unit has been specifically designed as a single patient, reverse osmosis (RO) unit to supply purified water suitable for hemodialysis or renal replacement therapies. -
Page 17: Detailed Features And Process Of Operation
• Audible alarm. • Data logging facility. • Internal leak and water loss detection system. • Recirculation up to point of use. • Ultra-filter • Tilt detection. • Built in backflow prevention. • Semi-automatic chemical cleaning program. Detailed features and process of operation To reduce the risk of accidental damage all external water and electrical connections can be found at the back of the unit. -
Page 18: Explanation Of Rear Connections
Explanation of rear connections Cooling Fan • Key Switch • Alarm Output • USB port • On/Off switch • Fuses • Power lead socket • Acid cleaner inlet • Water In • Water Out • Water Return • Drain... -
Page 19: Operating The Touchscreen
OPERATING THE TOUCHSCREEN Explanation of Buttons The operation of the Centurion 1500 is controlled via the touch screen display which can be found on the top of the unit. The picture below shows an interpretation of the display. Menu Selection Button Start CENTURION+... -
Page 20: Start" Button
5.1.3 “START” button Pressing the “START” button the unit will go into “PROCESSING” mode and start to produce purified water and the screen below will be displayed. PROCESSING 15.09.09 12:36 Status Function Permeate Solenoid Break Tank Drain Solenoid Inlet Solenoid RO Module Stop STOP... -
Page 21: Stopping The Unit During Normal Operation
5.2.3 Stopping the unit during normal operation To stop the unit at any time press the “STOP” button on the screen. If the unit has been running for two hours or more, the unit will perform a shut-down flush which directs a high concentrate flow across the membrane to the drain for 30 seconds. -
Page 22: Mimic Symbols
5.3.1 Mimic symbols The symbols are presented on the screen below the “status bar”. The text indicates the current operation and the stage reached within that operation. This text will alternate with any warning or advisory messages that may be present. The symbols represent the main components within the unit. -
Page 23: Menus And Settings
MENUS AND SETTINGS User menu Pressing the “MENU” button from the POWER-ON screen will reveal the “USER MENU”. There are six sub menus which will allow you to adjust the “Time & Date” (see Section 6.1.1), start a “Clean” (see Section 7), reset the internal Ultra-filter replacement date (see Section 6.1.2), for “Product Information”... - Page 24 Set Time If you select “Set Time” the BACK screen opposite will be displayed. The flashing cursor identifies which digit you can adjust. 14:46 By using the ▲/▼buttons you can either increase or decrease the HH:MM number value. Once the correct number has been selected, press “NEXT”...
-
Page 25: Pre-Filter Replacement Date
6.1.2 Pre-Filter replacement date (Centurion 1500 UF variant L998374 only) The Pre filter replacement date should be reset when the Ultra-filter is replaced during maintenance. This would normally be carried out by your Healthcare provider and will ensure that the Centurion unit will provide a prompt message when the next filter change becomes due. -
Page 26: Engineer & Settings Menu
6.1.4 Engineer & Settings menu Warning: The ‘Engineer and Settings Menus’ are only accessible for use by trained and authorized personnel. If any data held within these menus is altered the performance/safety of the unit and/or water quality may be seriously affected. An access PIN number is required to enter this menu. -
Page 27: Chemical Cleaning And Heat Disinfection
Warning: Chemical cleaning of the unit MUST only be carried by an approved or person trained by AmeriWater or your Healthcare provider. DO NOT attempt to clean the unit if you have not been trained. DO NOT use any other household cleaner to clean the unit, only use those cleaners supplied by AmeriWater, or your Healthcare provider or you may risk causing severe damage to the unit and its components and pose a serious risk to yourself or the person on dialysis. -
Page 28: Heat Disinfection
Warning: Heat disinfection should only be carried out if you have been trained by AmeriWater or by your Healthcare provider. For security a key is provided once you have been trained which will enable you to activate the heat disinfection cycle. DO NOT attempt to clean the unit if you have not been trained. -
Page 29: Schedule Of Regular Checks & Tasks
8.1.1 Schedule of regular checks & tasks Typical range Typical Task detail Comments of values frequency Pre-Dialysis Refer to Section Before each Refer to checks dialysis Healthcare session provider if results are unacceptable Dialysis water Maximums as Yearly To be sampled quality: listed in Tables 1 by your... -
Page 30: Pre-Dialysis Checks
Healthcare provider. If unsure ask, or contact AmeriWater for advice. Take the necessary precautions when wiping up any bodily fluids, your Healthcare provider should be consulted if unsure. -
Page 31: Storage And Preservation Recommendations
Storage and preservation recommendations Use the guide below to determine the best method to store your unit if it is not be used for any length of time. Time not in Recommendations Up to 1 month Ideally the unit should be left in Power-On Standby mode such that it will run for 10 minutes every 2 hours. -
Page 32: Troubleshooting
Healthcare provider in diagnosing the fault. Contact your Healthcare provider or AmeriWater and provide them with the details of the fault. -
Page 33: Troubleshooting Guide
Troubleshooting Guide 9.1.1 Warning & alarm messages Displayed Message or Reason Checks Proposed Actions notification The internal water 1. Make sure the 1. If the feedwater supply is “Tank Low Level” break tank has feedwater supply is not a problem and the unit insufficient water turned on and still does not run and this... - Page 34 The water being 1. Check the 1. If the feedwater has a high “Temperature High” produced has a temperature of the temperature, investigate or temperature incoming water change supply. above the entered supply. set point of 95 2. Remove any local external Deg F 2.
- Page 35 The unit has been 1. Check that the 1. At the front underside of “Tilt” moved or knocked unit is upright and the unit is a black drain plug, whilst running to standing on a firm unscrew the plug and let any such an extent flat surface.
- Page 36 The time period No checks If you are trained and “HeatSan Due” set by your required. approved to do so carryout a Healthcare heat disinfection on the unit provider for the at the next convenient time. next Heat If you are not authorized to disinfection has clean the unit then contact expired and the...
- Page 37 During heat 1. The fault may lie 1. Advise your Healthcare disinfection the with the heater, Provider immediately, do not Over Temperature unit has detected circulating pump or try to carry out another heat a temperature of one of the disinfection cycle the circulating temperature...
-
Page 38: Electrical & Mechanical Faults
9.1.2 Electrical & mechanical faults Observed Fault Reason/s Checks Proposed Actions The unit will not 1. The mains 1. Check that your 1. If checks 1 – 3 switch on and the incoming power area is not have not proved to screen is blank. -
Page 39: Water Quality Non-Compliance
temperature has 4. Check the last time dropped significantly. the unit was chemically cleaned 6. One of the internal and make a note of pressure sustaining the date. valves may be 5. Only during incorrectly set or at extreme winter fault. -
Page 40: Consumables And Spares
guidance when not using the unit. 5. Refer to section 8.2 “Pre- dialysis checks” to assess RO membrane performance. 6. Repeat analysis to confirm result. Dialysis water 1. Excessive 1. Obtain sample 1. It will be the quality: One or more increase in of feedwater to responsibility of your... -
Page 41: Technical Specification
11.0 Technical specification 11.1 Services/ connections and physical properties 11.1.1 Electrical specifications/connections Mains supply Max Power Electrical consumption Operation supply (Watts) Standby Normal Single operation phase 115V 60Hz During heat plus earth 1000 disinfection Warning: To avoid risk of electric shock, this equipment must be connected to a supply main with protective earth. -
Page 42: Ip Rating
Volt free/dry changeover contacts Minimum applied Voltage: 34Vdc/24Vac Maximum applied current: 1 Amp Details of this connection shall be provided upon request, contact AmeriWater or your Healthcare provider. 11.1.5 Water quality and performance Max drain flow- Permeate Recovery Output water quality... -
Page 43: Raw Water Break Tank
11.1.8 Raw water break tank Working volume: 0.092USgals (350 mls) Classification: 20mm air gap to provide backflow prevention Material: 316 Stainless steel 11.1.9 Weights and dimensions Width Depth Weight (Lbs) Height (inches) (inches) (inches) 86 (Dry) 99 (Working) 11.1.10 Main PCB battery Voltage: Type: Lithium, CR2032... -
Page 44: Guidance On Electromagnetic Emissions
Guidance and manufacturer’s declaration – electromagnetic emissions The Centurion 1500 is intended for use in the electromagnetic environment specified below. AmeriWater or Healthcare Provider should assure that it is used in such an environment. Emissions Test Compliance Electromagnetic environment - guidance... -
Page 45: Guidance On Electromagnetic Immunity
Guidance and manufacturer’s declaration – electromagnetic immunity The Centurion 1500 is intended for use in the electromagnetic environment specified below. AmeriWater or your Healthcare Provider should assure that it is used in such an environment. Immunity test IEC 60601 test... -
Page 46: Guidance On Electromagnetic Immunity For Non-Life Supporting Equipment
Guidance and manufacturer’s declaration – electromagnetic immunity The Centurion 1500 is intended for use in the electromagnetic environment specified below. AmeriWater or your Healthcare Provider should assure that it is used in such an environment. Immunity test IEC 60601 test... -
Page 47: Separation Distances For Rf Devices And Centurion
The Centurion 1500 is intended for use in an electromagnetic environment in which radiated RF disturbances are controlled. AmeriWater or your Healthcare Provider will help prevent electromagnetic interference by calculating and maintaining a minimum distance between portable and mobile RF communications equipment (transmitters) and the Centurion unit as recommended below, according to the maximum output power of the communication equipment. -
Page 48: Classification Mark
11.8 Classification mark The device bears the following UL mark: CLASSIFIED BY UNDERWRITERS LABORATORIES INC. WITH RESPECT TO ELECTRIC SHOCK, FIRE, MECHANICAL HAZARDS ONLY IN ACCORDANCE WITH ANSI/AAMI ES60601-1 (2005, 3 ed.) and CAN/CSA-C22.2 No. 60601-1 E351652... -
Page 49: Appendices
12.0 APPENDICES 12.1 How to use the push-fit connectors To make a connection, simply push to tube in by hand; the pushfit collet locking system then holds the tube firmly in place without deforming it or restricting flow Push the tube into the connector until the tube stops. -
Page 50: E-Waste
12.2 E-Waste Disposal of the unit or any electrical component from the unit must be in accordance with local requirements in your province or state for the disposal of electrical waste (E-Waste). Your Healthcare provider will be responsible for the disposal of any such items and for the disposal of the unit if required. -
Page 51: Flow Schematic
12.3 Flow schematic... -
Page 52: Certificate Of Conformity
12.4 Certificate of conformity...
Need help?
Do you have a question about the CENTURION 1500+ and is the answer not in the manual?
Questions and answers