Table of Contents
Advertisement
Available languages
Available languages
Quick Links
INSTRUCTION MANUAL
Keep this manual in a safe place for future reference
TEMPERATURE CONTROL STEAM TRAP
EINBAU- UND BETRIEBSANLEITUNG
Gebrauchsanleitung leicht zugänglich aufbewahren
TEMPERATUREINSTELLBARER KONDENSATABLEITER
MANUEL D UTILISATION
Conserver ce manuel dans un endroit facile d'accès
PURGEUR RÉGULATEUR DE TEMPÉRATURE
Copyright (C) 201 by TLV CO., LTD. All rights reserved.
LEX3N-TZ
LEX3N-TZ
LEX3N-TZ
LEX3N-TZ
Advertisement
Table of Contents

Related Manuals for TLV LEX3N-TZ


Summary of Contents for TLV LEX3N-TZ
- Page 1 TEMPERATURE CONTROL STEAM TRAP LEX3N-TZ EINBAU- UND BETRIEBSANLEITUNG Gebrauchsanleitung leicht zugänglich aufbewahren TEMPERATUREINSTELLBARER KONDENSATABLEITER LEX3N-TZ MANUEL D UTILISATION Conserver ce manuel dans un endroit facile d’accès PURGEUR RÉGULATEUR DE TEMPÉRATURE LEX3N-TZ LEX3N-TZ Copyright (C) 201 by TLV CO., LTD. All rights reserved.
- Page 2 Note: The LEX3N-TZ can only control the temperature of condensate discharge from the trap; it cannot control product temperature nor the temperature of condensate backing up in the system.
-
Page 3: Safety Considerations
• The three types of cautionary items above are very important for safety; be sure to observe all of them, as they relate to installation, use, maintenance, and repair. Furthermore, TLV accepts no responsibility for any accidents or damage occurring as a result of failure to observe these precautions. - Page 4 • Diese drei Warnzeichen sind wichtig für Ihre Sicherheit. Sie müssen unbedingt beachtet werden, um den sicheren Gebrauch des Produktes zu gewährleisten und Einbau, Wartung und Reparatur ohne Unfälle oder Schäden durchführen zu können. TLV haftet nicht für Unfälle oder Schäden, die durch Nichtbeachtung dieser Sicherheitshinweise entstehen.
-
Page 5: Règles De Sécurité
• Ces 3 indicateurs sont importants pour votre sécurité; observez les précautions de sécurité énumérées dans ce manuel pour l’installation, l’utilisation, l'entretien et la réparation du produit. TLV ne prend aucune responsabilité en cas d’accident ou de dommage survenant à la suite d'un non-respect de ces précautions. - Page 6 2. Configuration Aufbau Configuration LEX3N-TZ Description Description Body Snap Ring Cover Spring Pin Valve Stem Seal Ring Adjusting Screw Screen Bimetal Element Locknut Washer Cap Nut Valve Seat Cover Gasket Valve Seat Gasket Nameplate Spring Guide Overexpansion Spring Thrust Plate...
- Page 7 3. Exploded View Einzelteile Pièces détachées CAUTION DO NOT REMOVE CAP NUT OR COVER WHILE TRAP IS UNDER PRESSURE. Allow trap body temperature to cool to room temperature before removing cap nut or cover. Failure to do so may result in burns or other injury. READ INSTRUCTION MANUAL CAREFULLY.
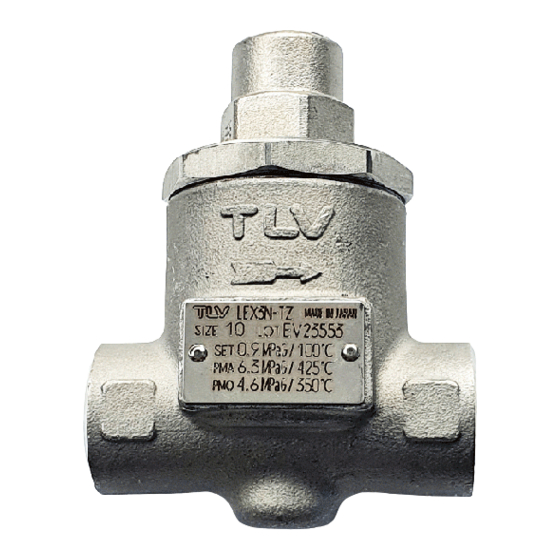
- Page 8 4. Specifications Technische Daten Données techniques Model Modèle Nominal Diameter Serial Number Größe/DN Seriennummer Dimension/DN Numéro de série Valve No.** Set temperature*** Set Pressure*** Einstelltemperatur*** Einstelldruck*** Température de réglage*** Pression de réglage*** Maximum Allowable Temperature* TMA Maximum Allowable Pressure* Maximal zulässige Temperatur* TMA Maximal zulässiger Druck* Température maximale admissible* TMA Pression maximale admissible*...
-
Page 9: Proper Installation
As freezing occurs on outlet side, use a short, thick-walled pipe to discharge to atmosphere. 8. When used as an external air vent for TLV steam traps, connect to the top of the steam trap. 9. Install inlet and outlet valves to isolate the product in event of trap failure or maintenance. - Page 10 The standard "0" position is the position where point (A), the Screw bottom of the adjusting screw slot is even with point (B), the top surface of the cap. LEX3N-TZ 100 °C at 0.9 MPaG (9 barg), 212 °F at 130 psig Temperature Setting Range 15 ˚C below saturated...
-
Page 11: Cleaning Function
- thereby preventing condensate discharge and resultant lowered product temperature. The LEX3N-TZ contains a built-in cleaning device that can be used without removing the trap from the line. Follow the steps below to remove contaminant accumulation from around the valve opening. -
Page 12: Inspection And Maintenance
3. Hold the adjusting screw in place with a flat-head screwdriver and remove the locknut slowly in case of any additional steam leakage. 4. Check the current set position of the adjusting screw. Check and record the number of turns required to return to the standard factory setting (when points (A) and (B) are even with each other as shown on page 9). - Page 13 Parts Inspection Procedure Gasket(s) Check for warping and damage Check for scratches and wear Seal Ring Check for scratches and wear Valve Stem Bimetal Element Check for wear and deformation Check for wear Over-expansion and Return Springs Screen Check for clogging, corrosion or damage Valve Seat Check for rust, scale, oil film wear or damage Body, Cover...
-
Page 14: Troubleshooting
Tightening Torque and Distance Across Flats Distance Across Torque Part Flats N . m (lbf . ft) (in) / Cap Nut (26) ( 185 ) / Cover (22) / Valve Seat 1 N . m ∼ ∼ 10 kg ・ cm NOTE: - Coat all threaded portions with anti-seize. - Page 15 2. Vor Einbau Leitung durchblasen, um Öl und Verschmutzungen zu entfernen. 3. Sicherstellen, dass die Leitungsnennweite ausreichend groß dimensioniert ist. 4. LEX3N-TZ dort einbauen, wo die Warnbeschriftungen an Gehäuse (und Kappe) bei Wartung und Reparatur gut sichtbar sind. Außerdem am niedrigsten Punkt der Rohrleitung einbauen, damit Kondensat gut zufließen kann.
- Page 16 Vorgang ab Punkt 1 wiederholen. Standard Werkseinstellung ("0"-Stellung): Die Standard "0"-Stellung ist gegeben, wenn Schlitzende (A) auf einer Ebene mit der Oberfläche (B) des Gehäusedeckels liegt. Temperatureinstellbereich LEX3N-TZ 15 ˚C unter Sattdampf- 100 °C bei 9 bar ü temperatur Justierschlitz Justier- schraube Betriebsdruck (bar ü)
- Page 17 Einlassventil und dem Kondensatableiter auf Atmosphärendruck abgesunken ist (wenn die Oberflächentemperatur auf Raumtemperatur abgesunken ist). Die Kappe oder Konternummer nicht öffnen, wenn die Absperrarmaturen noch offen und LEX3N-TZ noch unter Druck steht. 2. Den Gehäusedeckel mit einem Schraubenschlüssel halten und mit einem anderen Schlüssel die Kontermutter langsam lösen.
-
Page 18: Inspektion Und Wartung
Einlassventil, dann das Auslassventil schließen und den Schaden reparieren. 10. Danach die Einstelltemperatur wieder einstellen. Zuerst LEX3N-TZ vollständig absperren und den Dampfdruck, wie folgt, reduzieren: 11. Zuerst Einlassventil schließen, dann Auslassventil. Warten bis der Dampfdruck dem Umgebungsdruck entspricht (Wenn die Oberflächentemperatur Raumtemperatur erreicht hat). - Page 19 Ausbau und Einbau der Teile (Einbau erfolgt in umgekehrter Reihenfolge) Bauteil & Nr. Ausbau Einbau Kappe 16 Mit Gabel- oder Steckschlüssel Zuschrauben, Anzugsmoment abschrauben. beachten. Kappendichtung 21 Dichtung abnehmen, Dichtflächen Dichtung erneuern, falls verformt oder reinigen. beschädigt. Kontermutter 15 Mit Gabel- oder Steckschlüssel Aufsetzen und festziehen.
-
Page 20: Fehlersuche
11. Fehlersuche Falls der Kondensatableiter nicht zufriedenstellend arbeitet, lesen Sie nochmals Kapitel 5 und 6. Gehen Sie dann die nachfolgende Fehlerliste durch, um den Fehler zu orten und zu korrigieren. Symptome Gegenmaßnahmen Ursachen Bimetall-Element ersetzen Kondensat Ein Bimetall-Element ist gebrochen fließt nicht ab oder Die Zusammensetzung (Reihenfolge) der Reihenfolge korrigieren... - Page 21 • CONVIENT pour le chauffage d’instruments UNIQUEMENT SI la température de la vapeur ou du condensât à l’intérieur de l’enceinte N’ENDOMMAGE PAS l’instrument. • CONVIENT en tant qu’évent d’air externe sur les purgeurs de vapeur TLV, ou en tant que vanne anti-gel pour la protection des conduites de condensât contre le gel.
-
Page 22: Réglage De La Température
(A) où le bas de la fente de la vis de réglage est plane avec la surface (B) du haut du couvercle. Plage de réglage de la température LEX3N-TZ 15 ˚C inférieure à la 100 °C à 9 bar température de saturation Fente de réglage... -
Page 23: Fonction De Nettoyage
Le LEX3N-TZ dispose d’un mécanisme de nettoyage incorporé qui peut être utilisé pendant que le purgeur fonctionne. Suivre les étapes ci-dessous pour retirer toute accumulation contaminante autour de l’ouverture de la soupape. -
Page 24: Contrôle Et Entretien
3. Tenir la vis d’ajustement en place avec un tournevis à tête plate et retirer lentement le contre- écrou en cas de fuite de vapeur supplémentaire. 4. Vérifier la position de la vis de réglage. Vérifier le nombre de tours nécessaires pour revenir au réglage standard à... - Page 25 Retrait et remplacement des pièces (suivre l'ordre inverse pour le rassemblage) Pièce & No. Pendant le démontage Pendant le rassemblage crou à chapeau 16 Utiliser une clé à écrou appropriée Serrer avec le moment de torsion approprié Joint écrou à chapeau 21 Retirer le joint et nettoyer les Remplacer par un nouveau joint surfaces de scellement...
-
Page 26: Détection Des Problèmes
11. Détection des problèmes Si la performance escomptée n’est pas atteinte après l’installation, relire les parties 5 et 6 et vérifier les points suivants de façon à prendre les mesures appropriées. Problème Cause Remède Remplacer par un nouvel Un élément bimétallique est endommagé Pas d’expulsion de élément bimétallique ou cassé... -
Page 27: Product Warranty
12. Product Warranty 1) Warranty Period: one year after product delivery. 2) TLV CO., LTD. warrants this product to the original purchaser to be free from defective materials and workmanship. Under this warranty, the product will be repaired or replaced at our option, without charge for parts or labor. - Page 28 For Service or Technical Assistance: Contact your representative or your regional office. Für Reparatur und Wartung: Wenden Sie sich bitte an Ihre Vertretung oder an eine der Niederlassungen. Pour tout service ou assistance technique: Contactez votre agent ou votre bureau régional USA and Canada: T e l: [1]-704-597-9070 USA und Kanada:...
Need help?
Do you have a question about the LEX3N-TZ and is the answer not in the manual?
Questions and answers