Table of Contents
Advertisement
Quick Links
Advertisement
Table of Contents

Related Manuals for Elation WW PROFILE HP IP


Summary of Contents for Elation WW PROFILE HP IP
- Page 1 WW PROFILE HP IP™ user manual...
- Page 2 Elation Professional USA | 6122 S. Eastern Ave. | Los Angeles, CA. 90040 323-582-3322 | 323-832-9142 fax | www.elationlighting.com | info@elationlighting.com Elation Professional B.V.
-
Page 3: Table Of Contents
C O N T E N T S General Information Warranty Safety Instructions and Guidelines Overview Lens and Gobo Holder Installation Installation System Menu DMX Channel Functions And Values Cleaning and Maintenance Technical Specifications Optional Accessories www.elationlighting.com... -
Page 4: General Information
O P T I O N A L C O R R O S I O N - R E S I S T A N T C O A T I N G Optional Corrosion-Resistant Coatings may be available for this fixture. Please consult your Elation Professional sales representative for details. www.elationlighting.com... - Page 5 You may also visit us on the web at www.elationlighting.com any comments or suggestions. For service related issue please contact Elation Professional®. ELATION SERVICE USA - Monday - Friday 8:00am to 5:00pm PST...
- Page 6 WARRANTY REGISTRATION Please complete and mail in the enclosed warranty card or register online: http://www.elationlighting.com/Login.aspx to validate your purchase. All returned service items whether under warranty or not, must be freight pre-paid and accompany a return authorization (R.A.) number. The R.A. number must be clearly written on the outside of the return package.
-
Page 7: Warranty
No accessories should be shipped with the product. If any accessories are shipped with the product, Elation Professional® shall have no liability what so ever for loss and/or or damage to any such accessories, nor for the safe return thereof. -
Page 8: Safety Instructions And Guidelines
S A F E T Y I N S T R U C T I O N S A N D G U I D E L I N E S This fixture is an extremely sophisticated piece of electronic equipment. To guarantee a smooth operation, it is important to follow all instructions and guidelines in this manual. - Page 9 S A F E T Y I N S T R U C T I O N S A N D G U I D E L I N E S DO NOT TOUCH the fixture housing during operation. Turn OFF the power and allow approximately 15 minutes for the fixture to cool down before serving.
-
Page 10: Overview
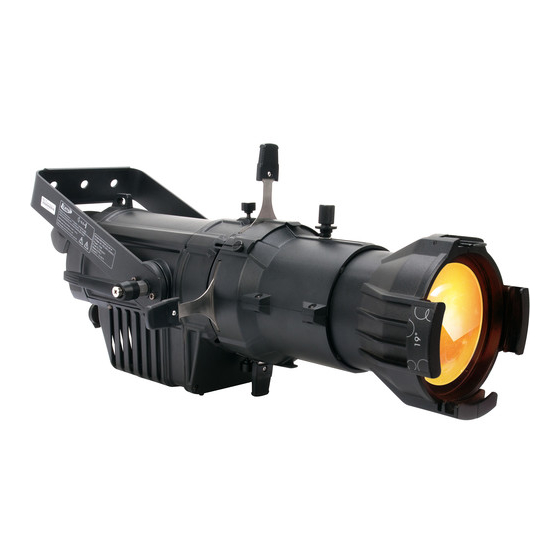
O V E R V I E W Lens (not included) FUSE FOCUS powerCON TRUE1 OUT UP Button 5pin DMX OUT DOWN Button Mounting Yoke MODE/ESC Button Adjustable Yoke LCD Menu Control Display BLADE SHUTTERS ENTER Button LENS Rotation 5pin DMX IN ROTATION powerCON TRUE1 IN Static Gobo/ Gobo Rotator... -
Page 11: Lens And Gobo Holder Installation
L E N S A N D G O B O H O L D E R I N S T A L L A T I O N *Static Gobo Holder / Gobo Rotator Not Included www.elationlighting.com... - Page 12 FIXTURE MUST POWERED BEFORE CONNECTING! FAILURE TO DO SO WILL CAUSE DAMAGE TO THE FIXTURE! www.elationlighting.com...
-
Page 13: Installation
I N S T A L L A T I O N F L A M M A B L E M A T E R I A L W A R N I N G Keep fixture at least 5.0 feet (1.5m) away from any flammable materials, decorations, pyrotechnics, etc. - Page 14 POWER LINKING Max number of WW PROFILE HP IP™ units power linked together: 5 units @120V | 10 units @240V u NOTE: USE CAUTION WHEN POWER LINKING OTHER MODEL FIXTURES AS THE POWER CONSUMPTION OF OTHER FIXTURES MAY EXCEED THE MAX OUTPUT ON THIS FIXTURE.
- Page 15 RIGGING Overhead rigging requires extensive experience, including amongst others calculating working load limits, installation material being used, and periodic safety inspection of all installation material and the fixture. If you lack these qualifications, do not attempt the installation yourself. Improper installation can result in bodily injury.
-
Page 16: System Menu
S Y S T E M M E N U The fixture includes an easy to navigate system menu. The control panel (see image below) located on the front of the fixture, provides access to the main system menu and is where all necessary system adjustments are made to the fixture. During normal operation, pressing MODE/ESC button once will access the fixture’s main menu. - Page 17 ELATION© WW PROFILE HP IP™ S Y S T E M M E N U Supports Software Versions: ≥1.0.0 Features are subject to change without any prior written notice. MAIN MENU SUB MENU OPTIONS / VALUES DESCRIPTION (Default Settings in BOLD)
- Page 18 Persnal - Stat Set - Addr DMX When ON, define the desired fixture DMX address via an external controller. NOTE: This process assumes the fixture DMX address is set to 001. If fixture DMX address is not at 001, you must adjust the channel numbers listed below accordingly in order for this feature to work. For example: if your fixture address is 010, then Channel 1 becomes Channel 10, Channel 2 becomes Channel 11, and Channel 3 becomes Channel 12.
- Page 19 Persnal - Reset Default (011) ONLY QUALIFIED TECHNICIANS SHOULD PERFORM THIS FUNCTION. NOTE: SAVED WHITE BALANCE IS ERASED AFTER A RESET IS PERFORMED. This function restores all fixture settings to the factory default settings. The password is 011 and must be entered each time a reset is performed. EditProg –...
- Page 20 EDIT PROGRAM – Record Controller – Working With Built In Programs A Master unit can send up to 3 different data groups to the Slave units, i.e. a Master unit can start 3 different Slave units, which run 3 different programs. The Master unit sends the 3 program parts in a continuous loop.
- Page 21 EDIT PROGRAM – Record Controller – Working With Built-In Program [continued] 3. Program Selection for Auto Pro Part “Edit Program”. ENTER to confirm. “Select Programs”. ENTER to confirm. elect “Auto Pro Part 1”, “Auto Pro Part 2” or “Auto Pro Part 3”, and select which Slave program is to be sent.
- Page 22 EDIT PROGRAM – Record Controller – Working With Built-In Program [continued] Example: Program 2 includes scenes: 10, 11, 12, & 13 Program 4 includes scenes: 8, 9, & 10 Program 6 includes scenes: 12, 13, 14, & 15 Auto Pro Part 1 is Program 2 Auto Pro Part 2 is Program 3 Auto Pro Part 3 is Program 6 The 3 Slave groups run the Auto Program in certain time segments.
-
Page 23: Dmx Channel Functions And Values
D M X C H A N N E L F U N C T I O N S A N D V A L U E S MODE / CHANNEL VALUE FUNCTION LED INTENSITY 0-255 Intensity 0 to 100% LED FINE INTENSITY 0-255 FINE Intensity Adjustment... -
Page 24: Cleaning And Maintenance
Regular inspections are recommended to insure proper function and extended life. There are no user serviceable parts inside this fixture, please refer all other service issues to an authorized Elation service technician. Should you need any spare parts, please order genuine parts from your local Elation dealer. -
Page 25: Technical Specifications
T E C H N I C A L S P E C I F I C A T I O N S SOURCE High Power 130W Warm White LED 50,000 Hour Average LED Life* *May vary depending on several factors including but not limited to: Environmental Conditions, Power/Voltage, Usage Patterns (On-Off Cycling), Control, and Dimming. - Page 26 DIMENSIONAL DRAWINGS Please Note: Specifications and improvements in the design of this unit and this manual are subject to change without any prior written notice. www.elationlighting.com...
-
Page 27: Optional Accessories
O P T I O N A L A C C E S S O R I E S ORDER CODE ITEM QUICK RIG CLAMP Low Profile Quick Release Clamp IPR701 IP65 Rated DMX Controlled Dual Gobo Rotator PHD019 Profile High Definition Lens 19° PHD126 Profile High Definition Lens 26°...
Need help?
Do you have a question about the WW PROFILE HP IP and is the answer not in the manual?
Questions and answers