Table of Contents
Advertisement
Quick Links
Advertisement
Table of Contents

Related Manuals for Parker NitroFlow HP


Summary of Contents for Parker NitroFlow HP
-
Page 1: User Manual
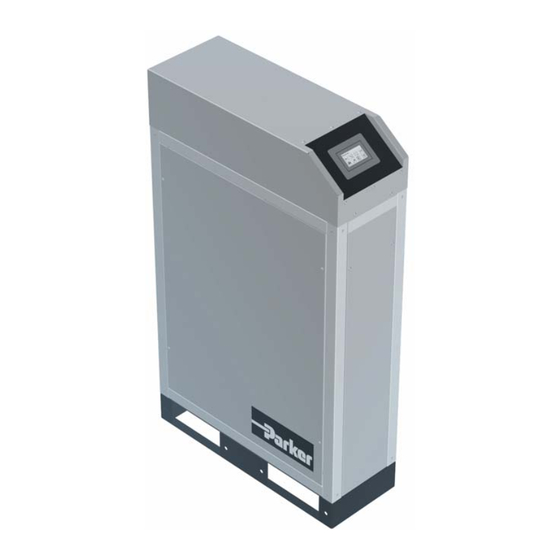
USER MANUAL ® NitroFlow NITROGEN GENERATOR Parker Filtration & Separation B.V. PO Box 258 4870 AG - Etten-Leur The Netherlands Tel: +31 (0)76-508 53 00 Fax: +31 (0)76-508 53 33 E-mail: pfsinfo@parker.com www.parker.com/pfs K3.1.141e Manual NitroFlow HP_EN.doc - 1 -... - Page 2 Parker Filtration & Separation B.V. Parker Filtration & Separation B.V. retains the right to make changes in parts at any point without first or directly notifying the customer. The contents of this manual can also be changed without prior warning.
-
Page 3: Table Of Contents
USER MANUAL......................1 1 INTRODUCTION ....................5 1.1 G ......................5 ENERAL 1.2 P ..................... 6 ICTOGRAMS 1.3 I ................7 DENTIFICATION AND SERVICE 1.4 C ....................7 ERTIFICATES 1.5 U ..............8 SE IN ACCORDANCE WITH PURPOSE 1.6 U .................. - Page 4 6.2.1 Main screen ....................28 6.2.2 Settings menu ..................30 6.2.3 Log-on menu ..................31 6.2.4 Alarm menu ..................32 6.2.5 Pressure switch menu ................35 6.2.6 Options menu ..................36 6.2.7 Local settings menu ................37 6.2.8 Maintenance menu ................
-
Page 5: Introduction
Introduction General ® NitroFlow HP is a product of Parker Filtration & Separation B.V. This manual forms an integral part of the product. The manual describes the installation, daily operation, maintenance and troubleshooting. Content ® Read the manual carefully before the installation and operation of the NitroFlow These instructions must be thoroughly understood before installing and operating this product. -
Page 6: Pictograms
Pictograms In this manual and on the product the following pictograms are used: Warning A warning shows a hazard that can cause death or serious injury. Follow the instructions. Caution A caution shows a danger that can cause damage to the equipment. Follow the instructions. -
Page 7: Identification And Service
HP. The identification plate shows the ® characteristics of the NitroFlow For service and technical assistance, please contact our local representative or: PARKER FILTRATION & SEPARATION Hermitage Court, Hermitage Lane, Maidstone, Kent ME16 9NT England Tel: (+44) 1622 7233 00 Fig. -
Page 8: Use In Accordance With Purpose
HP is intended to make nitrogen out of normal ambient air. The system is based on gas separation membranes. Each different or further use will not be in conformity with the purpose. Parker Filtration & Separation B.V. will not accept any liability for improper use. -
Page 9: Health, Safety And Environmental Aspects
Health, safety and environmental aspects General ® Correct use of the NitroFlow HP nitrogen generator is important for your personal ® safety and for trouble-free functioning of the NitroFlow HP. Incorrect use can cause ® damage to the NitroFlow HP or can lead to incorrect gas supply. Warning •... -
Page 10: Electricity
HP to the appropriate nitrogen concentration for your application. • Install the peripheral equipment, piping and nitrogen storage vessels according to standard procedures. Parker Filtration & Separation B.V. cannot take responsibility for this. ® • Do regular maintenance to the NitroFlow HP, to ensure proper and safe operation. -
Page 11: Environmental Aspects
According to EC-regulations electrical systems have to be disassembled and recycled at the end of their life. Parker Filtration & Separation B.V. can support you in this. Make sure that instructions concerning health, safety and environment are compliant with the local legislation and regulations. -
Page 12: Description Of The Appliance
Description of the appliance General ® The NitroFlow HP separates compressed air into nitrogen and an oxygen enriched air stream. The separation system uses membranes. The compressed air is supplied from a central system or from a dedicated compressor. The nitrogen produced can be connected directly to the application or can be stored ®... -
Page 13: Parts Nitroflow Hp
® Parts NitroFlow ® Fig. 3-2: Parts of NitroFlow A Oxygen sensor B Hollow fiber membrane C Compressed air filters D SD-card E Printed circuit board F Active carbon adsorber G Flow control valve for purity adjustment H Flow control valve for sample flow In- and outlet connections J Drain outlet K Power inlet... -
Page 14: Process Diagram
Process diagram ® The NitroFlow HP can either be connected directly to the nitrogen consumer or to a nitrogen reservoir. The latter is advised in case of discontinuous or variable peak demands. Consumer NitroFlow Nitrogen out Pressurized air in Nitrogen reservoir NitroFlow Fig. -
Page 15: Process Scheme
Process scheme K3.1.141e Manual NitroFlow HP_EN.doc - 15 -... -
Page 16: Technical Specifications
Technical specifications General Delivery pressure Max. delivery pressure (vessel) inlet pressure minus pressure drop (max. 2 bar(g) / 29 psig) Ambient conditions Temperature 10°C to 40°C / 50°F to 104°F Air quality Normal clean ambient air, relative humidity < Pressurized air specifications Max feed pressure 13 bar(g) / 190 psig Compressed air temperature range... - Page 17 Parts ® 1x NitroFlow ® NitroFlow 1x Manual Table 4-1: General data K3.1.141e Manual NitroFlow HP_EN.doc - 17 -...
- Page 18 Default settings software parameters Menu What Default setting Interval 60 min Logs Language English Local settings Pressure Bar(g) Local settings Flow Local settings Local settings Purity O2 high Active: No Alarm settings Unit stop: No Level: 5% Delay: 30 sec O2 low Active: No Alarm settings...
-
Page 19: Production Capacity
P-switch Pressure switch Unit on 2.0 bar(g) Pressure switch Unit off 7.0 bar(g) Pressure switch Auto restart Options Remote Options Pin code Options ® Table 4-2: Default settings software parameters NitroFlow ® NitroFlow Part number ® NitroFlow 159.004032 ® NitroFlow 159.004033 ®... -
Page 20: Air Consumption
4.2.1 Air consumption Type Nominal air use Nm³/hr Nitrogen purity (%) 99.5 ® NitroFlow 14.5 15.0 16.3 17.5 18.9 19.5 ® NitroFlow 28.9 30.0 32.7 35.0 37.8 39.0 ® NitroFlow 43.4 45.0 49.0 52.5 56.7 58.5 ® Table 4-5: Air use NitroFlow HP (Nm /hr 20°C 1013mbar) at nominal conditions: •... -
Page 21: Installation
Installation ® Follow the paragraphs in this chapter to install the NitroFlow Transport and storage Warning ® • The NitroFlow HP is heavy in weight; take appropriate safety measures in handling and transport ® • Put the NitroFlow HP in the original box to transport the ®... -
Page 22: Compressed Air Supply
Compressed air supply ® 5.3.1 Ambient temperature of NitroFlow With increasing temperatures the pressurised air consumption will increase and consequently the capacity will change. Make sure the temperature of the compressed air is as low as reasonably possible. 5.3.2 Checklist for compressed air supply The source of compressed air can be either a central compressed air system or a stand-alone compressor dedicated to the nitrogen generator. -
Page 23: Unpack And Check Equipment
Unpack and check equipment Open the packaging. Make sure that all components have been delivered (refer to table 4-1). Connecting to pressurized air supply ® The NitroFlow HP must be connected to the pressurized air supply on the inlet indicated with the icon (fig. 5-1). Lead the drain outlet (fig. - Page 24 ® Fig. 5-3 Terminals NitroFlow Refer to fig. 5-4 for location of power cable inlet. K3.1.141e Manual NitroFlow HP_EN.doc - 24 -...
-
Page 25: Connect Nitrogen Consumer
Connect nitrogen consumer Warning • Make sure that tubes connected to the system are free of dust, particles, metal parts and curls, liquids and grease before you ® connect the NitroFlow Drain outlet Power inlet ® Fig. 5-4 Connections NitroFlow Compressed air inlet. -
Page 26: Connect Input And Output Contacts
Connect input and output contacts In- and output signals can be connected to the terminal strip on the printed circuit board (refer to §3.3). Terminal strip Battery TI/TT Fuse QAIh/QT T1,25A/250V SD-card Power supply Transformer Fig.5-5: Printed circuit board K3.1.141e Manual NitroFlow HP_EN.doc - 26 -... - Page 27 Clamp Function Input/output signals Remote start/stop Digital input Nominal input current: 10 mA Voltage: internal power supply Outlet pressure Analogue outputs Oxygen concentration 4 – 20 mA. Max. 200 Ohm Generator is producing nitrogen (RUN) Digital outputs Potential free relay contacts General alarm (normally open / normally closed) No alarms...
-
Page 28: Controller
Controller Menu structure The menu structure of the control system is as shown below. Return to a previous screen in the menu by pushing the “return to previous screen” -button. Mainscreen Alarm display Settings Switch on/off unit Log on Set alarms Pressure Options Local... - Page 29 Symbol/data Information/result When flashing there is an alarm; touch the symbol and the current alarm will be shown. (refer to § 7.3.1) Unit status (A) Can be OFF / RUN / STAND-BY / ALARM / P-RELIEF OFF: Main switch is on but generator is not operational RUN: Generator is operational (producing nitrogen) STAND-BY: Generator is stopped by the option pressure switch (PSH) or generator is waiting for remote control signal.
-
Page 30: Settings Menu
6.2.2 Settings menu Access: Touch settings menu button in main screen Function: Access to various menus Symbol Menu Access to log on menu (refer to §6.2.3) Access to alarm settings menu (refer to §6.2.4) Access to pressure switch menu (refer to §6.2.5) Access to options menu (refer to §6.2.6) Access to local settings menu (refer to §6.2.7) Access to maintenance menu (refer to §6.2.8) -
Page 31: Log-On Menu
6.2.3 Log-on menu Access: Touch log on button in settings screen ATTENTION: The PIN CODE is default off. Therefore you do not need to enter a PIN CODE when you start-up the system for the first time. Function: Protect the settings in the system with a (personal) pin code. In the log on menu: •... -
Page 32: Alarm Menu
If the button in the settings screen is not crossed out (see below), there are two possible options: • Pin code is not activated and all menus are free accessible • Pin code is activated but menus are not accessible because correct pin code was not entered. - Page 33 To activate an alarm touch the active button (A). You can select NO, YES or AUTO RESET. When you select YES or AUTO RESET, the rest of the data that needs to be set for the specific alarm will automatically pop-up. K3.1.141e Manual NitroFlow HP_EN.doc - 33 -...
- Page 34 Button Selection Result Active Alarm is switched off Active Alarm is switched on Active AUTO RESET If actual fault is resolved before alarm is reset (only if manually, the alarm will disappear from the alarm Stop=NO) message menu automatically. Stop Generator will stop when alarm occurs.
-
Page 35: Pressure Switch Menu
Please note that the 6 alarms will not be monitored before 60 seconds after the generator has switched to status RUN. In case of an alarm the generator will give a sound, the alarm relay will be activated and the symbol will start flashing. -
Page 36: Options Menu
6.2.6 Options menu Access: Touch options menu button in settings screen Function: Set various options (auto restart, remote and pin code) ATTENTION: All options are default set to NO. Button Selection Result Auto R. Return to the same situation/status after a power (= auto restart) failure Auto R. -
Page 37: Local Settings Menu
Button (A) can be used to make a selection and with buttons (B) adjustments can be made. 6.2.7 Local settings menu Access: Touch local settings menu button in settings screen Function: Set data to local requirements Button Selection Result Language (A) English / All text in the screen will appear in the chosen Nederlands /... -
Page 38: Maintenance Menu
6.2.8 Maintenance menu Access: Touch maintenance menu button in settings screen Function: Shows maintenance status and offer calibration possibility. The maintenance menu consists of 5 different screens. Each screen displays maintenance status or calibration buttons. Data Explanation Type Shows type of generator Version Software version of system O2 lifetime... - Page 39 Data Explanation Outlet Outlet pressure in either BAR(G) or PSIG Inlet Membrane pressure in either BAR(G) or PSIG C Inlet Compressed air inlet temperature in Celcius* or Fahrenheit* * When selected BAR(G), temperature is displayed in Celcius. When selected PSIG, temperature is shown in Fahrenheit.
- Page 40 Button Explanation O2 – 20.9% Touch this button to calibrate the O sensor to 20.9%. When touching this button the O sensor has to be exposed to ambient air (refer to §9.4 for detailed explanation how to calibrate the O sensor) Set flow Only visible when selected LPM in the local settings menu and...
-
Page 41: Data Logging Menu
6.2.9 Data logging menu Access: Press data logging menu button in the settings screen Function: Read the logged process data (only alarms) Alarms as well as status of the sensors (temperature, pressure, O , flow and maintenance) are saved on the SD-card. The time between the logging (saving) of this data on the memory card can be chosen in the data logging menu (default 60 minutes). -
Page 42: Software Updates
The software version for the touch screen controller for the NitroFlow HP can be found in the maintenance -menu (refer to §6.2.8). When Parker Filtration & Separation updates the software, a new version can be put on the touch screen controller following the instructions in appendix B of this manual. -
Page 43: Commissioning And Operation
Commissioning and Operation ® Commissioning the NitroFlow 1. Make sure that the connections are correct and fixed properly. 2. Make sure that pressurized air pressure is available on the inlet. 3. Connect the unit to mains electricity by setting the main switch to the ON-position ®... -
Page 44: Alarm Messages
7.3.1 Alarm messages When the Nitrogen Out symbol (A) in the main screen is flashing, it means that an alarm is occurring. To see which alarm is occurring, touch the symbol for more information (refer to §6.2.4). Alarms that can appear are: Alarm description What happens? Default... -
Page 45: Troubleshooting
Troubleshooting Troubleshooting list In case of trouble always start with calibrating the O sensor (refer to §9.5). Trouble Possible cause Possible solution Delivery (flow) Compressed air supply too Check / increase the air supply of nitrogen too Leak in piping (external or Check for leaks in external and internal) internal piping. - Page 46 Trouble Possible cause Possible solution Unit is standby Wait until pressure in application or storage vessel drops N2 purity is too Sample flow to O sensor is Check / readjust the sample flow to low (= O2 incorrect the O sensor.
-
Page 47: Maintenance
Maintenance Maintenance scheme ® The NitroFlow HP is virtually maintenance free Part Action Frequency Filters Replace filter elements Yearly or after 8000 running hours, which comes first. 1x per year, together Active carbon Replace adsorber with filter elements adsorber 1x per year Check purity Determine oxygen content in output and setting... -
Page 48: Replace Inlet Filter Element
Replace inlet filter element 1. Close the compressed air supply. 2. Allow the system to depressurize. Check on display. ® 3. Switch off the NitroFlow HP on the touch screen. 4. Remove the side sheet metal of the gas separation compartment (refer to fig. -
Page 49: Replace Automatic Drains Of Filters
Replace automatic drains of filters 1. Open the filter (refer to §9.2). 2. Unscrew the nut (D). 3. Remove the old drain unit (B) from filter bowl (A). 4. Check if the O-ring (C) came out with old drain. 5. Replace new drain (B) in filter bowl (A). 6. -
Page 50: Calibrate Oxygen Sensor
Calibrate oxygen sensor 1. Stop the unit by touching the button in the main screen (refer to §6.2.1). 2. Let the system depressurize Warning: Do not touch live wires! 3. Remove the sensor cap (E) and expose the sensor to ambient air. 4. -
Page 51: Replace Fuse
Replace fuse To maintain the safety of the product, use only the fuse of the size and rating as specified (T3.15A / 250V). 1. Stop the unit by touching the button in the main screen (refer to §6.2.1). 2. Switch off the main switch. 3. -
Page 52: Electrical Scheme And Terminal Connections
Electrical scheme and terminal connections ® Fig. 10-1 Electrical scheme NitroFlow K3.1.141e Manual NitroFlow HP_EN.doc - 52 -... - Page 53 ® Fig. 10-2 Electrical terminal connections NitroFlow K3.1.141e Manual NitroFlow HP_EN.doc - 53 -...
-
Page 54: Index
Index Maintenance ........47 —A— Maintenance kit ........20 Alarm menu ........32 Maintenance menu ......38 Alarm messages ......... 44 Menu structure........28 Ambient air.......... 12 —N— Ambient conditions ......16 Nitrogen ..........9 —C— nitrogen consumer ......25 cable for remote control ...... -
Page 55: Appendix A: Nitroview Quick Reference V1.0
Appendix A: NitroView Quick reference v1.0 First start up After installing NitroView via the Suite installer you can start using it, start with 2 questions. First, you need to create a configuration file, where settings will be saved in. (even width/height, column width/height/order) You can exchange this file with other PC’s to create the same configuration everywhere. - Page 56 changing this you need to press ‘Apply Filter’ so it regenerates the log. 6: Log columns The columns for the log The text in this row will be changed when selecting a log. You are free to change the order and width of each column. You can also click on it to sort the log by this.
- Page 57 Preferences 1: Language Change the language of NitroView 2: Color The colors for each event Each log type has its own color scheme for background colors. You can globally change the text color as well. (For example: if you use dark colors for the events, you can choose white text) Just click on a color box, then you can pick a color.
-
Page 58: Appendix B: Firmware Upgrade Instructions V2.03 Nitroflow ® Series
All log data is erased during the upgrade process (also on the SD-card). When there is an error during the upgrade procedure, try again from the start. In case of problems contact Parker technical support Controller upgrade steps: 1. Switch the main Power switch OFF (consult manual) 2. - Page 59 • V2.03 / 13 November 2008 Hour-counters for filter lifetime changed. Logo revision. Hour-counter reset bug fixed. • V2.02 / 25 February 2008 - Hardware compability bug solved. Readout of ID3, 4, 5, 6. - Service menu functionality improved. - Compressor hour counter reset code added. •...
Need help?
Do you have a question about the NitroFlow HP and is the answer not in the manual?
Questions and answers