
Related Manuals for Parker Balston NitroFlow TG2 Series


Summary of Contents for Parker Balston NitroFlow TG2 Series
- Page 1 Installation, Operation and Maintenance Manual Bulletin TI-NITROFLOW TG2-G TI-NITROFLOWTG2 NitroFlow TG2 Installation, Operation, and Maintenance Manual 1-800-343-4048 www.labgasgenerators.com...
-
Page 2: Explanation Of Warning Symbols
Installation, Operation and Maintenance Manual Bulletin TI-NITROFLOW TG2-G TI-NITROFLOWTG2 Explanation of Warning Symbols Symbol Description Caution, refer to accompanying documents for explanation. Refer to the caution note indicated for explanation. Caution, risk of electric shock. Refer to the warning note indicated for explanation. -
Page 3: General Description
1-800-343-4048, 8AM to 5PM Eastern Time Any modification of the product will void the warranty. or e-mail at gsftechsupport@parker.com. For other locations, Failure to operate this product in accordance with the please contact your local representative. - Page 4 Installation, Operation and Maintenance Manual Bulletin TI-NITROFLOW TG2-G TI-NITROFLOWTG2 Figure 2A, Compressor Flow Schematic (Zero Air) (Zero Air) (N2) Figure 2B, Nitrogen Generator Flow for NitroFlow TG2 Compressor Pump The design of the oil-less rotary scroll compressor offers high reliability and quiet operation. The scroll consists of two sets of identical spirals that are offset 180 degrees from each other.
-
Page 5: Water Separator
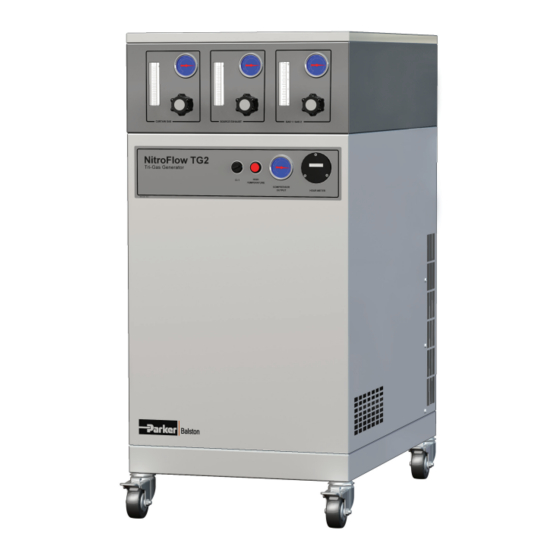
Diagnostics There are two diagnostic indicator lights on the Parker Balston NitroFlow TG2 System: High Temperature LED (red): The “High Temperature” LED indicator illuminates when the compressor pump has reached its maximum temperature. The compressor will shut down by a thermal switch opening, preventing power to the motor. - Page 6 15 feet. See Accessory Parts table on Page 17 for details. The Parker Balston NitroFlow TG2 Generator Series creates minimal noise during operation. The noise generated is about 49dB at one meter. Periodically there is an air discharge noise from the drain port eliminating accumulated fluids in the prefilters and receiver tank.
- Page 7 Outlet Gases The three outlet gas ports consist of three ¼” NPT bulkhead fittings. Parker Balston recommends minimum ¼” PFA plastic tubing with a minimum pressure rating of 125 psig (8.6 bar). Check all piping connections for leaks using a bubble-type leak detecting solution.
-
Page 8: Operation
Installation, Operation and Maintenance Manual Bulletin TI-NITROFLOW TG2-G TI-NITROFLOWTG2 Recommended A03-0412 voltage step-down transformer - If your facility supply voltage is 255V or higher, then the use of this transformer is required. Accessories A03-0411 voltage step-up transformer - If your facility supply voltage is 208V or lower, then the use of this transformer is required. -
Page 9: Maintenance
Safety risks that may affect the service personnel are identified with the necessary protective measures described. Parker highly recommends service be performed by a Parker trained technician only. Call the factory about PMP, the Preventative Maintenance Program. The service personnel will verify the safe state of the generator after the maintenance or repair is completed. - Page 10 THE UNDERSTANDING THAT THE DOCUMENT AND THE INFORMATION IT CONTAINS WILL NOT BE CH'KD BY: DATE: Haverhill, Massachusetts USA COPIED OR DISCLOSED TO OTHERS OR USED FOR ANY PURPOSE OTHER THAN CONDUCTING BUSINESS WITH PARKER, AND WILL BE RETURNED AND ALL FURTHER USE DISCONTINUED UPON REQUEST BY DRAWN BY: DATE: TITLE: REV.: PARKER.
-
Page 11: Intake Filter
Installation, Operation and Maintenance Manual Bulletin TI-NITROFLOW TG2-G TI-NITROFLOWTG2 Cleaning If necessary, wipe the generator with a clean, dry cloth on an as-needed basis. Do not use water, aerosols or other cleaning agents on the unit. Use of any liquid detergent to clean the unit could pose an electrical hazard. - Page 12 Installation, Operation and Maintenance Manual Bulletin TI-NITROFLOW TG2-G TI-NITROFLOWTG2 Figure 15, belt diagram Grease Orbital 1 Remove the plastic dust cap from the pump (see Figure 16). Scroll Compressor 2 Rotate the compressor pulley until the grease fitting is visible in the dust cap hole. Bearings 3 Using a grease gun extension adapter to engage the grease fitting, supply the proper amount of grease according to the grease delivery Table 1, Figure 16.
- Page 13 Installation, Operation and Maintenance Manual Bulletin TI-NITROFLOW TG2-G TI-NITROFLOWTG2 Grease Pin Crank Remove the side compressor access panel (see Figure 1). Bearing Remove the fan duct. Remove the nuts, bolts, and then the fixed scroll. Grease three pin crank bearings according to Table 1 and Figure 17. Replace fixed scroll and fan duct.
- Page 14 Installation, Operation and Maintenance Manual Bulletin TI-NITROFLOW TG2-G TI-NITROFLOWTG2 LP Tip Seal Figure 25 Dust Seal for OS Figure 27 HP Tip Seal for OS Backup Tube LP Tip Seal HP Tip Seal for FS for FS Figure 26 Install the new high pressure (shorter one) tip seal starting from the center of the scroll, outward inside the seal channel.
-
Page 15: Fuse Replacement
Installation, Operation and Maintenance Manual Bulletin TI-NITROFLOW TG2-G TI-NITROFLOWTG2 12 Place dust seal over the backup tube. (Figures 33, 34) Caution! The backup tube and dust seal must meet at the bottom of the housing in the six o’clock position. 13 Install the stationary scroll housing onto the orbiting scroll housing and reassemble the unit. - Page 16 Installation, Operation and Maintenance Manual Bulletin TI-NITROFLOW TG2-G TI-NITROFLOWTG2 Carbon Modules During the 10,000 hour service interval only the inlet Carbon Module (B06-0264) closest the rear of the generator is replaced (see figure 10). All three carbon modules are replaced during the 30,000 hour service.
-
Page 17: Filter Silencer
Remove drain assembly from bulkhead fitting and then the quick disconnect fitting from drain inlet. Note: both the bulkhead and quick disconnect fittings will be reused with the new drain assembly. Parker recommends the use of Teflon plumbers tape on the treads of these fittings during reassembly. -
Page 18: System Specifications
Installation, Operation and Maintenance Manual Bulletin TI-NITROFLOW TG2-G TI-NITROFLOWTG2 System Specifications System Specifications NitroFlow TG2 CSA Certification Standard CAN/CSA C22.2 No. 61010-1 IEC Standard IEC 61010-1 UL Standard UL 61010 IEC 61010 Installation Category II IEC 61010 Pollution Degree 2 Impact Code IK08 EMC Compliance... -
Page 19: Troubleshooting
Installation, Operation and Maintenance Manual Bulletin TI-NITROFLOW TG2-G TI-NITROFLOWTG2 Accessory Parts Part Number Voltage Step-Down Transformer A03-0412 Voltage Step-Up Transformer A03-0411 Exhaust Ventilation Kit B04-0575 Bottle Drain Kit B04-0540 In-line Duct Fan (120V) A03-0378 Exhaust Duct Kit B04-0693 Maximum Relative Humidity at Different Temperatures Temperature (°F) Relative Humidity (%) Compressor Output Pressure at Different Altitudes... -
Page 20: Compressor Troubleshooting
Installation, Operation and Maintenance Manual Bulletin TI-NITROFLOW TG2-G TI-NITROFLOWTG2 Compressor Troubleshooting Symptom Probable Cause Corrective Action • Power not plugged in • Plug in power cord POWER ON light (green) does not appear supply outlet • Power switch is not ON •... - Page 21 Installation, Operation and Maintenance Manual Bulletin TI-NITROFLOW TG2-G TI-NITROFLOWTG2 Compressor Troubleshooting Symptom Probable Cause Corrective Action TEMPERATURE HIGH light • Room temp is above 90°F • Add ventilation or air is on, Compressor shuts conditioning to room down • Inlet air duct is obstructed •...
- Page 22 Installation, Operation and Maintenance Manual Bulletin TI-NITROFLOW TG2-G TI-NITROFLOWTG2 NitroFlow TG2 Generator Troubleshooting Symptom Probable Cause Corrective Action • Compressor is not ON • Turn on compressor No pressure • Regulator is closed • Open pressure regulator • System leaks at fitting •...
- Page 23 Parker guarantees, at Parker’s option, to replace the product, repair the product, or refund the original price for the product. This warranty applies only to defects in material or workmanship and does not cover: wear components on compressors, routine maintenance recommended by the instructions provided with this product, or filter cartridges.
- Page 24 Installation, Operation and Maintenance Manual Bulletin TI-NITROFLOW TG2-G TI-NITROFLOWTG2 Figure 49 1-800-343-4048 www.labgasgenerators.com...
- Page 25 Installation, Operation and Maintenance Manual Bulletin TI-NITROFLOW TG2-G TI-NITROFLOWTG2 1-800-343-4048 www.labgasgenerators.com...
- Page 26 Installation, Operation and Maintenance Manual Bulletin TI-NITROFLOW TG2-G TI-NITROFLOWTG2 1-800-343-4048 www.labgasgenerators.com...
- Page 27 Installation, Operation and Maintenance Manual Bulletin TI-NITROFLOW TG2-G TI-NITROFLOWTG2 1-800-343-4048 www.labgasgenerators.com...
- Page 28 © 2012, 2019 Parker Hannifin Corporation Printed in U.S.A. Bulletin TI-NITROFLOWTG2-PKI-A 7/2019 Parker Hannifin Manufacturing Limited Parker Hannifin Corporation Gas Separation and Filtration Division EMEA 242 Neck Road Dukesway, Team Valley Trading Estate Lancaster, NY 08135 Gateshead, Tyne and Wear, England NE11 0PZ...
Need help?
Do you have a question about the Balston NitroFlow TG2 Series and is the answer not in the manual?
Questions and answers