Advertisement
Table of Contents
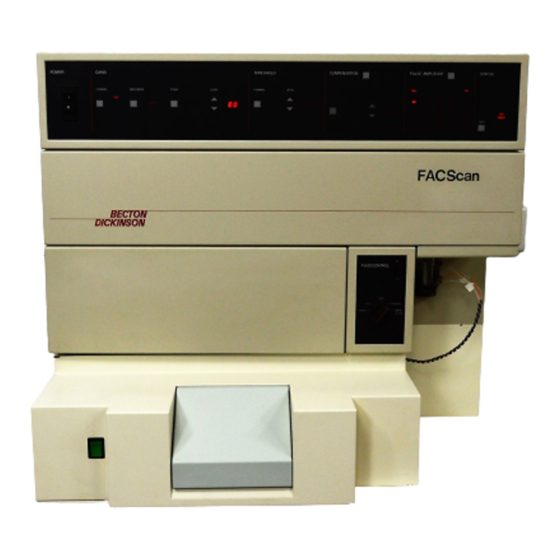
FACScan
A. Before acquisition:
1. Turn on the FACScan machine. It will take about 10-15 min for the FACScan to warm up
(front panel will change from "Not Ready" to "Standby" when ready). Then start the
computer. This allows the computer to recognize the FACScan properly. If the computer
was on, restart it.
2. Click on the BDPACinit icon on the desktop
3. Open CellQuest program.
4. Open the appropriate Acquisition Template for your experiment.
5. Open the following windows for data acquisition:
a.
Acquire -> Connect to Cytometer: This command will connect CellQuest to the FACScan
machine and open the "Acquisition Control" bar, which is what will use to start and stop data
b.
Cytometer ->Detectors/Amps: This window indicates the voltage and amp values set for FSC,
SSC, and each FL channel, which is determined for each type of experiment.
c.
Cytometer ->Threshold: This value determines the lowest FSC limit for data acquisition. It is used
to help eliminate dead cells/debris from your acquired events.
d.
Cytometer ->Compensation: This window sets values to correct for signal overlap between
fluorescence channels.
6. Set the instrument settings for your experiment (Cytometer -> Instrument Settings).
These values will have to be determined with the cells you have prior to acquiring data.
a.
Cytometer -> Instrument Settings
b.
Click Open to select the saved instrument settings for your given experiment.
c.
Click Set to actually apply these settings to the current acquisition
d.
Click Done.
7. To save each acquired sample, do the following:
a.
Acquire -> Parameter Description
b.
Click Folder to select the folder in which data will be stored
c.
Click File, set the File Count to 1. You may also wish to label each sample with an identifier – this
can be a Custom Prefix, which will place the prefix at the start of each sample file you collect, or a
Sample ID, which will create a unique name for each sample (you will have to enter that name in
the Sample ID textbox in Parameter Description before each file is collected).
d.
Set the label for each parameter if desired. P1 and P2 should be FSC and SSC respectively. P3
refers to what will be read on FL1 (i.e. FITC, GFP, etc.), P4 on FL2, etc. If the label you desire is
not listed under the scrolldown menu, simply type it in.
8. CellQuest is now ready to collect your data.
Advertisement
Table of Contents

Related Manuals for BD FACScan


Summary of Contents for BD FACScan
- Page 1 FACScan A. Before acquisition: 1. Turn on the FACScan machine. It will take about 10-15 min for the FACScan to warm up (front panel will change from “Not Ready” to “Standby” when ready). Then start the computer. This allows the computer to recognize the FACScan properly. If the computer was on, restart it.
- Page 2 Empty the waste tank and fill the sheath fluid reservoir if necessary (up to the red line). When completely finished, turn off the FACScan power if no other users are signed up after you and then turn off the computer.
Need help?
Do you have a question about the FACScan and is the answer not in the manual?
Questions and answers