
Related Manuals for SOMFY GDK 700


Summary of Contents for SOMFY GDK 700
- Page 1 Motorisation pour porte de garage Motorisation for garage door Notice d’installation et d’utilisation Installation and operating guide...
-
Page 3: Table Of Contents
Réalisation de l’auto-apprentissage Vérification du réglage mécanique de la porte 2.2 Paramètres avancés 2.3 Verrouillage/Déverrouillage du menu des paramètres 2.4 Mémorisation des télécommandes 2.5 Effacement des télécommandes 2.6 Réinitialisation des réglages FR - Notice d’installation et d’utilisation GDK 700 - SOMFY... -
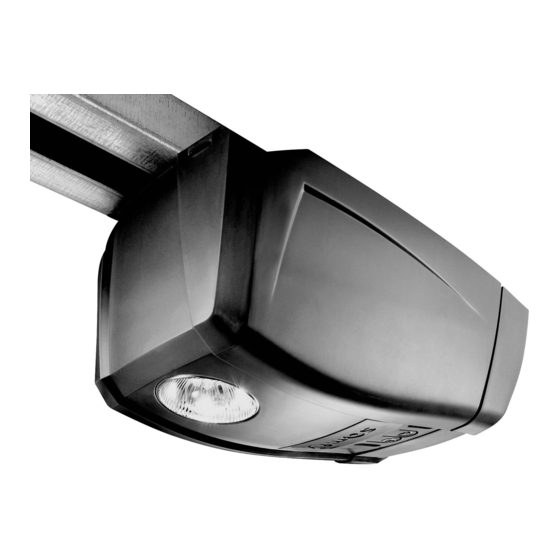
Page 4: Présentation Du Produit
Butée fin de course Vis auto-formeuse Ø 4x8 x 16 Vis auto-perceuse TCB-H 4,2x13 zn x 2 Télécommande Cordon d’alimentation Ampoule 24 V 20 W type halogène G4 x 1 FR - Notice d’installation et d’utilisation GDK 700 - SOMFY... -
Page 5: Encombrement
Cellules photoélectriques 4 x 0,5 mm (RX cellule réceptrice) 2 x 0,5 mm (TX cellule émettrice) Feu orange 2 x 0,5 mm Antenne Contact à clé 2 x 0.5 mm² FR - Notice d’installation et d’utilisation GDK 700 - SOMFY... -
Page 6: Domaine D'application
Dimension maximale des portes Portes basculante débordante et portes sectionnelles H (m) 2,35 2 , 9 0 L (m) 3,00 Surface max. = 7 m Poids max. = 70 kg FR - Notice d’installation et d’utilisation GDK 700 - SOMFY... -
Page 7: Pré-Requis Pour L'installation
Ø 6 Quantité : x 2 Quantité : x 2 Quantité : x 4 Type : Plastique Type : Acier Ø 10 Ø 10 Quantité : x 2 Quantité : x 2 FR - Notice d’installation et d’utilisation GDK 700 - SOMFY... -
Page 8: Installation
“H” en retirant 10 à 200 mm à “D”. Puis reporter cette valeur sur le linteau depuis le plafond. La marque indique la position du bas de la chape linteau. FR - Notice d’installation et d’utilisation GDK 700 - SOMFY... -
Page 9: Fixation Des Chapes Linteau Et Porte
• Centrer la chape porte par rapport à la partie haute • La chape peut-être fixée soit au linteau, soit directement de la porte. au plafond. • Fixer la chape. FR - Notice d’installation et d’utilisation GDK 700 - SOMFY... - Page 10 • Centrer la chape linteau par rapport à la porte du garage. • Centrer la chape porte par rapport à la partie haute • Fixer la chape. de la porte. • Fixer la chape. FR - Notice d’installation et d’utilisation GDK 700 - SOMFY...
-
Page 11: Assemblage Du Rail En 3 Parties
Les vis de fixation ne doivent Dans le cas d’une motorisation collée au plafond, pas rentrer dans le rail ne pas utiliser les vis de fixation des manchons. (ne pas percer). FR - Notice d’installation et d’utilisation GDK 700 - SOMFY... -
Page 12: Montage De L'ampoule
Assemblage de la tête moteur à 90° pour une • Le caoutchouc s’écrase lorsque l’on serre. optimisation de la course moteur. Pour une bonne tension, le caoutchouc doit mesurer entre 18 et 20 mm (distance “X”). FR - Notice d’installation et d’utilisation GDK 700 - SOMFY... -
Page 13: Fixation De L'ensemble Au Plafond
Cas n°1 : Motorisation collée au plafond Ø8 x 50 • Fixer le rail au plafond. Cas n°2 : Motorisation décollée du plafond h < 255 mm • Fixer l’ensemble au niveau de la tête moteur. FR - Notice d’installation et d’utilisation GDK 700 - SOMFY... -
Page 14: Fixation Du Bras De Liaison Sur La Porte Et Sur Le Chariot
• Débrayer le chariot à l’aide du • Amener le chariot au niveau • Fixer le bras à la chape porte dispositif de débrayage manuel. de la porte. et au chariot. FR - Notice d’installation et d’utilisation GDK 700 - SOMFY... -
Page 15: Réglages
Le caoutchouc de tension ne doit jamais être totalement comprimé : pour une bonne tension, le caoutchouc doit mesurer entre 18 et 20 mm (distance “X”, voir page 10). • Si nécessaire, ajuster la tension de la courroie. FR - Notice d’installation et d’utilisation GDK 700 - SOMFY... -
Page 16: Raccordement Électrique De L'alimentation
: positionner d’abord la partie basse du capot ci-dessus : déclipser d’abord la partie haute du capot dans la fente puis clipser ensuite la partie haute. puis ôter la partie basse (sans forcer). FR - Notice d’installation et d’utilisation GDK 700 - SOMFY... -
Page 17: Programmation
• Appuyer 3 fois sur la touche ”A” pour accéder au • Appuyer sur la touche ”B” pour entrer en mode paramètre auto-apprentissage. auto-apprentissage. Le voyant ”B” clignote 2 fois en continu : le moteur est en attente d’auto-apprentissage. FR - Notice d’installation et d’utilisation GDK 700 - SOMFY... - Page 18 • Pendant le cycle d’auto-apprentissage : Si la porte est en mouvement, l’appui sur n’importe quelle touche stoppe le mouvement et interrompt l’auto-apprentissage. Nota : le moteur est à nouveau en attente d’auto-apprentissage (voir cas n°2 - figure 3). FR - Notice d’installation et d’utilisation GDK 700 - SOMFY...
-
Page 19: Vérification Du Réglage Mécanique De La Porte
• En cas de modification de ce paramètre, vérifier impérativement que la détection d’obstacle est conforme à l’annexe A de la norme EN 12 453. Le non respect de cette consigne pourrait gravement blesser des personnes, par exemple écrasées par la porte. FR - Notice d’installation et d’utilisation GDK 700 - SOMFY... - Page 20 • Le nombre ”N” de clignotement du voyant ”B” indique la valeur du paramètre (voir tableau ci-dessous). Voyant A Type d’alimentation Voyant B Alimentation secteur (type d’alimentation par défaut) Alimentation solaire FR - Notice d’installation et d’utilisation GDK 700 - SOMFY...
-
Page 21: Verrouillage/Déverrouillage Du Menu Des Paramètres
En cas d’appui involontaire sur la touche ”B”, passer à l’étape ”Déverrouillage du menu des paramètres”. A ce niveau de l’installation, la motorisation est prête à fonctionner. Les télécommandes livrées dans le kit sont déjà mémorisées. FR - Notice d’installation et d’utilisation GDK 700 - SOMFY... -
Page 22: Mémorisation Des Télécommandes
• Appuyer pendant 2 secondes sur la touche ”B”. • Appuyer sur la touche de la télécommande • L’éclairage intégré clignote pendant 5 secondes. L’éclairage intégré s’allume. La touche de la télécommande est mémorisée. FR - Notice d’installation et d’utilisation GDK 700 - SOMFY... -
Page 23: Effacement Des Télécommandes
Les télécommandes et les réglages sont désormais L’éclairage intégré s’allume puis se met à clignoter effacés. (5 secondes). 2.6 Réinitialisation des réglages Pour réinitialiser tous les réglages, il suffit de lancer un nouvel auto-apprentissage (voir page 15). FR - Notice d’installation et d’utilisation GDK 700 - SOMFY... -
Page 24: Utilisation
• Un nouvel appui sur la touche de la télécommande provoque la fermeture de la porte. FR - Notice d’installation et d’utilisation GDK 700 - SOMFY... -
Page 25: Utilisation De La Télécommande Porte Ouverte
• Un appui sur la touche avec la flèche vers le bas provoque la fermeture de la porte. FR - Notice d’installation et d’utilisation GDK 700 - SOMFY... -
Page 26: Fonctionnement De La Détection D'obstacle
Il s’éteint automatiquement au bout de 30 secondes, après la fin du mouvement de la porte. Une utilisation répétitive donnant lieu à un allumage continu de l’éclairage intégré, peut conduire à une extinction automatique due à une protection thermique. FR - Notice d’installation et d’utilisation GDK 700 - SOMFY... -
Page 27: Fonctionnement Du Dispositif De Débrayage Manuel
”ouverture totale”. Laisser la porte s’ouvrir jusqu’à sa position ”ouverture • Lancer une ouverture totale de la porte depuis une totale”. télécommande mémorisée. • La porte s’ouvre avec une vitesse dégradée. FR - Notice d’installation et d’utilisation GDK 700 - SOMFY... -
Page 28: Accessoires
4.2 Raccordement du feu orange clignotant (Réf. : 2400596) Le feu orange est activé lors de tout mouvement de la porte avec une pré-signalisation de 2 s avant le début du mouvement. FR - Notice d’installation et d’utilisation GDK 700 - SOMFY... -
Page 29: Raccordement De L'antenne Déportée (Réf. : 2400472)
Pour une durée de vie optimale de la batterie, il est recommandé de couper l’alimentation principale et de faire fonctionner la motorisation sur batterie pendant quelques cycles, 3 fois par an. Raccordement FR - Notice d’installation et d’utilisation GDK 700 - SOMFY... -
Page 30: Raccordement Du Contact À Clé (Réf. : 2400597)
Le contact à clé permet de commander la manœuvre et l’éclairage de la porte de garage motorisée. 4.6 Raccordement du kit solaire (Réf. : 2400961) Se référer à la notice du panneau solaire. FR - Notice d’installation et d’utilisation GDK 700 - SOMFY... -
Page 31: Plan De Câblage Général Des Accessoires
Couper l’alimentation électrique du moteur avant toute installation d’un périphérique. Repère Désignation Réf. Contact à clé 2400597 Antenne déportée 2400472 Batterie de secours 2400720 Cellules photoélectriques 2400939 Feu orange clignotant 2400596 Kit solaire 2400961 FR - Notice d’installation et d’utilisation GDK 700 - SOMFY... -
Page 32: Entretien Et Dépannage
La communauté est là pour vous répondre, et la réponse à votre question y figure peut être déjà ! Vous pouvez également prendre contact auprès d’un conseiller Somfy par téléphone au (0.15€ la minute), disponibilité du service sur 0 820 055 055 www.somfy.fr... -
Page 33: Changement De L'ampoule De L'éclairage Intégré
• Soulever le capot. • Retirer la pile à l’aide • Remplacer la pile la télécommande. d’un tournevis. (3 V CR 2430) puis repositionner le capot et le clip de la télécommande. FR - Notice d’installation et d’utilisation GDK 700 - SOMFY... -
Page 34: Caractéristiques Techniques
Fixe : 14 cm/s (max.) Vitesse de fermeture Fixe : 12 cm/s (max.) Programmable : pas de ralentissement, zone de Vitesse d’accostage en fermeture ralentissement courte (30 cm), zone de ralentissement longue (50 cm) FR - Notice d’installation et d’utilisation GDK 700 - SOMFY... - Page 35 Performing auto-programming Checking the mechanical setting of the door 2.2 Advanced settings 2.3 Locking/unlocking the parameters menu 2.4 Memorising the remote controls 2.5 Clearing the remote controls 2.6 Reinitialising the settings EN - GDK 700 installation and operating guide - SOMFY...
-
Page 36: Kit Contents
3-part rail Connecting arm Sleeve End limit stop Thread-forming screws Ø 4x8 x 16 TCB-H 4.2x13 zn self-tapping Remote control screws 24 V 20 W G4 halogen bulb Power supply cord EN - GDK 700 installation and operating guide - SOMFY... -
Page 37: Space Requirements
Type of cable Photoelectric cells 4 x 0.5 mm (RX receptor cell) 2 x 0.5 mm (TX emitter cell) Orange light 2 x 0.5 mm Aerial Key lock 2 x 0.5 mm² EN - GDK 700 installation and operating guide - SOMFY... -
Page 38: Types Of Doors Which Can Be Motorised
Maximum dimension of doors Up-and-over doors and sectional doors H (m) 2.35 2 . 9 0 L (m) 3.00 Max. surface area = 7 m Max. weight = 70 kg EN - GDK 700 installation and operating guide - SOMFY... -
Page 39: Prerequisites For Installation
Type: Ø 8 Type: Ø 8 Type: Ø 6 Quantity: x 2 Quantity: x 2 Quantity: x 4 Type: Plastic Type: Steel Ø 10 Ø 10 Quantity: x 2 Quantity: x 2 EN - GDK 700 installation and operating guide - SOMFY... -
Page 40: Installation
“H” by subtracting 10 from 200 mm from “D”. Then mark this value on the lintel from the ceiling. The mark indicates the lower position of the lintel bracket. EN - GDK 700 installation and operating guide - SOMFY... -
Page 41: Fastening The Lintel And Door Brackets
• Centre the door bracket in relation to the top of the • The bracket can be fastened either to the lintel or directly to door. the ceiling. • Attach the bracket. EN - GDK 700 installation and operating guide - SOMFY... - Page 42 • Centre the lintel bracket in relation to the garage door. • Centre the door bracket in relation to the top of the door. • Attach the bracket. • Attach the bracket. EN - GDK 700 installation and operating guide - SOMFY...
-
Page 43: Assembling The Rail In 3 Sections
• Secure the assembly using the mounting screws. mounting screws In the case of a motorisation attached to the ceiling, must not penetrate the rail do not use the sleeve mounting screws. (do not drill). EN - GDK 700 installation and operating guide - SOMFY... -
Page 44: Assembling The Bulb
Assembly of the motor head at 90° to optimise the motor travel. • The rubber squashes when tightened. To obtain the correct tension, the rubber must measure between 18 and 20 mm (distance “X”). EN - GDK 700 installation and operating guide - SOMFY... -
Page 45: Fastening The Unit To The Ceiling
Case 1: Motorisation against ceiling Ø8 x 50 • Fasten the rail to the ceiling. Case 2: Motorisation not against ceiling h < 255 mm • Fasten the unit at the motor head. EN - GDK 700 installation and operating guide - SOMFY... -
Page 46: Fastening The Link Arm To The Door And The Carriage
If the back release handle is higher than 1.80 m, it will be necessary to extend the cable to make it accessible to all users. • Release the carriage using • Bring the carriage level with the door. • Secure the arm to the door bracket the manual back release device. and carriage. EN - GDK 700 installation and operating guide - SOMFY... -
Page 47: Settings
The tension rubber must never be fully compressed: to obtain the correct tension, the rubber must measure between 18 and 20 mm (distance “X”, see page 10). • If necessary, adjust the belt tension. EN - GDK 700 installation and operating guide - SOMFY... -
Page 48: Electrical Connection To The Power Supply
first, position the lower section of the cover in the above: first, unclip the upper section of the cover then groove then clip the upper section into place. remove the lower section (without forcing it). EN - GDK 700 installation and operating guide - SOMFY... -
Page 49: Programming
• Press button “A” 3 times to access the auto- • Press button “B” to enter auto-programming mode. programming parameter. Indicator light “B” flashes twice continuously: the motorisation is waiting for auto-programming. EN - GDK 700 installation and operating guide - SOMFY... - Page 50 • During the auto-programming cycle: If the door is moving, the movement is stopped and auto-programming is interrupted if any of the buttons are pressed. NB: The motor is again awaiting auto-programming (see case no.2 - figure 3). EN - GDK 700 installation and operating guide - SOMFY...
-
Page 51: Checking The Mechanical Setting Of The Door
• If this parameter is changed, it is essential to check that the obstacle detection complies with appendix A of standard EN 12 453. Failure to follow this instruction may result in serious injury, e.g. due to crushing by the gate. EN - GDK 700 installation and operating guide - SOMFY... - Page 52 • The number of times “N” that indicator light “B” flashes indicates the value of the parameter, see table below). Indicator light A Power supply type Indicator light B Mains power supply (default type of power supply) Solar power EN - GDK 700 installation and operating guide - SOMFY...
-
Page 53: Locking/Unlocking The Parameters Menu
If button B is pressed accidentally, move on to the “Unlocking the parameters menu” step At this stage in the installation, the motorisation is operational. The remote controls supplied in the kit have already been memorised. EN - GDK 700 installation and operating guide - SOMFY... -
Page 54: Memorising The Remote Controls
• Press button “B” for 2 seconds. • Press the button on the remote control The integrated lighting comes on. • The integrated lighting flashes for 5 seconds. The remote control button has been memorised. EN - GDK 700 installation and operating guide - SOMFY... -
Page 55: Clearing The Remote Controls
All the remote controls and all the settings are now comes on then begins to flash (5 seconds). cleared. 2.6 Reinitialising the settings To reinitialise all settings, simply run a new auto-programming process (see page 15). EN - GDK 700 installation and operating guide - SOMFY... -
Page 56: Operation
• Pressing the remote control button again when the door is opening causes the door to stop. • Pressing the remote control button again causes the door to close. EN - GDK 700 installation and operating guide - SOMFY... -
Page 57: Using The Remote Control With Door Open
• Pressing the central remote control button when the door is opening or closing causes the door to stop. • Pressing the arrow down button causes the door to close. EN - GDK 700 installation and operating guide - SOMFY... -
Page 58: Obstacle Detection Mode
When the door stops moving, it goes off automatically a er 30 seconds. Repetitive use will cause the integrated lighting to be lit constantly which may result in the light being switched off automatically due to thermal protection. EN - GDK 700 installation and operating guide - SOMFY... -
Page 59: Manual Back Release Mode
“fully open” position again. Allow the door to open to its “fully open” position. • Open the door fully using a memorised remote control. • The door will open at a reduced speed. EN - GDK 700 installation and operating guide - SOMFY... -
Page 60: Accessories
If the cells are disconnected, it is essential to recreate the bridge between terminals “1” and “2”. 4.2 Connecting the flashing orange light (Ref.: 2400596) The orange light is activated whenever the door moves, with a 2-second pre-warning before movement starts. EN - GDK 700 installation and operating guide - SOMFY... -
Page 61: Connecting The Remote Antenna (Ref.: 2400472)
For optimum battery life it is recommended that the main power supply be switched off and the motorisation operated using the battery for several cycles, three times a year. Connection EN - GDK 700 installation and operating guide - SOMFY... -
Page 62: Connecting The Key Contact (Ref.: 2400597)
4.5 Connecting the key contact (Ref.: 2400597) The key contact serves to control the moving and lighting of the motorised garage door. 4.6 Connecting the solar kit (Ref.: 2400961) Refer to the solar panel guide. EN - GDK 700 installation and operating guide - SOMFY... -
Page 63: Accessories General Wiring Diagram
Switch the electrical power supply to the motorisation off before installing any peripheral. Mark Designation Ref. Key lock 2400597 Offset aerial 2400472 Backup battery 2400720 Photoelectric cells 2400939 Flashing orange light 2400596 Solar kit 2400961 EN - GDK 700 installation and operating guide - SOMFY... -
Page 64: Maintenance And Repairs
Product has reached operating limit. the auto-programming phase. 5.3 Assistance www.somfy.com If the fault remains or for any other problem or enquiry relating to your motorisation, visit: EN - GDK 700 installation and operating guide - SOMFY... -
Page 65: Changing The Integrated Light Bulb
• Li the cover. • Remove the battery using • Replace the battery the remote control. a screwdriver. (3 V CR 2430) then reposition the cover and the clip of the remote control. EN - GDK 700 installation and operating guide - SOMFY... -
Page 66: Technical Data
Opening speed Fixed: 14 cm/s (max.) Closing speed Fixed: 12 cm/s (max.) Programmable: no reduction in speed, short slow zone (30 Docking speed when closing cm), long slow zone (50 cm) EN - GDK 700 installation and operating guide - SOMFY... - Page 68 Forum d’entraide : Somfy Gmbh Somfy Ltd. 07472 / 930 - 495 (+44) 0113 391 3030 www.somfy.de www.somfy.co.uk Somfy Sp. z o.o Somfy LLC Russia 810377199 8 (800) 555-60-70 www.somfy.ru/diy www.somfy.pl Somfy España SA Somfy Nederland B.V. 900 20 68 68 023 56 23 752 www.somfy.es...
Need help?
Do you have a question about the GDK 700 and is the answer not in the manual?
Questions and answers