Magnetrol Jupiter JM4 Installation And Operating Manual
Magnetostrictive level transmitter; foundation fieldbus
Hide thumbs
Also See for Jupiter JM4:
- Operating manual (124 pages) ,
- Installation and operating manual (68 pages) ,
- Safety manual (16 pages)

Related Manuals for Magnetrol Jupiter JM4


Summary of Contents for Magnetrol Jupiter JM4
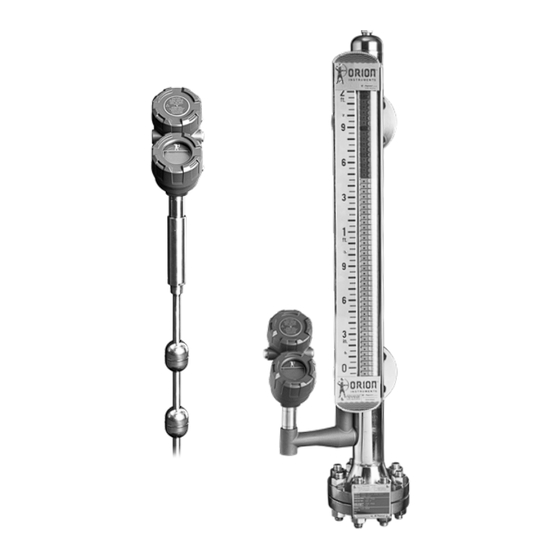
- Page 1 Model JM4 Installation and Operating Manual Software v1.x Magnetostrictive Level Transmitter Foundation fieldbus ™...
- Page 2 Performance specifications are effective with date of issue Conventions Used in this Manual and are subject to change without notice. Magnetrol reserves Certain conventions are used in this manual to convey the right to make changes to the product described in this specific types of information.
-
Page 3: Table Of Contents
Jupiter® Model JM4 Magnetostrictive Transmitter with fieldbus Output ™ OUNDATION Table of Contents 1.0 Foundation fieldbus Overview 3.0 Function Blocks 1.1 Description....... . 4 3.1 Overview . -
Page 4: Foundation Fieldbus Tm Overview
fieldbus Overview ™ oundation Description Foundation fieldbus is a digital communications system that ™ serially interconnects devices in the field. A Fieldbus system is similar to a Distributed Control System (DCS) with two excep- tions: • Although a Foundation fieldbus system can use the same ™... -
Page 5: Device Description (Dd)
Any Fieldbus host system can operate with a device if it has the proper DD and Common File Format (CFF) for that device. The most recent DD and CFF files can be found on the Foundation fieldbus™ web site at www.fieldbus.org or at www.magnetrol.com. NOTE: Consult your host system vendor for any host-specific files that may be needed. 1.2.1... -
Page 6: Intrinsic Safety
Intrinsic Safety The H1 physical layer supports Intrinsic Safety (IS) applications with bus-powered devices. To accomplish this, an IS barrier or galvanic isolator is placed between the power supply in the safe area and the device in the hazardous area. H1 also supports the Fieldbus Intrinsically Safe Concept (FIS- CO) model which allows more field devices in a network. -
Page 7: Unpacking
Caution: Do not discard the shipping container until all parts are accounted for and inspected. 2.1.3 Electrostatic Discharge Handling Magnetrol/Orion’s electronic instruments are manufactured to the highest quality standards. These instruments use electronic components that may be damaged by static electricity present in most work environments. -
Page 8: Remote Mount Transmitter Head
• Screwdriver and assorted hand tools for making conduit and electrical connections. • Tape measure or ruler if configuring via Set 4 mA and Set 20 mA display screens. • Digital multimeter or DVM to troubleshoot supply voltage problems. • 2.5 mm Allen key to tighten transmitter to probe connection. 2.1.6 Remote Mount Transmitter Head For applications with possible clearance or transmitter accessibil- ity issues, the JM4 is available with a remote mount transmitter... -
Page 9: Securing The Transmitter To The Mli
Fig. 2-4a. Top Mount Fig. 2-4b. Top Mount Offset Fig. 2-4c. Bottom Mount 2.2.3 Securing the Transmitter to the MLI Each externally mounted JM4 transmitter is provided with a set of clamps (two or more, depending on probe length) for secur- ing to the MLI chamber. If the JM4 was ordered with an Orion MLI, it will be shipped pre-mounted, but if the transmitter was ordered separately, then it can be secured using the following steps. -
Page 10: Installation On Atlas™ Vs. Aurora
4. The upper clamp will need to be open to a large enough diame- ter to be able to mount to the MLI as well as the probe. The up- per clamp should be positioned just above the ⁄ " NPT threads. 5. -
Page 11: Mounting For Direct Insertion
Mounting for Direct Insertion 2.3.1 Available Configurations The direct insertion version of the JM4 transmitter has several available configurations as well. As with external-mount, direc- tion insertion JM4 is available with one or two floats. JM4 can be installed in external chambers or into the main vessel. It is also available with a centering disc and/or stilling well to keep the probe in position. -
Page 12: Centering Disc
2.3.3 Centering Disc All Jupiter model JM4 transmitters that come with a stilling well are also provided with a centering disc to prevent the probe from making contact with the stilling well. Wiring Caution: F fieldbus versions of the JUPITER Model JM4 OUNDATION transmitter operate at 9-17.5 VDC. Higher voltages will Black (-) Red (+) damage the transmitter. -
Page 13: Intrinsically Safe
6. Replace and tighten the cover to the transmitter wiring compart- ment before applying power. 2.4.2 Intrinsically Safe (FISCO) An Intrinsically Safe (IS) installation potentially has flammable media present. An approved IS barrier must be installed in the non-hazardous (safe) area to limit the available energy out to the hazardous area. -
Page 14: Configuration
4. Connect an Earth ground wire to the nearest green ground screw per local electrical code (not shown in illustration). 5. Connect the positive supply wire to the (+) terminal and the negative supply wire to the (-) terminal. 6. Replace and tighten the cover to the wiring compartment of the transmitter before applying power. - Page 15 2.5.2.1 Navigating the Menu UP moves to the previous item in the menu branch. DOWN moves to the next item in the menu branch. BACK moves back one level to the previous (higher) branch Jupiter® Model JM4 item. Level 58.7 ENTER enters into the lower level branch or switches to the en- try mode.
-
Page 16: Password Protection
2.5.2.4 Entering Numeric Data Using Increment/Decrement Use this method to input the following data into parameters such as Damping and Failure Alarm. Push Button Keystroke Action Increments the displayed value. If held down the digits scroll until the push button is released. Depending on which screen is being revised, the in- crement amount may increase by a factor of 10 after the value has been incremented 10 times. -
Page 17: Model Jm4 Menu: Step-By-Step Procedure
The default User Password installed in the transmitter at the factory is 0. With a password of 0, the transmitter is no longer password protected, and any value in the basic user menus can be adjusted without entering a confirming password. NOTE: If a User is not known or has been misplaced, the menu item New Password in the DEVICE SETUP/ADVANCED CONFIG menu displays an encrypted value representing the present... - Page 18 The Home Screen presentation can be customized by viewing or hiding some of these items. Figure 2-12 is an example of a Home Screen for a Model JM4 configured for a Level Only application. MAIN MENU Pressing any key on the Home Screen will present the Main Menu, consisting of three basic menu labels shown in all capital letters.
-
Page 19: Auto-Configuration/Reset New Probe Diagnostic
2.5.5 Auto-Configuration/Reset New Probe Diagnostic Each JM4 probe has its own set of configuration parameters stored inside. With these parameters, it is possible to auto-con- figure the transmitter using the following steps. 1. Connect the new probe to the transmitter. 2. The home screen will display a “Device Failure New Probe” message in alternating video on the screen. -
Page 20: Configuration Menu Tree
2.5.6 Model JM4 Configuration Menu – Device Setup Home Screen Main Menu Identity Device Setup Product Name (read only) Orion S/N (read only) DIGITAL BOARD (read only) ANALOG BOARD (read only) [Physical Dev Tag] (read only) [Device Address] [Date Code] (read only) Level Units Volume Units* Basic Config Measurement Type: Volume Config... - Page 21 2.5.6 Model JM4 Configuration Menu – Device Setup Home Screen Main Menu Vessel Dimensions: Identity Vessel Type: Device Setup Radius Basic Config Rectangular Ellipse Depth Volume Config* Horizontal/Flat Conical Height Horizontal/Ellipse Width Horizontal/Spherical Length Spherical Vertical/Flat Custom Table Setup: Vertical/Ellipse Custom Table Type: Vertical/Spherical Linear Vertical/Conical Spline Custom Table Level Input Source:...
- Page 22 2.5.6 Model JM4 Configuration Menu – Device Setup Home Screen Main Menu Identity Device Setup Basic Config Volume Config I/O Config Local Display Config Advanced Config Blocking Distance: 0 to 50 feet (0 m to 15 m) Minimum Separation: 0 to 28 inches (0 cm to 71 cm) Zero Offset: -50 to 50 feet (-15 m to 15 m)
- Page 23 2.5.6 Model JM4 Configuration Menu – Device Setup Home Screen Main Menu Identity Device Setup Basic Config Volume Config Local Display Config Advanced Config Factory Config Elec Temp Offset: º C -60 to +60 NAPValue: 0 to 59999 Factory Reset Factory Calib Conv Factor 0 to 32767 Probe Properties Scale Offset -3.28 to 3.28 ft (-1 m to 1 m)
-
Page 24: Function Blocks
Function Blocks Overview The function of a Foundation fieldbus™ device is determined by the arrangement of a system of blocks defined by the Fieldbus Foundation. The types of blocks used in a typical User Applica- tion are described as either Standard or Advanced. Function Blocks are built into the Foundation fieldbus™... -
Page 25: Universal Fieldbus Block Parameters
The End User needs the Process Variable value as an Analog Input to their fieldbus network. 3.1.1 Universal Fieldbus Block Parameters The following are general descriptions of the parameters com- mon to all blocks. Additional information for a given parameter is described later in that specific block section. ST_REV (static data revision): a read only parameter that gives the revision level of the static data associated with the block. -
Page 26: Resource Block
Line.” DD_RESOURCE: A string identifying the tag of the resource that contains the Device Description for this device. MANUFAC_ID: Contains Magnetrol International’s Foundation fieldbus™ manufacturer’s ID number, which is 0x000156. DEV_TYPE: The model number of the Jupiter Model JM4 FF transmitter (0x0005). - Page 27 CYCLE_SEL: Allows the user to select the block execution method. MIN_CYCLE_T: The time duration of the shortest cycle inter- val. It puts a lower limit on the scheduling of the resource. NV_CYCLE_T: The minimum time interval between copies of non-volatile (NV) parameters to NV memory. NV memory is only updated if there has been a significant change in the dynamic value and the last value saved will be available for the restart procedure.
-
Page 28: Additional Resource Block Parameters
ACK_OPTION (Acknowledge Option): Selects whether alarms associated with the block will be automatically acknowl- edged. WRITE_PRI (Write Priority): The priority of the alarm gener- ated by clearing the write lock. WRITE ALM (Write Alarm): The alert generated if the write lock parameter is cleared. - Page 29 FD_MAINT_MASK: Used to suppress an alarm from being broadcast for single or multiple conditions that are active in the MAINT alarm category. FD_CHECK_MASK: Used to suppress an alarm from being broadcast for single or multiple conditions that are active in the CHECK alarm category.
-
Page 30: Transducer Block
“simulation” indicator in the Block Error parameter. SERIAL_NUMBER: Read-only parameter that corresponds to “Magnetrol Serial Number” in the Transducer Block. FIRMWARE_VERSION: Read-only parameter that corre- sponds to “Firmware Version” in the Transducer Block. -
Page 31: Password Parameters
If DEVICE_STATUS indicates a problem, refer to Section 5.3 Troubleshooting. For a complete list of Transducer Block Parameters, refer to table in the Appendix. NOTE: The user should compare the DD file and revision number of the device with the HOST system to ensure they are at the same revision level. Please refer to the DD Revision Table Section 1.2.1. -
Page 32: Analog Input Block
Analog Input Block The ANALOG INPUT (AI) block takes the Jupiter Model JM4 FF input data, selected by channel number, and makes it avail- able to other function blocks at its output. The channel selections are: Channel Param- Transducer Blocks Process Variable eter Value (AI Blocks) Level Interface Level... - Page 33 • Target: The mode to “go to” • Actual: The mode the “block is currently in” • Permitted: Allowed modes that target may take on • Normal: Most common mode for target PV: Either the primary analog value for use in executing the function, or a process value associated with it.
- Page 34 FIELD_VAL: Raw value of the field device in % of PV range, with a status reflecting the Transducer condition before signal characterization (L_TYPE) or filtering (PV_FTIME). UPDATE_EVT: This alert is generated by any change to the static data. BLOCK_ALM: The block alarm is used for all configuration, hardware, or system problems in the block.
-
Page 35: Ai Block Diagnostics
3.4.2 AI Block Diagnostics The AI blocks can display a BLOCK_ERR diagnostic when: 1. The Channel is not set correctly. (Refer to Default Channel Table in Section 3.4). 2. XD_SCALE does not have suitable engineering units. 3. The SIMULATE parameter is active. 4. -
Page 36: Ai Out Display Screens
3.4.3.1 AI Out Display Screens The Analog Input Block Out values can be conditionally dis- played as part of the “rotating” home menu screens. A represen- tative example is shown at left. The screens will be formatted as shown with: •... -
Page 37: Ai Block Configuration
3.4.4 AI Block Configuration Below are shown some examples of various typical AI Block configurations. ORI-651 Jupiter ® Model JM4 Magnetostrictive Transmitter – F fieldbus ™ oundation... -
Page 38: Simulation Feature
3.4.5 Simulation Feature The Jupiter Model JM4 with FOUNDATION fieldbus™ supports the Simulate feature in the Analog Input block. The Simulate feature is typically used to exercise the operation of an AI block by simulating a TRANSDUCER block input. This feature cannot be activated without the placement of a hardware jumper. - Page 39 BKCAL_OUT: The value and status required by the BKCAL_ IN input for another block. BLOCK_ALM: Used for all configuration, hardware, or system problems in the block. BLOCK_ERR: Reflects the error status associated with the hardware or software components associated with a block. BYPASS: Used to override the calculation of the block.
- Page 40 LO_LO_ALM: The LO _LO alarm data. LO_LO_LIM: The setting for the alarm limit used to detect the LO_LO alarm condition. LO_LO_PRI: The priority of the LO_LO alarm. LO_PRI: The priority of the LO alarm. MODE_BLK: The actual, target, permitted, and normal modes of the block.
-
Page 41: Advanced Function Blocks
TRK_SCALE: The high and low scale values associated with TRK_VAL. TRK_VAL: The value applied to OUT in LO mode. UPDATE_EVT: This alert is generated by any changes to the static data. BLOCK-ERR-DESC: Reports more specific details regarding some errors reported through BLOCK_ERR. Advanced Function Blocks Integrator Block (IT) The Integrator (IT) function block integrates one or two vari-... - Page 42 IN_1: The block input value and status. IN_2: The block input value and status. OUT_TRIP: The first discrete output. OUT_PTRIP: The second discrete output. TIME_UNIT1: Converts the rate time, units in seconds. TIME_UNIT2: Converts the rate time, units in seconds. UNIT_CONV: Factor to convert the engineering units of IN_2 into the engineering units of IN_1.
-
Page 43: Arithmetic Block (Ar)
UNCERTAIN_LIMIT: Sets the limit for PCT_INC. OUT receives the status “uncertain” if PECT_INC ≥ UNCERT.LIM. OP_CMD_INT: Operator command RESET resets the totalizer OUTAGE_LIMIT: The maximum tolerated duration for power failure RESET_CONFIRM: Momentary discrete value with can be written by a host to enable further resets, if the option “Confirm reset”... - Page 44 MODE_BLK: The actual, target, permitted, ad normal modes of the block. • Target: The mode to “go to” • Actual: The mode the “block is currently in” • Permitted: Allowed modes that target may take on • Normal: Most common mode for target BLOCK_ERR: This parameter reflects the error status associat- ed with the hardware or software components associated with a block.
-
Page 45: Input Selector Block (Is)
COMP_LO_LIM: Determines the low limit of the compensa- tion input. ARITH_TYPE: The set of 9 arithmetic functions applied as compensation to or augmentation of the range extended input. BAL_TIME: Specifies the time for a block value to match an input, output, or calculated value or the time for dissipation of the internal balancing bias. - Page 46 OUT: The block output value and status. OUT_RANGE: High and low scale values, engineering units code, and number of digits to the right of the decimal point associated with OUT GRANT_DENY: Options for controlling access of host com- puters and local control panels to operating, tuning, and alarm parameters of the block.
-
Page 47: Signal Characterizer Block (Sc)
Signal Characterizer Block (SC) The Signal Characterizer (SC) function block characterizes or approximates any function that defines an input/output rela- tionship. The function is defined by configuring as many as 21 X, Y coordinates. The block interpolates an output value for a given input value using the curve defined by the configured coordinates. -
Page 48: Reference Information
CURVE_Y: Curve input points. The “y” points of the curve are defined by an array of 21 points. UPDATE_EVT: This alert is generated by any changes to the static data. BLOCK_ALM: The block alarm is used for all configuration, hardware, connection failure, or system problems in the block. BLOCK_ERR_DESC: Reports more specific details regarding some errors reported through BLOCK_ERR. - Page 49 5.3.1 Troubleshooting Problem Solution Blank display Ensure local Keypad / LCD is properly installed. Re- move power and reapply power to the unit. Check to see if LED on module is illuminated. Check voltage at terminal board. If jumper is in place under display, remove jumper. Transmitter does not track level (External Mount) Remove transmitter and probe from piping column and...
- Page 50 5.3.2 Status Messages Display Message Brief Description Solution No Probe No probe connected to transmitter Check probe connection to transmitter, Consult Factory New Probe Probe memory contents disagree On Display, go to ‘Reset New Probe’ and enter pass- with EEPROM image word. Analog Board Error No response from co-processor, or Consult Factory.
-
Page 51: Configuration Information
5.4 Configuration Information 5.4.1 Volumetric Capability Selecting Measurement Type = Volume and Level allows the Model JM4 transmitter to measure volume as the Primary Mea- sured Value. 5.4.1.1 Configuration Using Built-In Vessel Types The following table provides an explanation of each of the Sys- tem Configuration parameters required for volume applications that use one of the nine Vessel Types. - Page 52 Vessel Types Horizontal/Spherical Spherical Horizontal/Elliptical Vertical/Elliptical Vertical/Spherical Rectangular Vertical/Flat Vertical/Conical Horizontal/Flat ORI-651 Jupiter ® Model JM4 Magnetostrictive Transmitter – F fieldbus ™ oundation...
- Page 53 5.4.1.2 Configuration Using Custom Table If none of the nine Vessel Types shown can be used, a Custom Table can be created. A maximum of 30 points can be used to establish the level to volume relationship. The following table provides an explanation of each of the System Configuration parameters for volume applications where a Custom Table is needed.
- Page 54 5.4.2 Reset Function A parameter labeled “Reset Parameter” is located at the end of the DEVICE SETUP/ADVANCED CONFIG menu. In the event a user gets confused during configuration or advanced troubleshooting, this parameter gives the user the ability to reset the Model JM4 transmitter configuration. Unique to the Model JM4 transmitter is the ability for Orion In- struments to fully “pre-configure”...
-
Page 55: Hazardous Location Approvals
Hazardous Location Approvals These units are in compliance with the EMC directive 2004/108/EC, the PED directive 97/23/EC and the ATEX directive 94/9/EC. EXPLOSION PROOF NON-INCENDIVE US/Canada: US/Canada: Class I, Div 1, Group B, C and D, T4 U.S.: Class I, II, III, Division 2, Group A, B, C, D, E, F, G, T4, Ta = -40ºC to 70ºC Ta = -40ºC to +70ºC Canada: Class I, Division 2, Group A,B,C,D T4, Ta = -40ºC to 70ºC Type 4X, IP67... - Page 56 SPECIAL CONDITIONS OF USE: 1. The enclosure contains aluminum and is considered to present a potential risk of ignition by impact or friction. Care must be taken during installation and use to prevent impact or friction. 2. To maintain the T4 temperature code care shall be taken to ensure the enclosure temperature does not exceed 70°C.
- Page 57 5.5.1 Agency Specifications – FM/CSA Intrinsically Safe Installation CURRENT LOOP "SEE NOTE 2" JUPITER JM4-51XX-XXX ORI-651 Jupiter ® Model JM4 Magnetostrictive Transmitter – F fieldbus ™ oundation...
- Page 58 5.5.2 Agency Specifications – FM/CSA Intrinsically Safe Foundation Fieldbus Installation Any FM Approved Intrinsically Safe Associated Apparatus with Entity Parameters suitable for the FISCO Concept. Ui (Vmax) = 17.5V Ii (Imax) = 380 mA Pi = 5.32 W Ci = 440pF Li = 2.7µH Leakage current < 50µA Ui (Vmax) = 17.5V Ii (Imax) = 380 mA Pi = 5.32 W...
-
Page 59: Specifications
Specifications 5.6.1 Functional/Physical System Design Measurement Principle Magnetostriction-based mechanical response signal Input Measured Variable Level, response signal time of flight 6 to 400 inches (15 to 999 cm) Span Output Type 4 to 20 mA with HART: 3.8 mA to 20.5 mA useable (per NAMUR NE43) fieldbus : H1 (ITK Ver. - Page 60 5.6.1 Functional/Physical Humidity 0 to 99%, non-condensing Electromagnetic Compatibility Meets CE requirement (EN 61326) and NAMUR NE 21 Surge Protection Meets CE EN 61326 (1000V) ANSI/ISA-S71.03 Class SA1 (Shock); ANSI/ISA-S71.03 Class VC2 Shock/Vibration (Vibration) Performance Linearity ±0.01% or 0.030" (0.76 mm), whichever is greater Accuracy ±0.01% full scale or 0.05"...
- Page 61 5.6.4 Physical Specifications - Transmitter inches [mm] 3.39 4.18 106.2 3.77 95.9 8.35 10.04 212.1 255.1 5.09 129.4 45° 3.96 Transmitter Head 100.7 16.92 16.92 20.92 17.17 16.92 429.7 429.7 531.3 429.7 Direct Insertion Direct Insertion Direct Insertion Direct Insertion Direct Insertion .75 NPT .75 NPT, High Temp & Cryo 1" BSP 2" BSP 2" NPT ORI-651 Jupiter ®...
- Page 62 5.6.4 Physical Specifications - Transmitter inches [mm] 15.16 16.42 20.23 385.1 513.9 External Top Mount External Top Mount External Top Mount Offset Offset, Cryo 22.92 18.92 20.42 582.1 480.5 518.6 Direct Insertion Direct Insertion External Top Mount Flange Flang, High Temp & Cryo High Temp & Cryo 11.39 17.06 289.4 7.84 12.63 199.1 433.4 320.7 External Bottom Mount External Bottom Mount Offset Offset, Cryo ORI-651 Jupiter ® Model JM4 Magnetostrictive Transmitter –...
-
Page 63: Safe Operating Area
5.6.5 Power Supply Requirements Safe Operating Area Safe Operating Area 1136 Loop Typical HART 4-20 mA Digital Solar Mode Operating Area 16.25 V 18.9 V 24 V 36 V Vsupply (Loop Supply Voltage) Supply Voltage Operational Mode Current Consumption Vmin Vmax HART 16.25V General Purpose 20mA 16.25V 28.6V... -
Page 64: Model Number Breakdown
5.7 Model Number Transmitter 1 2 3 | BASIC MODEL NUMBER Jupiter 4th Generation Magnetostrictive Level Transmitter 4 | POWER 24 VDC Two Wire 5 | SIGNAL OUTPUT 4-20 mA with HART fieldbus Communications ™ oundation 6 | SAFETY OPTIONS SIL 2 Suitable - 3rd party FMEDA 7 | ACCESSORIES/MOUNTING 1, 2, B, &... - Page 65 Model Number Direction Insertion Probe 1 | TECHNOLOGY Jupiter Magnetostrictive Probes - Model JM4 2 | MEASUREMENT SYSTEM English Metric 3 | CONFIGURATION Standard (-65 to +500 °F) High-Temp Extension (+500 to +800 °F) Cryogenic (-320 to +176 °F) 4 5 | PROCESS CONNECTION - SIZE/TYPE (consult factory for other process connections) Threaded 1"...
- Page 66 Model Number Continued Direction Insertion Probe 8 | INSTALLATION CONSIDERATIONS Direct Insertion unit mounted in vessel without stilling well. Probe centering disc not required. Direct Insertion unit mounted in chamber, bridle, or stilling well. Probe centering disc required. 9 | CONSTRUCTION CODES K, L, M, &...
- Page 67 Model Number External Mount Probe 1 | TECHNOLOGY Jupiter Magnetostrictive Probes - Model JM4 2 | MEASUREMENT SYSTEM English Metric 3 | CONFIGURATION Top Mount Top Mount Offset Bottom Mount Offset Top Mount, High-Temp Top Mount Offset, High-Temp Bottom Mount Offset, High-Temp Top Mount, Cryogenic Top Mount Offset, Cryogenic Bottom Mount Offset, Cryogenic...
- Page 68 Model Number Continued External Mount Probe 8 | INSTALLATION CONSIDERATIONS No mounting clamps required. Chamber/Clamp Sizes for MLI Mount Without High Temperature Insulation 2" (or if digit 20 of MLI model code is 1, 2, or 7) ⁄ " (or if digit 20 of MLI model code is 3, 4, 5, or 6) 3"...
-
Page 69: Parts
Parts 5.8.1 Replacement Parts Current Loop ber: Part Num J M 4 (1) Electronic Module (6) Housing Cover Digit 5 Replacement Part Digits 031-2856-001 Replacement Part 031-2856-002 004-9225-002 0,1,3, 0,1,2 A,B,C,D 004-9225-003 (2) Display Module 0,1,A 036-4413-005 Digit 5 Digit 7 Replacement Part A,B,C 036-4413-001... -
Page 70: Appendix A
Appendix A Level (and Interface) Transducer Block Table Item Parameter Name Parameter Label BLOCK_STRUCTURE BLOCK STRUCT ST_REV Static Revision TAG_DESC Tag Description STRATEGY Strategy ALERT_KEY Alert Key MODE_BLK Block Mode BLOCK_ERR Block Error UPDATE_EVT Update Event BLOCK_ALM Block Alarm TRANSDUCER_DIRECTORY Transducer Directory TRANSDUCER_TYPE Transducer Type... - Page 71 PROBE_DRIVE_PLUS_COUNTS Probe Drive+ Counts PROBE_WAIT_COUNTS Probe Wait Counts PROBE_DRIVE_MINUS_COUNTS Probe Drive- Counts PROBE_CAL_DATE Probe Cal Date PROBE_CAL_LOC Probe Cal Location PARAMETER_5 Parameter 5 PARAMETER_6 Parameter 6 LEVEL_OFFSET Level Offset ZERO_OFFSET Zero Offset SENSITIVITY Sensitivity BLOCKING_DISTANCE Blocking Distance ALARM_DELAY Failure Alarm Delay LEVEL_TRIM Level Trim LEVEL_THRESHOLD_MODE...
- Page 72 Drive- Counts FACTORY_PARAMETER_1 Factory Parameter 1 FACTORY_PARAMETER_2 Factory Parameter 2 FACTORY_PARAMETER_3 Factory Parameter 3 FACTORY_PARAMETER_4 Factory Parameter 4 MAGNETROL_SERIAL_NUMBER Magnetrol S/N DATE_CODE Date Code CONFIG_CHANGED_MODE TB Config Chgd Mode RESET_CONFIG_CHANGED Reset Config Changed USER_PASSWORD New User Password LOCAL_DISP_MEAS_VALUES Local Disp Meas Values...
- Page 73 HISTORY_CONTROL History Control HIST_ENTRY1 Event History 1 HIST_ENTRY2 Event History 2 HIST_ENTRY3 Event History 3 HIST_ENTRY4 Event History 4 HIST_ENTRY5 Event History 5 HIST_ENTRY6 Event History 6 HIST_ENTRY7 Event History 7 HIST_ENTRY8 Event History 8 HIST_ENTRY9 Event History 9 HIST_ENTRY10 Event History 10 RESET_HISTORY Reset History...
- Page 74 Level (and Interface) Transducer Block Table Item Parameter Name Parameter Label BLOCK_STRUCTURE BLOCK STRUCT ST_REV Static Revision TAG_DESC Tag Description STRATEGY Strategy ALERT_KEY Alert Key MODE_BLK Block Mode BLOCK_ERR Block Error UPDATE_EVT Update Event BLOCK_ALM Block Alarm TRANSDUCER_DIRECTORY Transducer Directory TRANSDUCER_TYPE Transducer Type XD_ERROR...
- Page 75 VOLUME_TABLE_PT_11 Volume Table Pt 11 VOLUME_TABLE_PT_12 Volume Table Pt 12 VOLUME_TABLE_PT_13 Volume Table Pt 13 VOLUME_TABLE_PT_14 Volume Table Pt 14 VOLUME_TABLE_PT_15 Volume Table Pt 15 VOLUME_TABLE_PT_16 Volume Table Pt 16 VOLUME_TABLE_PT_17 Volume Table Pt 17 VOLUME_TABLE_PT_18 Volume Table Pt 18 VOLUME_TABLE_PT_19 Volume Table Pt 19 VOLUME_TABLE_PT_20...
- Page 76 Copyright © 2016 Magnetrol Interna onal, Incorporated. All rights reserved. Printed in the USA. Magnetrol & Magnetrol logotype and Orion Instruments & Orion logotype are registered trademarks of Magnetrol International, Incorporated. HART® is a registered trademark of the HART Communication Foundation PACTware™...
Need help?
Do you have a question about the Jupiter JM4 and is the answer not in the manual?
Questions and answers