Advertisement
1
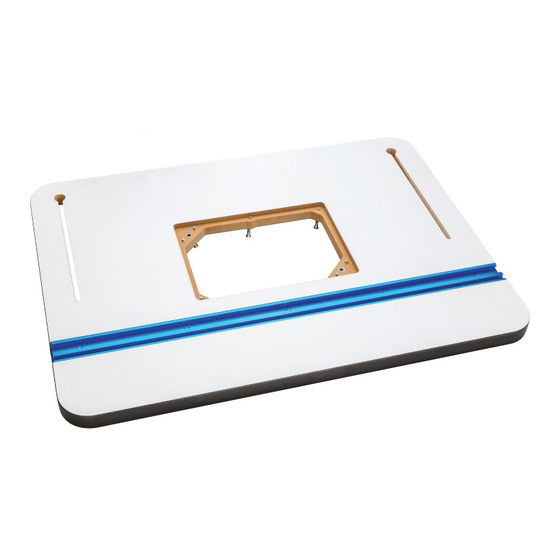
Thank you for purchasing Rockler's HPL Router Tabletop. It combines a bright, durable surface with plate-leveling
features and a dual-track miter slot to provide great visibility and years of precise, low-friction routing. Please
read these instructions thoroughly before assembly.
PARTS list - HPL Router Tabletop
1 HPL Tabletop
2 #6 x 3/4" Wood Screw
3 7 x 40mm Plate Leveling Screw
HPL Router Tabletop
Assembly Instructions
3
2
Quantity
1
12
8
1
Advertisement
Table of Contents

Subscribe to Our Youtube Channel
Related Manuals for Rockler HPL


Summary of Contents for Rockler HPL
-
Page 1: Assembly Instructions
HPL Router Tabletop Assembly Instructions Thank you for purchasing Rockler's HPL Router Tabletop. It combines a bright, durable surface with plate-leveling features and a dual-track miter slot to provide great visibility and years of precise, low-friction routing. Please read these instructions thoroughly before assembly. - Page 2 2. Install the router plate and adjust the screws' height until the router plate is flush with the HPL Tabletop (1). Attaching to Steel Router Table Legs 1. Set the HPL Tabletop (1) on the assembled Steel Router Table Leg Set (48426, sold separately), aligning the predrilled holes in the underside of the top with the mounting holes in the steel stretchers.
Need help?
Do you have a question about the HPL and is the answer not in the manual?
Questions and answers