Table of Contents
Advertisement
Advertisement
Table of Contents

Related Manuals for Mercedes-Benz Marco Polo 2017


Summary of Contents for Mercedes-Benz Marco Polo 2017
- Page 1 Marco Polo / Marco Polo ACTIVITY / Marco Polo HORIZON Supplement Mercedes-Benz...
- Page 2 Symbols WARNING Warning notes make you aware of dangers which could pose a threat to your health or life, or to the health and life of others. Environmental note Environmental notes provide you with infor- mation on environmentally aware actions or disposal.
- Page 3 The equipment or model designation of your Please note that the Mercedes-Benz Guide app vehicle may differ according to: may not yet be available in your country.
-
Page 4: Table Of Contents
Contents Index ............4 Marco Polo central control panel ..43 General notes ........43 Operating the central control panel ..43 At a glance ..........8 Setting the time ........44 Equipment overview, Marco Polo ..... 8 Setting the alarm ........44 Equipment overview, Marco Polo Warning messages on the central con- ACTIVITY / HORIZON ....... - Page 5 Contents Technical data ........89 Identification plate ......... 89 Dimensions and weights ......89 Operating data ........90 Capacities ..........91 Tyre pressure ......... 91...
-
Page 6: Index
Index see Auxiliary battery ......62 1, 2, 3 ... 12 V circuit .......... 61 see Roof bed 12 V socket .......... 62 see Seat/berth combination 230 V power supply ......63 Bed extension 230 V socket ........64 Folding up ........31 Removing/fitting ...... - Page 7 Index Malfunctions/warning messages ..55 Malfunctions/warning messages ..59 Furniture Notes on care ........77 Technical data ......... 91 Fasteners ......... 24 Using ..........54 Notes on care ........77 Curtains Fuse box General notes ........25 Rear ..........68 Fuses Notes on care ........
- Page 8 Index Sink ..........52 Important safety notes ....17 Maintenance ........80 Manual ..........17 Notes on care ........78 Layout ............. 8 Reading lamp ........41 Linen cupboard ........71 Window ..........17 Luggage compartment enlarge- Power supply ment ............. 73 Technical data .........
- Page 9 Index Opening/closing ......23 Top Tether ..........13 Problem (malfunction) ..... 23 Transport ..........70 Roller sunblind ......... 23 Travel tips ..........15 Sliding table Tyre pressure ........91 Folding in ......... 39 Folding out ........39 Socket ..........64 USB port ..........
-
Page 10: At A Glance
At a glance Equipment overview, Marco Polo Function Page Function Page Central control panel Coolbox Fuse box Swivelling driver's and co- Gas shutoff valve for gas driver's seat (see the vehicle cooker Operating Instructions) Electrical connection of the The auxiliary battery is loca- seat/berth combination ted in the base of the driver's seat. -
Page 11: Equipment Overview, Marco Polo Activity / Horizon
At a glance Equipment overview, Marco Polo ACTIVITY / HORIZON Function Page Function Page Swivelling co-driver's seat Auxiliary heating control (see the vehicle Operating panel (see the vehicle Oper- Instructions) ating Instructions) Not illustrated: Seat/berth combination Manual pop-up roof Bed extension Roof bed Sliding sunroof Folding table (see the vehicle... -
Page 12: Marco Polo Central Control Panel
At a glance Marco Polo central control panel Basic display Function Page Voltage of the auxiliary bat- tery (V) Charge status of the auxiliary battery (%) Coolbox on Switch-on time of the auxili- ary heating programmed Auxiliary heating mode Outside temperature (†) Alarm on Time Warning active... -
Page 13: Safety
If the child restraint system has always secure the child in a child restraint been exposed to direct sunlight, leave it to system suitable for Mercedes-Benz vehicles. cool down before securing the child in it. The child restraint system must be appropri- Never leave children unattended in the vehi- ate to the age, weight and size of the child. -
Page 14: Isofix Child Seat Securing System
The child cannot It is advisable to use Mercedes-Benz care be restrained in the event of an accident, for products to clean child restraint systems rec- instance. -
Page 15: Top Tether
Children in the vehicle Top Tether Introduction Top Tether provides an additional connection between the child restraint system secured with ISOFIX and the rear of the seat/berth combina- tion. It helps reduce the risk of injury even fur- ther. If the child restraint system is fitted with a Top Tether belt, this should always be used. -
Page 16: Anti-Theft Protection
Important safety notes Make sure that: and cable leads have been disconnected from the vehicle. Top Tether hook = is hooked into Top Before the centre of the thunderstorm is directly Tether anchorage ;, as shown above your vehicle: Top Tether belt ? is not twisted Pull the mains cable out of the vehicle socket Tighten Top Tether belt ?. -
Page 17: Travel Tips
Mercedes-Benz homepage under the you will be driving and your destination, e.g.: vans and recreational vehicles section... - Page 18 Operation in winter In wintry parking conditions, Mercedes-Benz recommends: Release the parking brake to prevent it from freezing. Engage a gear and additionally secure the vehicle with chocks or similar to prevent it from rolling away. Never route the power supply cables on the ground.
-
Page 19: Opening And Closing
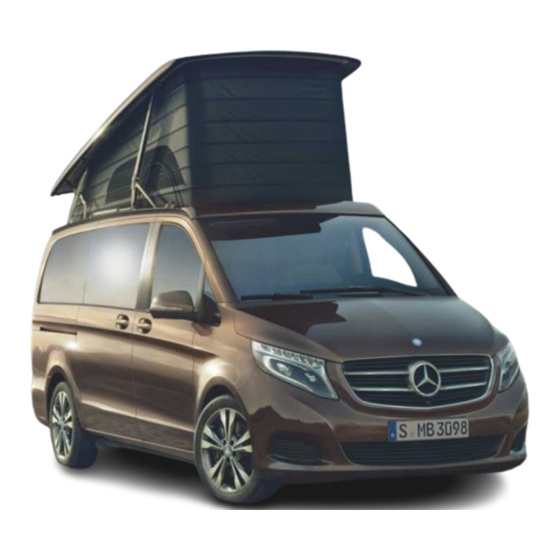
Pop-up roof Key, Marco Polo WARNING If the opened pop-up roof is not secured it There are two additional keys provided along could drop and trap you or other people. There with the vehicle keys. Each of these keys locks is a risk of injury. - Page 20 Pop-up roof Gas spring (example: co-driver's side) Engage articulated lever B into bracket A on both the driver's and co-driver's side. Push up the pop-up roof with both hands, until Make sure that the bellows are not trapped jacket tube ? comes into contact audibly between the roof and the vehicle body.
- Page 21 Pop-up roof Remove all objects from the bed frame. When leaving the vehicle, always take the key Remove the consumer from the USB port in with you and lock the vehicle. Never leave the pop-up roof. children unattended in the vehicle. Fold down the bed frame and align the mat- tress.
- Page 22 Pop-up roof Problems with the pop-up roof Problem Possible causes/consequences and M Solutions A continuous warning Pull-away warning. tone sounds. The electrical pop-up roof is open and the engine is running. Switch off the engine. Turn the key to position 2 in the ignition lock. Close the electrical pop-up roof.
- Page 23 If the pop-up roof cannot be closed using the emergency release, contact Mercedes-Benz Service24h The Mercedes-Benz Service24h telephone numbers can be found on a sticker in the area of the driver's door and in the vehicle Maintenance Booklet. The Service Hotline can be reached around the clock.
-
Page 24: Sliding Sunroof
The Mercedes-Benz Service24h telephone numbers can be found on a sticker in the driver's door entrance area and in the vehicle Maintenance Booklet. The Service Hotline can be reached around the clock. -
Page 25: Roller Sunblind
Sliding sunroof To open manually: press and hold button :. This means that the reversing feature cannot To open completely: briefly press button :. prevent someone being trapped in these sit- Automatic operation is started. uations. There is a risk of injury. To close manually: press and hold but- When closing make sure that no body parts ton ;. -
Page 26: Hinged Windows
Furniture fasteners, Marco Polo If someone is trapped: release the switch immediately or press the switch in any direction during the automatic closing process The closing process is stopped. Problem Possible causes/consequences and M Solutions The sliding sunroof does The additional battery is discharged. not open or close. -
Page 27: Roller Blinds, Marco Polo
Cab curtain opening accidentally while the vehicle is in Before attaching the cab curtain, make sure motion. the inside of the windscreen is clean. In this way, you can avoid leaving marks and ensure To unlock: press button :. that both suction cups retain a secure hold. The corresponding compartment is unlocked. -
Page 28: Seats, Berths And Table
Marco Polo seat/berth combination Marco Polo seat/berth combination When leaving the vehicle, always take the key with you and lock the vehicle. Never leave Important safety notes children unattended in the vehicle. WARNING If the switches are pressed more than once The seat belt does not offer the intended level in an uncontrolled way, for too long or in quick of protection if you have not moved the back-... -
Page 29: Positioning The Seat
Marco Polo seat/berth combination Moving the seat/berth combination event of an accident. There is then an increased risk of injury. Important safety notes Maintain a minimum distance of 5 cm between the knees of the respective vehicle WARNING occupants and the seat in front of them. If you move the seat/berth combination while the vehicle is in motion, the seat may move unexpectedly or jerk, for instance, when brak-... -
Page 30: Increasing The Load Compartment Capacity
Marco Polo seat/berth combination Moving the seat/berth combination Starting from basic position 2, the seat/berth combination for passengers can be moved for- wards or backwards by 5 cm. In doing so, make sure that passengers have sufficient legroom to reduce the risk of injury during braking. Increasing the load compartment capa- city by positioning the seats outside the optimum area of protection... -
Page 31: Resetting
Marco Polo seat/berth combination Fold down the short section of bed exten- Only use the bed when the vehicle is station- sion ;. ary. To fold away: fold up the short section of bed extension ;. Move the backrest into an upright position. Insert the head restraints of the seat/berth combination. - Page 32 Marco Polo seat/berth combination Pull up lever = on both sides of the seat/ Removing and fitting the seat/berth berth combination. combination The seat/berth combination is released. Removing Lift the seat/berth combination at the front out of the guide rails. Lift the seat/berth combination out of the vehicle.
-
Page 33: Removing/Fitting
Marco Polo seat/berth combination Folding up guide rails will no longer be parallel to one another. The seat/berth combination can then no longer be inserted and engaged. Move the seat slider to the correct position first in this case ( page 88). -
Page 34: Seat/Berth Combination, Marco Polo Activity / Horizon
Seat/berth combination, Marco Polo ACTIVITY / HORIZON Problems with the seat/berth combination Problem Possible causes/consequences and M Solutions The seat backrest and The seat/berth combination is not operational due to undervoltage. cushion contours cannot Adjust the seat backrests of the seat/berth combination individu- be adjusted. -
Page 35: Moving
Seat/berth combination, Marco Polo ACTIVITY / HORIZON impaired. The seat belts may then fail to pro- can no longer provide optimum protection. vide the intended protection. When moving the seat outside the specified In particular, always grip the retainer loop on optimum area of protection, the protective the centre seat when adjusting the backrest effect of the windowbag is gradually reduced... - Page 36 Seat/berth combination, Marco Polo ACTIVITY / HORIZON the seat/berth combination is free and that is a risk of injury in the event of an accident or no objects can become trapped. when braking as a result of the passenger's head striking the seat in front. The seat/berth combination, trim or the objects may become damaged.
-
Page 37: Setting Up/Folding Away The Berth
Seat/berth combination, Marco Polo ACTIVITY / HORIZON Release lever =. Rotate the head restraints by 180° and insert The locking mechanism engages automati- them into the holders on the rear side of the cally. seat/berth combination. Pull the seat/berth combination and check the locking mechanism. - Page 38 Seat/berth combination, Marco Polo ACTIVITY / HORIZON Fitting WARNING If the seat/berth combination is not fully engaged, it may be thrown about while the vehicle is moving. There is a risk of an acci- dent and injury. Always ensure that the seat/berth combina- tion is engaged as described.
-
Page 39: Rear Bench Seat
Roof bed tabs ? again. If necessary, repeat the seat To remove: fold up the bed extension. fitting. Swing levers : at both feet of the bed exten- Move the seat/berth combination to the sion inward. desired position and lock into place The bed extension is unlocked. -
Page 40: Safety Net
Roof bed The safety net should always be set up if there Tensioning the safety net are persons are in the roof bed ( page 38). Folding up the roof bed WARNING If you do not hook the bed frame in place in the way described here, it may fall down, strike a person and trap body parts. -
Page 41: Sliding Table, Marco Polo
Sliding table, Marco Polo Sliding table, Marco Polo Folding in the sliding table (drive posi- tion) Folding out the sliding table (park position) WARNING If the sliding table is folded out during the Fold the table panel of the sliding table journey, it could be flung around. -
Page 42: Lights
Interior lighting Interior lighting Overview Marco Polo overview The vehicle's interior lighting includes the fol- Lights lowing additional lamps: Interior light over the Lights seat/berth combina- tion (can be switched Reading lamps with automatically and dimmer function in the manually) pop-up roof (can be switched manually) Reading lamp beside... -
Page 43: Ambient Lighting
Interior lighting Reading lamps in the pop-up roof Lighting in the roof fame, Marco Polo When you close the pop-up roof, the reading lamps must be engaged in the brackets. You could otherwise damage the reading lamps or the bellows of the pop-up roof. The LED lamps are located on both sides of the vehicle between the B and C-pillars in the roof frame. -
Page 44: Replacing Bulbs
Replacing bulbs the integrated reading lamps on the right and left are switched on manually. To switch the reading lamp on/off: press corresponding button : or ;. Interior lamps beside the roof stow- age box, Marco Polo The interior lamps are fitted on both sides beside the roof stowage box and are switched on/off individually. -
Page 45: Marco Polo Central Control Panel
Operating the central control panel General notes Main menu To call up the main menu: press or turn the control knob. If you do not press a button for 30 seconds or do not use the control knob, the central control panel returns to the basic display. -
Page 46: Setting The Time
Setting the alarm Press or turn the control knob. Calling up menus The display shows the main menu. Main menu "Coolbox" menu is selected You can call up the individual menus from the Select the desired menu using the control main menu. -
Page 47: Warning Messages On The Central Con- Trol Panel
Problems with the central control panel Use the control knob to call up the "Time set- you may not recognise function restrictions of tings" menu. safety-related systems. The operating safety of your vehicle could be affected. There is a risk of an accident. Drive on carefully. -
Page 48: Additional Battery
Problems with the central control panel Problem Possible causes/consequences and M Solutions The central control panel is in sleep mode because the voltage of the additional battery is below 10.5 V. The coolbox, the auxiliary heating, the electric pop-up roof and the sensors are switched off consecutively. -
Page 49: Climate Control
Auxiliary heating (auxiliary warm-air heater) Auxiliary heating (auxiliary warm-air WARNING heater) When the auxiliary heating is switched on, very hot air can be discharged from the vent Important safety notes on the rear side of the driver's seat base. This may cause burns in the immediate proximity DANGER of the vent. -
Page 50: Notes
Auxiliary heating (auxiliary warm-air heater) The air-intake opening in the auxiliary heating is Operating the auxiliary heating using underneath the driver's seat. The vent is on the the Marco Polo central control panel rear side of the driver's seat base. Always make sure that both openings are free from obstruc- Switching the auxiliary heating on/off tion. -
Page 51: Setting
Auxiliary heating (auxiliary warm-air heater) Using the 9 or : button, set the Whether and how quickly the temperature desired switch-on time. set is reached depends on the outside tem- perature. If you press and hold the button for longer than two seconds, the time can be selected Setting switching times quicker. - Page 52 Auxiliary heating (auxiliary warm-air heater) Problem Possible causes/consequences and M Solutions The interior temperature sensor is faulty. The temperature in the living area cannot be set. The auxiliary heating After switching the auxiliary heating on again, it continuously heats the switches off.
-
Page 53: Rear-Compartment Air Conditioning
Rear-compartment air conditioning Problem Possible causes/consequences and M Solutions The auxiliary heating The fuse is malfunctioning. switches off and/or can- Replace the fuse. not be switched on. Have the cause of the defective fuse determined at a qualified spe- cialist workshop. The auxiliary heating is overheated. -
Page 54: Kitchen, Marco Polo
Sink Pull out the drawer under the sink as far as it Sink will go and empty it. Operation The water pump in the fresh water tank must not run dry. It could otherwise be damaged. Pull release levers : and ; pull on both pull- out rails. -
Page 55: Gas Cooker
Gas cooker Slide the drawer onto the pull-out rails. Keep flammable materials, particularly fat or oil, away from the cooker flames. This also Close the drawer. applies to plastics which not only burn, but The drawer engages in the pull-out rails. can also melt. -
Page 56: Coolbox
Coolbox To adjust the size of the flame: turn regu- lating valve A: Anti-clockwise — small flame Clockwise — large flame The flame must not reach past the base of the pot or pan. To stop cooking: turn regulating valve A clockwise as far as it will go (zero position). - Page 57 A hanging basket for orderly storage of cooled items is offered in the range of acces- sories. You can obtain the hanging basket from a Mercedes-Benz Service Centre. Using the central control panel you can set the To set the cooling level: use the control following cooling levels.
- Page 58 Coolbox Problem Possible causes/consequences and M Solutions The coolbox switches off The coolbox is switched off due to undervoltage. automatically or cannot Charge the auxiliary battery ( page 63). be switched on. The fuse is blown. Replace the fuse ( page 66).
-
Page 59: Water, Gas, Electr., Marco Polo
Water supply cate a full fresh water tank. If only one bar is Water supply shown, then there are approximately nine litres of fresh water remaining in the tank. Fresh water tank When the fresh water tank is empty, a warn- Important safety notes ing message is displayed continuously in the central control panel (... -
Page 60: General Notes
Water supply Turn on the sink tap. found in the publication for camper van users (published by the CIVD/Caravaning Industrie Verband Deutschland) and in camping guides. If such facilities are not available, collect the waste water in a suitable tank. Then discharge it into the public waste water system. - Page 61 Water supply Shutoff valve for waste water tank in the floor unit Once the waste water tank is empty, close on the left-hand side shutoff valve 3. Closed Open Open the shutoff valve for waste water tank The tank content drains away under the vehi- cle floor via hose :.
-
Page 62: Gas System
Gas system The gas cylinder container is under the ward- Gas system robe in the rear area. General notes To remove: close the gas shutoff valve . DANGER Modifications or work performed incorrectly could jeopardise the gas system's operating safety. If gas escapes, you could suffocate or the gas could ignite. -
Page 63: Electrical System
Electrical system The recesses on the cover for the quick- release fasteners have differing radii. Push quick-release fasteners = down slightly and turn about a of a turn clockwise. Cap ? is closed. Insert intermediate floor. Close wardrobe ;. Information on the gas cooker and gas shutoff valve can be found in the "Kitchen"... -
Page 64: V Socket
Electrical system 12 V sockets connected, the battery is protected against exhaustive discharge for four weeks. Extended periods of disuse without recharg- ing limit the battery's capacity. Note that cer- tain devices have undervoltage protection or are respectively switched off consecutively by the central control panel. -
Page 65: V Power Supply
Electrical system The interior lighting and USB ports continue ual current circuit breaker is functioning cor- to function. If you use them, the battery volt- rectly. age will decrease further. The 230 V power supply provides the following If the battery voltage was lower than 10.5 V, the components with current: additional battery must be charged to at least 12.5 V. -
Page 66: V Socket
2.5 mm² and a maximum Residual current circuit breaker length of 25 m. Mercedes-Benz recommends you use a power supply cable from the accessories range for your vehicle. If using a cable reel, extend the cable fully. -
Page 67: Battery Charger
Electrical system Battery charger The central control panel display The battery charger is fitted behind a service cover below the coolbox. Do not attempt to 230 V socket remove the service cover yourself. Maintenance To connect the 230 V power supply: open work on equipment behind the service cover service flap :. -
Page 68: Fuses
If you manipulate, bridge or replace a faulty Only use fuses that have been approved for fuse with a fuse of a higher amperage, the Mercedes-Benz vehicles and which have the electric cables could be overloaded. This may correct fuse rating for the system concerned. -
Page 69: Seat/Berth Combination
Electrical system Otherwise, components or systems could be To open: move the seat/berth combination damaged. to the foremost position ( page 27). Lift protective cap : away from the fuse The fuses in your vehicle switch off defective holder. power circuits. If a fuse blows, all the compo- nents on the circuit and their functions will To close: place protective cap : on the fuse cease to operate. - Page 70 Electrical system Designation Consumer Cable colour (cross- Fuse rating section [mm F60/2 Additional battery red/blue (2.5) 25 A charge red (2.5) F60/5 Central control panel red/orange (0.5) voltage measurement red (0.5) Fuse box under the co-driver's seat Designation Consumer Cable colour (cross- Fuse rating section [mm F60/1...
- Page 71 Electrical system Fuse box with three consumers (arranged from right to left) Consumer Cable colour Fuse rating Electrical sliding sun- Yellow 20 A roof (only Marco Polo ACTIVITY/HORIZON) 12 V socket, second Blue 15 A row of seats, right 12 V socket, second Blue 15 A row of seats, left...
-
Page 72: Loading, Stowing And Features
For more information and tips on securing loads, in the load compartment. see the vans and recreational vehicles section on the national Mercedes-Benz website Observe the following notes on loading and Bear in mind that the unladen weight is stowing a load:... -
Page 73: Drawers
Stowage spaces and stowage compartments Maximum loads table – Marco Polo Left-side wardrobe (maximum load 6 kg) Right-side wardrobe (maximum load 6 kg) Coolbox (maximum load 10 kg) Upper drawer (maximum load 3 kg) Lower drawer (maximum load 5 kg) Stowage compartment with sliding door (maximum load 10 kg) Stowage compartment under the seat/berth compartment (maximum load 13 kg) Roof stowage box (maximum load 3 kg) -
Page 74: Stowage Compartment
Stowage spaces and stowage compartments You can remove the stowage compartment to Stowage compartment under the increase the size of your vehicle's load com- seat/berth compartment partment. General notes To remove: slide seat/berth combination ? as far back as possible ( page 27). -
Page 75: Through-Loading Facility, Marco Polo
Stowing camping accessories, Marco Polo To open the through-loading facility: from Roof stowage box – Marco Polo below, grasp behind front panel : and pull metal tab ; downward. First pull out front panel : below from the handrail of the seat/berth combination and fold it upwards. - Page 76 Stowing camping accessories, Marco Polo Open the clasps of lashing strap : on the Insert camping table : in such a way that the transport bag. table panel is held by the bracket at the lower end. Remove the camping chairs from the trans- port bag.
-
Page 77: Awning Rail
On both sides of the vehicle, there is an awning rail for securing an awning or a sunroof. A suit- able awning or sunroof can be purchased from a Mercedes-Benz Service Centre. Awning If you extend the awning too far without supporting it, the awning and its mountings Release the locking feature ;... -
Page 78: Outside Shower, Marco Polo
Vanity mirror, Marco Polo tion and prevent water from flowing out unin- Outside shower, Marco Polo tentionally. Remove the shower hose from connec- To avoid damaging the water pump, only tion ;. turn the water pump on when the shower The non-return valve in the connection is hose, which is available as an accessory, is closed. -
Page 79: Maintenance And Care
Take care that the thermocouples on the gas Benz care products. They are designed spe- burners are not damaged or bent when cleaning cifically for Mercedes-Benz vehicles and rep- the gas cooker. resent the state of the art. You can obtain this care product from a Mercedes-Benz Service Clean the gas burners regularly using a brush. -
Page 80: Water Tank
Empty the waste water tank ( page 58). Mercedes-Benz recommends that you use Pull out the drawer under the sink as far as it non-slip mats to protect the camper floor. will go and empty it. Pull release levers on both pull-out rails. -
Page 81: Maintenance
Maintenance Fill both tanks with fresh water through the respective cleaning opening. Allow the mixture to take effect in accordance with the manufacturer's specifications. Empty the tanks and rinse them with fresh water. Let the water run for a short time to drain the remaining rinsing water. -
Page 82: Maintenance
Maintenance Removing/fitting the additional bat- Maintenance work tery, Marco Polo Manual pop-up roof: The auxiliary battery is located in the seat base Readjust the locking mechanism. of the driver's seat. Observe the information on Corrected and invoiced separately. the fitting and removal of the auxiliary battery Gas system (see vehicle Operating Instructions). - Page 83 Maintenance Stamp Stamp Mercedes-Benz Mercedes-Benz Service Centre Service Centre Maintenance work should be carried out by trained personnel only and confirmed on the following pages. Official licence plate Official licence plate km (with ASSYST km (with ASSYST km (without ASSYST km (without ASSYST Repair order no.
- Page 84 Maintenance Stamp Stamp Mercedes-Benz Mercedes-Benz Service Centre Service Centre Maintenance work should be carried out by trained personnel only and confirmed on the following pages. Official licence plate Official licence plate km (with ASSYST km (with ASSYST km (without ASSYST km (without ASSYST Repair order no.
- Page 85 Maintenance Stamp Stamp Mercedes-Benz Mercedes-Benz Service Centre Service Centre Maintenance work should be carried out by trained personnel only and confirmed on the following pages. Official licence plate Official licence plate km (with ASSYST km (with ASSYST km (without ASSYST km (without ASSYST Repair order no.
- Page 86 Maintenance Stamp Stamp Mercedes-Benz Mercedes-Benz Service Centre Service Centre Maintenance work should be carried out by trained personnel only and confirmed on the following pages. Official licence plate Official licence plate km (with ASSYST km (with ASSYST km (without ASSYST km (without ASSYST Repair order no.
- Page 87 Maintenance Stamp Stamp Mercedes-Benz Mercedes-Benz Service Centre Service Centre Maintenance work should be carried out by trained personnel only and confirmed on the following pages. Official licence plate Official licence plate km (with ASSYST km (with ASSYST km (without ASSYST km (without ASSYST Repair order no.
- Page 88 Maintenance Stamp Stamp Mercedes-Benz Mercedes-Benz Service Centre Service Centre Maintenance work should be carried out by trained personnel only and confirmed on the following pages. Official licence plate Official licence plate km (with ASSYST km (with ASSYST km (without ASSYST km (without ASSYST Repair order no.
- Page 89 Maintenance Stamp Stamp Mercedes-Benz Mercedes-Benz Service Centre Service Centre...
-
Page 90: Vehicle Tool Kit
Vehicle tool kit Moving the seat sliders Vehicle tool kit General notes The vehicle tool kit is located in the stowage compartment in the rear (see vehicle Operating Instructions). To remove the vehicle tool kit, raise the bed extension and fasten it to the head restraint page 31). -
Page 91: Identification Plate
Dimensions and weights Identification plate Marco Polo seat/berth 2030 x 1130 mm combination ACTIVITY seat/berth 1930 x 1350 mm combination Weights The permissible gross weight and the permissi- ble axle load depend on the equipment fitted. They are specified in the vehicle's registration documents and on the vehicle identification plate (see the vehicle Operating Instructions). -
Page 92: Operating Data
Operating data Optional equipment, accessories and Consumer power consumption attachments 11 W Water pump Roof bed Central control panel with Max. 4 W Maximum load 160 kg display Roof rack Approximately 2.5–4 W each Lamps in the roof frame 6 kg Permissible payload 50 kg Ambient lighting... -
Page 93: Capacities
Tyre pressure Auxiliary heating Tyre pressure Fuel consumption 0.39 l/h The tyre pressure levels for partially laden vehicles which are listed in the vehicle Oper- Supply voltage 12 V ating Instructions only apply to Marco Polo ACTIVITY/HORIZON. Power consumption 37 W Only the tyre pressures specified for fully Heater output 3000 W... - Page 95 Legal information Internet Further information about Mercedes-Benz vehi- cles and about Daimler AG can be found on the following websites: http://www.mercedes-benz.com http://www.daimler.com Editorial office You are welcome to forward any queries or sug- gestions you may have regarding these Operat-...
- Page 96 É4475842903Z102OËÍ 4475842903Z102 Order no. 6462 7782 02 Part no. 447 584 29 03 Z102 Edition 03-17...
Need help?
Do you have a question about the Marco Polo 2017 and is the answer not in the manual?
Questions and answers
Where is fuse that controls tailgate and drivers side sliding door?
Как пользоваться автономным отопителем мерседес марко поло горизонт
is the vehicle 4G compatible