Table of Contents
Advertisement
Available languages
Available languages
Quick Links
IMPORTANT!
DO NOT DESTROY
Installation
and
Maintenance
Manual
with Safety Information
and Parts List
RECOMMENDED SPARE PARTS HIGHLIGHTED IN GRAY
Model DC62, DC63
Model DC82, DC83
¡IMPORTANTE!
NO DESTRUIR
HYTROL | Jonesboro, Arkansas
Copyright © 1947- 2018 – Hytrol. All rights reserved.
Manual
de Instalación
Mantenimiento
con Información sobre Seguridad
y Lista de Piezas
REPUESTOS RECOMENDADOS DESTACADOS EN GRIS
Effective June 2018
Bulletin #679
y
Advertisement
Table of Contents

Related Manuals for HYTROL DC62


Summary of Contents for HYTROL DC62
- Page 1 Lista de Piezas and Parts List REPUESTOS RECOMENDADOS DESTACADOS EN GRIS RECOMMENDED SPARE PARTS HIGHLIGHTED IN GRAY Effective June 2018 Model DC62, DC63 Model DC82, DC83 Bulletin #679 HYTROL | Jonesboro, Arkansas Copyright © 1947- 2018 – Hytrol. All rights reserved.
-
Page 2: Table Of Contents
1. Contact Dealer from whom conveyor was purchased or nearest HYTROL Integration Partner. DC62 Parts Drawing & List ....7 2. Give Conveyor Model Number and Serial Number or HYTROL DC63 Parts Drawing &... -
Page 3: Safety Information
In an effort to reduce the possibility of injury to personnel working emergency exits if a suitable warning indicates low headroom. around HYTROL conveying equipment, safety labels are placed at various points on the equipment to alert them of potential hazards. -
Page 4: Installation
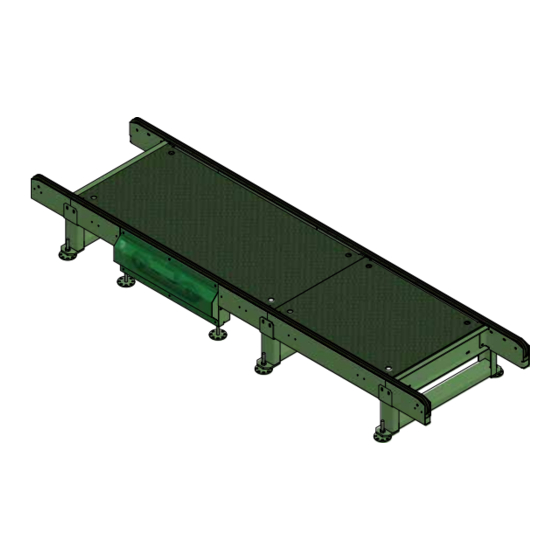
INSTALLATION • Location FIGURE 4A 1. Refer to building layout for PREFERRED FLOW obstructions such as machines, (FLUJO PREFERIDO) columns, walls, openings, etc. Check to see that conveyor layout drawings correspond with building layout. 2. Determine direction of product flow. Figure 4A indicates the flow as related to the drive. -
Page 5: Electrical Equipment
1) Check capacity of conveyor and reduce load to recommended level. Motor or reducer 2) Low voltage to motor. 2) Have electrician check and correct as necessary. overheating. 3) Low lubricant level in reducer. 3) Relubricate per manufacturer’s recommendations. For HYTROL reducer, refer to separate manual. -
Page 6: Drive Chain Tension Adjustment
• Drag Chain Tension Adjustment FIGURE 6A NOTE: Chain tension should be pre-set at factory. However, during normal operation, chain may stretch enough to require adjustment. DISTANCE BETWEEN SPROCKETS (DISTANCIA ENTRE PINONES) 1. Remove chain guard. SLACK 2% OF DISTANCE HALFWAY 2. -
Page 7: Dc62 Parts Drawing & List
• DC-62 Parts Drawing FLOW 20 21 • DC-62 Parts List REF NO. PART NO. DESCRIPTION 055.09745 Eurodrive Gearmotor - 1-1/2 HP, 230/460/3/60 028.6385 Idler Sprocket - 60B15H x .515" Bore 028.2003 Sprocket - 60B15 x 1-3/8" Bore 029.1025 #60 Roller Chain with Straight Sidebars 029.213 Connector Link #60 Chain 090.2037... -
Page 8: Dc63 Parts Drawing & List
• DC-63 Parts Drawing FLOW 20 21 • DC-63 Parts List REF NO. PART NO. DESCRIPTION 055.09745 Eurodrive Gearmotor - 1-1/2 HP, 230/460/3/60 028.6385 Idler Sprocket - 60B15H x .515" Bore 028.2003 Sprocket - 60B15 x 1-3/8" Bore 029.1025 #60 Roller Chain with Straight Sidebars 029.213 Connector Link #60 Chain 090.2037... -
Page 9: Dc82 Parts Drawing & List
• DC-82 Parts Drawing FLOW 20 21 • DC-82 Parts List REF NO. PART NO. DESCRIPTION 911.0205 Eurodrive Gearmotor - 2 HP, 230/460/3/60 028.6365 Idler Sprocket - 80B15H x .750" Bore 028.3043 Sprocket - 80B15 x 1-1/2" Bore 029.1035 #80 Roller Chain with Straight Sidebars 029.214 Connector Link #80 Chain 090.204... -
Page 10: Dc83 Parts Drawing & List
• DC-83 Parts Drawing FLOW 20 21 • DC-83 Parts List REF NO. PART NO. DESCRIPTION 911.0205 Eurodrive Gearmotor - 2 HP, 230/460/3/60 028.6365 Idler Sprocket - 80B15H x .750" Bore 028.3043 Sprocket - 80B15 x 1-1/2" Bore 029.1035 #80 Roller Chain with Straight Sidebars 029.214 Connector Link #80 Chain 090.204... -
Page 11: Spanish Version
1 . Contacte al representante que le vendió el transportador o el distribuidor de Hytrol llevar a cabo el procedimiento de la manera más segura . - Page 12 INSTALACION • Localización FIGURE 4A FIGURE 12A 1 . Refiérase a la disposición del PREFERRED FLOW edificio para evitar obstrucciones (FLUJO PREFERIDO) tales como maquinaria, columnas, paredes, etc. Revise que el diseño sistema transportación corresponda con el plano del edificio . 2 .
- Page 13 2) Que un electricista revise y corrija si es necesario. Motor o reductor recalentado . 3) Bajo nivel de lubricante en reductor. 3) Vuelva a lubricar de acuerdo a las recomendaciones del fabricante. Para el reductor Hytrol, refiérase al manual adjunto .
- Page 14 • Ajuste de Tensión de la Cadena Motorizada NOTA: La tensión de la cadena va ser pre-ajustada en la fábrica . Sin embargo, durante el funcionamiento normal, la cadena puede estirarse lo suficiente como para FIGURE 14A requerir un ajuste . DISTANCE BETWEEN SPROCKETS 1 .
- Page 16 W = WEEKLY (Semanal) M = MONTHLY (Mensual) Q = QUARTERLY (Trimestral) ( 8 7 0 ) 9 3 5 . 3 7 0 0 2020 HYTROL STREET W W W . H Y T R O L . C O M JONESBORO, ARKANSAS 72401 ( 8 7 0 ) 9 3 1 .
Need help?
Do you have a question about the DC62 and is the answer not in the manual?
Questions and answers