HYTROL 190-LRC Series Installation And Maintenance Manual
Hide thumbs
Also See for 190-LRC Series:
- Installation and maintenance manual (32 pages) ,
- Installation manual (20 pages)
Table of Contents
Advertisement
IMPORTANT!
DO NOT DESTROY
Installation and
Maintenance
Manual
with
Safety Information
and Parts List
RECOMMENDED SPARE PARTS HIGHLIGHTED IN GRAY
Model 190-ACC, LRC
LRS & LRSS
190-LRS
190-ACC
HYTROL CONVEYOR CO., INC.
1
© COPYRIGHT 2009–HYTROL CONVEYOR CO., INC.
¡IMPORTANTE!
NO DESTRUIR
Mantenimiento
con
y Lista de Refacciones
LAS REFACCIONES RECOMENDADAS SE RESALTAN EN GRIS
Effective March 2011
(Supercedes September, 2003)
Bulletin #620
Manual de
Instalación y
Información sobre Seguridad
190-LRC
190-LRSS
Jonesboro, Arkansas
Advertisement
Table of Contents

Related Manuals for HYTROL 190-LRC Series


Summary of Contents for HYTROL 190-LRC Series
- Page 1 RECOMMENDED SPARE PARTS HIGHLIGHTED IN GRAY LAS REFACCIONES RECOMENDADAS SE RESALTAN EN GRIS Effective March 2011 Model 190-ACC, LRC (Supercedes September, 2003) LRS & LRSS Bulletin #620 190-LRC 190-LRS 190-LRSS 190-ACC HYTROL CONVEYOR CO., INC. Jonesboro, Arkansas © COPYRIGHT 2009–HYTROL CONVEYOR CO., INC.
-
Page 2: Table Of Contents
Indice Table of Contents INTRODUCTION INTRODUCCION Receiving and Uncrating ....3 Recepción y Desembalaje . . . . . . . . . . . . . . . . . . .3 How to Order Replacement Parts . -
Page 3: Introduction
. NOTE: If damage has occurred or freight is missing, NOTA: Si algún daño ha ocurrido o faltan partes, Contact your Hytrol distributor. Contacte a su distribuidor de Hytrol. How to Order Como Ordenar Partes Replacement Parts... -
Page 4: Installation
En un esfuerzo por reducir la posibilidad de accidentes al per- working around HYTROL conveying equipment, warning sonal trabajando junto al equipo de transportación HYTROL, signs are placed at various points on the equipment to alert se colocan señales de advertencia en diferentes puntos them of potential dangers. -
Page 5: Support Installation
(SECCION MOTRIZ) (SECCION DE RETORNO) 2" 2" CONVEYOR CONVEYOR ADJUST TO ITEM ITEM DESIRED ELEVATION (AJUSTE A LA ELEVACION DESEADA) HYTROL CONVEYOR CO. INC. HYTROL CONVEYOR CO. INC. JONESBORO, AR JONESBORO, AR "MATCH-MARK" NUMBERS 4" (ETIQUETAS DE SECUENCIA DE ARMADO) -
Page 6: Ceiling Hanger Installation
Ceiling Hanger Instalación de los Installation Soportes a Techo If conveyors are to be used in an overhead application, ceil- Si los transportadores van a ser usados en aplicaciones ing hangers may have been supplied in place of floor sup- aéreas o superiores, soportes de techo pueden haber sido ports. -
Page 7: Conveyor Set-Up
Montaje del Transportador Conveyor Set-Up 1. . . Marque con tiza una línea en el suelo para ubicar el centro 1. . . Mark a chalk line on floor to locate center of the conveyor del transportador . (Floor Mounted Conveyors). 2. -
Page 8: Connecting The V-Belts
FIGURE 8A “MATCH-MARK” NUMBERS (ETIQUETAS DE ARMADO) SPUR CHANNEL (ESTRUCTURA DE ESPUELA) “K” BRACKET (ABRAZADERA “K”) “A” ADJOINING CONVEYOR CHANNEL (ESTRUCTURA DEL TRANS- DETAIL “A” PORTADOR ADYACENTE) Connecting the V-Belts Conectando las Bandas-V Modelo ACC Model ACC The double groove sheave, located at one end of each con- La polea doble ranura de la banda-V, que está... - Page 9 FIGURE 9A LONG INSIDE BELT DRIVE BED SECTION LONG OUTSIDE BELT SHORT “END” BELT (SECCION DE LA UNIDAD MOTRIZ) (BANDA CORTA DEL EXTREMO) (BANDA LARGA EXTERIOR) (BANDA LARGA INTERIOR) ANY REQUIRED LENGTH (LONGITUD REQUERIDA) DRIVE CHAIN (CADENA MOTRIZ) CAUTION! ¡PRECAUCION! Under no circumstances, attempt to install any V-belt Nunca trate de instalar la banda-V mientras el motor este while operating the drive motor.
-
Page 10: Racked Sections
Secciones Descuadradas Racked Sections It is important that each bed section be checked for a “racked” Es importante revisar que las secciones están encuadradas . or out-of-square condition. If conveyor is not square, tracking La Figura 10A muestra una sección descuadrada . problems will result. -
Page 11: Pressure Adjustment
Pressure Adjustment Ajuste de Presión MODELO “ACC” (FIGURA 11A) MODEL “ACC” (FIGURE 11A) El Modelo “ACC” esta equipado con ángulos de suspensión The “ACC” is equipped with suspension angles that support que sostienen los rodillos de presión y mantienen la banda the pressure rollers and hold the drive V-Belt in contact with motriz-V en contacto con los rodillos de transportación . -
Page 12: Operation
OPERATION OPERACION Medidas de Seguridad Operation Safety Precautions en la Operación A) Only trained employees shall be permitted to operate con- A) Los transportadores deben ser operados únicamente por veyors. Training shall include instruction in operation under empleados entrenados . El entrenamiento debe incluir instruc- normal conditions and emergency situations. -
Page 13: Conveyor Start-Up
Conveyor Start-Up Arranque del Transportador Before conveyor is turned on, check for foreign objects Antes de poner en marcha el transportador, revise si hay that may have been left inside conveyor during installation. objetos ajenos que puedan haber sido dejados dentro del These objects could cause serious damage during start- transportador durante la instalación . -
Page 14: Electrical Equipment
Electrical Equipment Equipo Eléctrico WARNING! ¡ADVERTENCIA! Electrical controls shall be installed and wired by a Los controles eléctricos deben ser conectados e insta- qualified electrician. Wiring information for the motor lados por un electricista calificado. La información and controls are furnished by the equipment manufac- sobre las conexiones del motor y los controles será... - Page 15 able in the immediate vicinity of such locations unless guard- contacto visual de las áreas de conducción, áreas de carga, ed by location, position, or guards. Where the design, func- puntos de transferencia y otros sitios potencialmente peli- tion, and operation of such conveyor clearly is not hazardous grosos localizados en la trayectoria del transportador que no to personnel, an emergency stop device is not required.
-
Page 16: Lubrication
Lubrication Lubricación La cadena motriz ha sido pre-lubricada por el fabricante The drive chain is pre-lubricated from the manufacturer by a mediante un proceso de sumersión caliente que asegura una hot dipping process that ensures total lubrication of all com- lubricación total de todos sus componentes . -
Page 17: Belt Replacement
Belt Replacement Reemplazo de la Banda MODEL “ACC” MODELO “ACC” 1. . . Check length of section in which belt is to be replaced. 1. . . Revise el largo de la sección en la que se reemplaza la 2. . . Determine if a “Long”... - Page 18 The Models “LRC” & “LRS” use standard “B” section trial de sección “B” estándar (Núcleo Sin-Vidrio). Estas industrial grade V-belts (Non-Glass Core). These belts bandas pueden comprarse en HYTROL o con distribui- may either be purchased from HYTROL or local suppli- dores locales. ers.
- Page 19 Belt Replacement Reemplazo de la Banda MODEL “ACC” MODELO “ACC” Los soportes con poleas están ubicados en ambos extremos Take-up brackets with sheaves are located at both ends of de la sección del transportador para ajustar la tensión de la conveyor section to adjust belt tension.
-
Page 20: Drive Chain Alignment And Tension
Alineación y Tensión Drive Chain Alignment and Tension de la Cadena Motriz The drive chain and sprockets should be checked periodi- La cadena motriz y las catarinas deben ser revisadas periódica- cally for proper tension and alignment. Improper adjustment mente para que estén correctamente tensas y alineadas . Ajustes will cause extensive wear to the drive components. -
Page 21: Trouble Shooting
Motor or reducer overheating. 4) Low lubricant level in reducer. 4) Relubricate per manufacturer’s recommendations. For HYTROL reducer, refer to separate manual. 5) One or more V-belts too tight. 5) Re-position take-up sheaves further from double groove sheave. TROUBLE SHOOTING DRIVE BELT TRACKING... -
Page 22: Maintenance Checklist
Planned Maintenance Checklist The following is a general maintenance checklist which covers the major components of your conveyor. This will be helpful in establishing a standard maintenance schedule. SCHEDULE SUGGESTED ACTION COMPONENT Weekly Monthly Quarterly Check for Noise MOTOR Check Temperature Check Mounting Bolts Check for Noise REDUCER... -
Page 23: External Slave Drive
Esclavada de External Slave Drive Externo de Motor TO INSTALL THE CONNECTING CHAIN COMO INSTALAR LA CADENA IMPULSADORA 1. . . Remove sprockets and chain quard back plate as nec- Remueva las catarinas y la cubierta de la guarda de 1. -
Page 24: Model 190-Acc Parts Drawing
Model 190-ACC Parts Drawing Dibujo de Partes del Modelo 190-ACC (Vea la Página 42 See Page 42 for Para Retenedores Sheave Retainers de Polea) 15 16 21 22 24 23 24 12 13 30 31 33 VIEW A--A VIEW B--B (Vista A--A) (Vista B--B) See Page 43 for Slave Connection... -
Page 25: Model 190-Acc Parts List
Model 190-ACC Parts List Lista de Partes del Modelo 190-ACC 1-1/2 1-1/2 Recommended Spare Parts Highlighted in Grey (Partes de Repuesto Recomendadas se Resaltan en Gris) Ref. No. Part No. Description Ref. No. Part No. Description — Motor - C-Face 042.914 Shoulder Bolt - Suspension Angle —... -
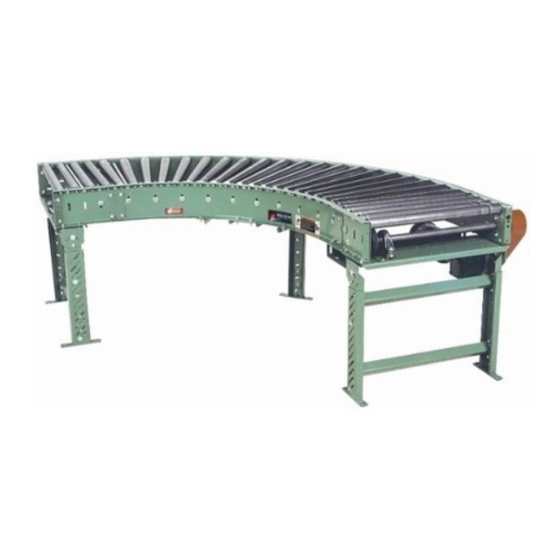
Page 26: Model 190-Lrc 90 Deg Parts Drawing
Model 190-LRC 90 ° Parts Drawing and List Dibujo y Lista de Partes del Modelo 190-LRC 90° 15 16 See Page 42 for Sheave Retainers (Vea la Página 42 Para Retenedores de Polea) Recommended Spare Parts END VIEW Highlighted in Grey (Vista de Extremo) (Partes de Repuesto Recomendadas se Resaltan en Gris) -
Page 27: Model 190-Lrc 90 Deg Parts List
Model 190-LRC 60 ° Parts Drawing and List Dibujo y Lista de Partes del Modelo 190-LRC 60° See Page 42 for Sheave Retainers (Vea la Página 42 Para Retenedores de Polea) Recommended Spare Parts Highlighted in Grey END VIEW (Partes de Repuesto Recomendadas (Vista de Extremo) se Resaltan en Gris) Ref. -
Page 28: Model 190-Lrc 60 Deg Parts Drawing
Model 190-LRC 45 ° Parts Drawing and List Dibujo y Lista de Partes del Modelo 190-LRC 45° 15 16 See Page 42 for Sheave Retainers (Vea la Página 42 Para Retenedores de Polea) Recommended Spare Parts END VIEW Highlighted in Grey (Vista de Extremo) (Partes de Repuesto Recomendadas se Resaltan en Gris) -
Page 29: Model 190-Lrc 60 Deg Parts List
Model 190-LRC 30 ° Parts Drawing and List Dibujo y Lista de Partes del Modelo 190-LRC 30° 40 39 15 16 13 14 See Page 42 for Sheave Retainers (Vea la Página 42 Para Retenedores de Polea) Recommended Spare Parts End View Highlighted in Grey (Vista de Extremo) -
Page 30: Model 190-Lrc 45 Deg Parts Drawing
Model 190-LRS 45 ° Parts Drawing and List Dibujo y Lista de Partes del Modelo 190-LRS 45° 15 16 50 48 See Page 42 for Sheave Retainers (Vea la Página 42 Para Retenedores de Polea) Recommended Spare Parts Highlighted in Grey End View (Partes de Repuesto Recomendadas (Vista de Extremo) -
Page 31: Model 190-Lrc 45 Deg Parts List
Model 190-LRS 30 ° Parts Drawing and List Dibujo y Lista de Partes del Modelo 190-LRS 30° 50 51 45 46 47 See Page 42 for Sheave Retainers (Vea la Página 42 Para Retenedores de Polea) Recommended Spare Parts End View Highlighted in Grey (Partes de Repuesto Recomendadas (Vista de Extremo) -
Page 32: Model 190-Lrc 30 Deg Parts Drawing
Model 190-LRSS 45 ° Parts Drawing and List Dibujo y Lista de Partes del Modelo 190-LRSS 45° See Page 42 for Sheave Retainers (Vea la Página 42 Para Retenedores de Polea) Recommended Spare Parts End View Highlighted in Grey (Partes de Repuesto Recomendadas (Vista de Extremo) se Resaltan en Gris) Ref. -
Page 33: Model 190-Lrc 30 Deg Parts List
Model 190-LRSS 30 ° Parts Drawing and List Dibujo y Lista de Partes del Modelo 190-LRSS 30° See Page 42 for Sheave Retainers (Vea la Página 42 Para Retenedores de Polea) Recommended Spare Parts End View Highlighted in Grey (Vista de Extremo) (Partes de Repuesto Recomendadas se Resaltan en Gris) Ref. -
Page 34: Model 190-Lrs 45 Deg Parts Drawing
Sub-Assemblies and Parts List 1-1/2 1-1/2 Ref.No. Part No. Description Conveyor Section (Specify Model) — MS Type Pivot Plate - 1-1/2 in. Flange — B-00913 3-11/16 in. High — B-02112 1-9/16 in. High — Floor Support Frame — B-00914 6 in. High (Specify OAW) —... -
Page 35: Model 190-Lrs 45 Deg Parts List
Sub-Assemblies and Parts List B-06855 B-07448 Description Ref.No. Part No. 024.1211 Sheave V-Idler, 3.8125 in. OD x 5/8 in.Bore B-21900-051 .635 in. ID x 7/8 in. OD x 1-19/32 in. Lg. Spacer 040.5034 5/8-11 x 3-1/2 in. Lg. Hex Bolt 041.104 5/8-11 NC2B Hex Nut Description... -
Page 36: Model 190-Lrs 30 Deg Parts Drawing
Sheave Retainer Parts Drawing Dibujo de Partes de Retenedores de Polea SA-039475 13” - 27” BR Drive With Slave SA-039476 31” - 39” BR Drive With Slave SA-039478 SA-039479 13” - 27” BR Drive End 31” - 39” BR Drive End B-14504 SA-039474 13”... -
Page 37: Model 190-Lrs 30 Deg Parts List
Slave Connection Parts Drawing & Parts List Dibujo y Lista de Partes de Conexión Esclava 3 29/32 9 1/8 13 7/16 3 1/32 Ref. No. Part No. Description Recommended Spare Parts B-15239 Chain Guard Back Plate Highlighted in Grey B-15241 Chain Guard Front Plate B-16679 Chain Guard Mounting Bracket... -
Page 38: Model 190-Lrss 45 Deg Parts Drawing
HYTROL CONVEYOR COMPANY, INC. 2020 Hytrol Street Jonesboro, Arkansas 72401 Phone: (870) 935-3700 EFFECTIVE MARCH 2011 Printed in the USA by Master Printing...
Need help?
Do you have a question about the 190-LRC Series and is the answer not in the manual?
Questions and answers