Table of Contents
Advertisement
Quick Links
Download this manual
See also:
User Manual
Advertisement
Table of Contents

Related Manuals for Festo SBSI-EN


Summary of Contents for Festo SBSI-EN
- Page 2 No part of this document may be reproduced, published or stored in information retrieval systems or data bases in any manner whatsoever, nor may illustrations, drawings and the layout be copied without prior written permission from Festo AG & Co. KG. We accept no responsibility for printing errors and mistakes which occurred in drafting these documentations.
-
Page 3: Table Of Contents
4.2.1 Vision Sensor, Short introduction, Starting the software 4.2.2 Vision Sensor Device Manager: Open sensors or sensor simulation / Passwords 4.2.3 Passwords 4.2.4 Password levels: 4.3 Vision Sensor Configuration Studio: Setting sensor, Job 4.3.1 Job Setup Vision Sensor SBSI-EN, 8033107 - 1401N12.05.2014 Page 3... - Page 4 4.3.2 Alignment settings 4.3.3 Detector settings 4.3.4 Output, I/O and data output 4.3.5 Result 4.3.6 Start sensor 4.4 Vision Sensor Visualisation Studio, display images and results 5 Type key 6 Technical Data Page 4 Vision Sensor SBSI-EN, 8033107 - 1401N12.05.2014...
-
Page 5: General Information And Safety
Attention must be paid to sufficient and constant object illumination to ensure reproducible results and avoid malfunction. Reflections or varying incident light may affect detection results. If necessary, use an external light source and/or light-screening / shrouding devices to exclude incident light Vision Sensor SBSI-EN, 8033107 - 1401N12.05.2014 Page 5... -
Page 6: Intended Use
ISO and AIM quality parameters. This enables you to intro- duce early correctional measures and thus avoid rejects due to illegible codes. The Vision Sensor range is an economic alternative to conventional image processing systems. Page 6 Vision Sensor SBSI-EN, 8033107 - 1401N12.05.2014... -
Page 7: Functions Overview
Timeout, specified time response Variable resolutions Illumination quadrant controlled Image recorder Ethernet interface RS422 / RS232 interface EtherNet/IP interface Sensor monitoring by Viewer, Job-Upload R3 integrated 6 / 12 X / X X / X Vision Sensor SBSI-EN, 8033107 - 1401N12.05.2014 Page 7... -
Page 8: Sensor Types
8 x 6 2930236 SBSI-B-R3B-F6-R-D Enhanced Red 5 x 4 2930237 SBSI-B-R3B-F12-R-D Enhanced Red 8 x 6 R3 Standard IR 2930238 SBSI-B-R3B-F6-NR Normal InfraRed 5 x 4 2930239 SBSI-B-R3B-F12-NR Normal InfraRed 8 x 6 Page 8 Vision Sensor SBSI-EN, 8033107 - 1401N12.05.2014... - Page 9 Enhanced InfraRed 8 x 6 *1 For longer operating distances (from approx. 200 mm) external illumination may be necessary. *2 External IR illumination is only possible with IR sensors or C-Mount sensors. Vision Sensor SBSI-EN, 8033107 - 1401N12.05.2014 Page 9...
-
Page 10: Field Of View / Depth Of View
Field of view R3 6mm lens, internal Fig. 1: Field of view R3 6mm lens, internal Field of view R3 12mm lens, internal Fig. 2: Field of view R3 12mm lens, internal Page 10 Vision Sensor SBSI-EN, 8033107 - 1401N12.05.2014... - Page 11 Depth of view R3 6mm lens internal, normal Fig. 3: Depth of view R3 6mm lens internal, normal Depth of view R3 6mm lens internal, enhanced Fig. 4: Depth of view R3 6mm lens internal, enhanced Vision Sensor SBSI-EN, 8033107 - 1401N12.05.2014 Page 11...
- Page 12 Depth of view R3 12mm lens internal, normal Fig. 5: Depth of view R3 12mm lens internal, normal Depth of view R3 12mm lens internal, enhanced Fig. 6: Depth of view R3 12mm lens internal, enhanced Page 12 Vision Sensor SBSI-EN, 8033107 - 1401N12.05.2014...
-
Page 13: Installation
Use only the mounting clamp MK 45 (no. 543-11000) or the mounting hinge MG2A (no.543-11023). 3.1.1 Arrangement for dark-field illumination For the prevention of direct reflections and accentuation of edges etc. Fig. 7: Arrangement for dark-field illumination Vision Sensor SBSI-EN, 8033107 - 1401N12.05.2014 Page 13... -
Page 14: Arrangement For Bright-Field Illumination
To avoid interfering reflection from the detection object, align the Vision Sensor at an angle of approx. 10°- 15° with reference to the optical axis. Fine adjustment Important: Fine adjustment of the Vision Sensor should not be carried out until after electrical connection and start-up (PC software installation). Page 14 Vision Sensor SBSI-EN, 8033107 - 1401N12.05.2014... -
Page 15: Alignment For A Vertical Illumination
/ the mirror as vertical as possible until the integrated illu- mination LEDs are directly dazzling in the image of the user interface (Arrangement for bright-field illu- mination (Page 14)). Fig. 9: Alignment for a vertical illumination Vision Sensor SBSI-EN, 8033107 - 1401N12.05.2014 Page 15... -
Page 16: Assembly Vision Sensor - Mounting Bracket Sbam-C6-Cp
(data and LAN) which are not in use. For error free operation the length of the connecting cables must not be longer than 30 m (except Ethernet cable). Failure to do this may cause malfunction. Page 16 Vision Sensor SBSI-EN, 8033107 - 1401N12.05.2014... -
Page 17: Connection Possibilities
3.2.1.1 LED Display Name Colour Meaning Pwr. green Operating voltage yellow Result 1 yellow Result 2 yellow Result 3 All LED´s are set without taking into account any timing function (e.g. Trigger delay) Vision Sensor SBSI-EN, 8033107 - 1401N12.05.2014 Page 17... -
Page 18: Focussing Screw
3.2.1.4.2 Connection of the Vision Sensor to a PC via a network: Fig. 14: Connection via a network 3.2.1.5 Data Connection M12 Connection socket for DATA serial interface, RS422 / RS232. PIN assignment DATA *A) (Page 20) Page 18 Vision Sensor SBSI-EN, 8033107 - 1401N12.05.2014... -
Page 19: Plug Connections
*4 All LED´s are set without taking into account any timing function (e.g. Trigger delay) For shielded cables use shield. 3.2.2.2 PIN assignment, connection LAN (M12) 4 pin Signal TxD+ RxD+ TxD- RxD- Vision Sensor SBSI-EN, 8033107 - 1401N12.05.2014 Page 19... -
Page 20: Pin Assignment Data *A)
For shielded cables use shield. 3.2.2.4 Exemplary connection plan and software settings for the following setup: Power supply Trigger 1x digital output Encoder Ethernet to PC or PLC Fig. 15: Exemplary connection plan Page 20 Vision Sensor SBSI-EN, 8033107 - 1401N12.05.2014... -
Page 21: Electrical Connection Supply Voltage And Shield
Fig. 18: Connection example Vision Sensor in NPN mode As the inputs refer to ground, an additional pull-up resistor may be required in order to increase the input voltage to 24V when unswitched. The outputs switch to ground. Vision Sensor SBSI-EN, 8033107 - 1401N12.05.2014 Page 21... -
Page 22: Network Settings, Short Reference
Sensor supports the automatic recognition of the Ethernet transmission rate, but 100 MBit at the most. The internet protocol IPv4 must be activated. There are two alternatives to configure and parameterize the Vision Sensor. See also chap. Network connection 1. Direct Connection 2. Network Connection Page 22 Vision Sensor SBSI-EN, 8033107 - 1401N12.05.2014... -
Page 23: Direct Connection - Setting The Ip Address Of The Pc
To alter the sensor’s IP address, see chap. Please do also not use the addresses .0 and .255 as these addresses are reserved for network infrastructure devices such as servers, gateways, etc. Fig. 19: PC IP Setup Vision Sensor SBSI-EN, 8033107 - 1401N12.05.2014 Page 23... -
Page 24: Network Connection - Setting The Ip Address Of The Vision Sensor
(Please note some pc’s have more than one Ethernet con- nection i.e. wireless and wired LAN connections d. When the new IP address has been set, Re-select the sensor and connect. Via Config or View Page 24 Vision Sensor SBSI-EN, 8033107 - 1401N12.05.2014... - Page 25 DHCP server may boot slower than the Vision Sensor. Make sure that the Vision Sensor is only switched on when the DHCP server is available. Vision Sensor SBSI-EN, 8033107 - 1401N12.05.2014 Page 25...
-
Page 26: Vision Sensor - Operating- And Configuration Software
For the display and monitoring of images and results from connected sensors, as well as job switch and job upload. Fig. 22: Software structure 4.1.2 Context help For all software functions a context sensitive help page is available and displayed as soon as a function is selected. Page 26 Vision Sensor SBSI-EN, 8033107 - 1401N12.05.2014... -
Page 27: Vision Sensor - Operating- And Configuration Software - Short Introduction
"Config“ to start the module "Vision Sensor Configuration Studio“. Vision Sensor Visualisation Studio is not available for the simulation mode as there is no device to send the images for display. Vision Sensor SBSI-EN, 8033107 - 1401N12.05.2014 Page 27... - Page 28 Configures a connected sensor or a sensor simulation View Displays image or result data from a connected sensor Edits network settings such as the sensor's IP address etc. E) Context help Context sensitive help Page 28 Vision Sensor SBSI-EN, 8033107 - 1401N12.05.2014...
-
Page 29: Passwords
In order to be able to use the function "Config“ after the allocation of passwords, it is now necessary to login by clicking on the toolbar login button, and then entering the assigned password. Fig. 27: Login button Vision Sensor SBSI-EN, 8033107 - 1401N12.05.2014 Page 29... - Page 30 "Deactivate password request“ checkbox, permanently deactivates password request. If passwords have been assigned and then forgotten, it is possible to reset passwords to delivery status by reinstalling the software on the local PC. Page 30 Vision Sensor SBSI-EN, 8033107 - 1401N12.05.2014...
-
Page 31: Vision Sensor Configuration Studio: Setting Sensor, Job
C) Image Image output with graphically adjustable operating and search zones as well as zoom function also filmstrip navigation when in simulation mode D) Context Context-sensitive online help, automatically updated for each action. Vision Sensor SBSI-EN, 8033107 - 1401N12.05.2014 Page 31... -
Page 32: Job Setup
Jobs are created here, and several jobs can be stored in the Vision Sensor. All global settings, valid for each individual job, e.g. shutter, gain, illumination settings etc. are also carried out here. Page 32 Vision Sensor SBSI-EN, 8033107 - 1401N12.05.2014... - Page 33 In this example, the outside contour is used for alignment and the plug can be found either by contour or by pattern matching. If the angular rotation of the object can vary also, the contour method must be used. Fig. 31: Alignment Vision Sensor SBSI-EN, 8033107 - 1401N12.05.2014 Page 33...
- Page 34 Detector 1: contact found (brightness value is in defined range as the shiny metal contact is mounted) res- ult positive. Detector 2: contact not found (brightness value out of defined range, as only weak reflection from the black plastic housing background) result negative. Page 34 Vision Sensor SBSI-EN, 8033107 - 1401N12.05.2014...
- Page 35 Select and activate the interfaces in the different tabs. Logically connect detector results and assign to the available I/O´s. In order to enable the output of serial result data, select the required interface and compose data string. Next topic:Result (Page 37) Vision Sensor SBSI-EN, 8033107 - 1401N12.05.2014 Page 35...
- Page 36 Selection of: binary or ASCII protocol, header and/or trailer, standard contents and/or flexible, com- binable, special individual data from the individual detectors. Any number of individual results from all the defined detectors can be freely arranged in an output string. Page 36 Vision Sensor SBSI-EN, 8033107 - 1401N12.05.2014...
- Page 37 All the results are produced and displayed just as on the sensor. However e.g. execution times will not be updated as these values are only informative when implemented on the sensor itself. See next step: „Start Sensor“. Next topic: Start sensor (Page 38) Fig. 35: Result display Vision Sensor SBSI-EN, 8033107 - 1401N12.05.2014 Page 37...
- Page 38 ‘software’ trigger can be sent using the Trigger button the left hand side of the image area. Next topic: Vision Sensor Visualisation Studio, display images and results (Page 39) Fig. 36: Start sensor Page 38 Vision Sensor SBSI-EN, 8033107 - 1401N12.05.2014...
- Page 39 In the tab „Job“, it is possible to switch between jobs present on the sensor. In the tab „Upload“, further, previously defined jobs or whole job sets can be loaded from the Vision Sensor Visualisation Studio on to the sensor. Fig. 37: Vision Sensor Visualisation Studio Vision Sensor SBSI-EN, 8033107 - 1401N12.05.2014 Page 39...
- Page 40 Vision Sensor Mounting and operating instructions 5 Type key Page 40 Vision Sensor SBSI-EN, 8033107 - 1401N12.05.2014...
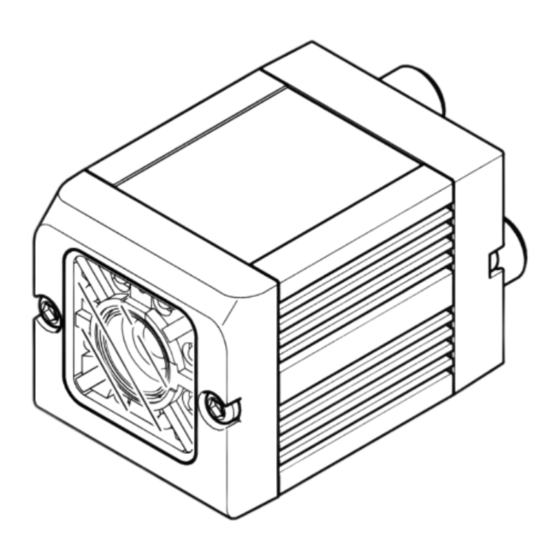
- Page 41 Length x width x height 65 x 45 x 45 mm (without plug) Weight approx.160 g Vibration / shock EN 60947-5-2 Ambient operating temperature 0° C ..50° C (80% humidity, non-condensing) Vision Sensor SBSI-EN, 8033107 - 1401N12.05.2014 Page 41...
- Page 42 EAN13, UPC-A, UPC-E), EAN128 (Codes A, B, C) • position and size of field of view freely adjustable • logic operation of single configuration (AND, OR = sorting) • verify Typical cycle time 40 ms one evaluation Coder reading Page 42 Vision Sensor SBSI-EN, 8033107 - 1401N12.05.2014...
Need help?
Do you have a question about the SBSI-EN and is the answer not in the manual?
Questions and answers