GDC SR-1000 STANDALONE INTEGRATED MEDIA BLOCK User & Installation Manual
Hide thumbs
Also See for SR-1000 STANDALONE INTEGRATED MEDIA BLOCK:
- User manual (137 pages) ,
- Installation manual (51 pages) ,
- Installation manual (17 pages)

Related Manuals for GDC SR-1000 STANDALONE INTEGRATED MEDIA BLOCK


Summary of Contents for GDC SR-1000 STANDALONE INTEGRATED MEDIA BLOCK
- Page 1 INSTALLATION MANUAL FOR SR-1000 STANDALONE INTEGRATED MEDIA BLOCK™ Version 17.0 March 15, 2018...
-
Page 2: Table Of Contents
9.2. Content ingest from FTP ......................27 10. AUDIO SETUP ........................ 28 11. SUBTITLES ........................30 12. AUTOMATION SETUP ..................... 31 12.1. Automation setup for server GPIO ..................31 Installation Manual for SR-1000 Standalone Integrated Media Block™ - 1 - March 15, 2018... - Page 3 14. TESTING PROCEDURES FOR QC AFTER INSTALLATION ............. 39 15. APPENDIX........................40 15.1. AES Audio and GPIO Pinout ....................40 15.2. GPIO Power Details ......................40 Installation Manual for SR-1000 Standalone Integrated Media Block™ - 2 - March 15, 2018...
- Page 4 The contents, features and specifications stated in this manual are subject to change without notice due to continuous product development and improvements. In no other event shall GDC Technology Limited be liable for any loss of profit or any other commercial damages, including but not limited to special, consequential, or other damages.
- Page 5 Tel: +51 1 340 5146 Tel: +1 818 972 4370 / CEP 18047-620, Brasil Tel: +65 6222 1082 +1 877 743 2872 (Toll Free) Tel: +55 15 33269301 Installation Manual for SR-1000 Standalone Integrated Media Block™ - 4 - March 15, 2018...
- Page 6 Tel: +91 22 4044 0500 Tel: +52 55 8851 1198/ ___+52 55 8851 1165 United Arab Emirates (Dubai) Business Centre, Dubai World Central, PO Box 390667, Dubai UAE Installation Manual for SR-1000 Standalone Integrated Media Block™ - 5 - March 15, 2018...
-
Page 7: Introduction
In this manual, the SR-1000 WebUI is used to configure the SR-1000. The Dashboard of the SR- 1000 WebUI is shown below (see Figure 1). Figure 1 Dashboard tab. Installation Manual for SR-1000 Standalone Integrated Media Block™ - 6 - March 15, 2018... -
Page 8: Equipment List
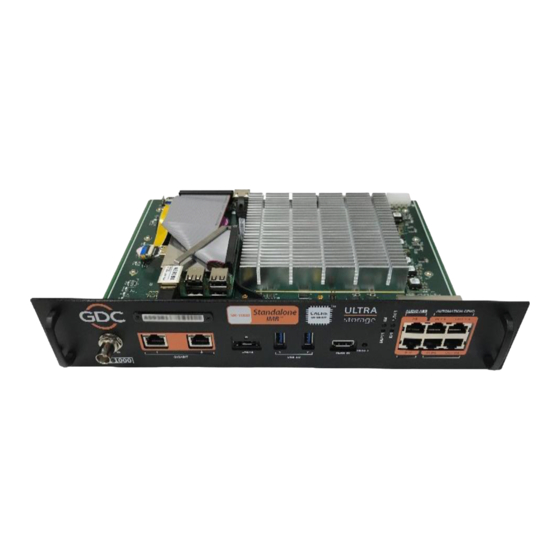
1.INTRODUCTION 1.1. Equipment List This section provides a suggested installation configuration of GDC SR-1000 for reference. Please contact our sales representative to specify the accessories needed for the installation. The SR-1000 Packaging Includes: Item Photo SR-1000 Unit with projector coverplate... -
Page 9: Installing Sr-1000 Into The Projector
2. INSTALLING SR-1000 INTO THE PROJECTOR Note: If the projector comes with the GDC IMB pre-installed, the instructions in this section can be skipped. This section of the manual describes the physical installation of the SR-1000 into the projector. If the projector does not have the GDC SR-1000 installed, follow the steps below to install the SR- 1000 into the projector. -
Page 10: Remove Existing Interface Board/Placeholders From The Projector
Figure 3 shows an interface board (with SMPTE 292 inputs) connected to a Barco projector. This board must be removed in order to install the SR-1000. Figure 3 Remove interface board from Barco projector. Figure 4 SR-1000 Placement on Barco projector. Installation Manual for SR-1000 Standalone Integrated Media Block™ - 9 - March 15, 2018... -
Page 11: Christie Projector Placement
If the SR-1000 is installed into the bottom slot, the board runs the risk of coming in contact with the IMB enclosure. Please refer to the projector manuals for more details on preparing the projector for SR-1000 installation. Installation Manual for SR-1000 Standalone Integrated Media Block™ - 10 - March 15, 2018... -
Page 12: Installing The Sr-1000 Into The Projector
Connect the provided Cat 5e LAN cable from the SR-1000 Gigabit 2 port to cinema network. Please see Section 5 for IP network instructions after the SR-1000 is installed. Installation Manual for SR-1000 Standalone Integrated Media Block™ - 11 -... -
Page 13: Connecting Portable Storage/Enterprise Storage With The Sr-1000
NOTE: To use Portable Storage as the content source, it MUST be connected to the eSATA port of the SR- 1000 board. 3.2. Connecting the Enterprise Storage Installation Manual for SR-1000 Standalone Integrated Media Block™ - 12 - March 15, 2018... - Page 14 Figure 11 Insert eSATA cable into SR-1000 eSATA port. NOTE: To use the Enterprise Storage as the content source, it MUST be connected to the eSATA port of the SR-1000 board. Installation Manual for SR-1000 Standalone Integrated Media Block™ - 13 - March 15, 2018...
-
Page 15: Sr-1000 Webui Access
4. There are 3 levels of users available. Select User, Technician or Maintenance, and enter the password to access the SR-1000. Figure 12 SR-1000 Login Page Installation Manual for SR-1000 Standalone Integrated Media Block™ - 14 - March 15, 2018... -
Page 16: Sr-1000 Ip Address Setup
Go to Network Configuration section. Enter the settings for Subnet Mask, Gateway, and IMB Ethernet 2. Figure 13 Network Configuration setting Once the settings have been entered, click Validate IPs. Installation Manual for SR-1000 Standalone Integrated Media Block™ - 15 - March 15, 2018... - Page 17 If all of the IP addresses are valid, the popup window below will appear: Figure 14 Network Configuration setting Click OK to exit. Click Save to save the settings. Installation Manual for SR-1000 Standalone Integrated Media Block™ - 16 - March 15, 2018...
-
Page 18: Storage Configuration
– Use CineCache for storage (For SR-1000 with CineCache installed CineCache only) PSD – Use Portable Storage or Enterprise Storage Figure 15 IMB Storage setting Installation Manual for SR-1000 Standalone Integrated Media Block™ - 17 - March 15, 2018... - Page 19 SR-1000 are able to detect the selected storage after restart. 4. The SR-1000 will restart and use the selected option for storage. Figure 16 Dashboard tab Figure 17 Restart window Installation Manual for SR-1000 Standalone Integrated Media Block™ - 18 - March 15, 2018...
-
Page 20: Series 2 Projector Setup
After the Marriage is performed and the tampers are cleared, green Married and Closed buttons will be shown respectively (as seen in Figure 18). Figure 18 Clear IMB tampers setting Installation Manual for SR-1000 Standalone Integrated Media Block™ - 19 - March 15, 2018... -
Page 21: Barco Series 2 Projector Setup
For details, please refer to the projector manual. Figure 19 INPUT source settings on Barco Series 2 projector. Installation Manual for SR-1000 Standalone Integrated Media Block™ - 20 - March 15, 2018... -
Page 22: Nec Series 2 Projector
6. Clear the Service Door/Marriage Tamper on the SR-1000. To use the SR-1000 for content playback, the INPUT source of the projector macros must be set to IMB. Installation Manual for SR-1000 Standalone Integrated Media Block™ - 21 - March 15, 2018... -
Page 23: Christie Series 2 Projector
Figure 22 Marriage account 3. Enter Username as [marriage] and its password and click [Login] button. (as shown in Figure 23). Figure 23 Marriage account login Installation Manual for SR-1000 Standalone Integrated Media Block™ - 22 - March 15, 2018... - Page 24 [Content Devices Configuration] (as Shown in Figure 24) Figure 24 Content Devices Configuration 5. Select [GDC] for the [IMB Installed]. (as shown in Figure 25) Figure 25 Content Devices Configuration 6. Clear the Service Door/Marriage Tamper on the SR-1000. To use the SR-1000 for content playback, the INPUT for projector channel must be set to [IMB- Generic].
-
Page 25: Settings For Series 2 Projectors
The settings for 3D output control (‘3D Sync Polarity’, ‘Dark Time’, ‘Output Delay’ and ‘Phase Delay’) should be customized according to the type of 3D system used (RealD, XpanD or Dolby3D). Installation Manual for SR-1000 Standalone Integrated Media Block™ - 24 - March 15, 2018... -
Page 26: Time Zone Setup
Under the Configuration tab in the menu, click the System subtab. Go to Configure TimeZone section. Select the Region/City in the dropdown menu of TimeZone Select. Click Save to save the setting. Figure 27 TimeZone setting Installation Manual for SR-1000 Standalone Integrated Media Block™ - 25 - March 15, 2018... -
Page 27: Content Ingest Management Setup
2. On the left column, select USB Drive. 3. Click Open to choose content to be ingested from the USB disk. Figure 28 Content source setting Installation Manual for SR-1000 Standalone Integrated Media Block™ - 26 - March 15, 2018... -
Page 28: Content Ingest From Ftp
5. Click Save to save the setting. Figure 29 Content source setting 6. Click Open to connect to the FTP server and choose the content for ingest. Figure 30 Content source setting Installation Manual for SR-1000 Standalone Integrated Media Block™ - 27 - March 15, 2018... -
Page 29: Audio Setup
(please refer to Figure 31). Figure 31 RJ45 DB25 Audio Connector. Figure 32 RJ45 DB25 pinout (For traditional audio connector). Figure 33 RJ45 DB25 pinout (For CP750/JSD80 audio connector). Installation Manual for SR-1000 Standalone Integrated Media Block™ - 28 - March 15, 2018... - Page 30 11. AUDIO SETUP Figure 34 AES Audio RJ45 pinout. Installation Manual for SR-1000 Standalone Integrated Media Block™ - 29 - March 15, 2018...
-
Page 31: Subtitles
It is recommended to use subtitle overlay for subtitle display. To do so, please check Subtitle Overlay Option under the Playback subtab of the Configuration menu. Figure 35 Subtitle setting Installation Manual for SR-1000 Standalone Integrated Media Block™ - 30 - March 15, 2018... -
Page 32: Automation Setup
The output pulse width must be at least 100ms. If a different output pulse width is required, the value can be entered in the ‘Output Pulse Width’ setting. Click the [Save] button to save any changes made. Installation Manual for SR-1000 Standalone Integrated Media Block™ - 31 - March 15, 2018... -
Page 33: Automation Setup For Projectors
‘Series 2’ checkbox. 6. Enter Login and Password for the projector if required. 7. Click Save to save the settings. Figure 37 Projector setting Installation Manual for SR-1000 Standalone Integrated Media Block™ - 32 - March 15, 2018... -
Page 34: Automation Setup For Ecna Devices
Server events, eCNA controls, eCNA status, and eCNA event report. All cues are disabled by default. 6. Click Save to save the settings. Figure 38 eCNA device setting Installation Manual for SR-1000 Standalone Integrated Media Block™ - 33 - March 15, 2018... -
Page 35: Automation Setup For Jnior Devices
5. The settings for Port, Login and Password are set to the default values for JUNIOR device if left empty. 6. Click Save to save the settings. Figure 39 JNIOR device setting Installation Manual for SR-1000 Standalone Integrated Media Block™ - 34 - March 15, 2018... -
Page 36: Automation Setup For Christie Act Devices
6. Default control cues will be set up for a new ChristieACT automation device. Control cues can be added or removed by clicking the + or – buttons. 7. Click Save to save the settings. Figure 40 Christie device setting Installation Manual for SR-1000 Standalone Integrated Media Block™ - 35 - March 15, 2018... -
Page 37: Automation Setup For Dolby Devices
3. Select DolbyCP650 as the device type. Enter the name of the Dolby CP650 device, and click OK. 4. Enter the IP address of the Dolby CP650 device. 5. Click Save to save the settings. Figure 41 Dolby device setting Installation Manual for SR-1000 Standalone Integrated Media Block™ - 36 - March 15, 2018... -
Page 38: Automation Setup For Usl Dax Devices
3. Select USL-DAX as the device type. Enter the name of the USL DAX device, and click 4. Enter the IP address of the USL DAX device. 5. Click Save to save the settings. Figure 42 USL DAX device setting Installation Manual for SR-1000 Standalone Integrated Media Block™ - 37 - March 15, 2018... -
Page 39: Automation Setup For Usl Jsd Devices
5. Select the correct model (JSD-80 or JSD-100) of the device the server is connected to. 6. Click Save to save the settings. Figure 43 USL JSD device setting Installation Manual for SR-1000 Standalone Integrated Media Block™ - 38 - March 15, 2018... -
Page 40: Component Enginnering Ta-10 Setup
3. Test the server’s ability to activate automation cues using test cues for lights, curtains, sound and fire alarm. 4. Test the remote access capabilities of the server, including: Theater Management System (TMS) access and network connectivity. Installation Manual for SR-1000 Standalone Integrated Media Block™ - 39 - March 15, 2018... -
Page 41: Appendix
Relay ON-resistance: Min = 6 / Typ = 10 / Max = 15 ohms Relay Current limit: Min = 300 / Typ = 360 / Max = 460 mA Relay output power dissipation (continuous) = 600 mW Installation Manual for SR-1000 Standalone Integrated Media Block™ - 40 - March 15, 2018... - Page 42 Cert. No. CN09/32221 GDC Technology manufacturing facility is ISO 9001:2008 certified. Copyright © 2018 GDC Technology Limited. All rights reserved. All trademarks listed in this manual are properties of their respective owners. Specifications are subject to change without notice due to ongoing product development and improvement.
Need help?
Do you have a question about the SR-1000 STANDALONE INTEGRATED MEDIA BLOCK and is the answer not in the manual?
Questions and answers