Table of Contents
Advertisement
Quick Links
Advertisement
Table of Contents

Related Manuals for CAS CL5000J series


Summary of Contents for CAS CL5000J series
- Page 1 앞표지 CL5000J...
-
Page 2: Table Of Contents
Table of Contents 1.GENERAL ......................................6 1.1 PRECAUTIONS...........................6 1.2 INTRODUCTIONS..........................8 1.3 SPECIFICATIONS..........................9 1.4 NAME AND FUNCTIONS......................11 1.5 Basic set - up............................15 1.6 SYMBOLS............................16 1.7 KEY FUNCTIONS..........................17 1.8 Installation of the Label Roll.......................20 2. PROGRAMMING ................................22 2.1 PLU Programming..........................26 2.1.1 Create By-Weight PLU (Menu code 1120)......................27 2.1.2 Create By-Count PLU (Menu code 1120)......................33 2.1.3 Create By-PCS PLU (Menu code 1120)........................34 2.1.4 Editing PLU (Menu code 1120)..........................36... - Page 3 2.7.6 Peel Sensor (Menu code 1734)...........................49 2.7.7 Print Intensity (Menu code 1735)..........................50 2.7.8 Adjust Feed Length (Menu code 1736)........................50 2.7.9 Label Preprint (Menu code 1737)..........................50 2.7.10 Printer Initialize (Menu code 1738).........................50 2.8 Programming Scale Configuration....................51 2.8.1 Department (Menu code 1830)..........................51 2.8.2 Date &...
- Page 4 3.3.4 Preset Tare..................................65 3.3.5 Successive Tare................................66 3.3.6 Tare Override...................................66 3.4 Calling Up a PLU..........................67 3.4.1 Using Numeric Key..............................67 3.4.2 Using Speed Key................................67 3.5 Override (FOR key)..........................68 3.5.1 By-Weight PLU................................68 3.5.2 By-Count PLU................................69 3.5.3 By-PCS PLU..................................70 3.6 Sales Operation............................72 3.6.1 Weighed Item Operation..............................72 3.6.2 By Count Item................................73 3.6.3 By PCS Item...................................74 3.7 Add-Up Transaction..........................76...
-
Page 5: General
1.GENERAL PRECAUTIONS... - Page 6 ※ This equipment is indoor use and all the communication wirings are limited to inside of the building.
-
Page 7: Introductions
Authorized CAS dealers are trained to help you with every aspect of the CL5000J and should you need servicing, they are expertly trained by CAS to assist you with virtually any... -
Page 8: Specifications
SPECIFICATIONS Max. Capacity 3/6kg 6/15kg 15/30kg Interval 1/2g 2/5g 5/10g Max. Tare -2.999kg -5.998kg -9.995kg A/D Conversion Rate Approx. 8 times/sec. Measurement Type Load Cell Platter Size 380 x 244 mm 48 PLU key, 72 PLU key, 36 function 36 function Standard Type (B) Pole Type (P, R) Speed Key... - Page 9 Operating Temp. -10°C ~ 40°C (14°F ~ 104°F) Power AC 100~240V 50/60Hz 1.5A Number Range 6000 1-999999 direct ingredients 300 chracter 1000 Indirect Ingredient 400 character 1~100 User Defined Barcode Format 1~20 Department 1~99 Origin 1~500 Programmable Data Group 1~99 Bitmap Image Quantity Symbol Report...
-
Page 10: Name And Functions
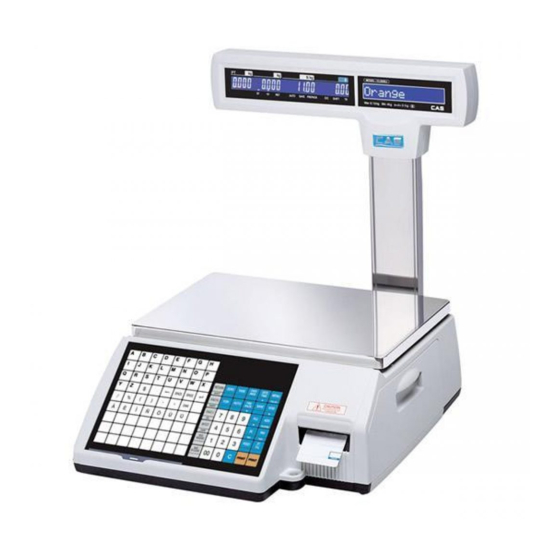
NAME AND FUNCTIONS OVERALL VIEW ■ Standard Type ■ Pole Type P... - Page 11 ■ Pole Type R ■ Hanging Type...
- Page 12 DISPLAY ■ Standard Type (B,P) ■ Pole Type R Max 6 / 15 kg Min 40 g e = d = 2 / 5 g KEYBOARD Standard...
- Page 13 Pole type Hanging type...
-
Page 14: Basic Set - Up
Basic set - up How to install tray H-type mounting method(3 suggested) -
Page 15: Symbols
SYMBOLS SYMBOLS DESCRIPTION ST (▼) Stable weight indicator Zero weight indicator ▶ ◀ NET (▼) Net weight indicator AUTO Print Mode indicator SAVE Auto clearing status indicator PREPACK Auto clearing status indicator DC (▼) Discount status indicator SHIFT (▼) Speed key shift status indicator Data transmission status indicator... -
Page 16: Key Functions
KEY FUNCTIONS DESCRIPTION Numeric keys. Used to enter pricing, qty, count, tare, etc. Double zero key. Clear key. Used to clear erroneous entries and error conditions. Re-Zero key. Use to remove small variations in the scale’s zero. Tare key. Use to manually enter and remove tare weights. Override key. - Page 17 DESCRIPTION ADD-Up key. This key when used in conjunction with ST/TTL key allows you print a customer-total label as well as individual transaction labels. Page Down key. only CL5000 Multi-Label key. Use this key to print multiple sales of the same transaction.
- Page 18 DESCRIPTION Alpha keys. Used to type text data. Used to type $ Backspace key. Used to backspace and delete text data. Space bar. Used to go to next line to enter text Special symbol keys. Used to type special symbol. (See ASCII code table on page 192) For future Note: X key is only used in sale mode and ESC key is only used in program mode.
-
Page 19: Installation Of The Label Roll
Installation of the Label Roll • Label Specifications Outer diameter of roll : 100mm Inner diameter of roll : 40mm Width of receipt roll : 40, 50, 60mm Width of label roll : 60mm(MAX) • Print Area Width of label : 60mm(MAX) Length of label : 80mm(MAX) - Page 20 To install the label roll at ANY time you must follow the directions in this section: ⑨ Press the FEED key. two or times forauto Label adjustment *If label position is not correct, you have to check follows : a, Label size.(Label setting menu) b.
-
Page 21: Programming
2. PROGRAMMING Program Mode Menu Tree (Menu code : 1000) CODE Menu CODE Sub Menu CODE Sub Menu 1120 New/Edit 1144 Expand 1100 1150 LIST 1160 Speed Key 1240 Sales Message 1250 Origin PLU Data 1200 1260 Barcode Table 1 1270 Tare 1280... - Page 22 CODE Menu CODE Sub Menu CODE Sub Menu 1830 Department/Store/speed key number 1840 Date/Time 1852 Change Password 1861 Display 1862 1860 Test 1863 Keypad Scale 1800 1864 Chess Printer Config 1865 Printer Sensor 1870 Scale Parameter 1891 1892 Table1 1890 Clear Memory 1893 Table2...
- Page 23 How to access PROGRAM MODE You can see the Program Menu screen by pressing the MENU key. You can use both keys, DATE-TIME/▲ and PLU/▼ to move other menu. Once you choose a proper menu, press PRINT key to execute program or transfer to sub menu. NOTE: Refer to the function keys avaiable program and calibration menu.
- Page 24 The sales transaction mode will work after scale’s turning on. First to execute program menu, that menu code should have entered. And then you press the PRINT Key to execute program menu. If you want to execute 1864 test chess print menu, just input choosen menu code. You can see this screen for a while, after pressing PRINT key.
-
Page 25: Plu Programming
PLU Programming You can set 20 items for a PLU as below table and if you want to use expanded items(21~28), you can enable those items in menu code:1144. Item Description Department No (1~99) Department No. PLU No (1~999999) PLU No. PLU Type Select PLU type among By Weight(1), By Count(2) or By-PCS(3) Name 1... -
Page 26: Create By-Weight Plu (Menu Code 1120)
※ Unit Weight Unit weight of Price (default 0 : unit price for 1kg) Item Description Tare No You can enter No. of tare data. ☆ Pieces (0-99) Set the number for By-PCS PLU Origin No. (0~500) 0=Do not use origin. (0~99) (0=Do not use Label No.), Aux. - Page 27 3. Enter PLU 2 First Name EX) “BEEF” 4. Enter PLU 3 2nd Name EX) “SiRLOIN” 5. Enter PLU 4 3rd Name EX) “001” 6. Select Group • If there is no group for this PLU, enter “0”. EX) 1. Meat 7.
- Page 28 9. Price EX) Price = $10.00 10. Tare • You can use Tare Table, EX) Tare Value = 100 g 11. Packed Date • This value can be from 0 to 999. EX) 0 : Today 1 : Tomorrow 2: Tomorrow +1 12.
- Page 29 15. Ingredient(Message) No • Refer to 1310 : MESSAGE. • If you do not want to use, enter “0” • Even if this indirect Ingredient number is setted, it doesn’t work while direct Ingredient is active. 16. Ingredient Text •If you want to use direct Ingredient meseage, type character.
- Page 30 21. Qty Unit No. • If you do not want to use, enter “0” This field does not work to By-Weight PLU. Please refer to menu code 1144: PLU EXPAND, to set the remaining plu data 21~28. 22. Unit Weight It set the Unit Weight of Price.
- Page 31 27. Barcode2 No. 28. Special Price (For future use) 29. Fixed Weight The weight of an item is fixed. • If you do not want to use, enter 0. EX) Do not use Fixed Weight 30. SAVE PLU • It’s same function as pressing “SAVE”. 31.
-
Page 32: Create By-Count Plu (Menu Code 1120)
2.1.2 Create By-Count PLU (Menu code 1120) ( MENU → 1. PLU → 2. New/Edit ) (1120 + “MENU” key) ◆ You can press the SAVE key at anytime to save the current PLU data and if you want to exit without saving, press the ESC key. ◆... -
Page 33: Create By-Pcs Plu (Menu Code 1120)
2.1.3 Create By-PCS PLU (Menu code 1120) ( MENU → 1. PLU → 2. New/Edit ) (1120 + “MENU” key) ◆ You can press the SAVE key at anytime to save the current PLU data and if you want to exit without saving, press the ESC key. * Please refer to 2.1.1 for PLU DATA setting which was not mentioned in this chapter 2.1.3. - Page 34 5. Qty Unit No. • This field work to By-PCS PLU or By-Count PLU. EX) Qty Unit No. 6 6. Pieces • If you do not want to use, enter “0” This field work to By-PCS PLU.
-
Page 35: Editing Plu (Menu Code 1120)
2.1.4 Editing PLU (Menu code 1120) ( MENU → 1. PLU → 2. New/Edit ) ◆ You can edit PLU as PLU creating and you can press the SAVE key at anytime to save the current PLU data and if you want to exit without saving, press the ESC key. 2.1.5 Expand PLU (Menu code 1144) ( MENU →... -
Page 36: Programming Plu Data Table I
Programming PLU Data Table I 2.2.1 New/Edit Sales Message (Menu code 1240) ( MENU → 2. PLU Data Table I → Sales Message ) You can press the SAVE key at anytime to save the current data and if you want to exit without saving, press the ESC key. -
Page 37: Origin (Menu Code 1250)
2.2.2 Origin (Menu code 1250) ( MENU → 2. PLU Data Table I → Origin ) You can use origin number when you create PLU. ◆ You can press the SAVE key at anytime to save the current data and if you want to exit without saving, press the ESC key. -
Page 38: Barcode (Menu Code 1260)
2.2.3 Barcode (Menu code 1260) ( MENU → 2. PLU Data Table I → Barcode ) You can use barcode when you create PLU. Barcode can be changed depending on the Global setting of barcode. ◆ You can press the SAVE key at anytime to save the current data and if you want to exit without saving, press the ESC key. - Page 39 Display that Press Backspace key. • Barcode format symbol Symbol Description item code PLU number price price check digit (It is created automatically) unit price weight quantity department group total barcode check sum (It is created automatically) transaction counter (serial number)
-
Page 40: Tare (Menu Code 1270)
4. Save Menu • If you want to save, press “PRINT” key. 2.2.4 Tare (Menu code 1270) ( MENU → 2. PLU Data Table I → Tare ) ◆ You can press the SAVE key at anytime to save the current data and if you want to exit without saving, press the ESC key. -
Page 41: List Unit Symbol (Menu Code 1280)
2.2.5 List Unit Symbol (Menu code 1280) ( MENU → 2. PLU Data Table I → Unit Symbol ) ◆ You can press the SAVE key at anytime to save the current data and if you want to exit without saving, press the ESC key. 1. -
Page 42: Programming Plu Data Table Ii
Programming PLU Data Table II 2.3.1 Ingredient (Menu code 1310) ( MENU → 3. PLU Data Table II → Message ) ◆ You can press the SAVE key at anytime to save the current data and if you want to exit without saving, press the ESC key. ◆... -
Page 43: Speed Key Setting
Speed Key Setting This menu is to set “speed keys”, one-touch keys, for most frequently used PLUs to simply call up them. You can program up to 5 speed key set. Remember that there is a SHIFT key that allows you to double-use the Speed Keys. The Speed keys are numbered left-to-right and top-to-bottom. -
Page 44: Programming Store Data
Programming Store Data This chapter explains how to access, program STORE data table (Price Look Up) in CL5000J series. 2.5.1 Store Data (Menu code 1410) ( MENU → Store Data Table → Store ) This section shows how to create, edit, list and delete store, customer, and advertisement message data. -
Page 45: Programming Global Setting
Programming Global Setting 2.6.1 Global Label Format (Menu code 1510) ( MENU → Global Setting → Label Format ) Label format #51~#60 are free formats that users may modify at their needs. Users may download one into the scale and set a specific free label format. ◆... -
Page 46: Barcode Format (Menu Code 1520)
2.6.2 Barcode Format (Menu code 1520) ( MENU → Global Setting → Barcode ) Global Barcode Setting provides all-in-one barcode setting by selecting nine different barcode options so that user does not need to save data for individual PLUs one by one. All related barcode data are selected and saved from PLU barcode data table user may already register. -
Page 47: Printing Programming
Printing Programming This chapter explains how to set printing-related environments. 2.7.1 Printing (Menu code 1700) ( MENU → Print ) ▶ PRINT Submenu Sub-menus Description Select Label Item Select item(s) which is(are) not printed on label. Print Hardware Set the label type and sensor of printer 2.7.2 Inhibit(Select) Printing Items(Menu code 1710) ( MENU →... -
Page 48: Printer Hardware (Menu Code 1730)
2.7.3 Printer Hardware (Menu code 1730) ( MENU → Print → Printer Hardware ) This section is to explain how to set printing H/W environments in the following table. ▶ Printer Hardware Sub-Menu Sub-menus Description Lable mode “Height(40) Label Size * ( ) are default value. -
Page 49: Print Intensity (Menu Code 1735)
( MENU → Print → Printer Hardware → Peel ) You can select [Y], [N] for “ACTIVE PEEL-OFF”. Selecting [Y], printer didn’t work until you take off former printed label. But [N], when you press print key, label was print out by compulsion. 2.7.7 Print Intensity (Menu code 1735) ( MENU →... -
Page 50: Programming Scale Configuration
Programming Scale Configuration 2.8.1 Department (Menu code 1830) ( MENU → Scale Config → Department ) This section shows how to select current department where scale is being used. User can use (call up) PLUs only for current department selected in sales mode. For example, if current department selected is 2(GROCERY) user can call up items registered only in 2(GROCERY) department. -
Page 51: Date & Time (Menu Code 1840)
2.8.2 Date & Time (Menu code 1840) ( MENU → Scale Config → Date/Time ) This section is to set scale’s DATE & TIME appropriately. You can use and number pad. Year 2.8.3 Change Password (Menu code 1852) ( MENU → Scale Config → Change Password ) 2.8.4 Display Test (Menu code 1861) ( MENU →Scale Config →... -
Page 52: Printer Sensor Test (Menu Code 1865)
2.8.8 Printer Sensor Test (Menu code 1865) ( MENU → Scale Config → Test → Printer Sensor ) User may exit from this menu, using “X/ESC” key. 2.8.9 Scale Parameter (Menu code 1870) ( MENU → Scale Config → Printer Hardware → Scale Parameter ) You can set scale’s environment by changing Parameter Values. -
Page 53: Clear Table1 (Menu Code 1892)
2.8.10.2 Clear Table1 (Menu code 1892) ( MENU → Scale Config → Clear Memory → Table1 ) Clear all Table1 date(Except PLU/discount data). 2.8.10.3 Clear Table2 (Menu code 1893) ( MENU → Scale Config → Clear Memory → Table2 ) Clear all Table2 date(Except PLU/discount data). -
Page 54: Report
Report 2.9.1 Report Menu (Menu code 1600) ( MENU → Report ) Sub-menus Description Report Print Print and display sales data Clear All Clear all reports of period 1 and 2 2.9.2 Print Report (Menu code 1610) ( MENU → Report → Print Report ) There are 3 detailed reports. -
Page 55: Plu Report (Menu Code 1612)
2.9.4 PLU Report (Menu code 1612) ( MENU → Report → Print Report → PLU Report ) Press “Print” key PLU report menu screen. Enter the number of Deprment and Press “Print” key. Enter the number of PLU and Press “Print” key. This menu print out information of each PLU data. -
Page 56: Deptment Report (Menu Code 1615)
Enter the number of Group and Press “Print” key. This menu print out information of each PLU Group data. 2.9.7 Deptment Report (Menu code 1615) ( MENU → Report → Print Report → Department ) Press “Print” key PLU report menu screen. Enter the number of Department and Press “Print”... -
Page 57: Clear All Report (Menu Code 1650)
2.9.9 Clear All Report (Menu code 1650) ( MENU → Report → Clear All ) You can delete all of report. If you delete all, then scale will create new report data. When you print out report later, updated report will be printed... -
Page 58: Communicaation
Communicaation 2.10.1 Communication (Menu code 1900) ( MENU → Communication ) 1. Feature You can control scale with PC or any computing environment,to do work such as data table up/down loading, deleting. 2. Pre-caution Set each Scale ID different (for individual scale management) Especially for report f eature in CL-Works needs individual scale ID to locate report data. -
Page 59: Network Setting (Menu Code 1910)
4. Before setting the network ■ Each scale needs fixed IP address. ■ Do not use DHCP without prior notice to CAS. If so CL-Works will not able to retract the right scale because access IP address will change constantly. -
Page 60: Ip (Menu Code 1913)
Change setting with keys. 2.10.4 IP (Menu code 1913) ( MENU → Communication → Network Setting → IP ) Setting IP and Port Set IP address and Port Scale need to have own TCP/IP NOTE: Recommend to get this information from authorized network management person. -
Page 61: Sales Operation
Basic Operation This chapter explains basic operation of scale, such as how to set zero, tare, call up a PLU and override unit price in CL5000J series. In order to make sales transaction user should access REGISTRATION mode. ■ How to access REGISTRATION MODE: Turn ON the scale. -
Page 63: Tare
Tare You can enter tare weights as long as there are no PLUs or MISC PLUs called-up. If you need to temporarily override a PLU’s tare weight, you must enter the tare weight first and then call-up that PLU. There are two ways to enter a tare weight and both ways will only work if there is no PLU or MISC PLU called-up. -
Page 64: How To Clear Tare
② Press “TARE” key. 3.3.3 How to Clear Tare ① Remove the item from the platter ② Press “TARE” key again. 3.3.4 Preset Tare ① Call up a PLU including tare (weight of container). EX) PLU #3 s tare =150 g... -
Page 65: Successive Tare
② Clear PLU#3, then tare is also automatically cleared. 3.3.5 Successive Tare ① Enter tare (weight of container) using numeric keys. EX) 150 g ② Enter the weight of container using numeric keys. EX) 200 g ③ Press “TARE key after removing item and container from the platter. 3.3.6 Tare Override ①... -
Page 66: Calling Up A Plu
② Place the container (Weight of container must be greater than weight data input) for TARE OVERRIDE. ③ Pressing “TARE” key overrides current PLU tare (weight of container) and the weightbecomes “O”. Calling Up a PLU There are two ways to call up a PLU by using numeric key and preset key. 3.4.1 Using Numeric Key ①... -
Page 67: Override (For Key)
Override (FOR key) The OVERRIDE key is used to temporarily change the pricing of priced PLUs. ☞ If you set program menu 1873(Save unit price change), changed priced is saved after printing a label. ☞ If Para 534 : Default UnitWeight is different from unit weight of PLU, “Multiple Unit PLU”... -
Page 68: By-Count Plu
3.5.2 By-Count PLU - PLU# 2.APPLE ( PLU Type : By count, Unit Price : 1.00$). ① Press OVERRIDE key. ② Enter QUANTITY and press FOR key. ③ Enter new unit price. ④ Enter QUANTITY and press FOR key. -
Page 69: By-Pcs Plu
3.5.3 By-PCS PLU - PLU# 3.Eggs ( PLU Type : By PCS, Pieces : 3, Unit Price : 30.00$). ① Press OVERRIDE key. ② Enter QUANTITY and press FOR key. ③ Enter PIECES and press FOR key... - Page 70 ④ Enter new unit price. ⑤ Press PRINT key to print label.
-
Page 71: Sales Operation
Sales Operation 3.6.1 Weighed Item Operation EXAMPLE: - PLU No : 29, PLU Name: ONION, PLU type : by weight, Unit Price : 1.50$, - Sales Weight =1.0kg ① Press Speed key to call up a PLU. • User may call up a PLU by pressing speed key or numeric key. Please refer to chapter 3.4 for details. -
Page 72: By Count Item
④ Remove the item(s) from the platter. * Total Price= Sales weight X Unit price Note: - In “SAVE” & “Prepack” mode the PLU is not automatically cleared when you remove the item from the platter. - If you set “PLU clr Aft sale(WT.OnTray)” to “Y” in Menu 1873, PLU is cleared even though you do not remove the item from the platter. -
Page 73: By Pcs Item
③ Press “PRINT” key to print a label and complete current transaction. This transaction(s) is saved in the sales record. * Total Price= Piece(s) X Unit price Note: - In “SAVE” & “Prepack” mode, the PLU called up is not automatically cleared when you remove the item from the platter. - Page 74 ③ Press “PRINT” key to print a label and complete current transaction. This transaction(s) is saved in the sales record. * Total Price= QUANTITY X [Unit price / PIECES] Note: - In “SAVE” & “Prepack” mode the PLU is not automatically cleared when you remove the item from the platter.
-
Page 75: Add-Up Transaction
Add-Up Transaction If you press the ADD key instead of the PRINT key, you will initiate the ADD-UP process. You can ADD-UP 399 items maximum. EXAMPLE 2: - PLU# 32=SIRLOIN, PLU Type = By-Weight, Unit Price=20.00, - PLU# 35=T-bone Steak, PLU Type = By-PCS, Pieces=3, Unit Price=6.00 ①... - Page 76 ④ Press ADD key. PLU is cleared automatically. You will see the display as below. ⑤ To complete the sale, press the PRINT key. (To repeat the ADD-UP process, press the ESC key.) Note: - You can press the VOID key to undo the transaction. (See chapter 3.10). - If you set “Print Item Label”...
-
Page 77: Void
Void TYou can press the VOID key to undo transaction in add-up process or floating clerk operation. Assumption) You sold several items ◆ If there is some PLU and some price to void ① Press ST/TTL key ② Press VOID key then last sale is cleared. -
Page 78: Return
Return The RETURN key is used to delete erroneous sale transactions. You can use the RETURN key to undo erroneous sales transactions like pressing the PRINT key inadvertently, selecting and printing the wrong PLU, an inadvertent Auto-Print in Pre- Pack mode, or perhaps adjusting the sales totals for a damaged or ruined package. Whatever the reason, the RETURN function will decrement returned PLU’s transaction counter and sales totals by the specified amount. -
Page 79: Prepack Key
Prepack Key When the scale is in Pre-Pack mode, it prints labels automatically. When it is in MANUAL mode, you must press the PRINT key (or ADD key) to get a label. In Pre- Pack mode, you cannot select AUTO mode. Pre-Pack works like AUTO and SAVE mode except that the weight does not need to return to zero for every auto-print. - Page 80 ③ Label is issued automatically. Note: If the scale is in Prepack mode then it will always auto-print if the Total price is greater than 0.00 and:...
-
Page 81: Direct Discount
Direct Discount If there is no discount information in PLU, you can use this function. 3.11.1 % Discount Price Key ① Place item on the platter and Call up a PLU(#1.APPLE) and press “%Discount” key ② ② Enter % amount to discount and press PRINT key Ex) 20% ③... -
Page 82: Appendix
4. Appendix Label Format There are fixed label format and user label format Fixed Label Format User Label Format 1~30 51~60 Quantity Method Built in CL5000J Download from PC You cannot edit format. Using the PC program, you can program format numbers Features 51 to 60. - Page 85 *Total Label...
-
Page 86: Fixed Label Format Sample
Fixed Label Format Sample (1) Label sample 1 ▶ (2) Label sample 2 ▶... -
Page 87: Label Field
Label Field Label Format has several fields and each field has own ID. Item label print the information of each PLU sale and Total label print the information of grand total of PLUs. 4.3.1 Item Label Field Item Field ID Description Department Name Print department name. - Page 88 Unit Price Print unit price when it is not applied Markdown Print total price when it is not applied Total Price Markdown Label Serial Print label serial number Store Name Print store name Store Tel Print Telephone numer of store Store Text Print information of store.
-
Page 89: Ascii Code Table
ASCII Code Table Microsoft Window Codepage 1252 Note: To enter “A”, first you have to read 40 in a row and 01 in a column and type 41. -
Page 90: Window Character Set Information
Window Character Set Information... - Page 91 MEMO...
- Page 92 MEMO...
- Page 93 MEMO...
- Page 95 뒷표지...
Need help?
Do you have a question about the CL5000J series and is the answer not in the manual?
Questions and answers