Geeetech A30 User Manual
Hide thumbs
Also See for A30:
- Building instructions (19 pages) ,
- User manual (53 pages) ,
- Manual (12 pages)
Table of Contents
Advertisement
Advertisement
Table of Contents

Subscribe to Our Youtube Channel
Related Manuals for Geeetech A30


Summary of Contents for Geeetech A30
- Page 1 GEEETECH A30 3D Printer —User Manual—...
-
Page 2: Table Of Contents
Contents Terms ................................2 Safety and Compliance ........................... 4 About Geeetech A30 ..........................6 Introduction to the Menu of the Control Panel ..................7 Home Page ..........................7 Control ............................8 Home ..........................8 2.2.1 Move ..........................9 2.2.2 Fan ..........................11 2.2.3... -
Page 3: Terms
All information in this Manual is subject to change at any time without notice and is provided for convenience purposes only. Geeetech reserves the right to modify or revise this Manual in its sole discretion and at any time. You agree to be bound by any modifications and/or revisions. - Page 4 Geeetech assumes no responsibility, nor will be liable, for any damages to, or any viruses or malware that may infect your computer, telecommunication equipment, or other property caused by or arising from your downloading of any information or materials related to Geeetech products.
-
Page 5: Safety And Compliance
Safety and Compliance Radio and Television Interference This equipment has been tested and found to comply with the limits for a Class B digital device, pursuant to Part 15 of the Federal Communications Commission (FCC) rules. These limits are designed to provide reasonable protection against harmful interference in a residential installation. - Page 6 In case of emergency, please disconnect the Geeetech A30 from the wall socket. Caution: The Geeetech A30 melts plastic during printing. Plastic odors are emitted during this operation. Make sure to set up the Geeetech A30 in a well-ventilated area.
-
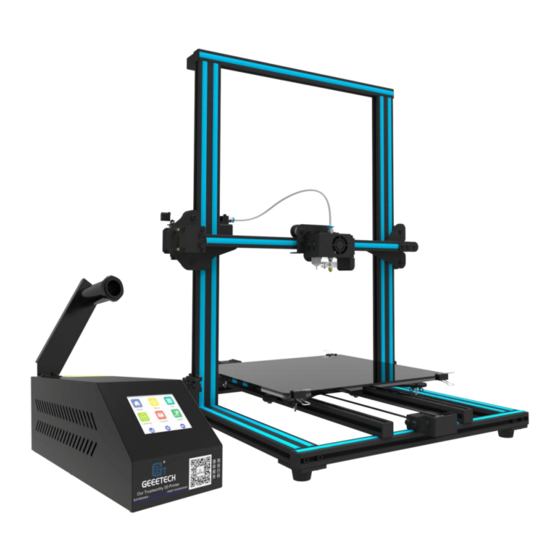
Page 7: About Geeetech A30
In addition, after assembling a Wi-Fi module, you could use App to remote control A30, enjoy a large number of free 3D models and share your fascinating printing moments with others. It is also practical for beginners and pros to control... -
Page 8: Introduction To The Menu Of The Control Panel
2. Introduction to the Menu of the Control Panel 2.1 Home Page After you start Geeetech A30, on the touch screen will appear the home page, showing three main menu functions: control, printing and setting. Click on the three menus... -
Page 9: Control
2.2 Control Click the [Control] menu to enter the corresponding interface, where it is convenient to manually control the 3D printer by means of the following functions: home, move, fan, leveling, filament and speed, as shown by the picture below. 2.2.1 Home... -
Page 10: Move
1) When the printer is running with a TF card or connected with a computer, clicking on the [Home] menu is disabled. This situation also applies to the [Disable] status of the stepper motors. 2) When the printer is idle, you can click to home X/Y/Z axis respectively. - Page 11 stepper motors. 2) When the printer is idle, X-: X axis moves away from the end stop; X+: X axis moves towards the end stop; Y-: Y axis moves away from the end stop; Y+: Y axis moves towards the end stop. : The motor of Z axis moves upward;...
-
Page 12: Fan
b. Switch the button to [Disable] to enable the motors. Under this condition, you can manually adjust the position of X/Y/Z axis and home the printer. The display of the coordinates of the X/Y/Z axis 1) When the motors are disabled, the 888.8 icon indicates that the coordinates are unknown. -
Page 13: Leveling
5 at every click. 2.2.4 Leveling For your first time to use manual leveling function, you need to enter the leveling interface by clicking , and choose auto level icon to turn off the switch on the auto-leveling interface, as shown in the picture. - Page 14 Then return to the former interface to choose the manual level icon . The following part shows how to manually level the build platform with 5 point leveling method. 1) When the printer is running with a TF card or connected with a computer, the leveling function is unavailable.
-
Page 15: Filament
distance between the printing head and the build platform. b. Choose 1: Z axis rises to Z=10mm and the extruder moves to point 1. And then the printing head moves to Z=0mm. Use a piece of A4 paper to check the distance between the printing head and the build platform. -
Page 16: Setting
2.3 Setting Choose [Setting] on the home page to visit the following interface, composed of the relevant settings for Wi-Fi connectivity, language, screen calibration, about Geeetech A30, factory default, etc. 2.3.1 Wi-Fi Connectivity This sub-interface shows the Wi-Fi switch, SSID, IP address, the IP of the server and the... -
Page 17: Language
Wi-Fi connectivity interface will display the relevant information. When all the configurations are successful, the Wi-Fi icon will turn into green 2.3.2 Language Geeetech A30 is compatible with two languages: Chinese and English. You could switch to the corresponding language for your need. -
Page 18: Calibrating The Touch Screen
2.3.3 Calibrating the Touch Screen The touch screen may have errors in terms of its displaying effects, for the reason of long-time usage. But no worries! It is effective to calibrate the screen via the calibration function. to enter the [screen calibration] mode. Click the ―+‖ on the screen, Click according to the prompts. -
Page 19: About
2.3.4 About Choose [About] to visit the [Info] interface, where you could check the relevant information about Geeetech A30, as shown by the picture below. 2.3.5 Factory Default 1) [Factory Default] is disabled, when the printer is running with a TF card or connected with a computer, or it stops working temporarily. - Page 20 Click the [Factory Default] button , and a prompt box will appear, as shown by the picture below. Choose [Yes]: restore factory and restart the printer. Choose [No]: return to the [settings] interface.
-
Page 21: Leveling The Build Platform
3. Leveling the Build Platform Step1. Choose [Leveling] icon to enter the interface to start to level the build platform. Meanwhile the motors will be homed and Z axis will move downward to Z=10mm. Step 2. Coarse leveling. Click the leveling point 5, the extruder will move to the fifth point. - Page 22 If you cannot feel a little bit friction at all, it means the distance between the nozzle and build platform is too far and the adhesion of filament to the platform will be not guaranteed. You need to click the downward icon to move the Z axis down in order to reduce the distance between the nozzle and the build platform.
-
Page 23: Start To Print
After restoring factory settings, we suggest you check the height of the nozzle and platform. 4. Start to Print Geeetech A30 could be used under three conditions: printing with EasyPrint 3D, stand-alone printing with a TF card and printing via Wi-Fi connectivity. -
Page 24: Connect Geeetech A30
If you can‘t find the COM, please check if the power switch is turned on or the USB cable is well connected. 3. Select your printer. Click the [printer] menu on the top left and choose the printer type as Geeetech A30. -
Page 25: Slice And Print
3D model and begin to print. 4.1.2 Slice and Print The file format of the model file for 3D printer is usually .stl. Geeetech A30 supports the following file format: STL, G-code. You can download models on the internet for printing. - Page 26 2) Print settings: click the [print settings] menu and modify the relevant parameters. Here we take the [Quick] mode as an example. Choose the [Quick] mode, set the printing quality as [Standard] and take the parameters like [Infill], [Extruder temperature] and [Layer height] by default. Select the [Support] button, according to your printing need.
- Page 27 3) Click [slicer] in the menu to slice the .stl file. You can observe the slicing time in the following picture. Upon slicing, you get the .gcode file.
-
Page 28: Stand-Alone Printing With A Tf Card
4.2 Stand-alone Printing with a TF Card Geeetech A30 can run stand-alone with a TF card, untethered to your computer. All you need to do is save 3D models in the TF card for printing. Here are the detailed procedures. - Page 29 2) Click the [Save] button to save the .Gcode file in TF card, as shown in the picture below. Note: The .Gcode file shall be kept in the root file of TF card, or the printer can‘t recognize the file.
- Page 30 3) Insert the TF card into the slot on the control box of Geeetech A30. 4) Click the [Printing] button on the home page of the touch screen.
-
Page 31: Printing Via Wi-Fi Connectivity
5) Choose your 3D model file from the file list and click [Print]. 4.3 Printing via Wi-Fi Connectivity After your successful configuration of a Wi-Fi module, Cloud 3D printing solution conveniently provides you with EasyPrint 3D App to enjoy free 3D models by just slightly pressing to start your printing journey. -
Page 32: Install Easyprint 3D App
Install EasyPrint 3D APP Download the EasyPrint 3D APP here and install the EasyPrint 3D App. www.geeetech.com/firmware/EasyPrint3D_Android.apk You could also download EasyPrint 3D App on Google Play and App Store. Once finishing installation, enter Me to register and log in. - Page 34 Step 3. Click [Register Now] and a pop-up interface will appear for your to check your email.
-
Page 35: Bind Printer To Easyprint 3D App
Step 4. Click OK and check your email. Log in with your account information. Note: As the EasyPrint 3D APP is continuously upgraded, some UI and workflow may be different, please follow the APP. 4.3.2 Bind printer to EasyPrint 3D App —... - Page 36 Step 3. Click the button in the picture below to enter the serial number manually.
- Page 37 Step 3. Click “Next”and the picture below will pop up to inform you that the binding process is successful.
-
Page 38: Wi-Fi Configurations
4. Then you will see the following interface, showing that the printer is off-line. That‘s the whole binding process. In the next part, we will finish the Wi-Fi configurations step by step. Be patient~ 4.3.3 Wi-Fi Configurations Detailed configuration procedures for Wi-Fi connectivity are as follows: Step 1. - Page 39 Step 2. Turn on Wi-Fi and click the button [Set] to enter the Config mode, as shown in the picture below.
- Page 40 Step 3. Open EasyPrint 3D App and click [Print]. At the page of pop-up, click the button“Wi-Fi” to enter Wi-Fi configuration, as shown in the picture below. Step 4. Click [Next] to start to detect Wi-Fi built in the printer. If the Wi-Fi is detected, you could see the following picture.
- Page 41 For Apple phone users, you will first see the Wi-Fi setting interface. Click Wi-Fi button to...
- Page 42 enter the Wi-Fi list interface. If the Wi-Fi signal is not detected, a prompt “Printer Wi-Fi is not detected” will pop up. Click [OK] and again click [Next] to re-detect the Wi-Fi signal.
- Page 43 Step 5. Choose the“GT_printer” hotspot, as shown in the picture.
- Page 44 Step 6. After successfully connecting GT_printer hotspot, you will the follow interface. Enter the WLAN name and password of your router. Click [OK] to connect your Wi-Fi. Step 7. When you succeed in connecting the Wi-Fi, the interface will show that the configuration is finished, as shown in the picture below.
- Page 45 Step 8. Then on the printer the interface returns back to the control panel. You can see the prompt, as shown in the picture below. Click the button“OK”on control panel, the interface will skip to Wi-Fi interface. The Wi-Fi icon will turn green on Wi-Fi interface. Meanwhile, SSID, IP Address and Server on this interface will display the relevant information, as shown in the picture below.
- Page 46 Note: If you choose a Wi-Fi hotspot without password, click ―Next‖ and continue your setting from step7. During the above config process, your Phone is connected to the GT-printer wifi hotspot, which has no access to the internet connection. So you will be logged out. After your successful config., your phone will be connected to your previous network automatically.
-
Page 47: Printing From Cloud Library
4.3.4 Printing from Cloud Library As above, once the configuration between APP and the printer is successful, you can start to print. Note: A TF card is still needed when print via Wi-Fi to save the files. 4.3.4.1 Printing from Cloud Gallery Step 1.Click Community——... - Page 48 Enter the model page; choose your favorite model, let‘s take the ―Rose‖ as an example:...
- Page 49 Enter the [Model details] page, click the button ―Print‖ here, you can preview to the model You can make some simple operations to the model on the screen with fingers, such as, zooming, rotating or moving.
- Page 50 Click the ―Print‖ button to start print. This will take a while to transfer the file from the cloud server to your printer. Please keep your wireless networks unimpeded. During the uploading, you can pause the uploading or give it up. Upon uploading, it will start printing after a while.
- Page 51 Step 1. Click [Community] to choose [SD card]. The interface will show the G.code files from A30 TF card. [Refresh] the interface, if there is no response. Step 2. Choose a model file and click [Print]. The interface will show the printing...
-
Page 52: Optional Add-On
5. Optional Add-on --- 3D Touch Auto-leveling 1) When the printer is running with a TF card or connected with a computer via a USB cable, the auto-leveling function is unavailable. This situation also applies to the [Disable] status of the stepper motors or moving the position of the extruder when... - Page 53 Before your auto-leveling operation, please make sure that the auto-leveling switch is on and the probe and nozzle are clean. When you turn on A30 and the switch for auto-leveling is on, the printer will be homed. Subsequently, the extruder moves down to the middle of the printing platform. The 3D Touch will test the Z coordinate of this position.
- Page 54 Click the button and the extruder will be homed. Then it moves down to the default test point. Adjust the nozzle‘s position in the Z axis by clicking the buttons to ensure appropriate distance between the nozzle and hotbed. Please choose small moving distance, for instance, 0.1mm and 1mm.
-
Page 55: Faq
3. If the first layer is unsatisfactory, please adjust the Z offset in an appropriate way. 6. FAQ As your deepening acquaintance with Geeetech A30 3D printer, you may meet different problems during the printing. The following are simple guidelines to help you easily solve some issues. - Page 56 This issue is a very common one for new 3D printer owners, but thankfully, it is also very easy to resolve! If your extruder is not extruding plastic at the beginning of your print, there are four possible causes. We will walk through each one below and explain what settings can be used to solve the problem.
- Page 57 2. Nozzle is too close to the bed If the nozzle is too close to the build platform, there will not be enough room for plastic to come out of the extruder. The hole in the top of the nozzle is essentially blocked so that no plastic can escape.
-
Page 58: Print Not Sticking To The Platform
6.1.2 Print Not Sticking to the Platform It is very important that the first layer of your print is strongly connected to the printer‘s build platform so that the remainder of your part can be built on this foundation. If the first layer is not sticking to the build platform, it will create problems later on. -
Page 59: Stringing Or Oozing
sure that plastic can be properly attached to the surface before starting the next layer. If you print the first layer too fast, the plastic may not have time to stick to the build platform. To solve this problem, it is typically very useful to print the first layer at a slower speed. EasyPrint 3D provides a setting for this exact feature. - Page 60 Troubleshooting 1. Retraction distance The most important retraction setting is the retraction distance. This determines how much plastic is pulled out of the nozzle. In general, the more plastic that is retracted from the nozzle, the less likely the nozzle is to ooze while moving. Most direct-drive extruders only require a retraction distance of 0.5-2.0mm, while some Bowden extruders may require a retraction distance as high as 15mm due to the longer distance between the extruder drive gear and the heated nozzle.
-
Page 61: How To Upgrade The Firmware
The specific method is as follows: 1. Connect your Geeetech A30 to the computer with the USB cable. 2. Turn the printer on. 3. In Easy Print 3D, choose the COM port and the printer type. - Page 62 After clicking the [upgrade firmware] tab, a window will pop up with the information of printer type and port, the current firmware version installed, the available version and the update summary of the latest firmware. Click updates and confirms updating, the progress bar will turn green, and the firmware will be updated automatically.
-
Page 63: Fail To Complete The Wi-Fi Configuration
Click ‗ok‘ and ‗Close‘ on the windows to complete the firmware upgrade. 6.3 Fail to Complete the Wi-Fi Configuration Tips: 1) At ④, if the Wi-Fi built in the printer could be detected, please exit from Set mode, turn the button Wi-Fi off and turn it on again. Enter the Set mode to continue the configuration. -
Page 64: Specifications Of Geeetech A30
3) At ⑥, if a prompt of configuration fails to appear, please start again to make the configuration. 4) If you have any questions, please contact with our technical support. 7. Specifications of Geeetech A30 Printing parameters Printing technology: FDM Build volume: 320*320*420mm Printing accuracy: 0.05mm... -
Page 65: Contact Us
Machine Net weight: 10.12 kg Machine Gross weight: 12.56 kg 8. Contact us 1. There are lots of documents and troubleshooting for GEEETECH A30 on our website. They are good resources if you would like to quickly solve problems by yourself.
Need help?
Do you have a question about the A30 and is the answer not in the manual?
Questions and answers