Table of Contents
Advertisement
Advertisement
Table of Contents

Subscribe to Our Youtube Channel
Related Manuals for Geeetech A10


Summary of Contents for Geeetech A10
- Page 1 Geeetech A10 Desktop 3D Printer ——USER MANUAL——...
- Page 2 Do read all the instructions and cautionary markings in this manual before operating your A10 3D printer. A10 3D printer contains heated moving parts. Never reach inside the printer while it is in operation or before it has cooled down.
-
Page 3: Table Of Contents
Content About A10 3D Printer...................................1 Preparation....................................2 1. Check Power Supply................................3 2. Software Resources.................................. 3 2.1 Repetier-Host..................................3 2.2 Arduino IDE................................... 3 2.3 Firmware..................................3 3. USB Driver Installation................................4 3.1 USB Driver Installation for Win7 OS..........................4 3.2 USB Driver Installation for Mac OS..........................4 4. - Page 4 9.5 Printing quality optimization............................51 10. Specifications..................................51 11. Contact us..................................... 53...
-
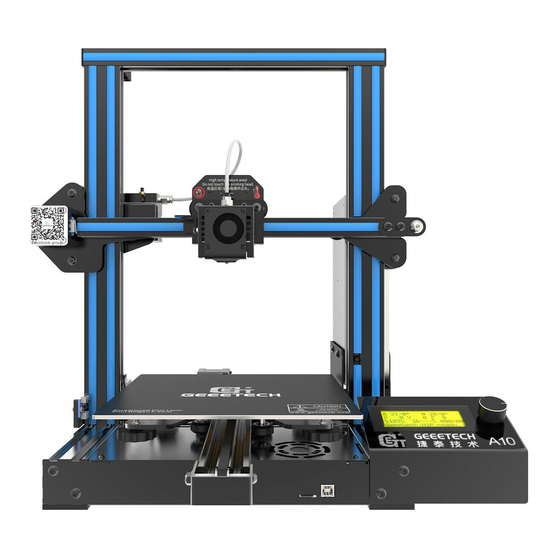
Page 5: About A10 3D Printer
Keeping Prusa I3 3D printers’ gantry structure and with its build volume as 220*220*260mm ³, A10 makes the best of the building platform and gives you a full view of the printing details. Its well-designed extruder greatly reduces the risk of clogging or leaking. -
Page 6: Preparation
Step 2. Remove A10 3D printer from foam box and set it down on a stable surface. Note: You will see a printing residue on the printing platform, which indicates your A10 has already gone through the 24 hours aging test, you can feel free to use. -
Page 7: Check Power Supply
1. Check Power Supply The power supply unit and control board of A10 are installed in the bottom of the printer, saving space, as well as lowering the gravity center of the printer to provide stable support for printing. The printer uses DC24V, 15A power supply. -
Page 8: Usb Driver Installation
3.1 USB Driver Installation for Win7 OS Power the A10 up and connect it to computer with the USB cable, the driver will be installed automatically. After installation, please enter Device manager and find the USB Serial Port which is the communication port for the printer and computer. -
Page 9: Set Up Repetier Host
Repetier Host. Choose the language as English. When you start Repetier Host for the first time, you need to set up parameters for A10. Click the Printer Settings on the top right corner, you will be presented with the following window. -
Page 10: Create New Printer
SHENZHEN GETECH TECHNOLOGY CO,.LTD 4.1 Create New Printer Click “Printer Setting” and you see a drop down box, with the currently selected printer. At the start you have only the default printer. To create a new printer you only need to change the printer name and press “Apply”. -
Page 11: Connection
SHENZHEN GETECH TECHNOLOGY CO,.LTD There are six tags in Printer settings in total. Detailed configurations of the 4 relevant tags are as follow. 4.2 Connection In this first tab, we will introduce how to connect your printer with the software. Port:... - Page 12 SHENZHEN GETECH TECHNOLOGY CO,.LTD Note: If the operating system is Mac OS, please set the baud rate of the firmware and Repetier Host as 115200. Open the firmware in Arduino, and modify the baud rate to 115200 in Configuration.h. Shown as following picture.
-
Page 13: Printer
SHENZHEN GETECH TECHNOLOGY CO,.LTD After successfully modifying the baud rate in firmware, change the baud rate in Repetier-Host to 115200 as well. About how to upload the firmware, please refer to FAQ. Note: After re-uploading the firmware, you may need readjust the motor direction of the printer. detailed methods please refer to following motor testing part. -
Page 14: Extruder
SHENZHEN GETECH TECHNOLOGY CO,.LTD Set the parameters as shown in the picture Travel Feed Rate: 3000 mm/min Z-axis Feed Rate: 100mm/min We suggest you to cancel the option of Go to Park Position after Job/Kill, or it may cause that the print head impacts the printed model when it moves to starting position after finishing printing. -
Page 15: Printer Shape
SHENZHEN GETECH TECHNOLOGY CO,.LTD Number of the extruder: 1 Diameter of the extruder: 0.4mm 4.5 Printer shape The “Printer Shape” tab defines your printer shape, or to be more exact the shape of your build area. The host will use this to limit your moves and to check, if your models fit onto the print bed. You can also define the position of the x and y end stop. - Page 16 SHENZHEN GETECH TECHNOLOGY CO,.LTD X Min:0 X Max: 220 Bed Left: 0 Y Min:0 Y Max: 220 Bed Front: 0 Printing Area: 220 x 220 x 260 (length/width/height) So far the setting of A10 is finished.
-
Page 17: Connect The Printer
SHENZHEN GETECH TECHNOLOGY CO,.LTD 4.6 Connect the Printer After setting, click the connect button on the top left corner of main interface. When the button turns green, the connection is successful. -
Page 18: Function Testing
SHENZHEN GETECH TECHNOLOGY CO,.LTD 5. Function Testing The firmware of A10 is already uploaded based on Windows 7 operating system, and we have done debugging to make sure that every part of it can work normally. However, there may be unpredictable factors during transportation . - Page 19 SHENZHEN GETECH TECHNOLOGY CO,.LTD Open Repetier host and connect the printer. Turn on the power supply. Connect the printer. Click Home button , then the three axes will move towards the endstop in turn . After they touch the endstop they will move back for a short distance and then stop the movement.
- Page 20 SHENZHEN GETECH TECHNOLOGY CO,.LTD Home position is in the left front corner of the printing platform.
- Page 21 SHENZHEN GETECH TECHNOLOGY CO,.LTD Note: origin point is the left front corner of the platform when printing. So when the printer is at home position, the coordinates of X/Y/Z axis are: X=0mm, Y=0mm,Z=0mm. As a result:...
- Page 22 SHENZHEN GETECH TECHNOLOGY CO,.LTD If the moving direction is reverse, you can alter the direction in the firmware. Please refer to FAQ. Tips: In manual control, the high-light part of the panel stands for the current selected direction, and it moves 1mm every click.
- Page 23 SHENZHEN GETECH TECHNOLOGY CO,.LTD...
- Page 24 SHENZHEN GETECH TECHNOLOGY CO,.LTD...
-
Page 25: Heating Test
SHENZHEN GETECH TECHNOLOGY CO,.LTD 5.1.2 Heating Test Click the heating button of the hot bed and the extruder . When the slash disappeared as shown below, it indicates the heating is ongoing and you can see the value rise up. -
Page 26: Extruder Test
SHENZHEN GETECH TECHNOLOGY CO,.LTD Meanwhile you can see the temperature at the bottom status bar of Repetier Host. 5.1.3 Extruder test Now we are to test if the extruder could extruder filamnet smoothly. Since the printer was homed just now, the nozzle is close to the building platform. - Page 27 SHENZHEN GETECH TECHNOLOGY CO,.LTD Please note: It is set in the firmware that the extruder will not work before the temperature reaches above 170℃. Therefore, please heat the extruder above 200℃ before testing the extruder. Otherwise motor will not have any response. 1.
-
Page 28: Lcd Controller Test
SHENZHEN GETECH TECHNOLOGY CO,.LTD You can also click the button to manually test if the extruder works normally. The button on the right is for rapid feeding filament. It is seldom used. If the extruder cannot work normally or the extrusion is not fluent, please refer to FAQ. - Page 29 SHENZHEN GETECH TECHNOLOGY CO,.LTD 1. Press the knob: confirm or enter sub-menu 2. Rotate the knob: roll to choose options or change parameters LCD homepage: 1. Extruder temperature: current temperature/target temperature 2. Hotbed temperature: current temperature/target temperature 3. Current coordinates of X/Y/Z 4.
- Page 30 SHENZHEN GETECH TECHNOLOGY CO,.LTD Main functions of Prepare menu: 1. Disable steppers: unlock the motor so that you can move them freely. 2. Auto home: automatically homing of each axis 3. Preheat PLA: manually preheat the hotbed and the extruder before printing PLA 4.
-
Page 31: Use Lcd For Motor Test
SHENZHEN GETECH TECHNOLOGY CO,.LTD For other detailed functions please read the following introduction of function tests. 5.2.2 Use LCD for Motor Test After understanding the functions of LCD, press the knob on LCD to enter the sub-menu, and choose Prepare: Choose Auto home in menu to do home operation: If you want to move the motor, choose Move axis:... -
Page 32: Build Platform Leveling
SHENZHEN GETECH TECHNOLOGY CO,.LTD move 1mm to test each axis. Choose the axis you need to move: Move X/Y/Z/E. Rotating the knob can make each axis move. After testing each axis, if you want to unlock the motors, choose Prepare>Disable steppers: 6. - Page 33 SHENZHEN GETECH TECHNOLOGY CO,.LTD b. Disable the motors. Use a piece of A4 paper to measure the distance between the nozzle and the building platform. Move the printing head to the first corner and slide the paper back and forth. When the nozzle grabs the paper a little, it indicates the distance is proper.
-
Page 34: Slic3R Setting
SHENZHEN GETECH TECHNOLOGY CO,.LTD The proper printing effect of the first layer is like following picture: 7. Slic3r Setting So far we can begin printing. But in order to achieve better effect, we need set the slicing parameters such as the diameter of the filament, speed, layer height. -
Page 35: Printing Setting
7.1 Printing Setting Set the layer height and height of the first layer in the option of Print settings. The layer height of A10 can be between 0.05-0.3mm. Considering of precision and speed, 0.2mm is the most appropriate. Set the first... - Page 36 SHENZHEN GETECH TECHNOLOGY CO,.LTD You can set the printing speed here:...
-
Page 37: Filament Setting
SHENZHEN GETECH TECHNOLOGY CO,.LTD 7.2 Filament Setting Set the filament diameter and printing temperature in the tab of Filament settings. Here we use 1.75mm PLA. Usually the temperature of the print head is 195-210℃, the hot bed is 60-70℃. Here we set them as 200℃ and 65℃. -
Page 38: Printer Setting
SHENZHEN GETECH TECHNOLOGY CO,.LTD 7.3 Printer Setting Set the shape and size of the hot bed and the number of extruder in the option of Printer settings> General. Hot bed shape:... - Page 39 SHENZHEN GETECH TECHNOLOGY CO,.LTD Number of extruder: 1...
- Page 40 SHENZHEN GETECH TECHNOLOGY CO,.LTD At the same time, set the diameter of the print head as 0.4mm. (Input the actual diameter of your printer)
-
Page 41: Other Parameters
SHENZHEN GETECH TECHNOLOGY CO,.LTD Note: The three setting steps should all be saved. 7.4 Other parameters Except for above settings, parameters like speed are also important to the printing effect, which requires your long time using experience of 3D printing. Here we give you a reference setting, please download the attachment config.ini. - Page 42 SHENZHEN GETECH TECHNOLOGY CO,.LTD Direct to the file A10 PLA config.ini and open it.
- Page 43 SHENZHEN GETECH TECHNOLOGY CO,.LTD After you imported the config.ini file, click the save button to rename and save. Click to save in the tab of Print Settings: Note: All the three settings need to be saved in turn!
- Page 44 SHENZHEN GETECH TECHNOLOGY CO,.LTD Click to save in the tab of Filament Settings:...
- Page 45 SHENZHEN GETECH TECHNOLOGY CO,.LTD Click to save in the tab of Printer Settings:...
-
Page 46: Start Printing
So far the preparation work is finished. Next step is to load model, slicing and printing. The file format of the model file for 3D printer is usually .stl. A10 supports following file formats: STL, 3ds, obj, mf, dae, G-code. You can download models on the internet for printing, for instance, thingiverse. Of course you can also design your own creative models for printing. -
Page 47: Slicing
SHENZHEN GETECH TECHNOLOGY CO,.LTD 8.2 Slicing You can use the following button to enlarge, shrink or rotate it. - Page 48 SHENZHEN GETECH TECHNOLOGY CO,.LTD After setting the size, choose the slicing parameters which were imported before in the slicer window, and click “Slice with Slic3r”.
- Page 49 SHENZHEN GETECH TECHNOLOGY CO,.LTD Now the .gcode file which can be recognized by the printer is generated. Click “Print” button to start printing.
-
Page 50: Stand-Alone Printing With Sd Card
SHENZHEN GETECH TECHNOLOGY CO,.LTD 8.3 Stand-alone Printing with SD card If you want to use SD card to print, we can save g.code file into SD card for printing. Note: the printer can only recognize .gcode file, and it can not be put in any folder! 8.3.1 Save Click Save for SD Print, and choose save button in the dialog. -
Page 51: Printing
SHENZHEN GETECH TECHNOLOGY CO,.LTD 8.3.2 Printing Insert the SD card into the printer, choose corresponding .gcode file to print. Press the knob on LCD, enter the main menu, and choose the Print from SD. Choose corresponding g.code file to begin printing. Heating... -
Page 52: Faq
Arduino1.0.1 is recommended, and you can download it here: http://www.geeetech.com/wiki/images/a/a2/Arduino-1.0.1-windows.zip 2. The firmware for the printer A10 uses GT2560 control board. Download the firmware of A10 here: http://www.geeetech.com/forum/viewtopic.php?f=20&t=17046 After Arduino and firmware are downloaded, you can upload the firmware. First please connect the printer... -
Page 53: Upload The Firmware In Mac Os
COM port, and click upload button to upload the firmware. For detailed uploading process, please refer to: http://www.geeetech.com/forum/viewtopic.php?f=13&t=17181 9.1.2 Upload the firmware in Mac OS The way of installing driver and uploading firmware in Mac OS is similar with that in Win 7 OS. For... -
Page 54: Change The Motor Direction
SHENZHEN GETECH TECHNOLOGY CO,.LTD http://www.geeetech.com/forum/viewtopic.php?f=21&p=27952#p27952 9.2 Change the motor direction In the configuration.h tab of firmware, find the following codes. Change the true of corresponding axis into false or false into true, and save the firmware and upload it into the printer. (Because you don’t know the firmware which has been uploaded by the control board is true or false, it may be necessary to upload both of the two parameters.) -
Page 55: Motors Can't Work
SHENZHEN GETECH TECHNOLOGY CO,.LTD http://www.geeetech.com/forum/viewtopic.php?f=13&t=17037 9.3 Motors can’t work When your are testing the motors, if the motor of an axis has no response or can not work normally (the extruder can work when it is above 170 ℃ ), you need check whether the motor, motor driven board or voltage of this axis can work normally or not. - Page 56 SHENZHEN GETECH TECHNOLOGY CO,.LTD Positioning precision: X/Y:0.011mm. Z: 0.0025mm Printing speed: 180 mm/s (max) Filament diameter: 1.75mm Nozzle diameter: 0.4mm Filament: ABS / PLA /flexible PLA/wood-polymer/PVA/HIPS/PETG, etc. Temp: Max temp for hotbed: 100℃ Max temp for extruder: 250℃ Software resources Operating system: Windows, MAC, Linux Control software: EasyPrint 3D, Repetier-Host, Simplify 3D, Cura, Slic3r, etc.
- Page 57 Machine Net weight: 7.6kg Machine Gross weight: 9.45 kg 11. Contact us 1. There are lots of documents and troubleshooting for A10 on our website. They are good resources if you would like to quickly solve problems by yourself. Technical support 2.If you still can not solve problems yourself even...
- Page 58 SHENZHEN GETECH TECHNOLOGY CO,.LTD...
- Page 59 www.geeetech.com...
Need help?
Do you have a question about the A10 and is the answer not in the manual?
Questions and answers