Table of Contents
Advertisement
Quick Links
Download this manual
See also:
User Manual
Advertisement
Table of Contents
Troubleshooting

Related Manuals for Dalsa Spyder2


Summary of Contents for Dalsa Spyder2
- Page 1 Spyder2 Camera User’s Manual S2-1x-xxx40-xx-L 21-Aug-18 03-032-10091-06 www.teledynedalsa.com...
- Page 2 Spyder2 User’s Manual N otice © 2018 Teledyne DA LSA A ll information provided in this manual is believed to be accurate and reliable. N o responsibility is assumed by Teledyne DA LSA for its use. Teledyne DA LSA reserves the right to make changes to this information w ithout notice.
-
Page 3: Table Of Contents
Spyder2 User’s Manual Contents Introduction to the Spyder2 Line Scan Camera _____________________________________ 5 1.1 Camera Highlights ....................5 1.2 Image Sensors ....................6 1.3 Camera Performance Specifications ..............6 Camera Hardware Interface ____________________________________________________ 10 2.1 Installation Overview ..................10 2.2 Input / Output Connectors and LED ..............10 2.3 Timing ........................ - Page 4 Spyder2 User’s Manual 5.2 Protecting Against Dust, Oil and Scratches ............42 5.3 Cleaning the Sensor Window ................43 Troubleshooting _____________________________________________________________ 44 6.1 Common Solutions ..................... 44 6.2 Troubleshooting Using the Serial Interface ............45 6.3 Specific Solutions ....................47 Camera Link™...
-
Page 5: Introduction To The Spyder2 Line Scan Camera
• Line rates up to 65 kH z Description The Spyder2 is a small, fast, and cost-effective camera boasting a full feature set and a Camera Link interface. A vailable in 512 to 2k resolutions, Spyder2 is small, light, and uses a single voltage pow er supply. -
Page 6: Image Sensors
• Document scanning 1.2 Image Sensors The Spyder2 uses the IL-P3 image sensor w ith 14 µm square pixels and 100% fill factor. Figure 1. IL-P3 Image Sensor Block Diagram Relative pos ition of package Pin 1 1.3 Camera Performance Specifications... - Page 7 Spyder2 User’s Manual Optical Interface Units Notes Sensor A lignment x, y µm ±180 17.52 ± 0.25 (C-M ount) 46.50 ± 0.25 (F-M ount) Υz ° ± 0.6 Parallelism/ Tilt µm <175 Die Surface Flatness µm Lens M ount C or F mount...
- Page 8 Spyder2 User’s Manual Camera Performance Units Min. Nom. Max. Notes Calibrated DC Offset @ -10dB gain @ 0dB gain @ +10dB gain A ntiblooming 100x Responsivity DN / (nJ/ 13.6±2 @ -10dB gain @ 0dB gain 42.8±5 @ +10dB gain 136.0±16...
- Page 9 Spyder2 User’s Manual Figure 2: Spyder2 Responsivity Spyder2 Responsivity@10dB 14µm pixels 400 500 1000 Wavelength (nm) 03-032-10091-06 Teledyne DALSA...
-
Page 10: Camera Hardware Interface
Spyder2 User’s Manual Camera Hardware Interface 2.1 Installation Overview In order to set up your camera, you should take these steps: 1. Connect Camera Link™ cables from camera to frame grabber. 2. Connect pow er. You must also set up the other components of your system, including light sources, frame grabbers, camera mounts, heat sinks, host computers, optics, encoders, and so on. - Page 11 H ealthy 2.2.2 Camera Link Data Connector The Camera Link interface is implemented as a Base Configuration in the Spyder2 cameras. A Base Configuration uses 1 M DR26 connector and 1 Channel Link chip. The main characteristics of the Base Configuration are: •...
- Page 12 Spyder2 User’s Manual Data Connector Figure 4: MDR26 Connector MDR26 Female M at ing Par t: 3M 334-31 ser ies Cable: 3M 14X 26-SZ LB-X X X-0LC* * Table 2: Camera Link Base Configuration Base Configuration One Channel Link Chip + Camera Control +Serial...
- Page 13 This camera’s data should be sampled on the See A ppendix A for the complete Camera Link timing, DA LSA Camera Link configuration table, and refer to the DA LSA Web site, mv.dalsa.com, for the official Camera Link document. Input Signals All inputs The camera accepts control inputs through the Camera Link M DR26F connector.
- Page 14 Incorrect voltages will damage the camera. Protect the camera with a fast-blow fuse between power supply and camera. Visit the w w w .mv.dalsa.com Web site for a list of companies that make pow er supplies that meet the camera’s requirements. The companies listed should not be considered the only choices.
-
Page 15: Timing
Spyder2 User’s Manual 2.3 Timing Figure 5. Spyder2 Overview Timing Showing Input and Output Relationships Figure 6. Spyder2 Fixed (Programmed) Integration Timing with External EXSYNC 03-032-10091-06 Teledyne DALSA... - Page 16 Spyder2 User’s Manual Table 4: Spyder2 Timing (Fixed Integration Mode) Symbol Definition Min (ns) (ns) (ns) tw SYN C The minimum low w idth of the EXSYN C pulse w hen not in SM A RT EXSYN C mode. tw SYN C...
- Page 17 Spyder2 User’s Manual Symbol Definition Min (ns) (ns) (ns) transfer from the photosites. Failure to meet this requirement may result in blooming in the H orizontal Shift Register. *SM A RT EXSYN C refers to exposure mode 4. Refer to section 3.9 Setting Line Rate and Exposure M ode for further information on exposure modes.
-
Page 18: Software Interface: How To Control The Camera
Spyder2 User’s Manual Software Interface: How to Control the Camera 3.1 Overview A ll camera features can be controlled through the serial interface. The camera can also be used w ithout the serial interface after it has been set up correctly. Functions available include: •... -
Page 19: Command Format
Spyder2 User’s Manual 3.2 Command Format The serial interface uses a simple A SCII-based protocol. • A carriage return (CR) ends each command. • Values in square brackets are optional. • There are tw o methods for entering the commands: In long form each command is w ritten in its entirety. -
Page 20: Startup
Spyder2 User’s Manual 3.4 Startup When the camera is first started, it must perform several actions before it is ready for imaging. This startup routine takes approximately 15 seconds, and follow s this sequence: 1. Initializes the camera and all internal hardw are. -
Page 21: Setting Baud Rate
Spyder2 User’s Manual 3.6 Setting Baud Rate To set the speed of the camera serial communication port, use the command: Syntax: sbr i Syntax Elements: Baud rate. A vailable baud rates are: 9600 (Default), 19200, 57600, and 115200. • N otes: Pow er-on rate is alw ays 9600 baud. -
Page 22: Setting Line Rate And Exposure Mode
3.9 Setting Line Rate and Exposure Mode The camera’s line rate (synchronization) is generated internally or input from a frame grabber/ host system. With six different exposure mode settings, the Spyder2 delivers many possibilities for flexible camera timing. Table 5 outlines each of these six exposure modes, and is follow ed by a full explanation on how to set the camera’s frame rate and... - Page 23 Spyder2 User’s Manual Setting the Exposure Mode To select an exposure mode, use the command: Syntax: sem i Syntax Elements: Exposure mode to use. Factory setting is 1. Refer to Table 5 on page 22 for a list of available modes.
-
Page 24: Setting A Region Of Interest
Spyder2 User’s Manual 3.10 Setting a Region of Interest command sets the pixel range used to collect the end of line statistic and sets the region of pixels used in the , and commands. To define a region of interest, use the command:... - Page 25 Spyder2 User’s Manual command, the M in, M ax, and M ean statistics at the end of the line output include statistics for the region of interest only. • Values returned are in DN . Example: gl 10 20 Returning Multiple Lines of Video You can also return the average for multiple lines of video data.
-
Page 26: Optimizing Offset Performance
Syntax Elements: Tap selection. A llow able values are 1 for one tap or 0 for all taps. Since the Spyder2 is a one tap camera, the values 1 or 0 are interchangeable. A nalog offset value. A llow able range is 0 to 1023. - Page 27 Syntax Elements: Tap selection. A llow able values are 1 for one tap or 0 for all taps. Since the Spyder2 is a one tap camera, the values 1 or 0 are interchangeable. Subtracted offset value in a range from 0 to 511.
-
Page 28: Setting Gains
Syntax Elements: Tap selection. A llow able values are 1 for one tap or 0 for all taps. Since the Spyder2 is a one tap camera, the values 1 or 0 are interchangeable. Gain setting. A gain value of 0 sets the camera to its nominal gain (0dB). -
Page 29: How To Calibrate The Camera
Spyder2 User’s Manual Line average in a range dependent on the current camera data mode setting: 8-bit: 64 to 251 DN 10 bit: 256 to 1007 DN See section 3.11 Returning Video Information for more information on line averages. •... - Page 30 Spyder2 User’s Manual When performing any camera calibration, random noise is minimized by averaging out up to 64 lines of valid data. To adjust the sample line size, use the command, css i w here is 16, 32, 64 (factory setting). A low er value reduces the camera’s calibration time, at the expense of increased coefficient error.
- Page 31 Spyder2 User’s Manual 5. Perform Dark (FPN ) calibration (see Dark Calibration on page 31). 6. Perform White (PRN U) calibration (see White Light Calibration on page 31). 7. Save the settings and pixel coefficients, using the commands wus and wpc .
-
Page 32: Setting And Reading Fpn Coefficients
Spyder2 User’s Manual level. Use the gl command to determine input level. If the signal level is too low or too high, adjust analog gain using the command sg . 3. The variance in light intensity across the target must not be more than 4 to 1. Because the maximum per-pixel digital gain is 2x, the camera w ill not be able to compensate for extremely non-uniform light. -
Page 33: Setting And Reading Prnu Coefficients
3.17 Test Patterns and End of Line Sequence End-of-line Sequence To alleviate post-processing, Spyder2 offers an end-of-line sequence that provides basic calculations including "line counter", "line average", "pixels above threshold", "pixels below threshold", and "derivative line sum". These basic calculations are the center of most automatic gain control (A GC) algorithms. -
Page 34: Monitoring The Camera
Spyder2 User’s Manual Use the sut and slt commands to set threshold values betw een 0 and 255 for 8-bit data modes, or 0 to 1023 for 10-bit data modes. To further aid in debugging and cable/ data path integrity, the first six bits of the output of the end-of-line sequence are "aa", "55", "aa". - Page 35 Spyder2 User’s Manual Blinking GREEN Progress Lengthy operation in progress Steady GREEN H ealthy N ote: When more than one condition is active, the LED indicates the condition w ith the highest priority. Error and w arning states are accompanied by corresponding messages further describing the current camera status.
-
Page 36: Rebooting The Camera
Spyder2 User’s Manual Voltage Measurement The command vv checks the camera’s input voltage and internal voltages during pow er- up. If they are w ithin the proper range, the camera returns OK>. Otherw ise the camera returns an error message. N ote that the voltage measurement feature of the camera provides only approximate results (typically w ithin 10%). -
Page 37: Optical, Mechanical, And Thermal Considerations
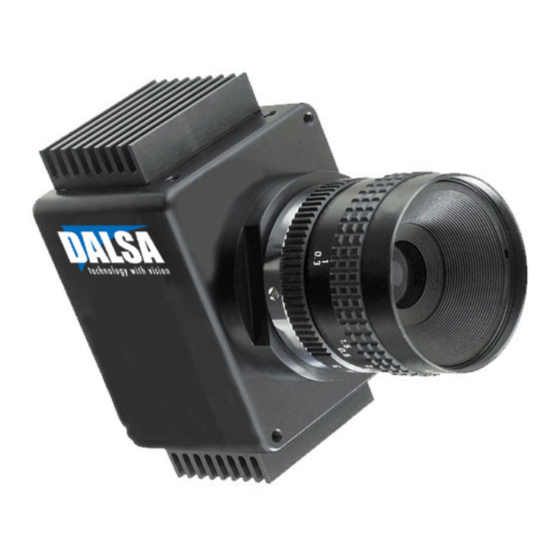
Spyder2 User’s Manual Optical, Mechanical, and Thermal Considerations 4.1 Mechanical Interface The camera’s electronics are housed in a ruggedized lightw eight aluminum case. See Figure 9. Mounting The camera can be mounted using the M 3 holes (metric-threaded) on its base or top, and on its front plate at the corners. - Page 38 Spyder2 User’s Manual steady state temperature. For Spyder2, at an ambient temperature of 25 °C and w ith no airflow , the camera takes 90 minutes to achieve steady state and 20 minutes to reach w ithin 10 °C of steady state. If your system cannot perform flat-field correction after w arm-up consider the recommended methods of reducing dark current and overall camera temperatures (see below ).
- Page 39 Factors include the nature, speed, and spectral characteristics of objects being imaged, exposure times, light source characteristics, environmental and acquisition system specifics, and more. DA LSA ’s w eb site, vfm.dalsa.com, provides an introduction to this potentially complicated issue. See “ Radiometry and Photo Responsivity”...
- Page 40 • LED light sources are relatively inexpensive, provide a uniform field, and longer life span compared to other light sources. H ow ever, they also require a camera w ith excellent sensitivity, such as DA LSA ’s Spyder2 camera. • H alogen light sources generally provide very little blue relative to IR.
- Page 41 Spyder2 User’s Manual ′ ′ This is the governing equation for many object and image plane parameters. Example: A n acquisition system has a 512 x 512 element, 10µm pixel pitch area scan camera, a lens w ith an effective focal length of 45mm, and requires that 100µm in the object space correspond to each pixel in the image sensor.
-
Page 42: Ccd Handling Instructions
(SGPDs) may exhibit higher image lag. Some SGPD sensors, such as the IL-P3 used in the Spyder2 cameras, may also exhibit a highly non-uniform response w hen affected by charge buildup, w ith some pixels displaying a much higher response w hen the sensor is exposed to uniform illumination. -
Page 43: Cleaning The Sensor Window
Spyder2 User’s Manual prevent oil contamination. H ow ever, the friction betw een the rubber and the w indow may produce electrostatic charge that may damage the sensor. To avoid ESD damage and to avoid introducing oily residues, only hold the sensor from the edges of the ceramic package and avoid touching the sensor pins and the w indow . -
Page 44: Troubleshooting
Spyder2 User’s Manual Troubleshooting The information in this chapter can help you solve problems that may occur during the setup of your camera. Remember that the camera is part of the entire acquisition system. You may have to troubleshoot any or all of the follow ing: •... -
Page 45: Troubleshooting Using The Serial Interface
Spyder2 User’s Manual PRIN PRIN is an optional input signal used to control exposure control (PRIN ). PRIN Indicates H igh Integration Pixel reset Data Clocking/Output Signals To validate cable integrity, have the camera send out a test pattern and verify it is being properly received. - Page 46 Spyder2 User’s Manual • N o test pattern or bad test pattern — M ay indicate a problem w ith the camera (e.g. missing bit) or a system setup problem (e.g. frame grabber or timing). Verify the presence of the LVA L and STROBE signals.
-
Page 47: Specific Solutions
Spyder2 User’s Manual 6.3 Specific Solutions No Output or Erratic Behavior If your camera provides no output or behaves erratically, it may be picking up random noise from long cables acting as antennae. Do not attach w ires to unused pins. Verify that the camera is not receiving spurious inputs (e.g. - Page 48 Spyder2 User’s Manual the End-of-line sequence “ on” by sending the command ). A ny deviation from a els 1 consistent value of these pixels (170DN / 85DN ) could be an indication of the follow ing: • shorted bits •...
-
Page 49: Camera Link™ Reference
Spyder2 User’s Manual Appendix A Camera Link™ Reference Camera Link is a communication interface for vision applications. For years, the scientific and industrial digital video market has lacked a standard method of communication. Both frame grabbers and camera manufacturers developed products w ith different connectors, making cable production difficult for manufacturers and very confusing for consumers. -
Page 50: A1 Camera Link™ Configuration Table
The follow ing table provides tap reconstruction information. DA LSA is w orking w ith the machine vision industry to use this table as the basis for auto configuration. Visit the http:/ / vfm.dalsa.com Web site and view the DA LSA Camera Link Implementation Road M ap document, 03-32-00450, for further details. - Page 51 Spyder2 User’s Manual Spyder2 Interface Parameters Table 6: Framegrabber Interface Parameters Item (when programmable configuration the S2-1x-xxx40-xx-L options are separated with a | ) Imager Dimension <1,2 or 1| 2> Imager Columns<number of active columns, X> 1024 2048 Imager Row s<number of active row s, Y> Line...
- Page 52 Spyder2 User’s Manual Item (when programmable configuration the S2-1x-xxx40-xx-L options are separated with a | ) Line Time M aximum <xx µs> 512: 1000 1024: 1000 2048: 1000 Internal Line/ Frame Time Resolution <xx ns> 0 if not applicable Pixel Reset Pulse M inimum Width <xx ns>...
-
Page 53: Networking Mode, Error Handling And Command List
Spyder2 User’s Manual Appendix B Networking Mode, Error Handling and Command List This appendix describes how to configure your camera for netw orking mode and provides a list of error messages and a complete list of camera commands. B1 Networking Mode The camera's netw ork feature provides the capability to connect and control multiple cameras over a multi-drop RS485 link. - Page 54 Spyder2 User’s Manual Example: change network ID of camera with serial number abcd to 1 : sci 1 abcd Note: each camera must be polled following use of a broadcast command. The Network Commands The netw ork command is an ordinary camera command prefixed by a netw ork prefix.
-
Page 55: B2 Error Handling
Spyder2 User’s Manual :a CR <CR><LF>a 0> Example: query command followed by a READY reply :a CR <CR><LF>a 1> A fter all cameras return the REA DY status, use the to poll each camera for the return codes of the sent broadcast command. - Page 56 Spyder2 User’s Manual Returned value Description Command code: correction_calibrate_fpn Error code: successful Informal message: code 64 + code 128 M onitoring task message: code 1 + code 32 The follow ing tables list the codes for errors, informal messages, and monitoring task messages.
- Page 57 Spyder2 User’s Manual Error Codes Code Description Suggested Cause outside the specified operating range N ot Used N ot Used A nalog offset calibration failure A nalog offset calibration failure (could not tune the analog offset to obtain targeted video level)
-
Page 58: B3 Camera Parameter Screen
Spyder2 User’s Manual Error Codes Code Description Suggested Cause IN FO: Calibration may be out- : several coefficients w ere clipped of-specification (FPN during the ccf command process coefficient clipped) IN FO: Calibration may be out- : at least one pixel -> digital offset + of-specification (DO+FPN >... - Page 59 Spyder2 User’s Manual GCP Screen Description Displays w hether netw ork Network Message Mode: disabled messages are enabled or disabled. Set w ith the snm command. See B1 N etw orking M ode for details. Firmw are design revision Firmware Design Rev.: xx-xx-xxxxx-xx number.
- Page 60 Spyder2 User’s Manual GCP Screen Description command had been issued. SETTINGS COMMON TO CALIBRATED AND UNCALIBRATED MODES: Digital gain value set w ith the System Gain: ssg command. See section 3.13 Setting Gains for details. Background subtract value set Background Subtract: w ith the ssb command.
-
Page 61: B4 All Available Commands
The first column of the table lists command codes returned as first code from gps . Note: Even though the Spyder2 camera has only one output tap, you must enter a value for the tap parameter, either a to indicate one tap, or a to indicate all taps. - Page 62 Spyder2 User’s Manual Code Command Short Parameters Description Form correction_set_sample Set number of line samples averaged for pixel coefficient calculations or for output of gla command. Values: 16, 32, 64(default). display_pixel_coeffs Display the pixel coefficients [i] [i] in the order FPN , PRN U, FPN , PRN U, …...
- Page 63 Spyder2 User’s Manual Code Command Short Parameters Description Form help Display the online help. region_of_interest Set the pixel range for reading end-of-line statistic and for the region of pixels used in the cag, cao, gl, gla, ccf, and ccp commands. Pixel start and end values in a range from 1 to sensor pixel count.
- Page 64 Spyder2 User’s Manual Code Command Short Parameters Description Form set_digital_offset Subtracts the input value from the video signal prior to the PRN U correction. The first parameter is the tap selection either 1 or 0 for all taps. The second parameter is the offset in a range from 0 to 511.
- Page 65 Spyder2 User’s Manual Code Command Short Parameters Description Form set_netmessage_mode Enable/ disable camera messages unrelated to the executed netw ork command: 0: Enable messages, default 1: Disable messages set_pretrigger Set the pretrigger to a value from 0 to 15. set_prnu_coeff Set the PRN U coefficient.
- Page 66 Spyder2 User’s Manual Code Command Short Parameters Description Form w arning_enable_disable Read enable/ disable status of [i] [i] all defined monitoring tasks. Optionally, the first parameter selects a monitoring task and the second parameter enables/ disable the selected task. w rite_pixel_coeffs Write all current pixel coefficients to EEROM .
-
Page 67: Emc Declaration Of Conformity
Spyder2 User’s Manual Appendix C EMC Declaration of Conformity 03-032-10091-06 Teledyne DALSA... -
Page 68: Revision History
Spyder2 User’s Manual Appendix D Revision History Revision Change Description Number M anual release Removed Pending from the EM C declaration of conformance, A ppendix C Changed pow er dissipation spec on page 7 from <7.5W to 5W. A dded Revision H istory. -
Page 69: Index
Spyder2 User’s Manual Index rate, 7 video, 25, 49 DC offset, 8 debugging, 44 analog processing, 19 digital data, 13 antiblooming, 8 digital processing, 19 applications, 6 dynamic range, 7 base configuration, 11, 12 EIA -644 Reference, 49 baud rate, 21... - Page 70 Spyder2 User’s Manual illumination, 39 offset image sensor. See sensor analog, 26 incorrect line rate, 47 calibrating, 27 input/ output, 10 optimizing, 26, 59, 60 inputs subtracting, 26 exteranl sync, 14 online help, 18 PRIN , 13 operational status of camera, 34...
- Page 71 Spyder2 User’s Manual troubleshooting, 46 stuck bits, 47 video correction, 29 data, 25 data, 49 tap reconstruction, 50 data, 49 temperature, 37 voltage measurement, 35 measurement, 36 recommendations, 35 test patterns generating, 45 timing fixed (programmed), 15 w arning messages, 35...
Need help?
Do you have a question about the Spyder2 and is the answer not in the manual?
Questions and answers